1Your role
Owner / Director can open every page and use every feature. The owner role can never be limited, so you can’t lock yourself out.
Practice Manager gets almost the same. By default a manager can’t sign and send prescriptions, and E-Prescriptions and My Schedule are off. Everything else, from Billing to Settings, is theirs.
Your role shows under your name at the bottom of the sidebar.
2When you sign in
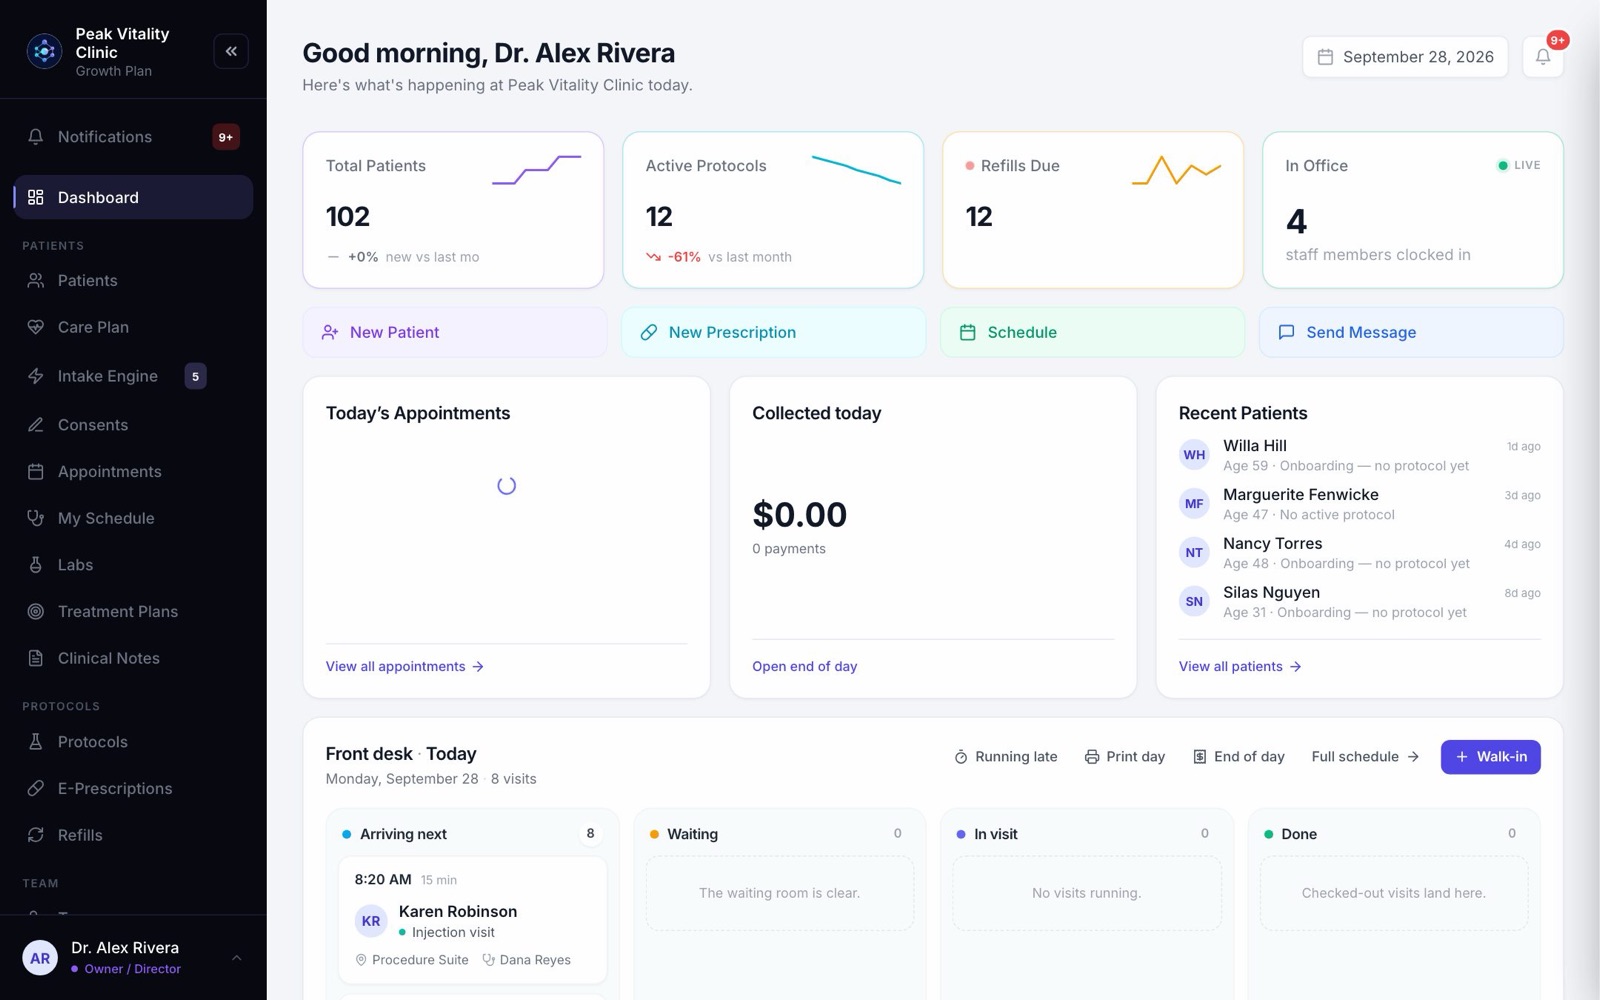
You land on the Dashboard. It shows today’s numbers, today’s visits, the front desk lanes, the money taken today, and the work queue.
The first time you sign in on a computer, a welcome offers the tutorial. Start the tutorial walks you through every page you use, one at a time. You can end it any time and pick it up again from your name at the bottom of the sidebar.
3Your checklist
The checklist box on the right has two lists. Learn Aminova is the everyday jobs, each done once on a practice patient. Set up your clinic is what has to be in place before you open. Only owners and managers see the second list.
An item ticks itself when the thing really exists. Show me takes you to the right page and lights up each click. Hid the box? Click your name at the bottom of the sidebar and pick Show the checklist.
4Set up the clinic, in order
- 1Your clinic’s details, time zone and opening hours, in Settings.
- 2Your visit types, with the forms and consents that go out with each booking, on Appointments → Visit types.
- 3Your consent forms, on Consents.
- 4Your team, on Team. Then who works when, on Staff Scheduling.
- 5Card payments, in Settings → Payments & Plans.
- 6e-Prescribing, from Setup on E-Prescriptions, if your plan includes it.
- 7Your booking link, on Appointments. Then bring in your patients from your old system.
Each of these has its own setup guide. They are listed at the end of this page.
5Invite your team
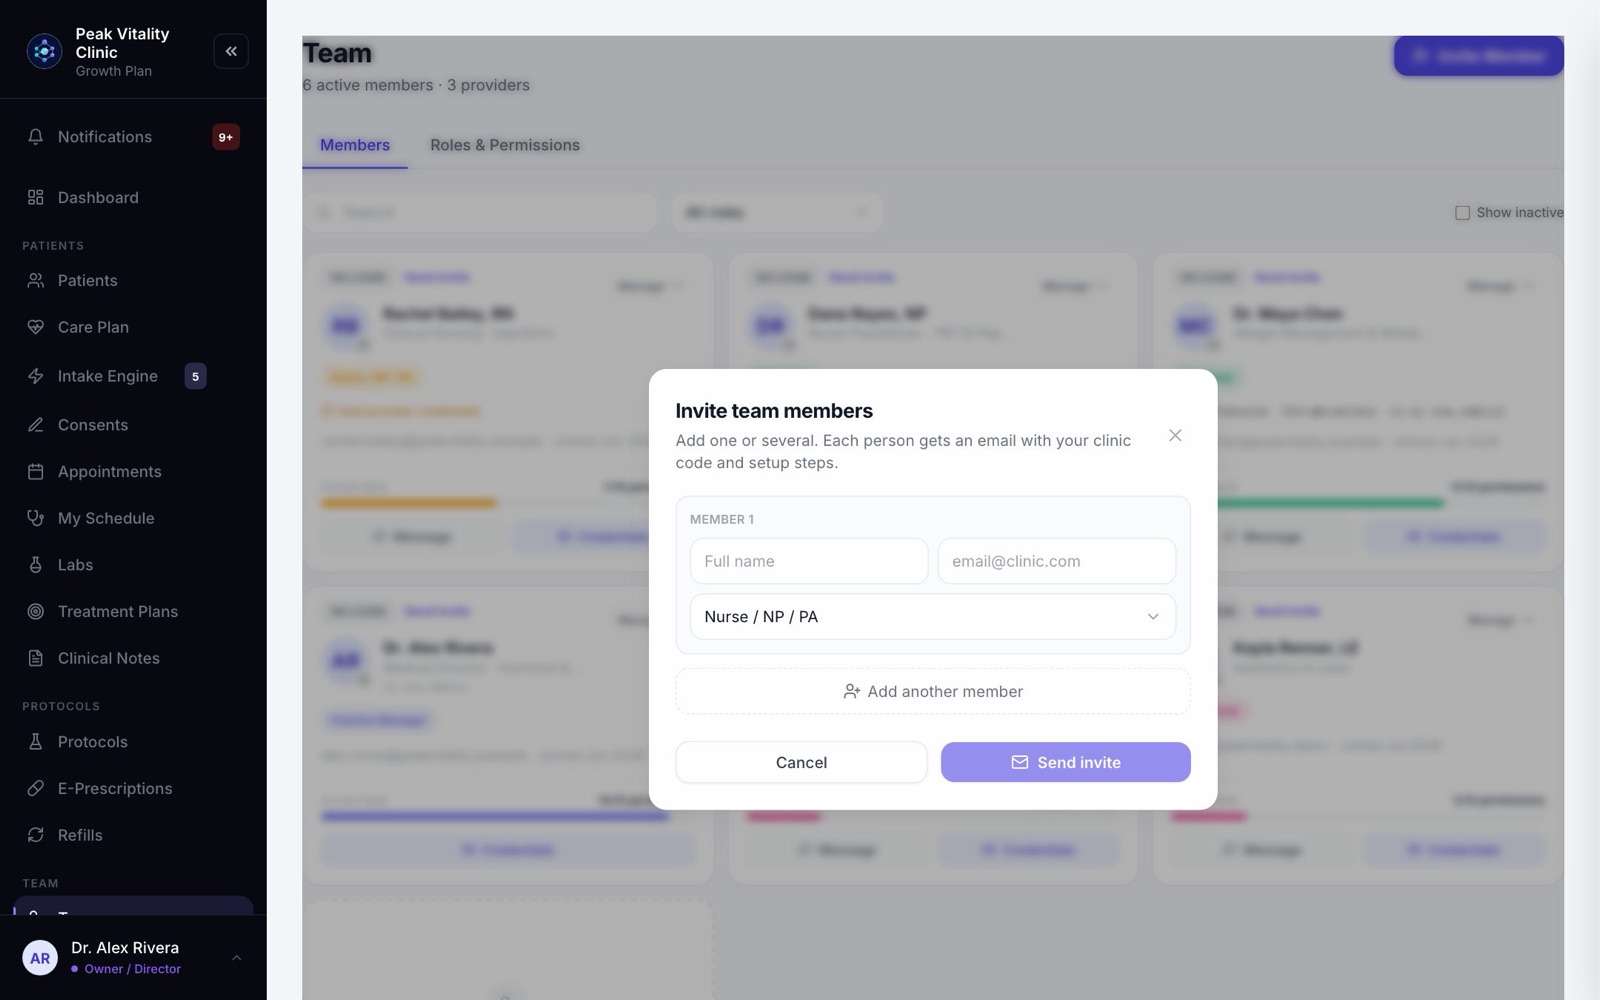
- 1Go to Team and click Invite Member.
- 2Type each person’s name and email, and pick their role. Add another member adds a row.
- 3Press Send invite. Each person gets an email with your clinic code and the steps to set up their own login.
- 4Invites nobody has accepted yet wait under Pending Invitations. Refresh sends the email again. Cancel takes it back.
6Pick the right role
- 1Physician: sees patients, writes notes, orders labs, signs and sends prescriptions.
- 2Nurse / NP / PA: clinical work, notes and lab orders. Can’t sign prescriptions unless you allow it.
- 3Medical Assistant: check-ins, patient prep and the dispensary. Sees contact details only on a chart.
- 4Front Desk: booking, check-in, forms and taking payments. Sees contact details only on a chart, and no clinic revenue.
- 5Billing Specialist: Billing and Analytics. No schedule and no charts.
7Change what a role can do
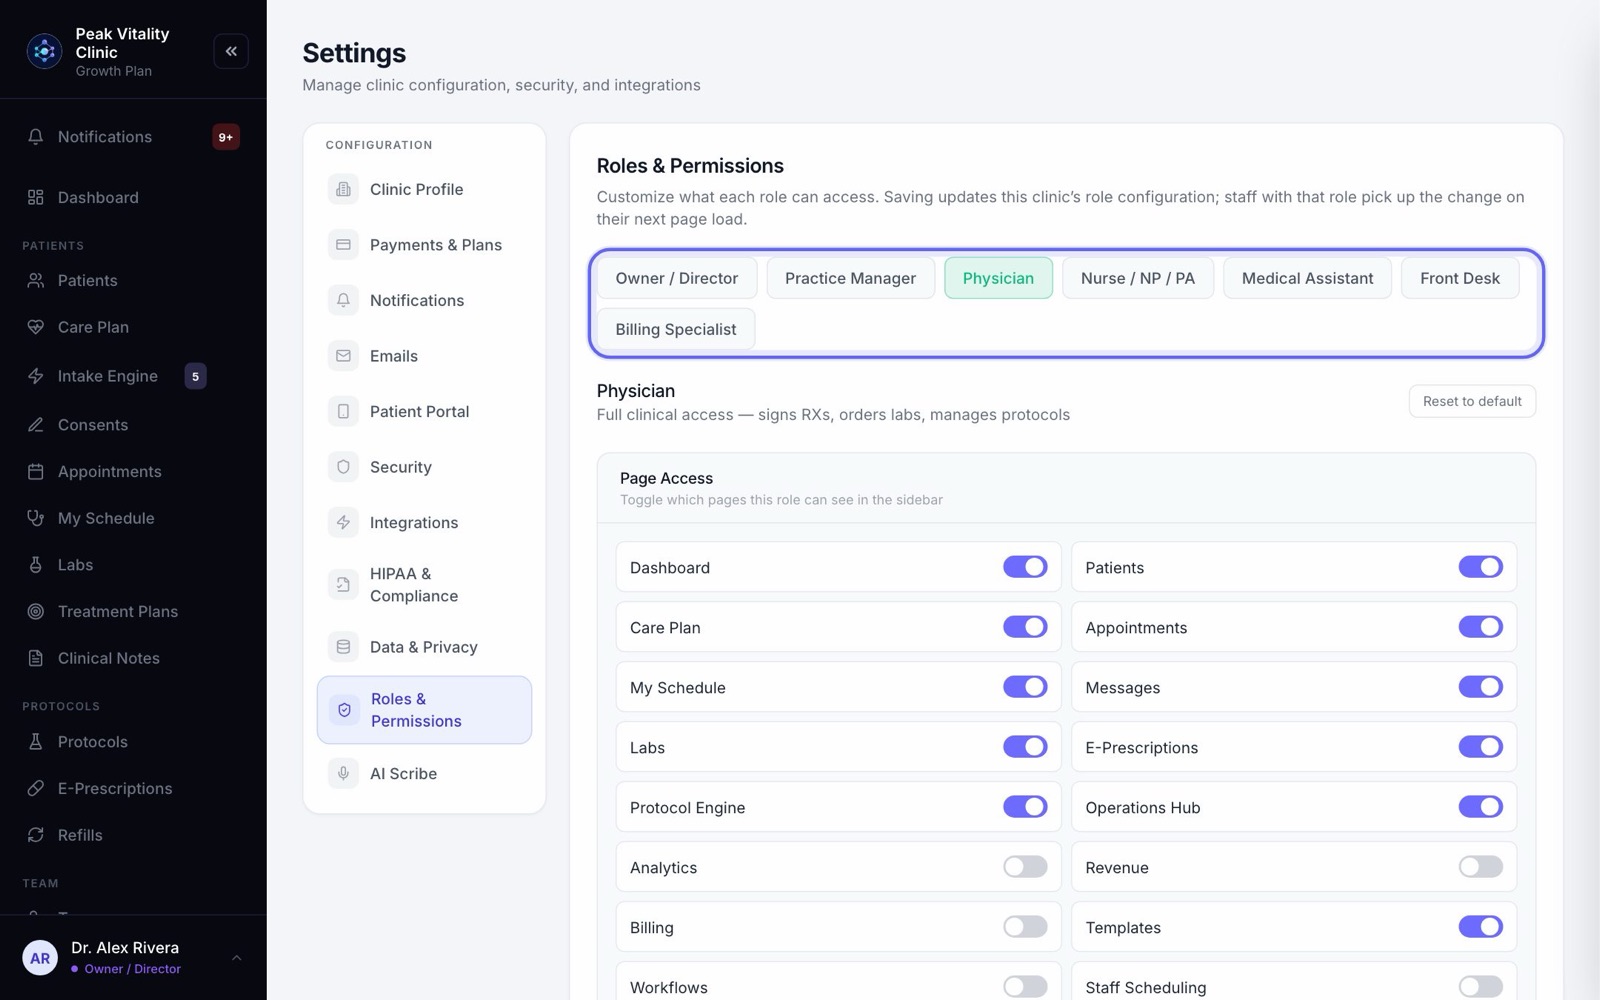
- 1Go to Settings and pick Roles & Permissions.
- 2Click a role. Under Page Access, switch pages on or off in their sidebar.
- 3Under Feature Access, switch actions on or off, like Take payments & print receipts or Full patient record access. A changed switch is marked MODIFIED.
- 4Press Save Permission Changes. Staff with that role get the change the next time a page loads.
- 5Only provider roles can be allowed to sign and send prescriptions. The Owner role can’t be changed.
8Change one person
- 1On Team, open the menu on that person’s card.
- 2Edit Role moves them to another role. Press Save Role.
- 3Edit Credentials holds their title, phone and, for providers, NPI, DEA and license. Tick Sees patients so patients can be booked with them.
- 4Reset 2FA, Sign out everywhere and Deactivate are there when someone loses a phone or leaves.
9Who works when
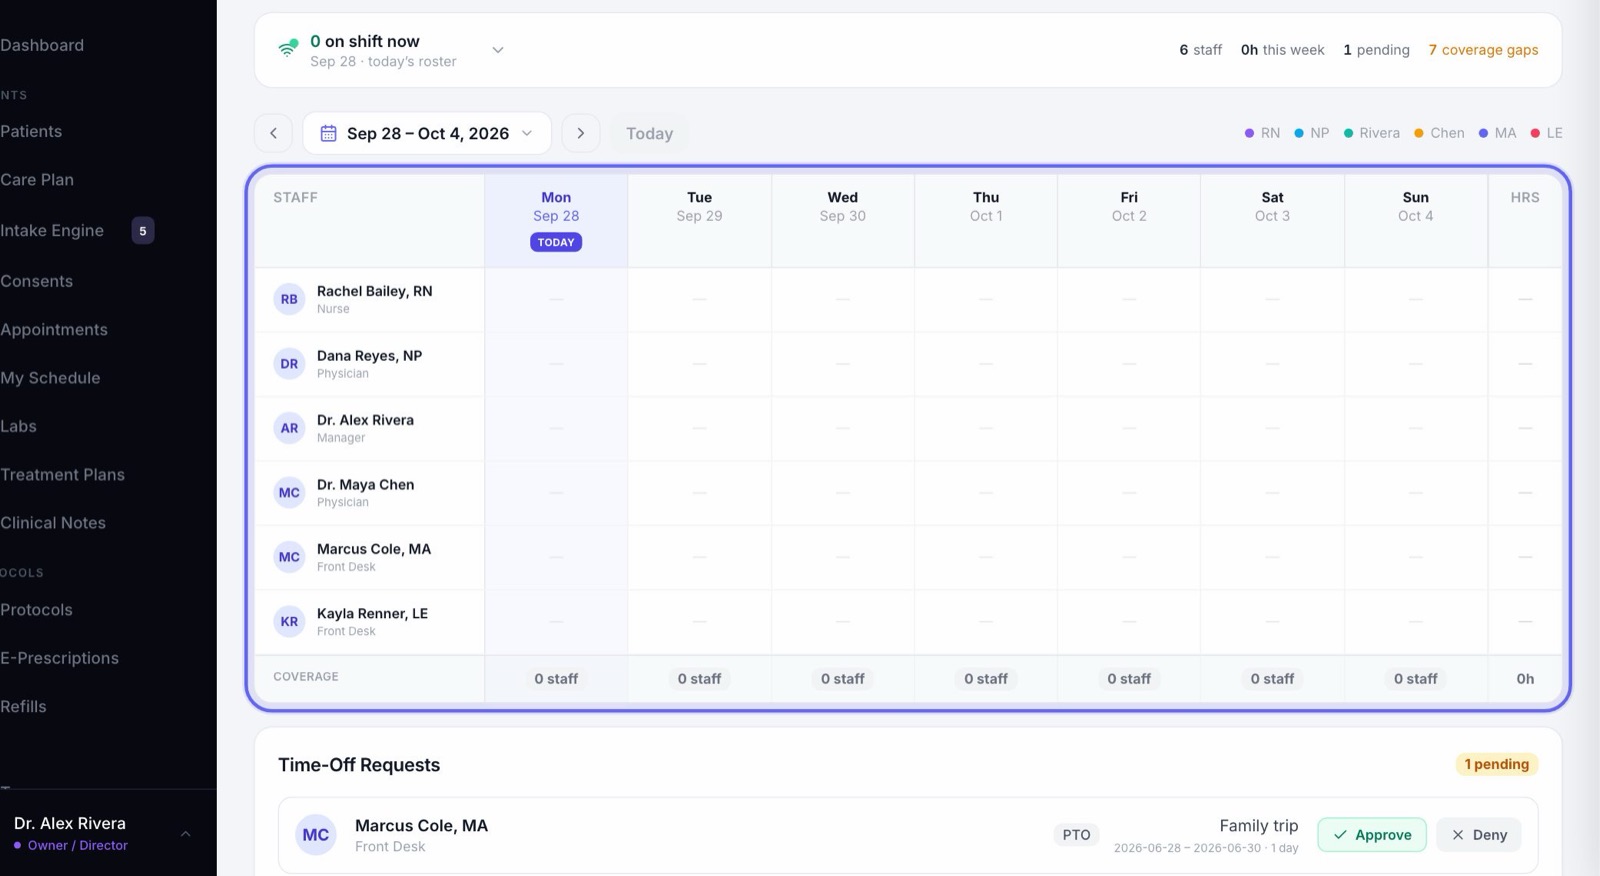
- 1On Staff Scheduling, add shifts for each person. For anyone who sees patients, their shifts are the times patients can book them.
- 2Approve or deny time-off requests there too.
- 3On Time Clock, you see everyone’s hours. Fix a missed punch with a reason, then export hours for your payroll company.
10Watch the day
- 1On the Dashboard, Collected today shows the money taken. Open end of day splits it by payment method.
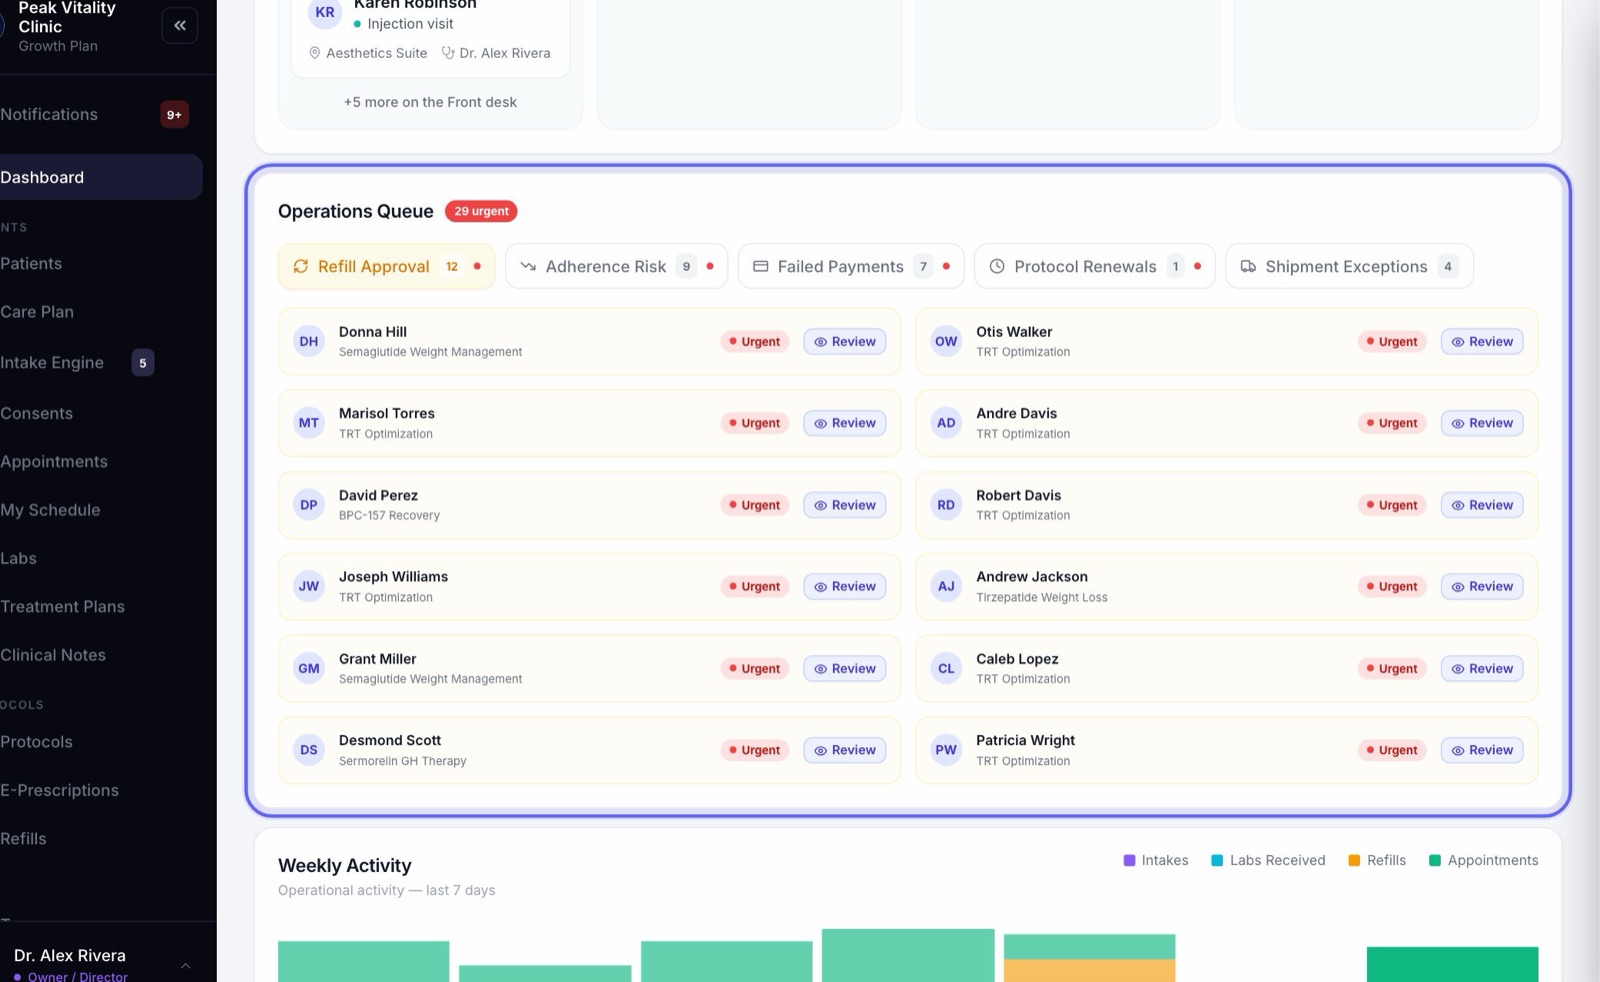
- 2The Operations Queue lists work that needs a person: refills to approve, patients falling behind, failed payments, renewals and shipments. As an owner or manager you see every tab.
- 3The bell at the top of the sidebar holds anything new for you, and the tasks your team sends.
11The money
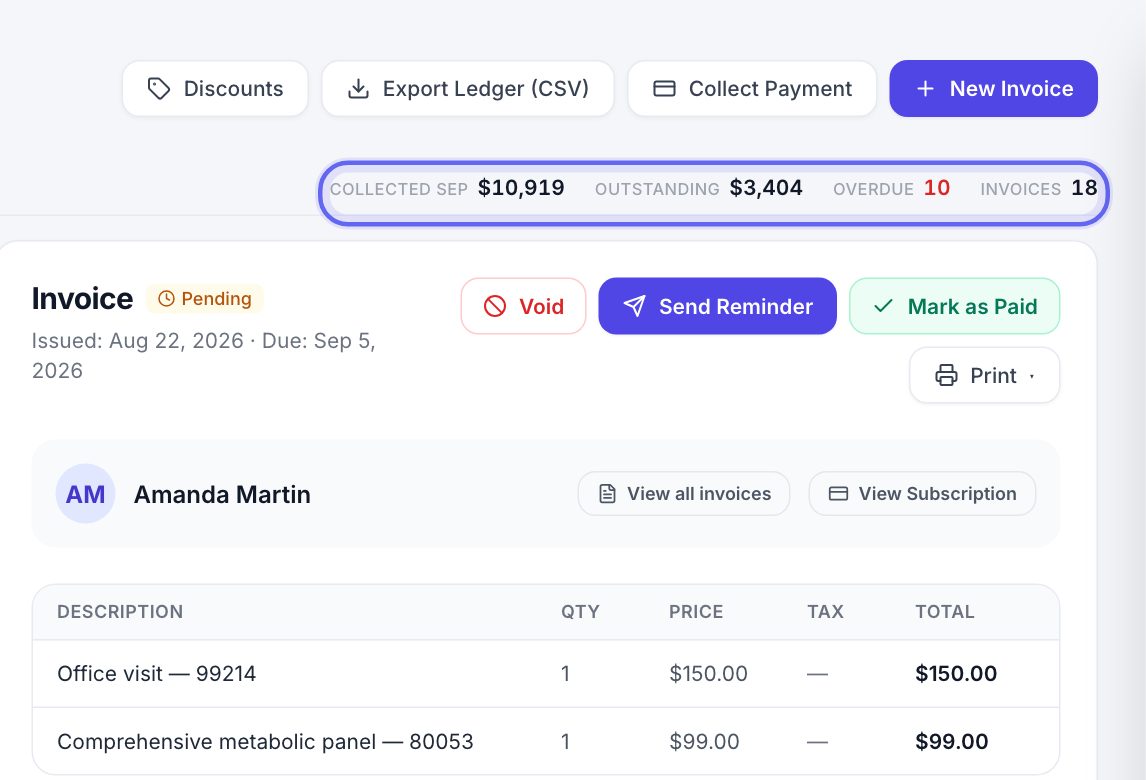
- 1Billing is every invoice, payment, membership and refund. Only people who can see revenue can give a refund.
- 2Analytics shows money collected, recurring revenue, new patients and finished visits, over the time you pick.
- 3Its Revenue Intelligence tab digs into money owed, renewals coming up and plans at risk of canceling.
12Jobs only owners and managers do
- 1Build and change visit types, and turn on or change the booking link.
- 2Build intake forms in Intake Engine, and bring in consent forms on Consents.
- 3Send messages to many patients at once from Communications, and set how your emails look.
- 4Choose who gets each patient chat, and the closed-office reply, under Messages.
- 5Set up Workflows, check the HIPAA Audit Trail, and change anything in Settings.
Try things on the practice patient first. A practice patient never gets emails, texts or bills.
Keep going
The tutorial and the checklist
A guided walk through every page you use, and a checklist of what to learn and set up. Practice on a made-up patient that nothing ever reaches.
Read the guideInvite your team
Give everyone at your clinic their own login, with the right role. Then add providers’ credentials so patients can be booked with them.
Read the guideSet up your clinic profile and hours
Add your clinic’s name, contact details, address and IDs, set your time zone and opening hours, add your locations, and upload your logo.
Read the guideSet up your visit types and booking link
Build each kind of visit once: its length, providers, rooms, price and forms. Then turn on the link patients book from.
Read the guideSet up staff shifts
Put everyone’s working hours on the roster. For providers, those shifts are the hours patients can book.
Read the guideTake card payments
Connect your card processor, add your card terminals, then set your payment rules: deposits, no-show fees, cash prices and your own payment types.
Read the guideSet up e-prescribing
Get each prescriber able to send prescriptions electronically: what Setup checks, the details each prescriber needs, and the extra steps for controlled substances.
Read the guideBring your patients over from your old system
Move your patients, charts, documents and forms into Aminova. Upload the files, check what was found, approve it, then look around before you make it final.
Read the guideTeam
Everyone who works at your clinic. Invite people, give each a role, keep their credentials up to date, and remove someone who has left.
Read the guideSettings
How your clinic runs: your details and hours, payments, what patients are told, the patient app, security, connected tools and who can do what.
Read the guideDashboard
Your clinic at a glance. Today’s numbers, who is coming in, the money taken, work that needs a person, and the bell where anything new for you lands.
Read the guideBilling
Bill patients, take payments and keep track of what’s owed. Make invoices, record and refund payments, print receipts, and set up your discounts.
Read the guideAnalytics
How the clinic is doing: money, patients, visits and what’s selling. Pick a time frame, compare it with the one before, and take the numbers with you.
Read the guideHIPAA Audit Trail
Who opened, changed or exported what, and when. Check flagged events, export the log, and keep your privacy records in one place.
Read the guideRather be shown?
Inside Aminova, the tutorial walks you through every page, and the Getting started checklist shows you each task click by click. Or book a live training session with our team.