1The page at a glance
Settings holds everything about how your clinic runs. The topics are listed on the left. Click one to open it on the right.
Only owners and managers can open Settings. Most changes save on their own a moment after you make them. Where a topic has a Save Changes button at the top, you can press it to be sure.
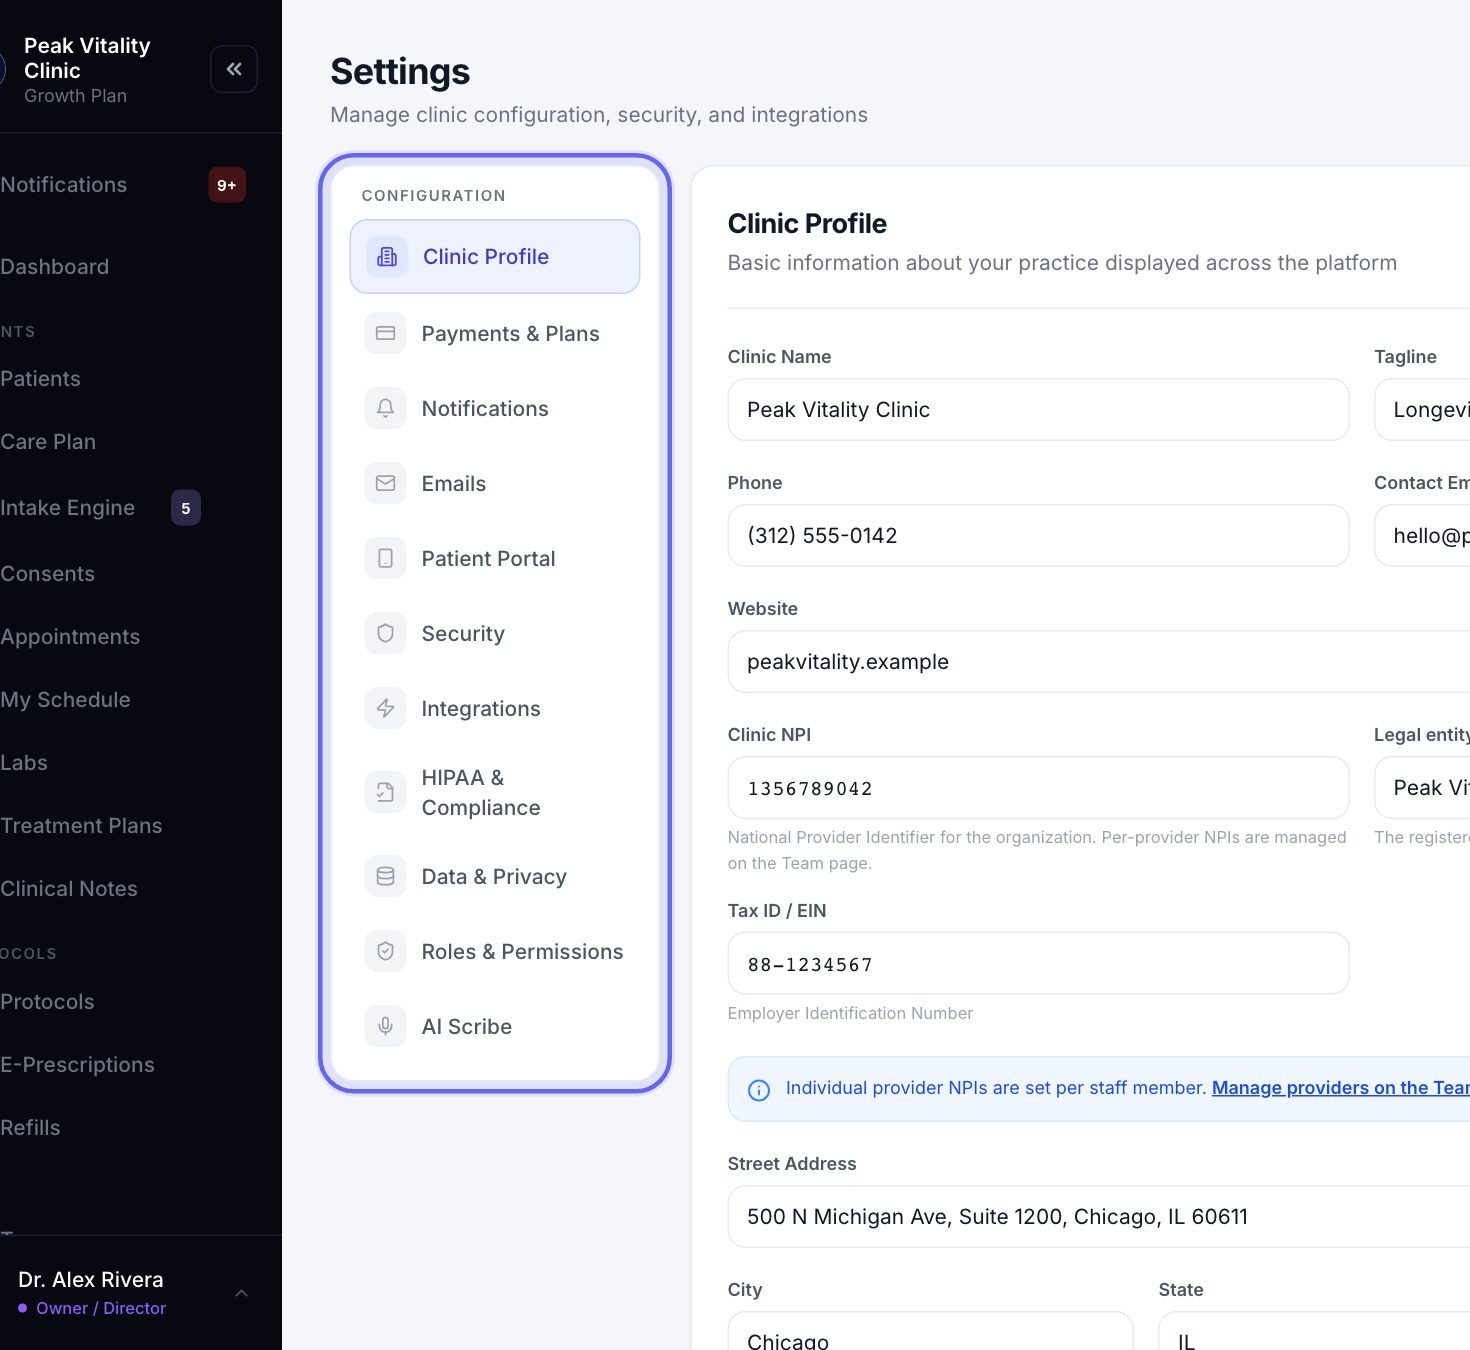
Settings opens on the topic you last had open, on this computer.
2Clinic Profile
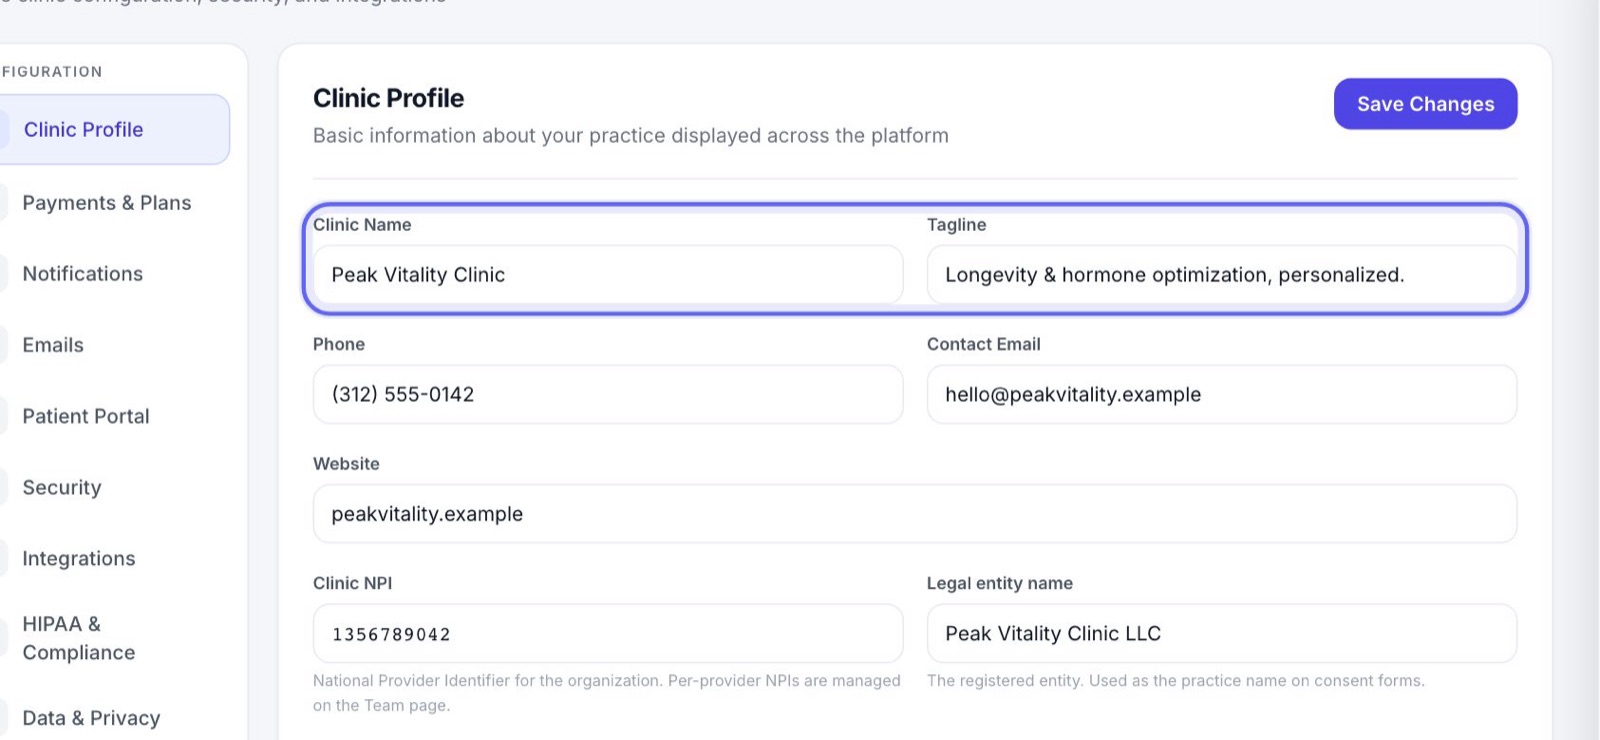
Your clinic’s name, phone, email, website and address, your clinic NPI, legal name and tax ID, your Timezone, and your Business Hours. It is also where you add your Locations and your lab targets.
The clinic profile setup guide walks through each part.
3Payments & Plans
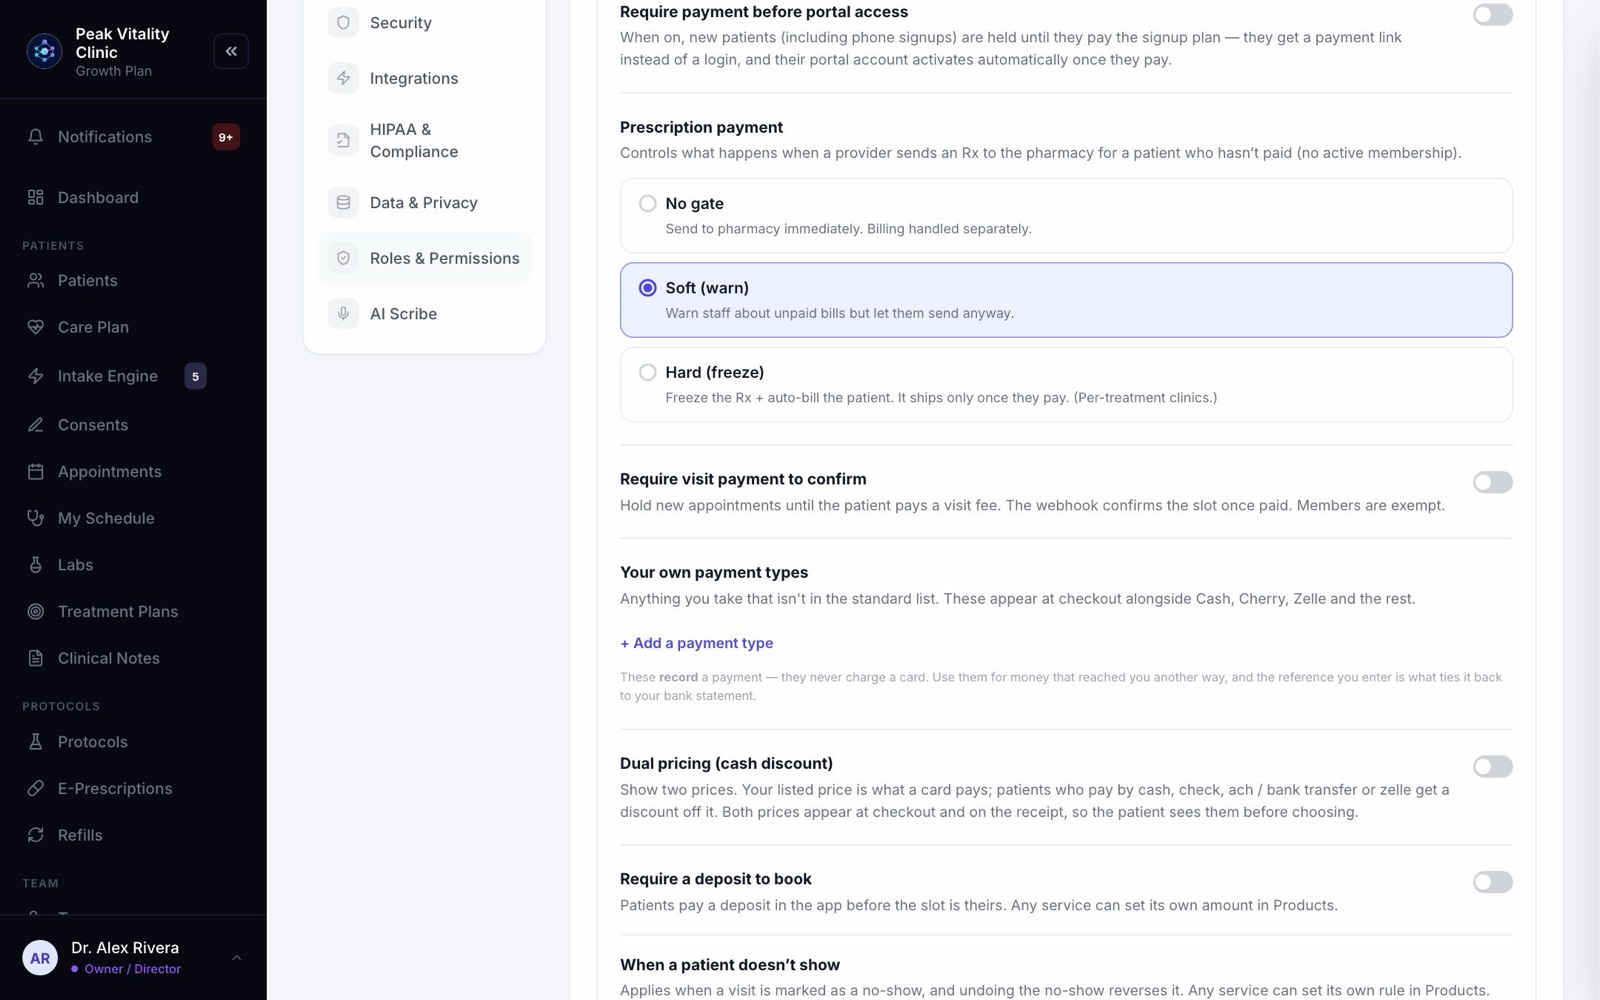
Connect your card processor and add your card terminals. Below that are your payment rules: what patients pay up front, deposits, no-show fees, a cash price, and your own payment types.
At the bottom, under Invoices & claims, are the billing details printed on invoices and claims. The card payments setup guide covers all of it.
4Notifications
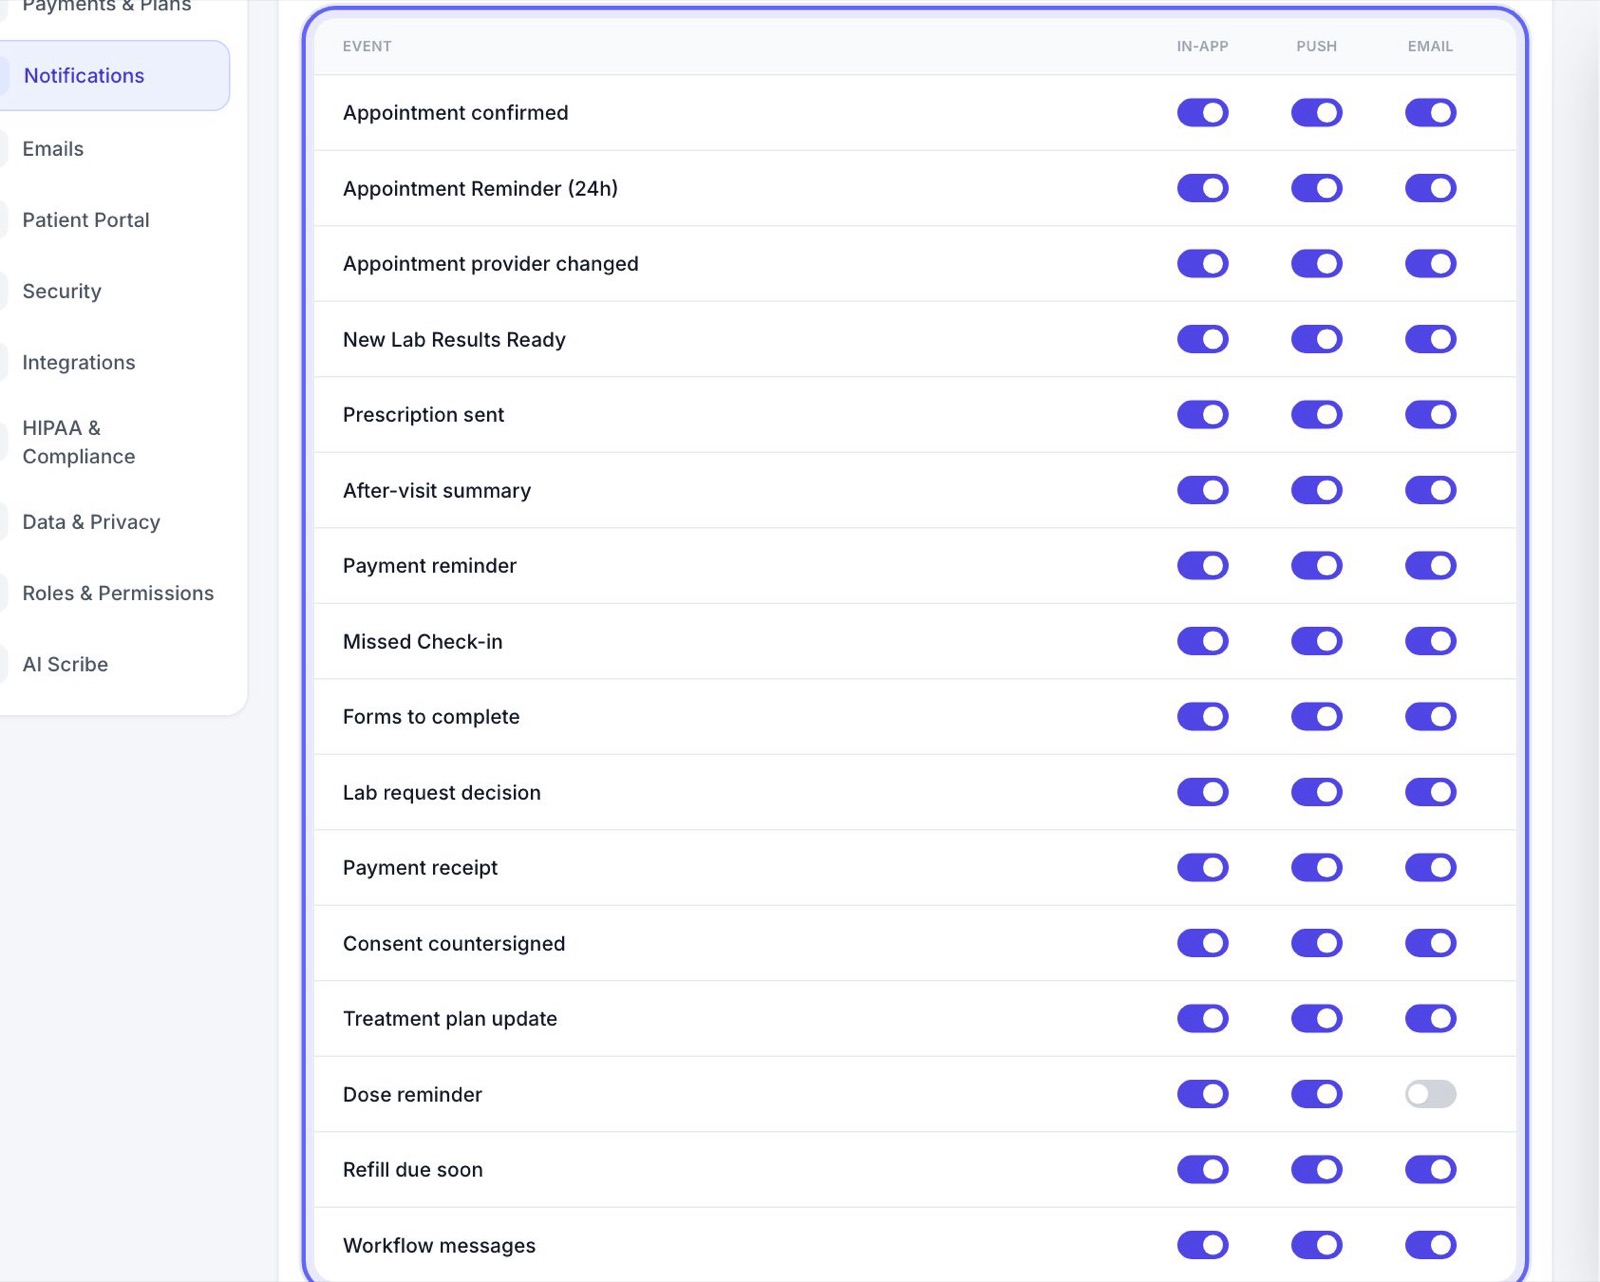
- 1The first table is what patients are told. For each event, like Appointment confirmed or New Lab Results Ready, switch In-App, Push and Email on or off.
- 2Staff notifications is what your team is told. Everything lands in the staff bell. Switch off a push to stop it buzzing their phones.
- 3Waiting room alert tells the front desk when a patient has waited this many minutes without being taken to a room. Type the minutes and press Save.
Texts aren’t sent. Reminders like a refill coming due are set up on the Workflows page.
5Emails
Every automatic email your patients get. It shows first whether your emails are arriving, and if not, why.
Below that is each email, with a preview of what the patient sees. You can change its Subject line, A line above the message, and its Sign-off.
6Patient Portal
- 1Patient Access Code is the code patients type to join your clinic in the app. Copy it to share. Changing it locks it for 60 days, so choose carefully.
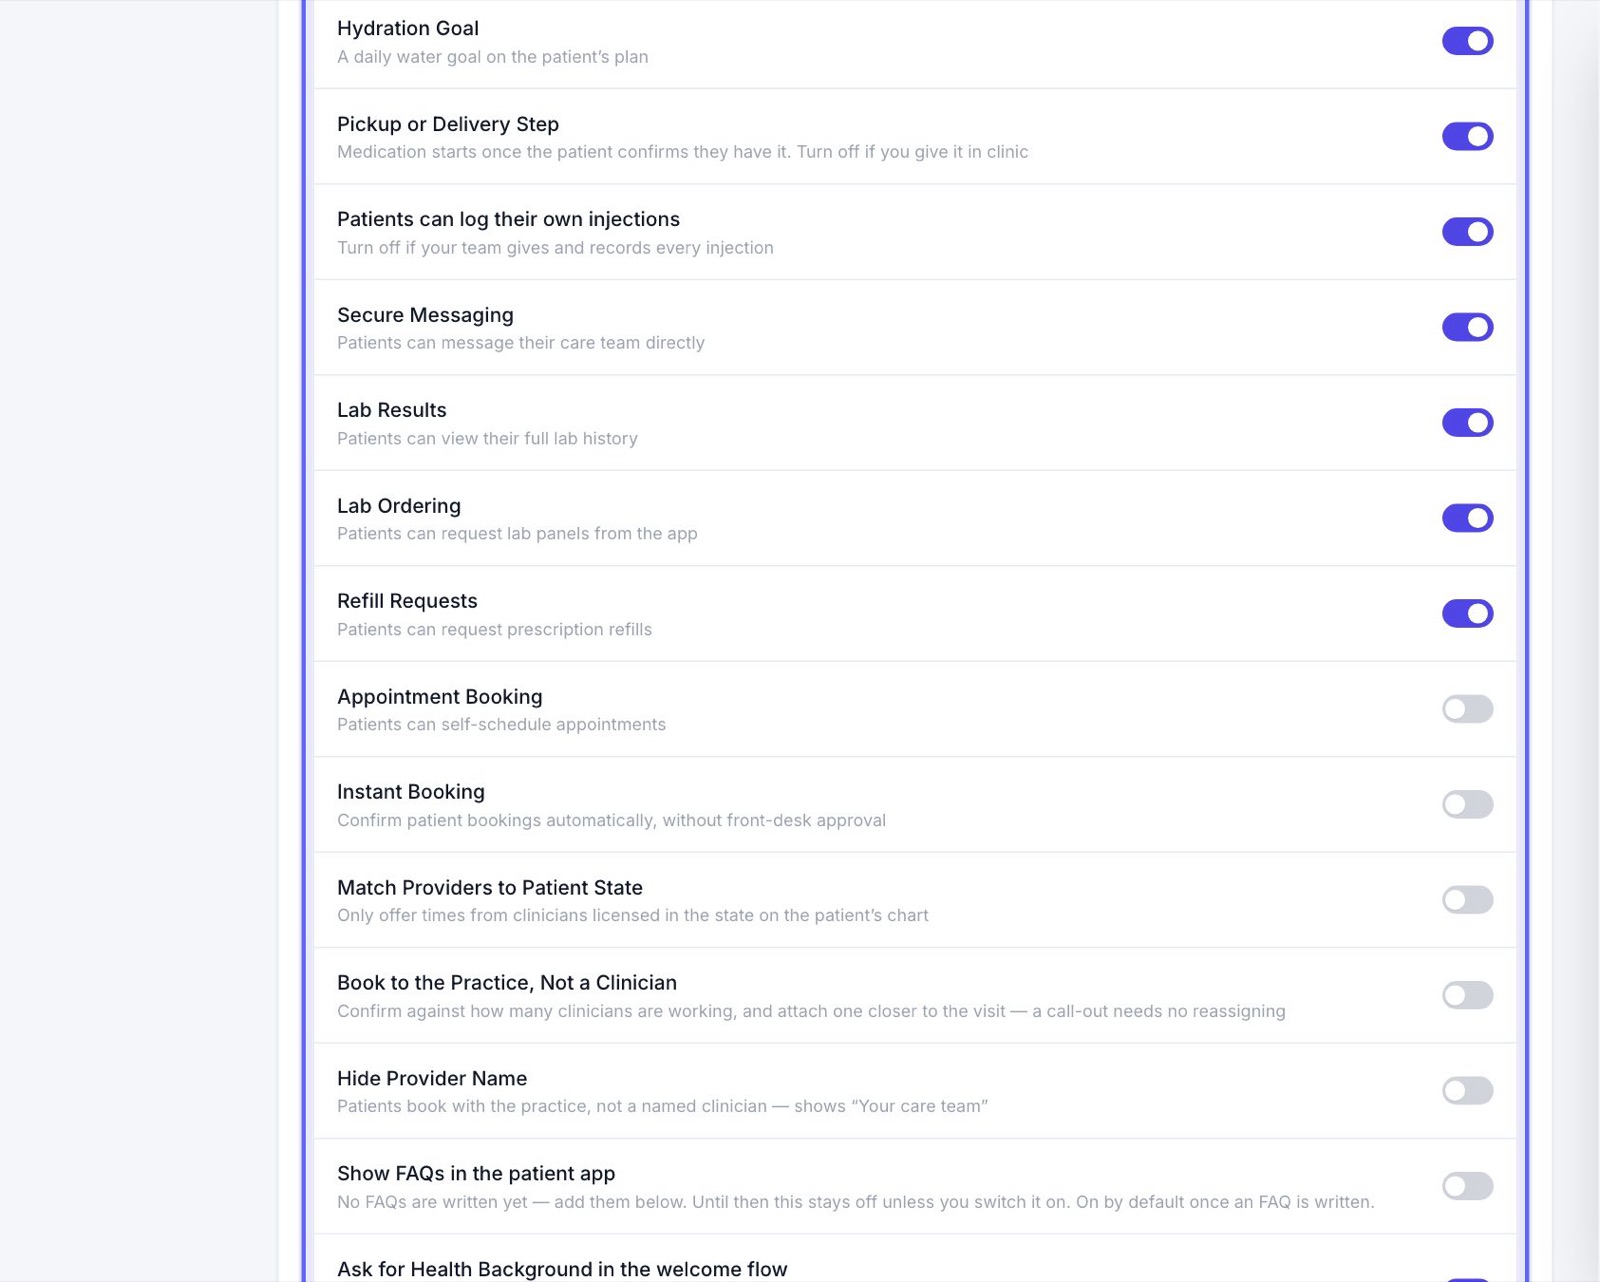
- 2Portal Features turns app features on or off, like Secure Messaging, Lab Results, Refill Requests and Appointment Booking.
- 3Write Frequently asked questions for the app’s FAQs page, and switch on Show FAQs in the patient app.
- 4Set the Appointment Reminder time and the Check-in Reminder Delay.
- 5The Progress page card sets what patients see on their progress page.
7Security
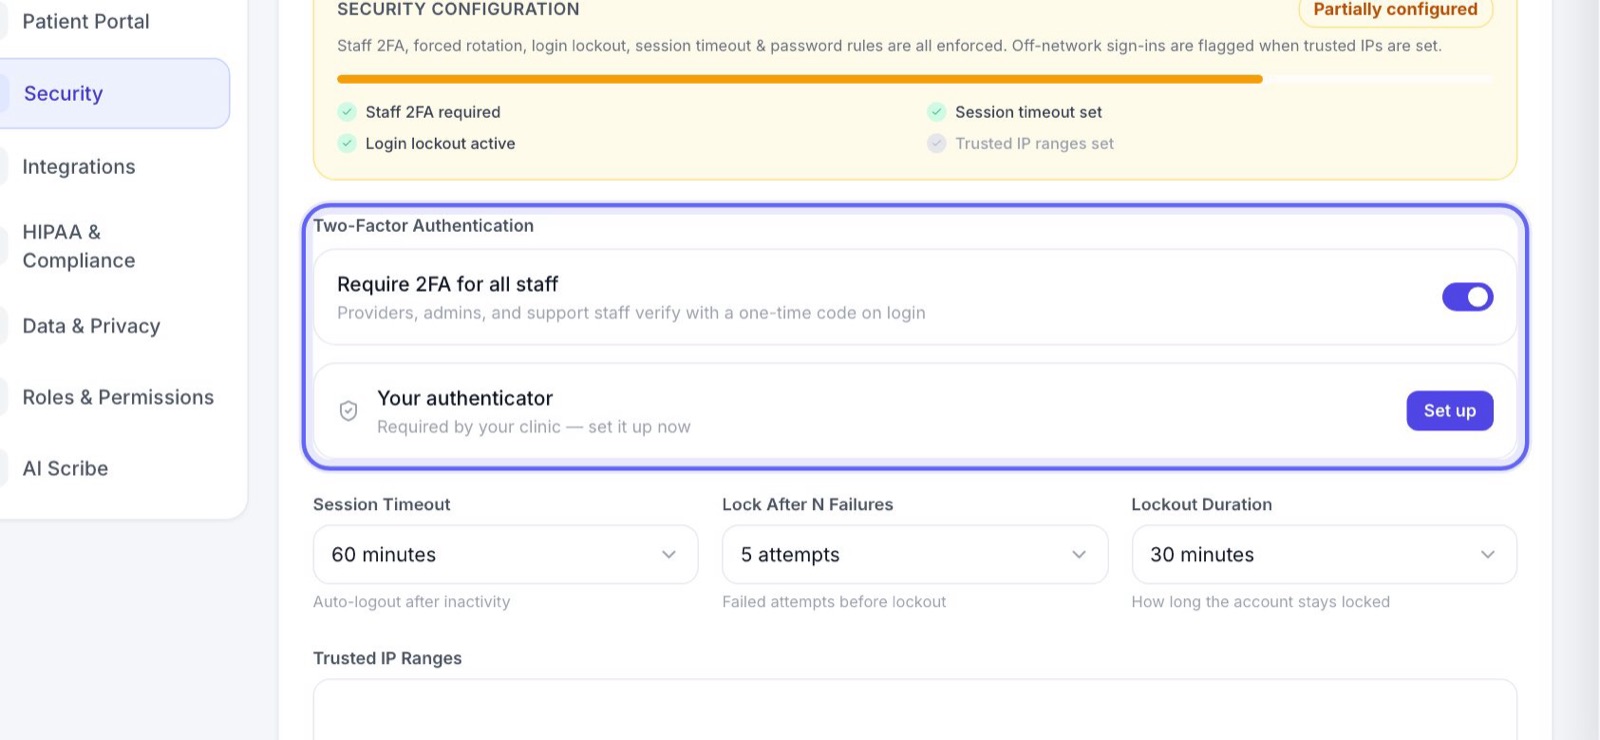
- 1Require 2FA for all staff makes everyone enter a code from an app on their phone when they sign in. Your authenticator is where you set up your own.
- 2Set the Session Timeout: how long Aminova waits before signing an idle computer out.
- 3Set Lock After N Failures and the Lockout Duration for wrong passwords.
- 4Add Trusted IP Ranges for your office. Sign-ins from anywhere else are flagged, and Office-only roles can’t sign in from anywhere else at all.
- 5Set your Password Policy: length, how often it changes, and what it must contain.
8Integrations
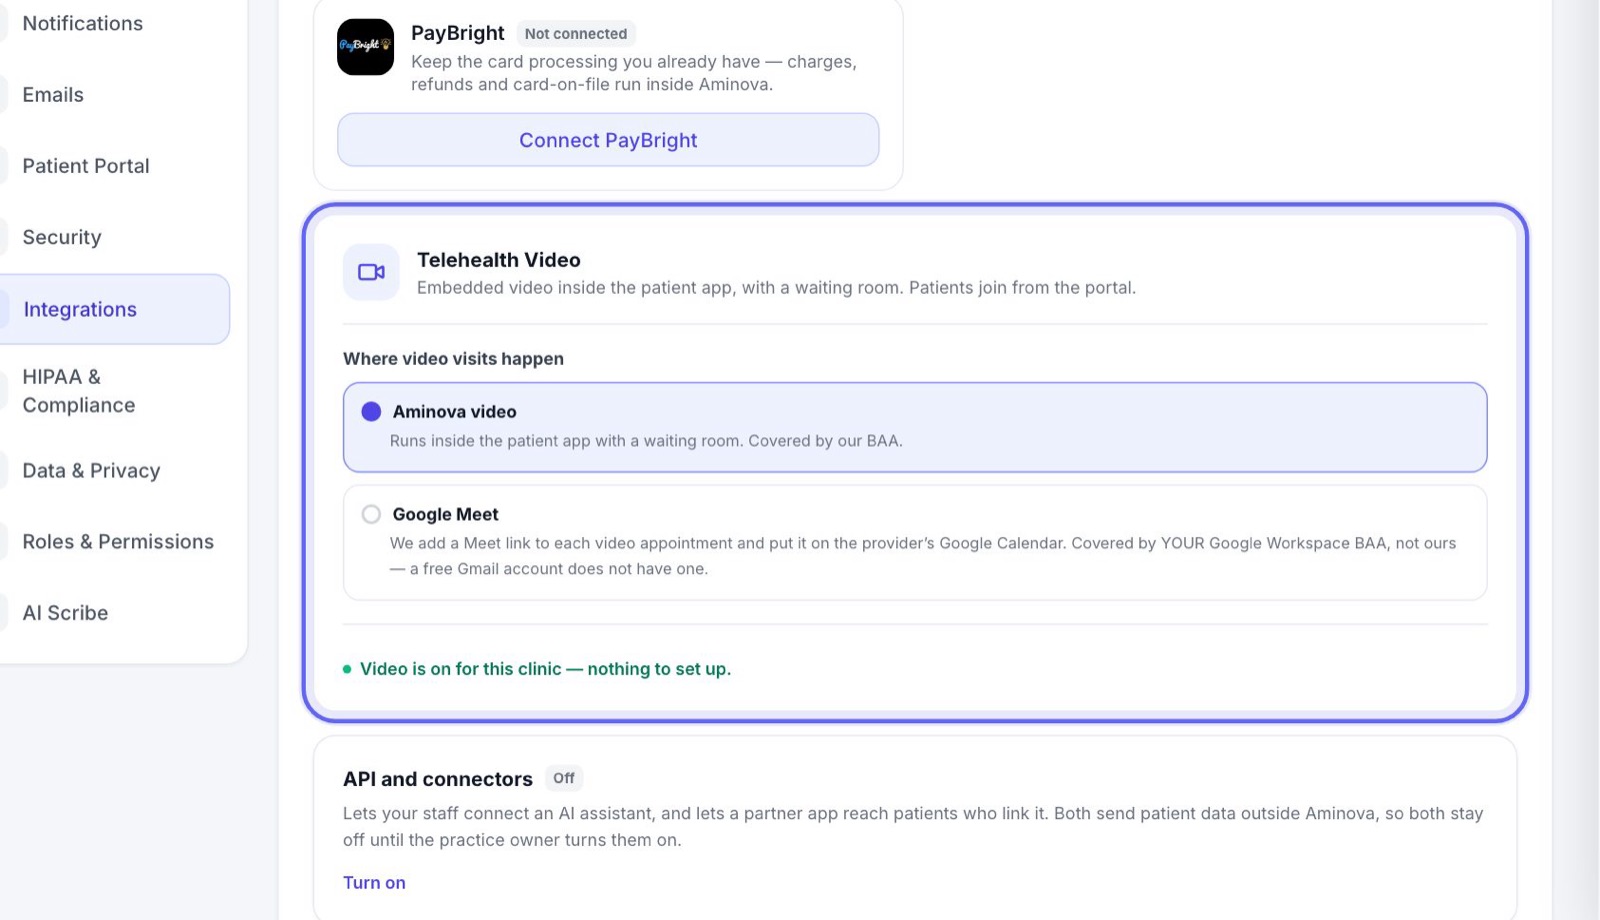
The Telehealth Video card is where you choose where video visits happen. The video visits setup guide explains the choice.
Press Add app to add an outside tool your clinic already uses, like your accounting software, then connect it on its card.
9HIPAA & Compliance
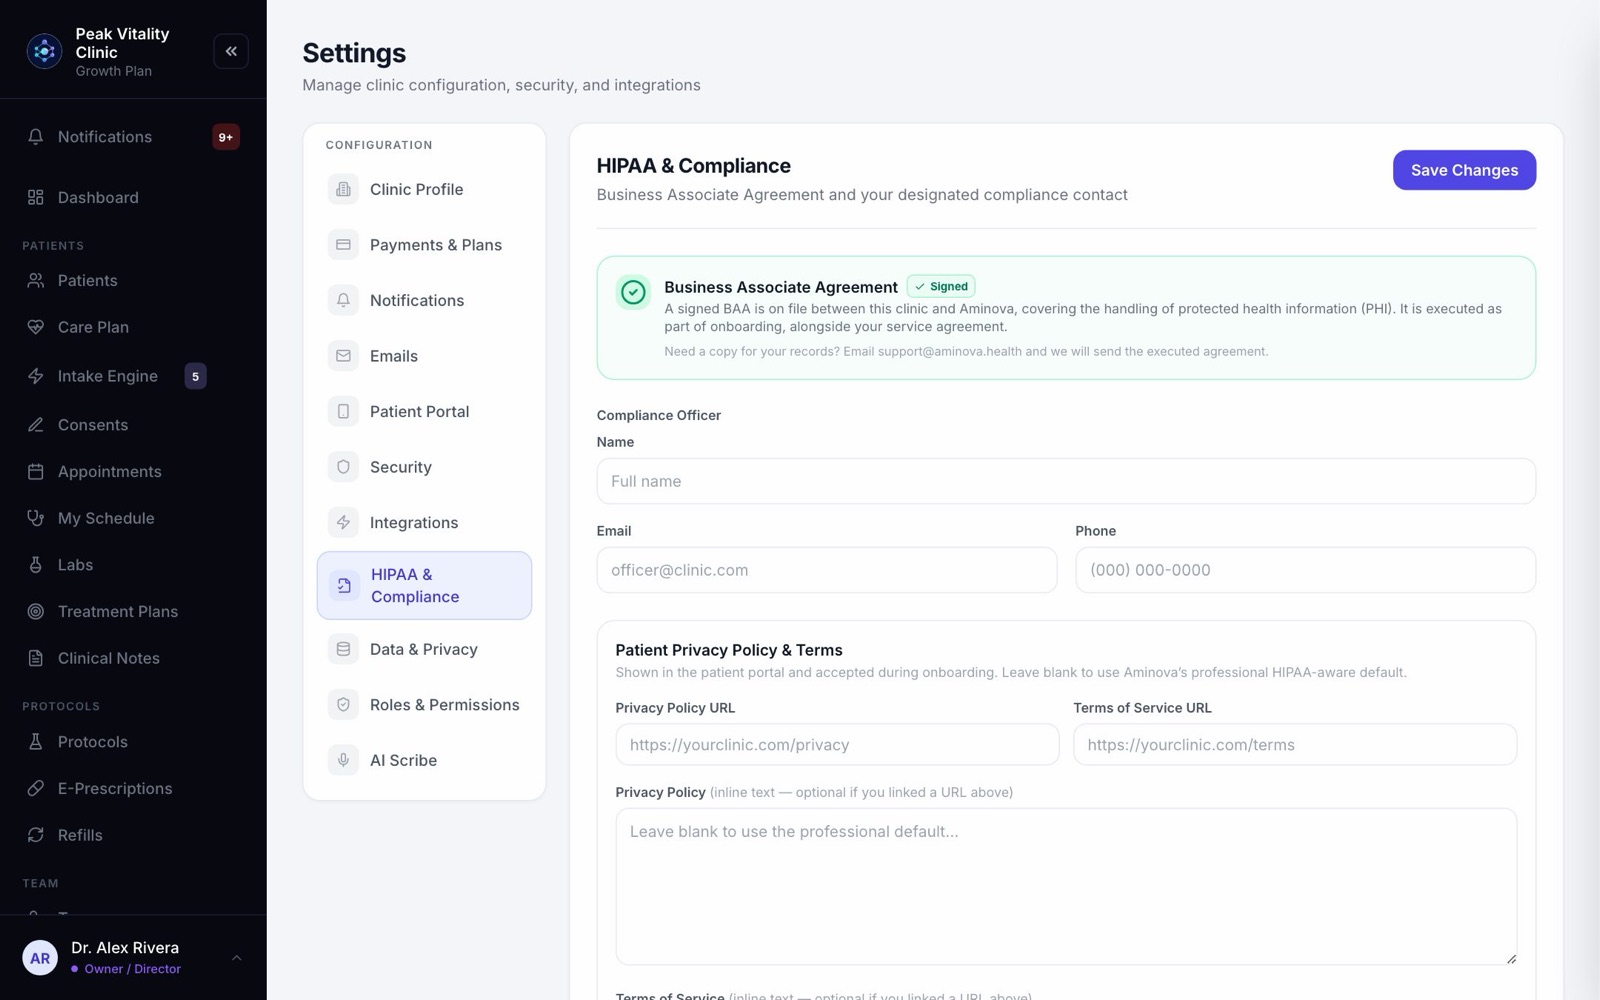
Your Business Associate Agreement with Aminova: the privacy contract that covers your patients’ information. It is signed when you join. Below it is your Compliance Officer: the name, email and phone of the person in charge of privacy.
Add your Privacy Policy URL and Terms of Service URL, or paste the text. View Audit Trail opens the HIPAA Audit Trail.
10Data & Privacy
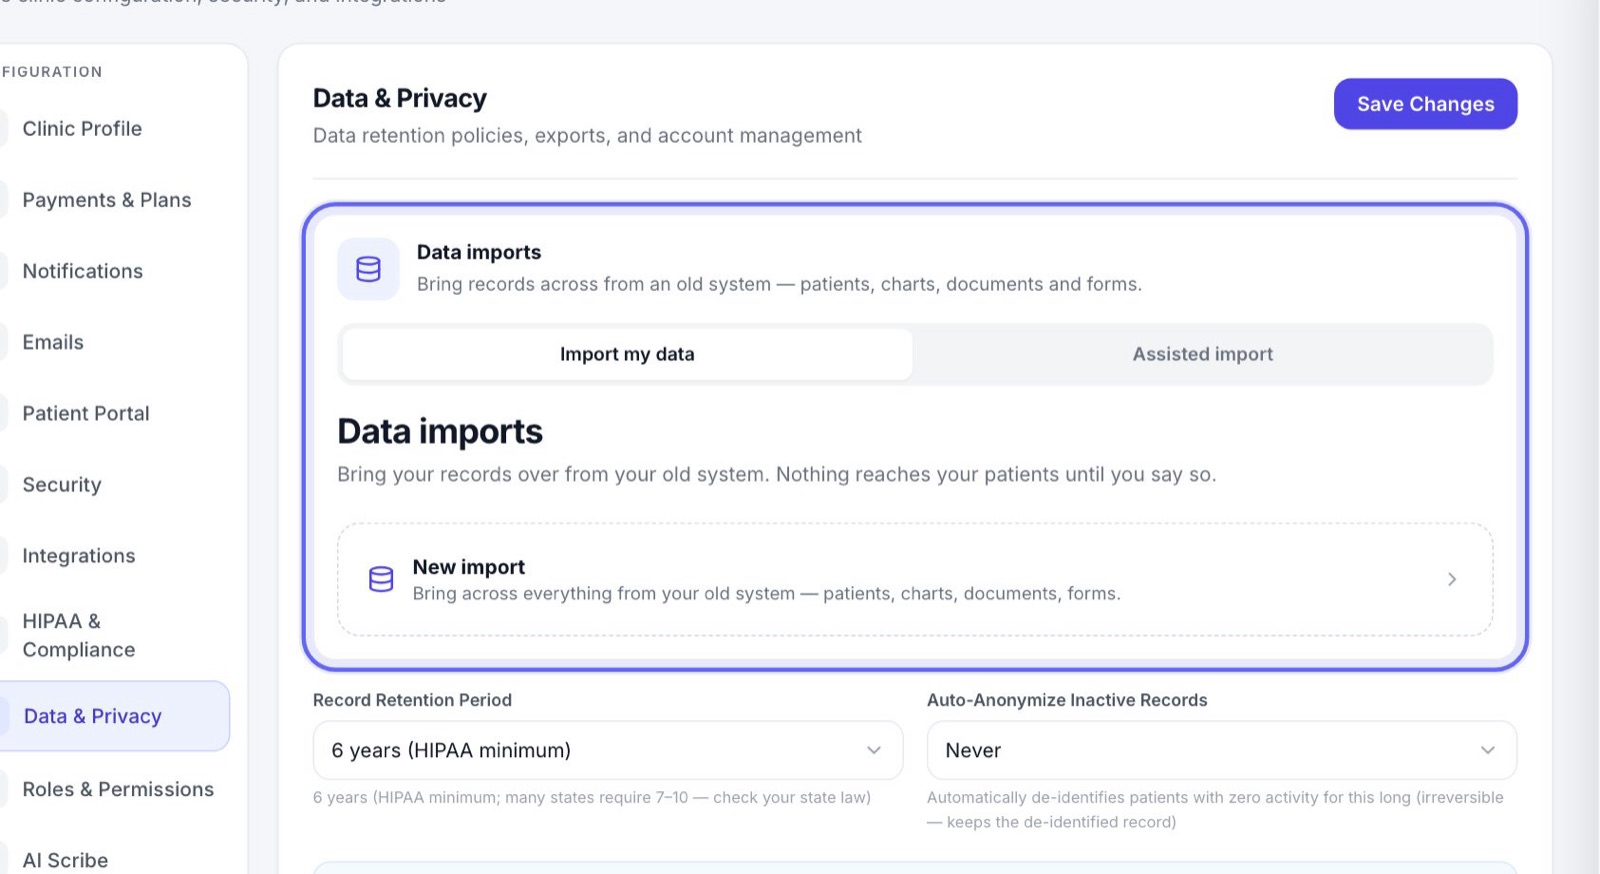
- 1Data imports brings patients, charts, documents and forms over from your old system.
- 2Choose your Record Retention Period. Check your state’s law: many ask for more than six years.
- 3Auto-Anonymize Inactive Records removes the details that identify a patient once they’ve had no activity at all for that long. It can’t be undone. Leave it on Never unless you’re sure.
- 4Export All Clinic Data downloads your patients, appointments, invoices and subscriptions.
11Roles & Permissions
- 1Pick a role at the top.
- 2Under Page Access, choose which pages it sees in the sidebar.
- 3Under Feature Access, choose which actions it can take.
- 4Press Save Permission Changes.
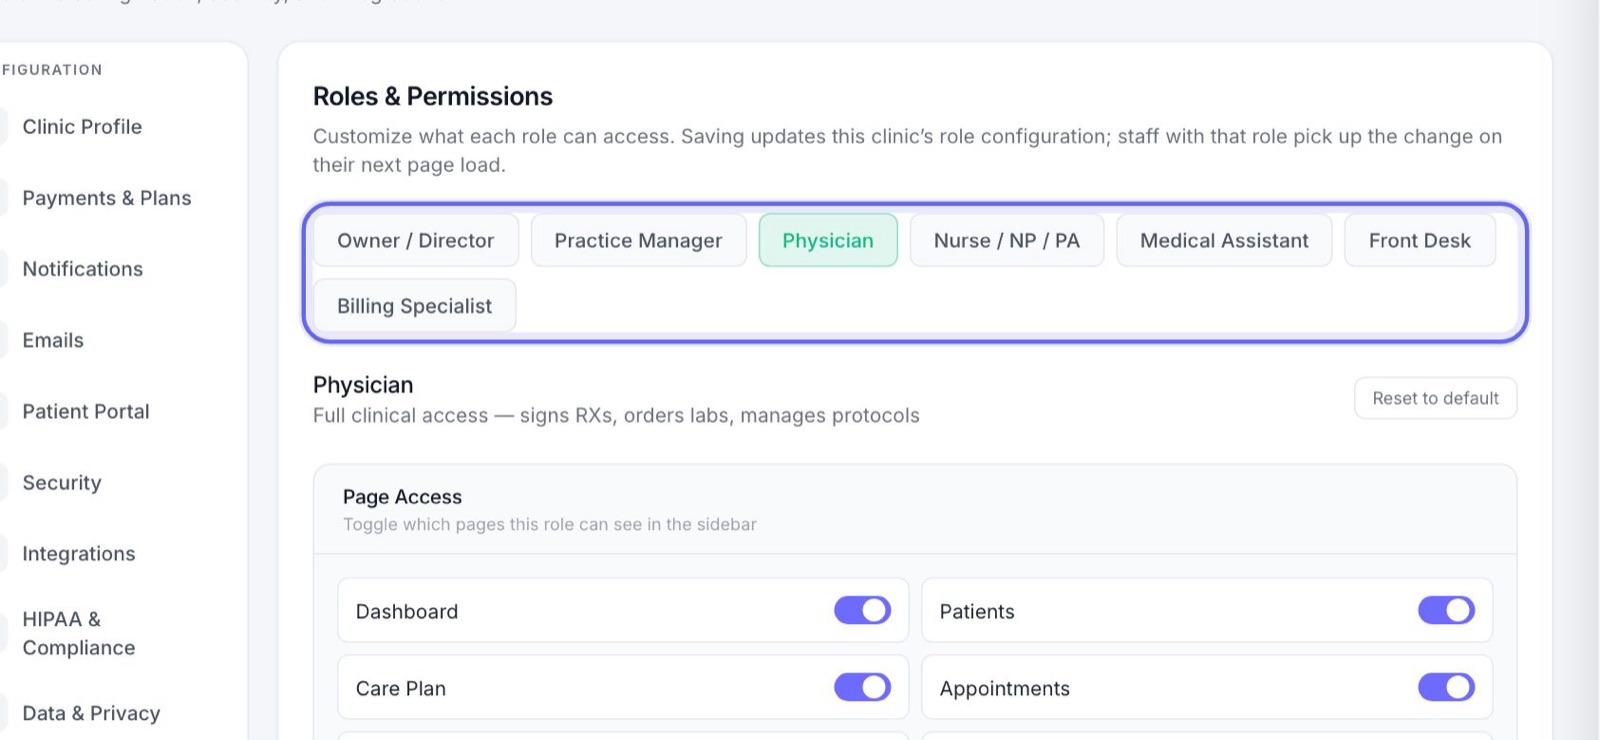
The Owner role always has full access and can’t be limited. To limit someone, give them a different role.
12AI Scribe
If your clinic has the AI scribe, this is where each provider sets how their own visit notes are written. It changes only your notes, not anyone else’s. How long visit recordings are kept is set here too, for the whole clinic.
Keep going
Set up your clinic profile and hours
Add your clinic’s name, contact details, address and IDs, set your time zone and opening hours, add your locations, and upload your logo.
Read the guideTake card payments
Connect your card processor, add your card terminals, then set your payment rules: deposits, no-show fees, cash prices and your own payment types.
Read the guideTurn on two-step sign-in
Make everyone confirm their sign-in with a code from an app on their phone. Set up your own first, then your team is walked through it the next time they sign in.
Read the guideSet up video visits
Choose where your video visits happen, make the right visit types video visits, and try one on your practice patient.
Read the guideBring your patients over from your old system
Move your patients, charts, documents and forms into Aminova. Upload the files, check what was found, approve it, then look around before you make it final.
Read the guideHIPAA Audit Trail
Who opened, changed or exported what, and when. Check flagged events, export the log, and keep your privacy records in one place.
Read the guideRather be shown?
Inside Aminova, the tutorial walks you through every page, and the Getting started checklist shows you each task click by click. Or book a live training session with our team.