1What you’re setting up
To take cards in Aminova, you connect the card processor your clinic already uses. The money goes straight to your bank. Aminova never holds it.
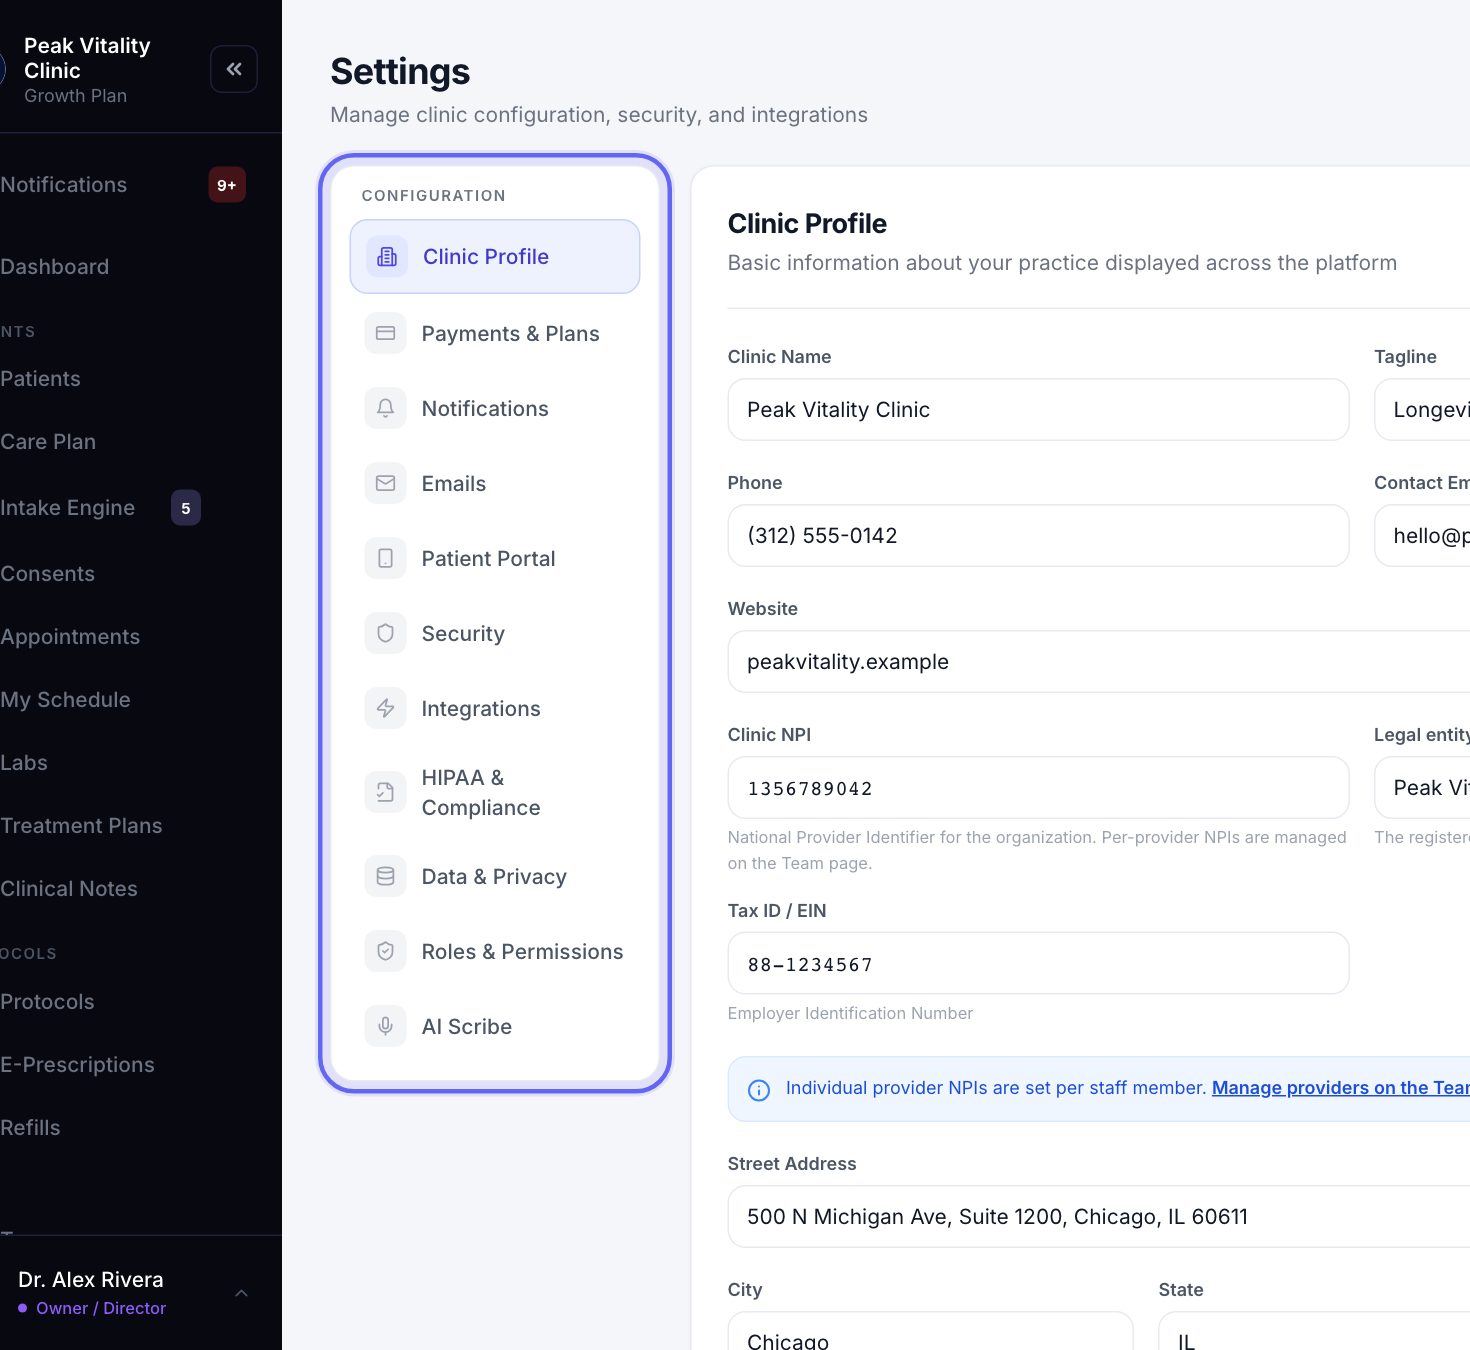
Then you add any card terminals you have, and choose your payment rules. Everything here lives in one place: Settings → Payments & Plans.
2Open Payments & Plans
- 1Go to Settings in the sidebar.
- 2Click Payments & Plans in the list on the left.
- 3Your card processor is at the top, under Payment processor. Your rules are below it.
3Connect your card processor
- 1Press the connect button on your card processor’s card.
- 2Depending on your processor, you either sign in to your account with them, or paste in keys from it.
- 3If you paste keys: put the API key in Source Key. Add the PIN only if your key has one.
- 4Add the Tokenization Key too if you want to type cards into Aminova. Without it, you can only take cards on a terminal.
- 5Tick These are live production credentials once you’re using your real keys, not test ones. Then connect. Aminova checks the keys with your processor before it saves them.
- 6The card now says Connected. Press Manage, then Test connection, any time you want to check it still works.
You may be asked for a code from your sign-in app before the keys are saved. That keeps your payment account safe.
4Add your card terminals
- 1On your processor’s card, press Manage.
- 2Under Card terminals, type a name, like “Front desk”, and the terminal’s Serial number. It’s printed on the underside.
- 3Press Add. Do the same for each terminal you have.
- 4Now Terminal shows up when you charge a visit, and Card (in person) works in Billing. The amount goes straight to the terminal and the patient taps or inserts their card.
In-person card payments on a terminal can include prescription items.
5Turn on live updates
- 1In the same popup, under Live updates, press Create webhook address.
- 2Press Copy, then paste the address into your card processor’s own account, where it asks for a webhook.
- 3Your processor gives you a signature key. Paste it back into Aminova and press Save.
Without this, a payment that takes a while to go through can stay “pending” in Aminova until someone checks.
6Decide what patients pay up front
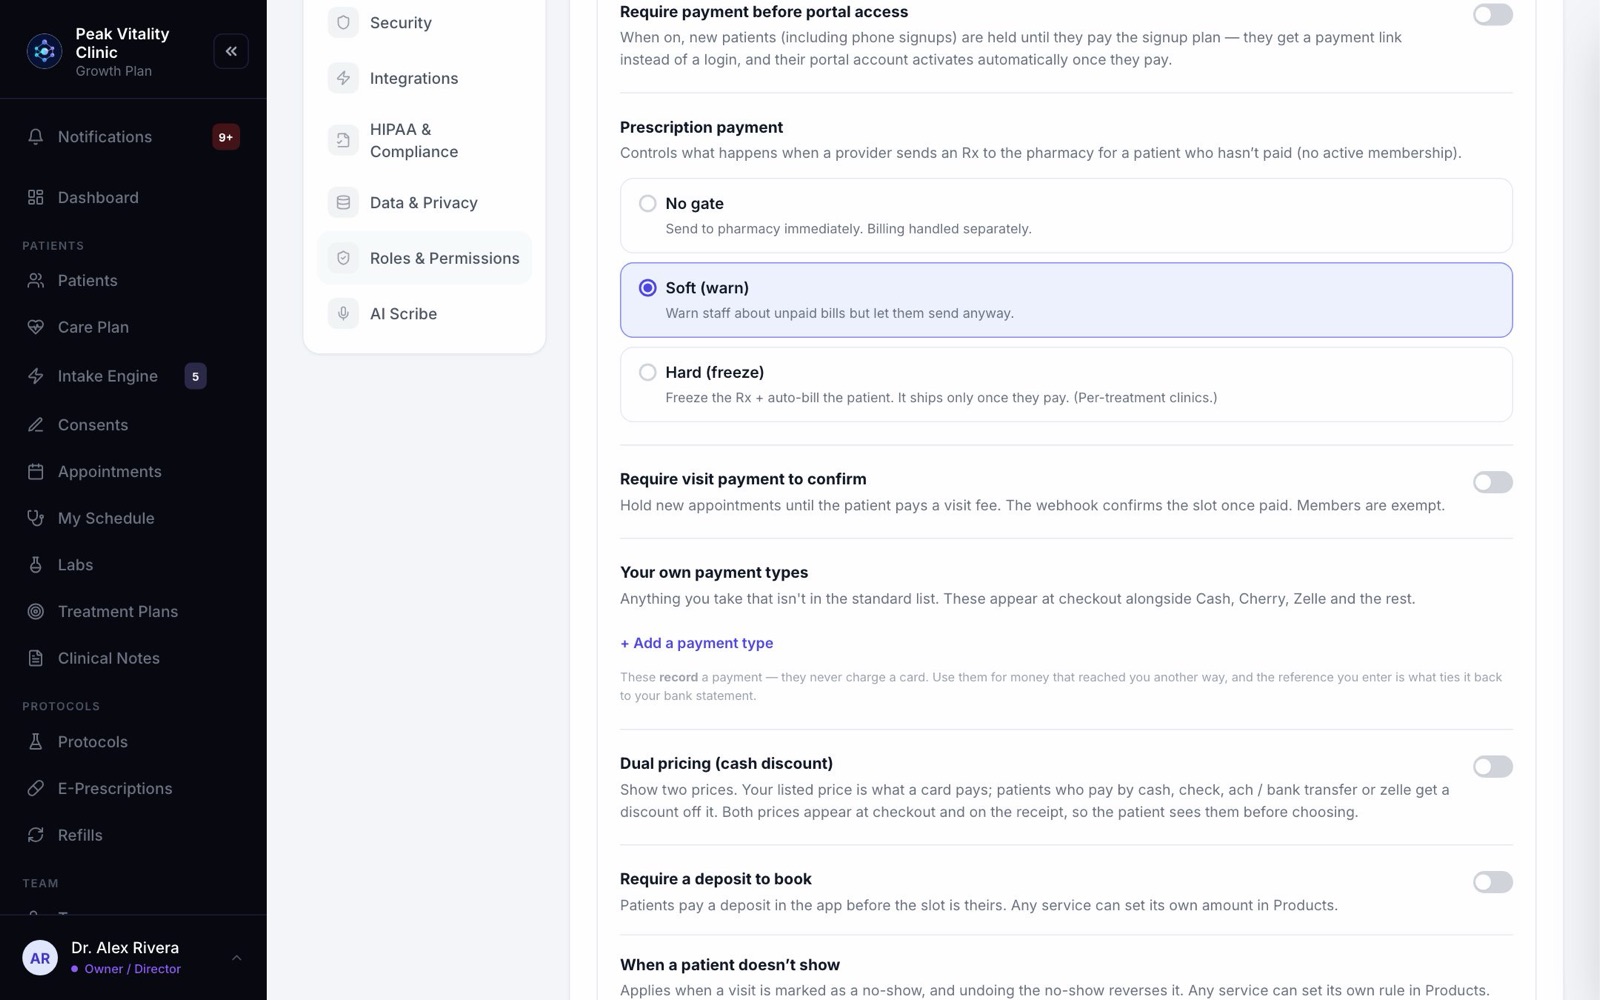
- 1Require payment before portal access: new patients get a payment link instead of a login, and their account opens once they pay. Pick the Signup plan they pay.
- 2Prescription payment: what happens when a prescription is sent for a patient with no active membership. No gate sends it, Soft (warn) warns your staff, and Hard (freeze) holds it and bills the patient until they pay.
- 3Require visit payment to confirm: new appointments wait until the patient pays a Visit fee. Members don’t pay it.
7Ask for a deposit to book
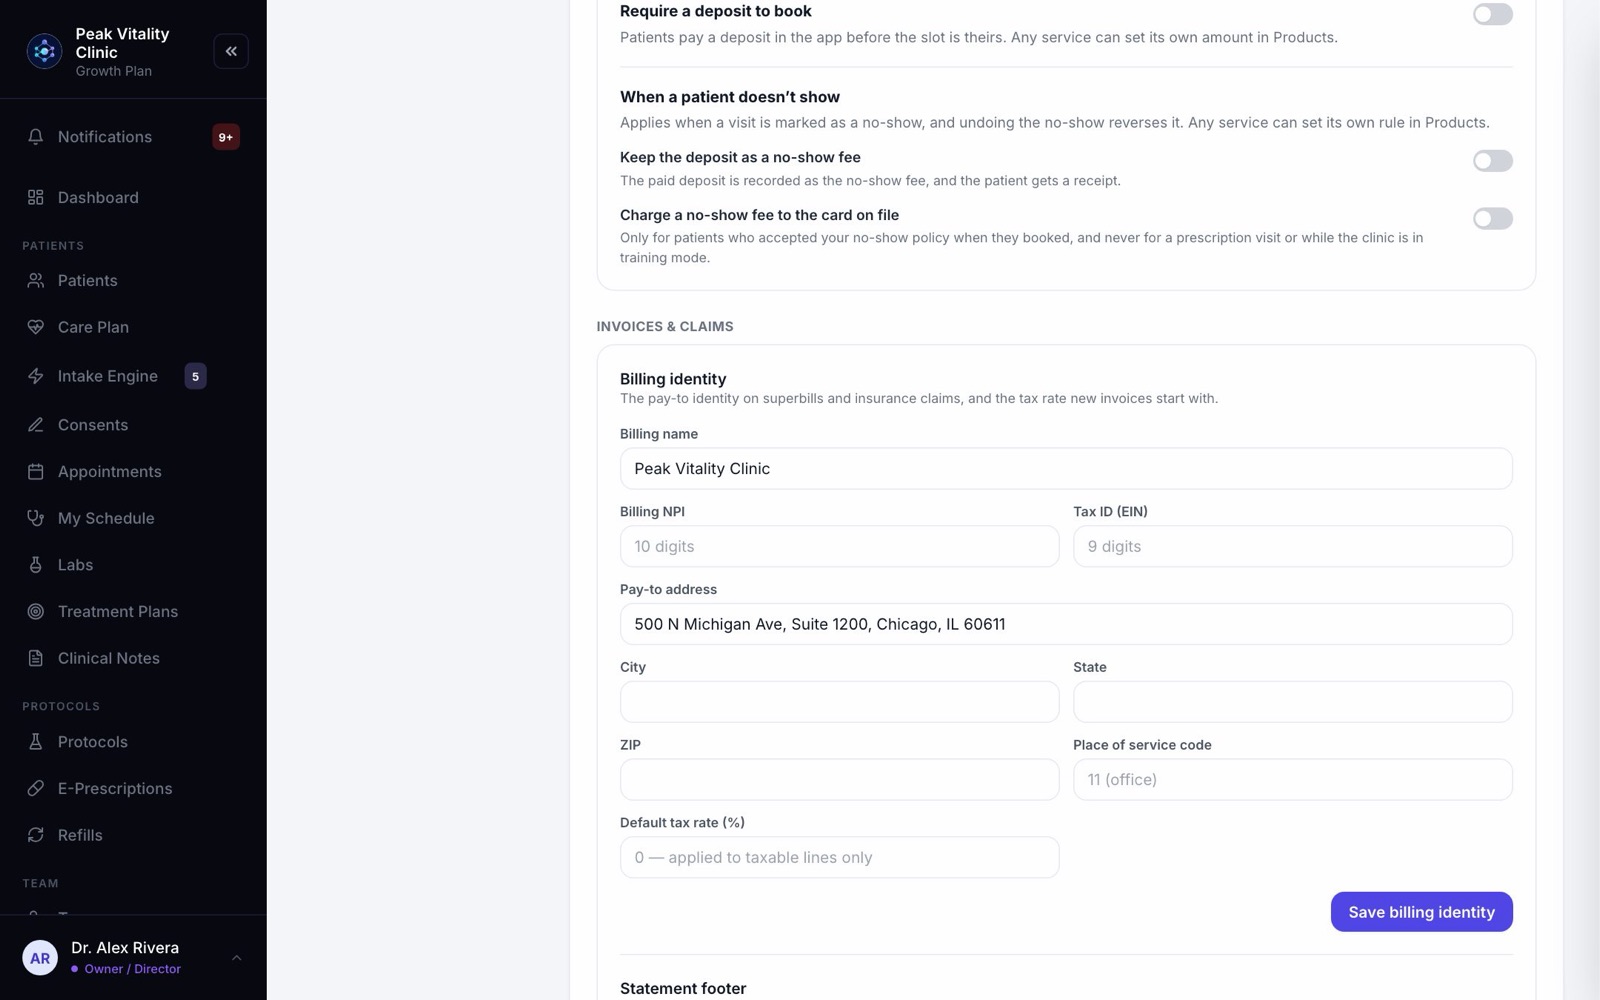
- 1Switch on Require a deposit to book.
- 2Choose A set amount or A percentage of the service’s price, and type it in.
- 3Patients booking online pay it in the app before the time is theirs.
- 4Leave Hold the slot before the money clears off, so a booking only goes through once the deposit is paid.
A single visit type can have its own deposit. Set it under Deposit at booking in the visit type.
8Choose what happens on a no-show
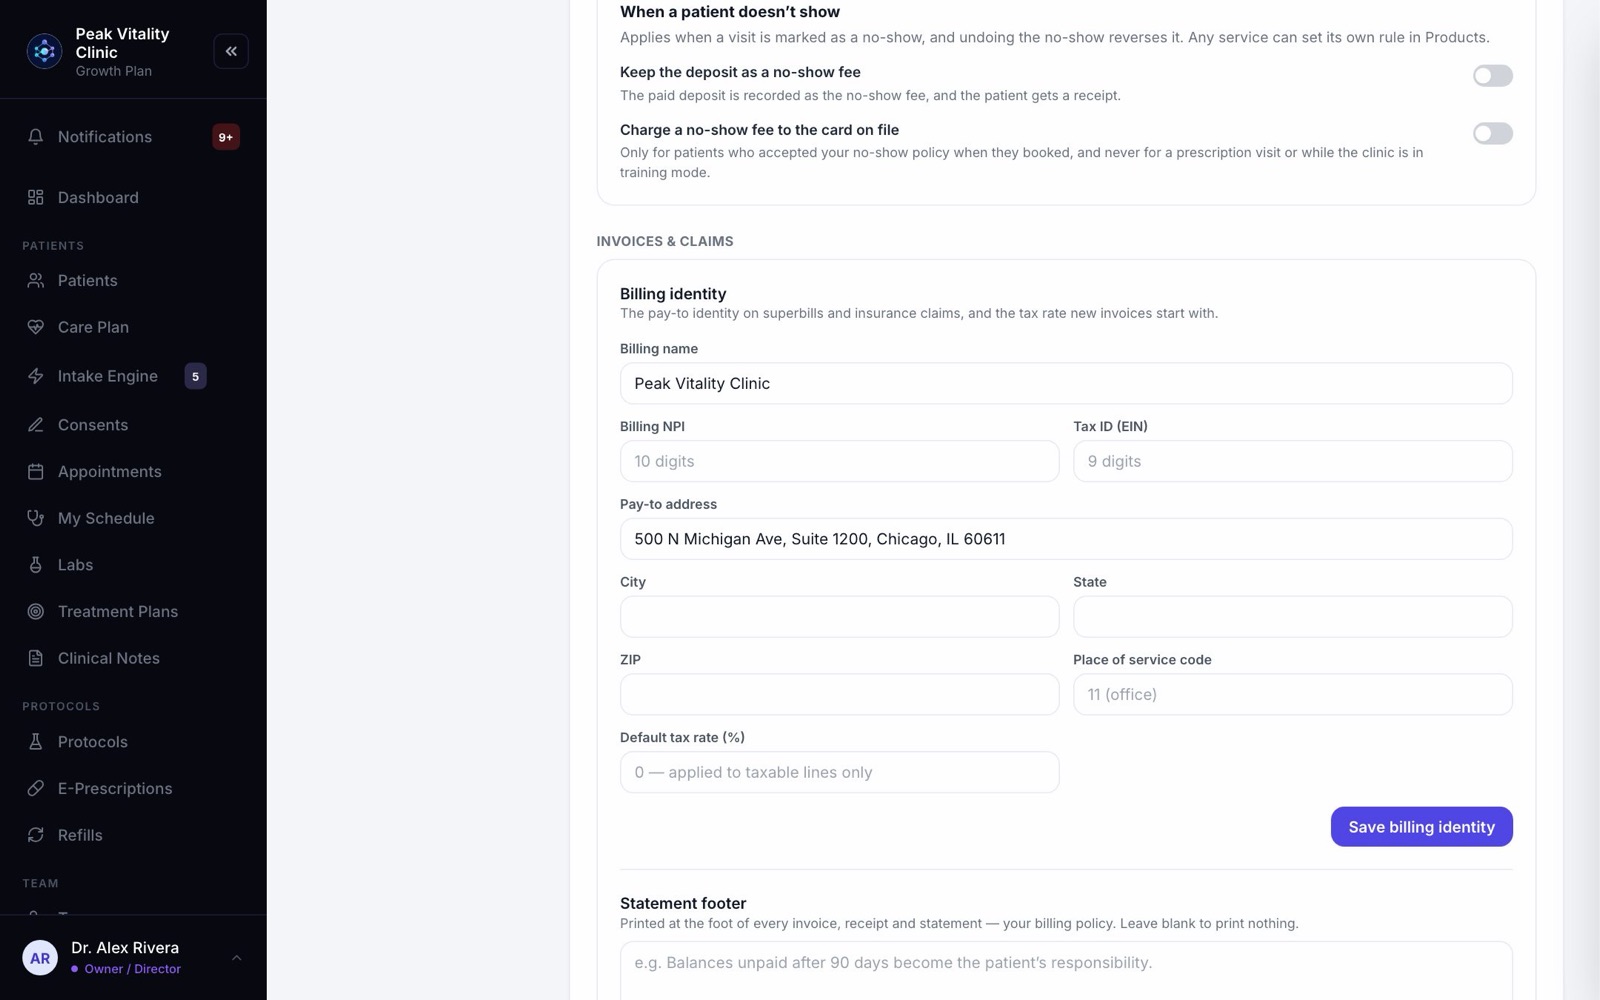
- 1Under When a patient doesn’t show, turn on Keep the deposit as a no-show fee, or Charge a no-show fee to the card on file and type the fee.
- 2Write the Policy patients accept when booking. Patients booking online see it with the amount and tick to accept it.
- 3A fee is only charged to patients who accepted it. Visits your team books don’t ask, so no fee is charged for them.
Undoing a no-show on the visit reverses what the rule did, where it can.
9Offer a cash price (optional)
- 1Switch on Dual pricing (cash discount).
- 2Choose Percent off or Dollars off, and the amount. Name the line the receipt shows, like “Cash discount”.
- 3Your listed price is what a card pays. Cash, a check or a bank transfer pays the lower cash price. Nothing is ever added to a card payment.
- 4Both prices show at checkout and on the receipt, so the patient sees them before they choose.
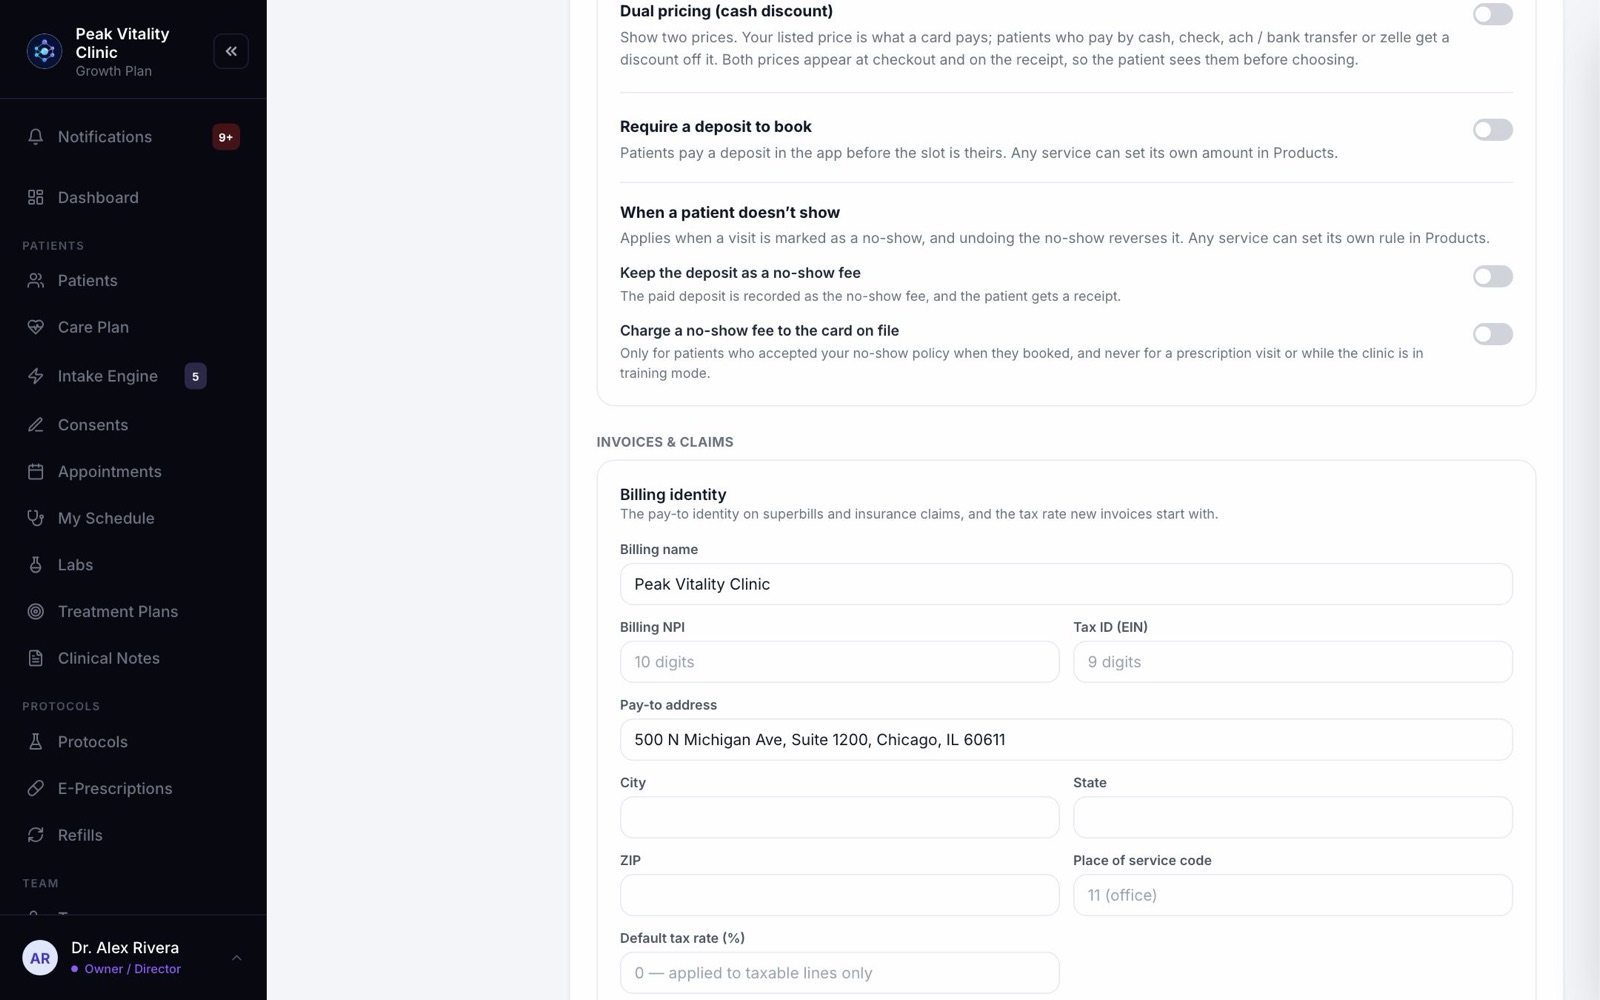
Tell us before you switch this on, so we can check your merchant account is set up for it.
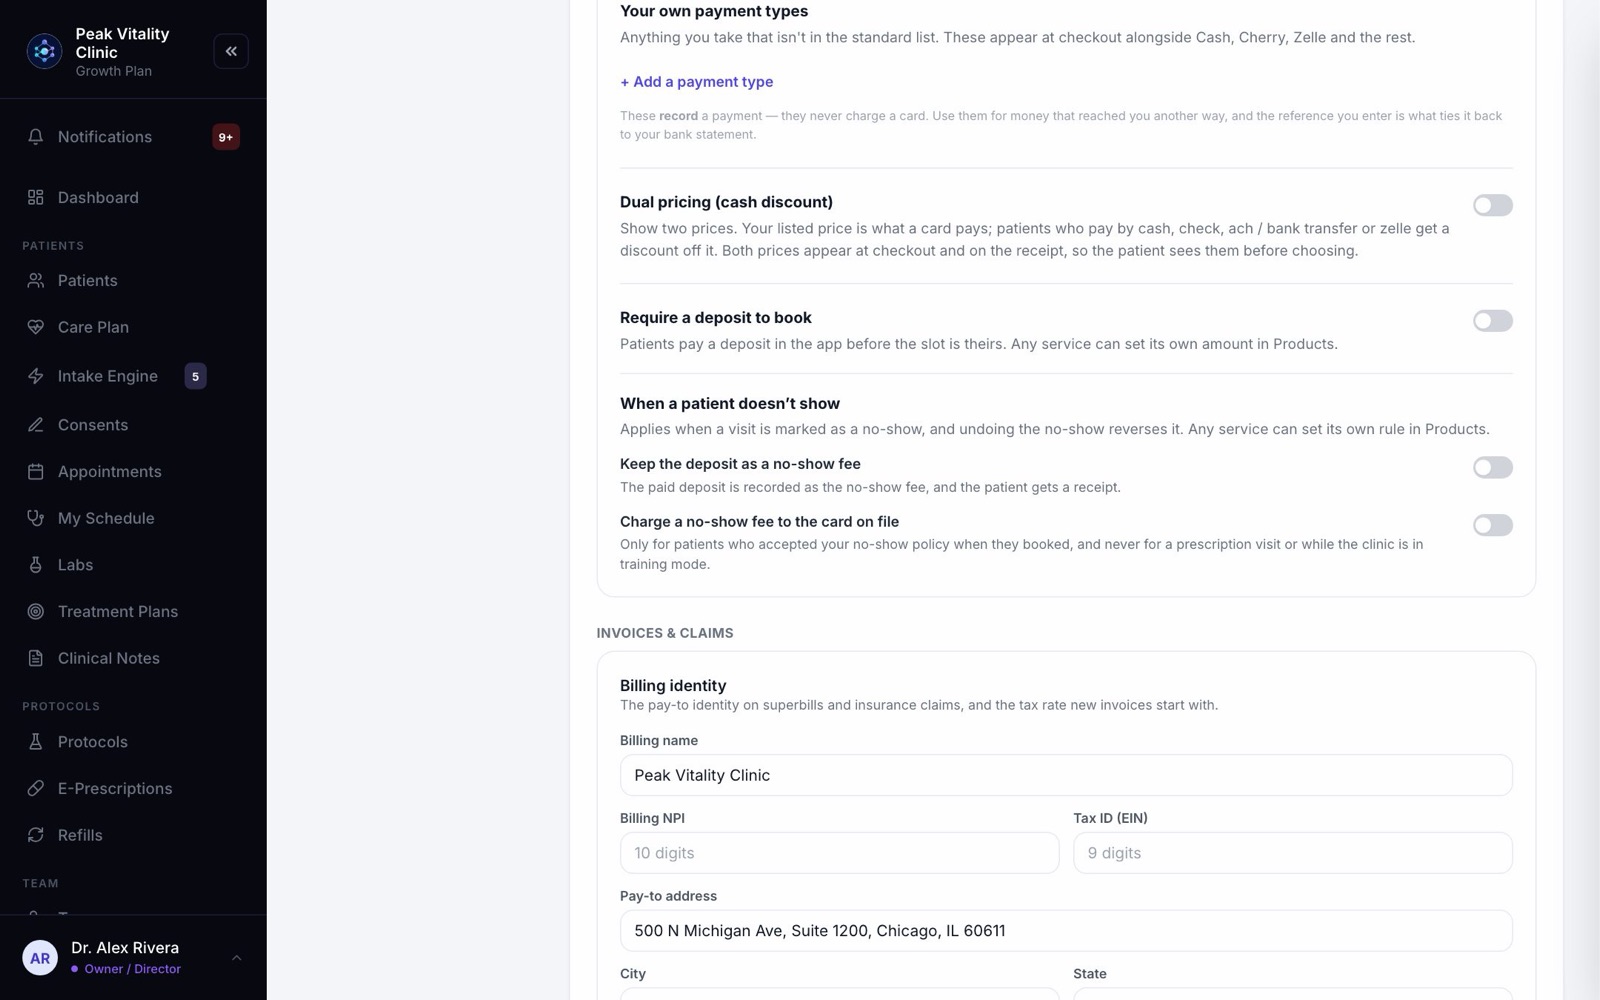
10Add your own payment types (optional)
- 1Under Your own payment types, press + Add a payment type.
- 2Give it a name, and what to ask for, like a reference number.
- 3It shows under How are they paying? in Billing’s Collect Payment, beside cash, check and the rest. It only records a payment. It never charges a card.
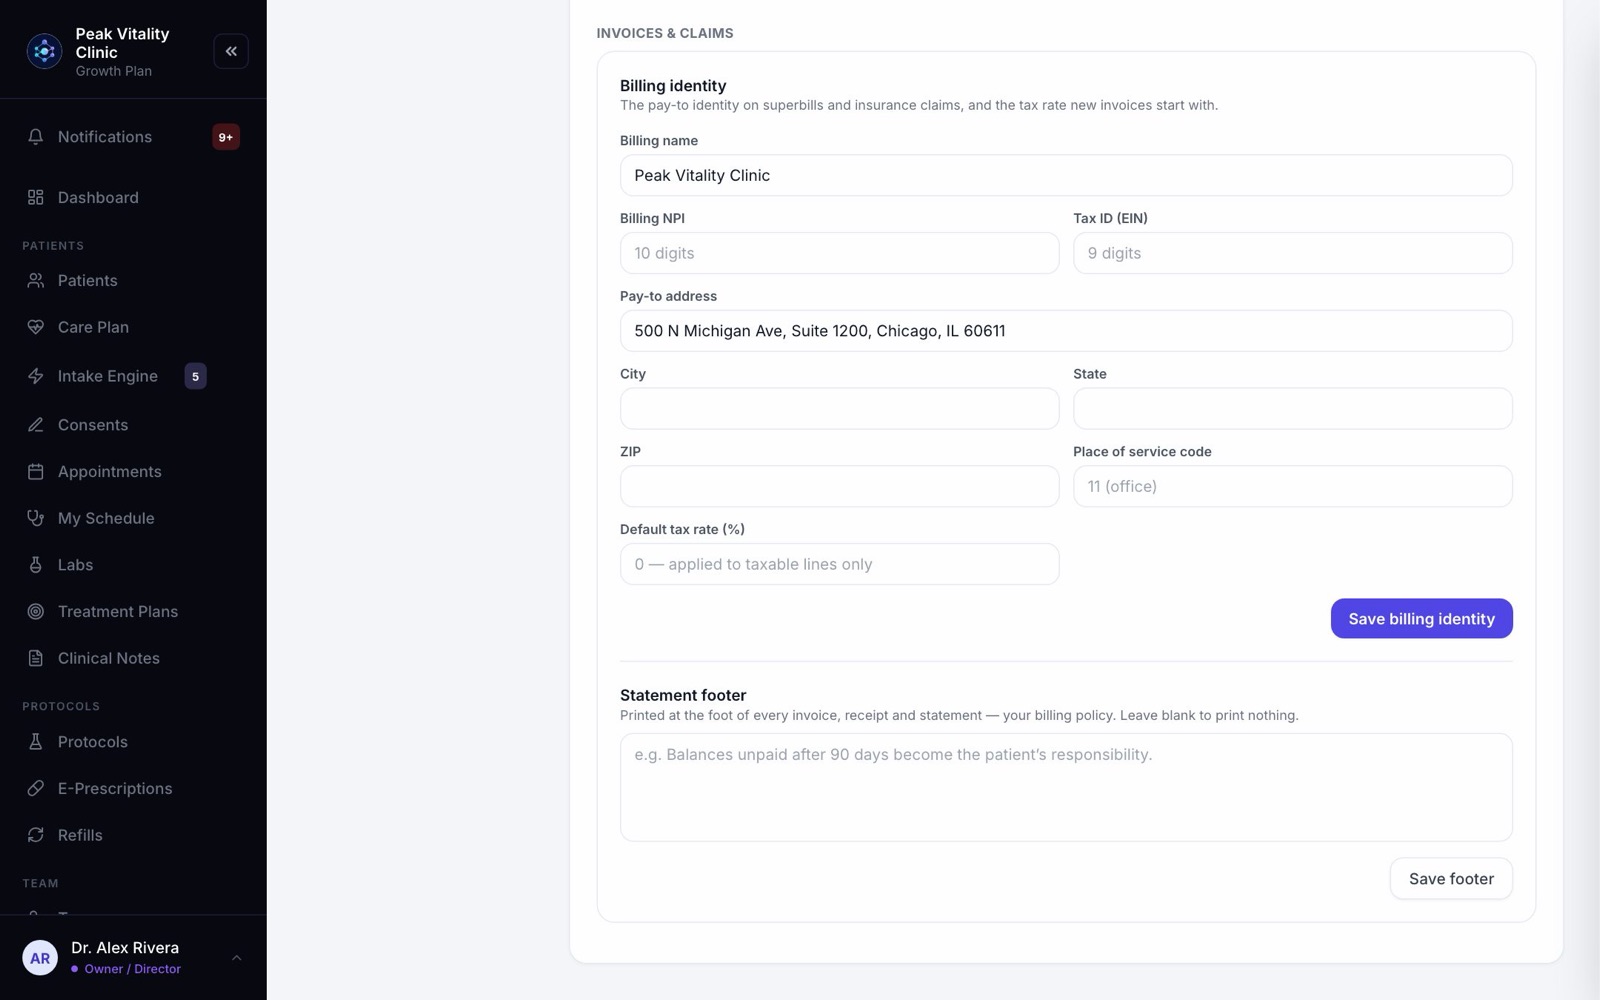
11Add your billing details
- 1Under Billing identity, fill in your billing name, NPI, tax ID and pay-to address. They go on superbills and insurance claims.
- 2Set your Default tax rate (%). New invoices start with it, on taxed lines only.
- 3Press Save billing identity.
- 4Add a Statement footer if you like: your billing policy, printed on every invoice, receipt and statement.
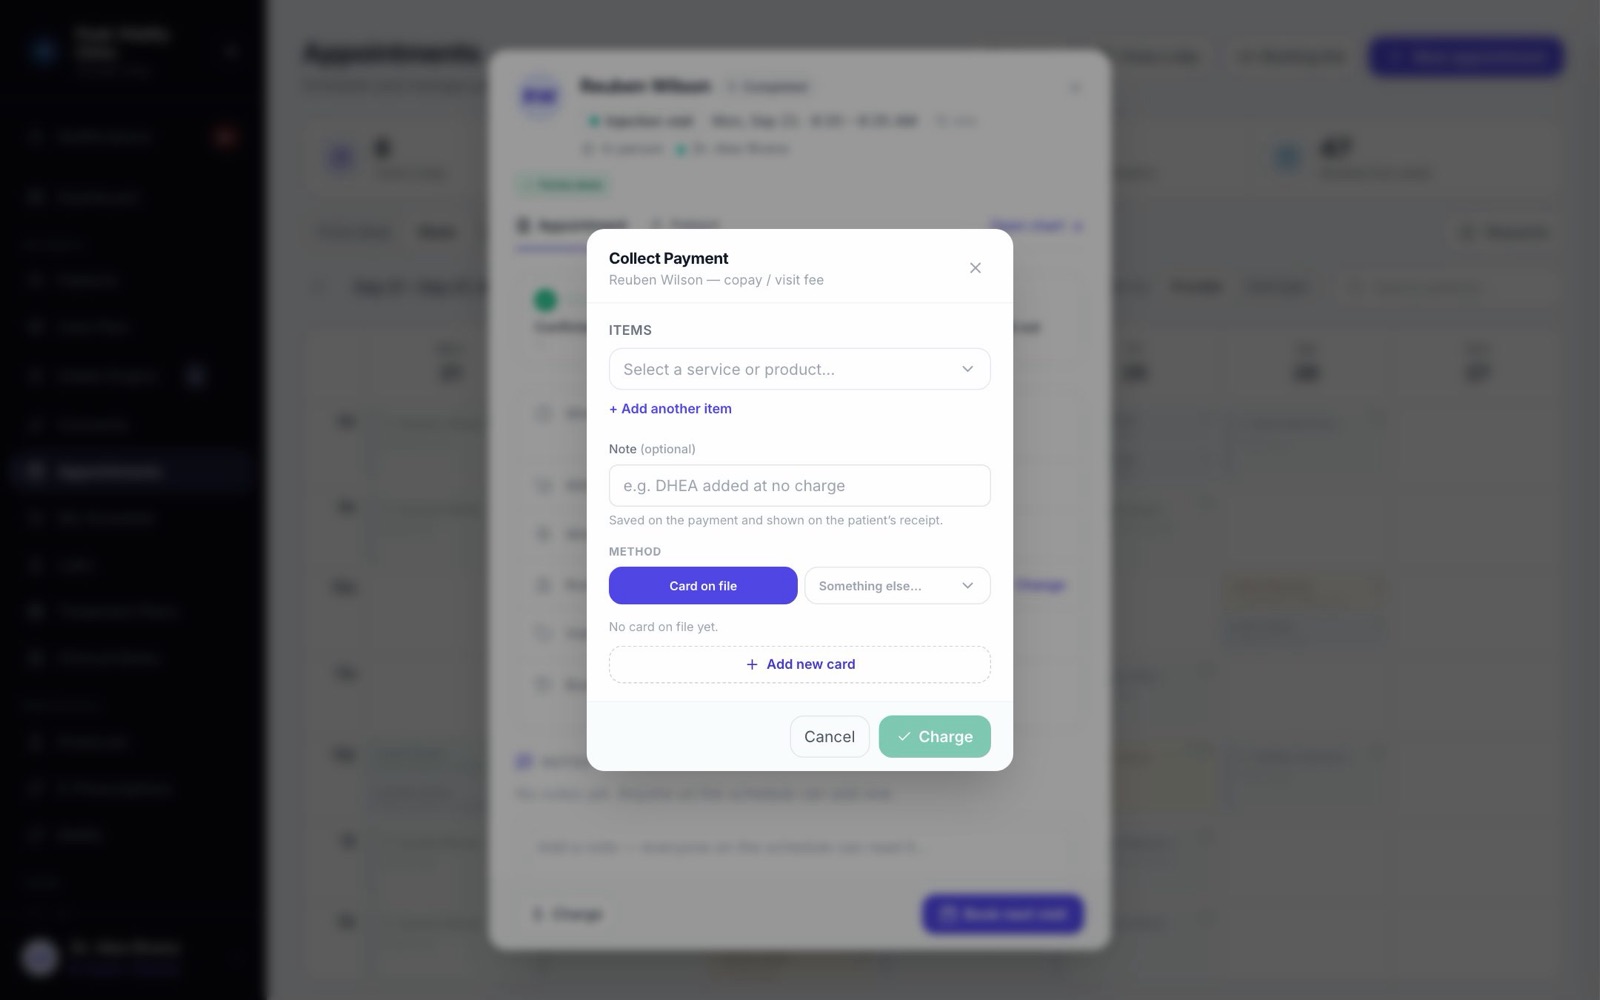
12Try a checkout
- 1Open your practice patient’s visit on Appointments and press Charge.
- 2Pick Something else…, choose Cash, type any amount and record it.
- 3That’s the same screen you use for real patients. Cards are never charged to a practice patient.
Keep going
Payments and checkout
Money from start to finish: the deposit when a visit is booked, the charge at the visit, the receipt, a refund if one is needed, and where it all shows up.
Read the guideBilling
Bill patients, take payments and keep track of what’s owed. Make invoices, record and refund payments, print receipts, and set up your discounts.
Read the guideSet up your visit types and booking link
Build each kind of visit once: its length, providers, rooms, price and forms. Then turn on the link patients book from.
Read the guideSettings
How your clinic runs: your details and hours, payments, what patients are told, the patient app, security, connected tools and who can do what.
Read the guideTurn on two-step sign-in
Make everyone confirm their sign-in with a code from an app on their phone. Set up your own first, then your team is walked through it the next time they sign in.
Read the guideRather be shown?
Inside Aminova, the tutorial walks you through every page, and the Getting started checklist shows you each task click by click. Or book a live training session with our team.