1What a visit type is
A visit type is one kind of visit you offer, like a new-patient consult, an IV drip or a follow-up. It holds everything about that visit: how long it takes, who sees it, which rooms it uses, what it costs, and which forms go to the patient.
Set each one up once. Every booking of it, at the front desk, in the patient app or on your booking link, fills in on its own.
2Open your visit types
- 1Go to Appointments in the sidebar.
- 2Click the Visit types tab.
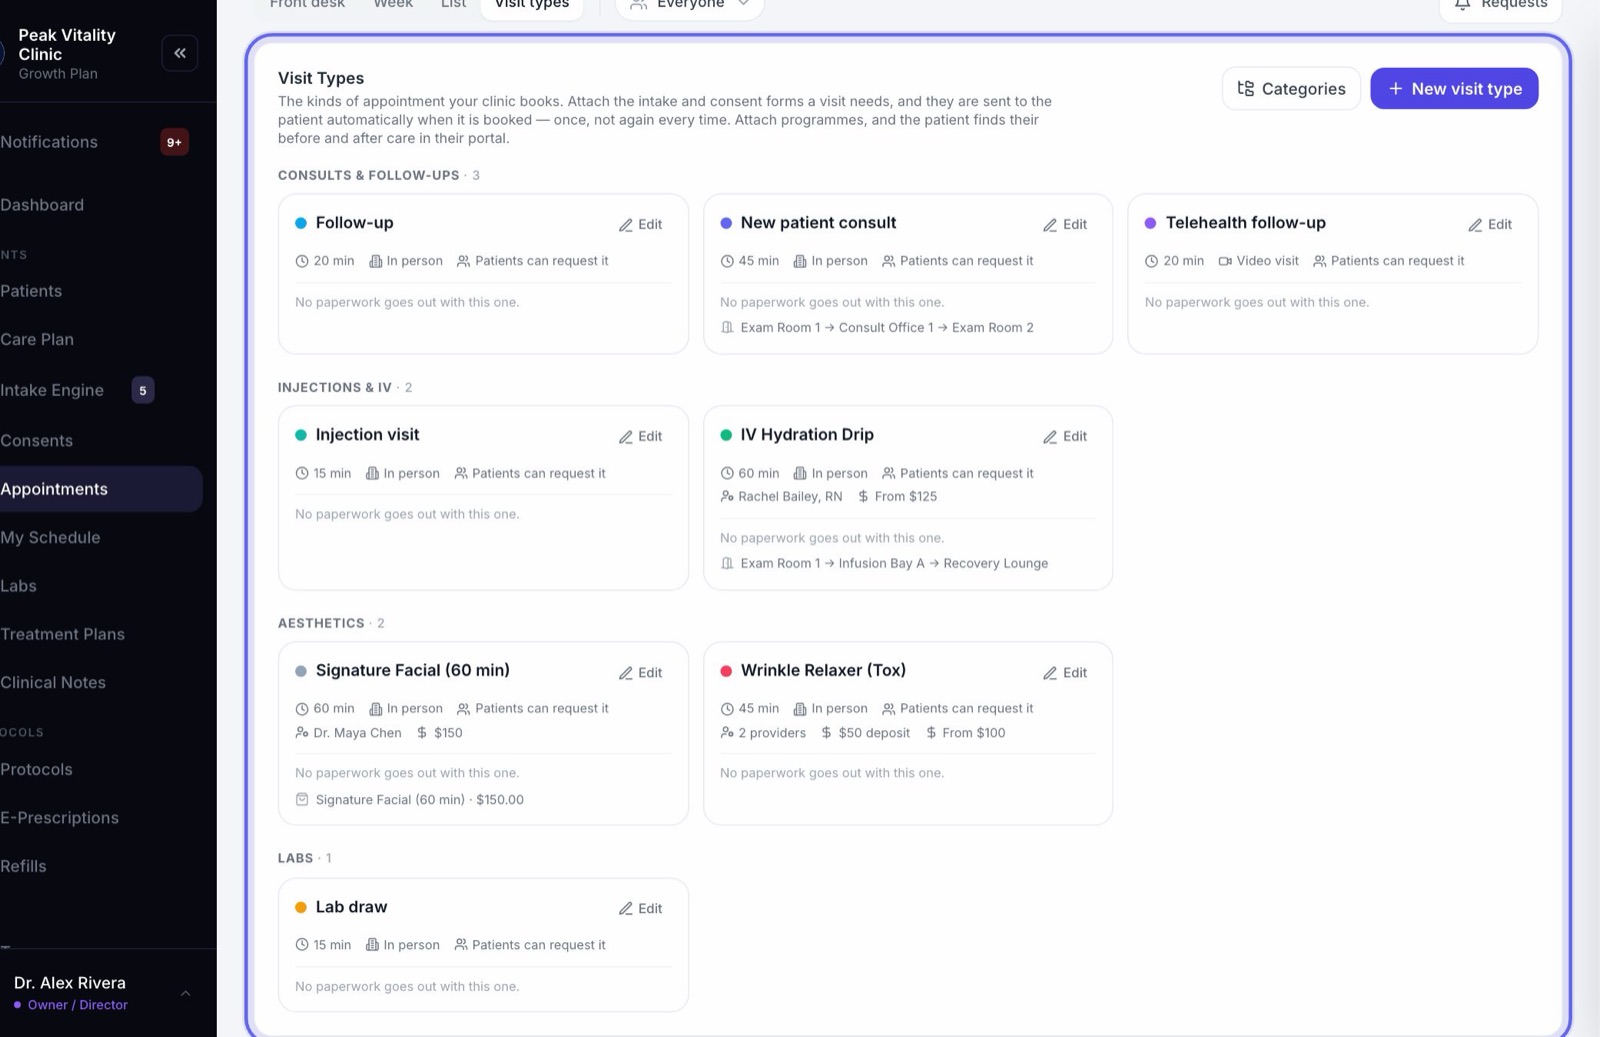
3Start a new visit type
- 1Click New visit type.
- 2The builder opens with its steps down the left side. You can move between them in any order.
- 3Nothing is saved until you press Create visit type at the end.
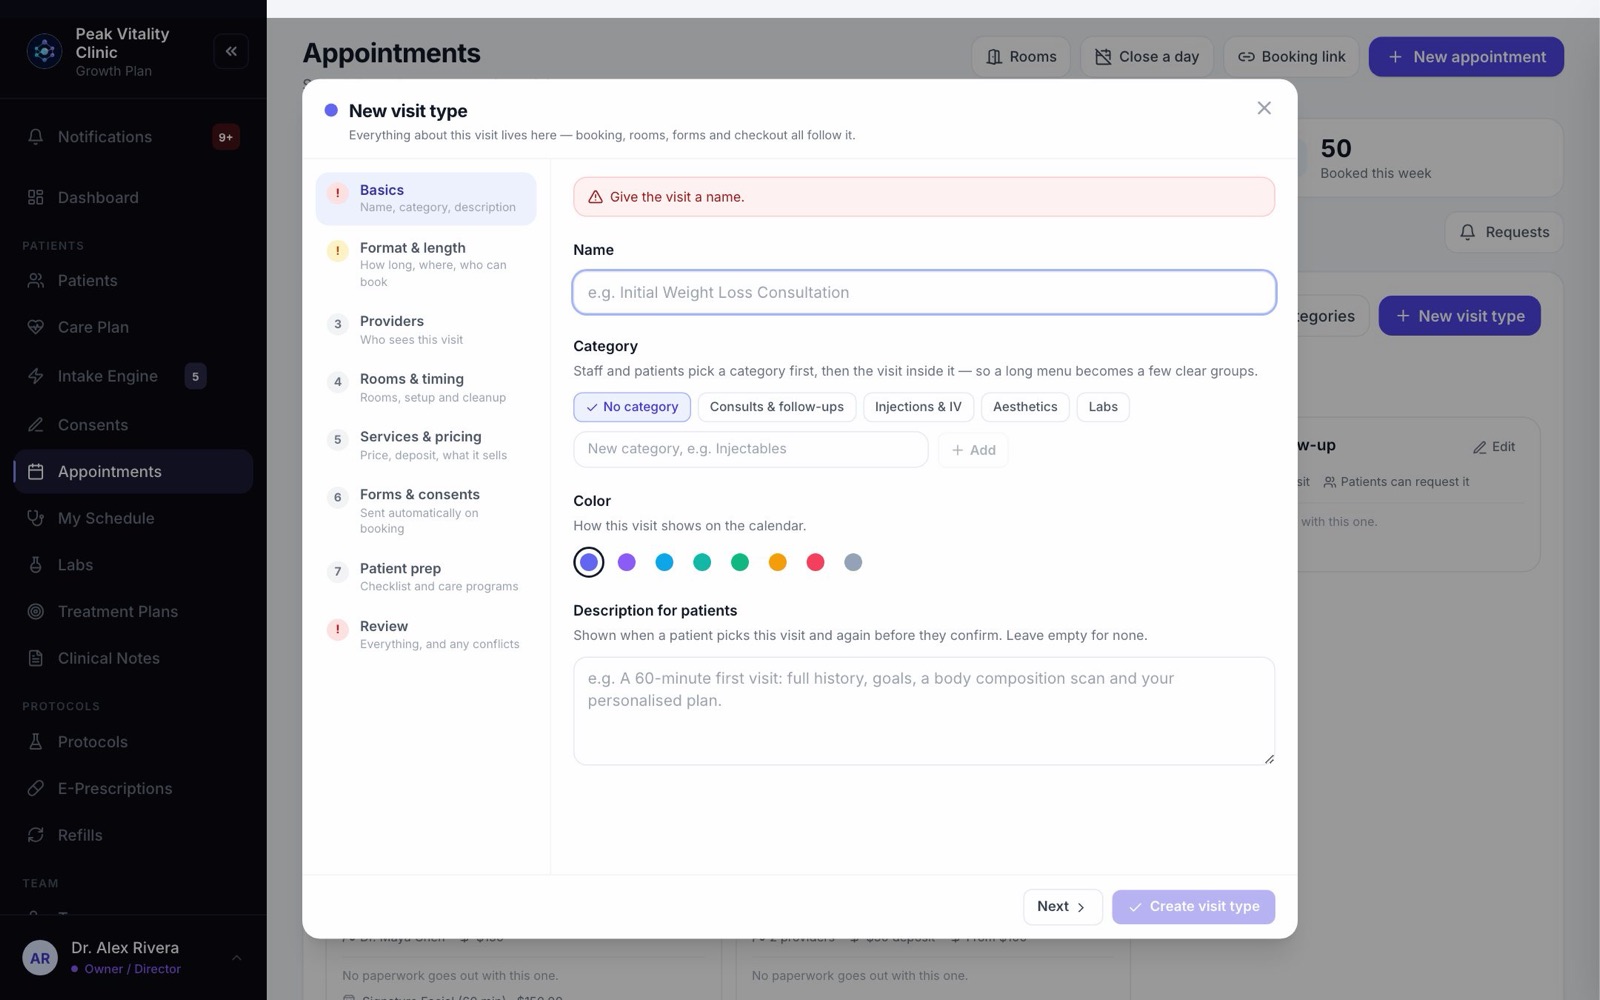
4Basics
- 1Give it a Name patients will recognize, like “New patient consult”.
- 2Pick a Category. Staff and patients choose a category first, then the visit inside it.
- 3Choose a Color. It is how this visit shows on the calendar.
- 4Add a short Description for patients if you like. They see it when they pick the visit.
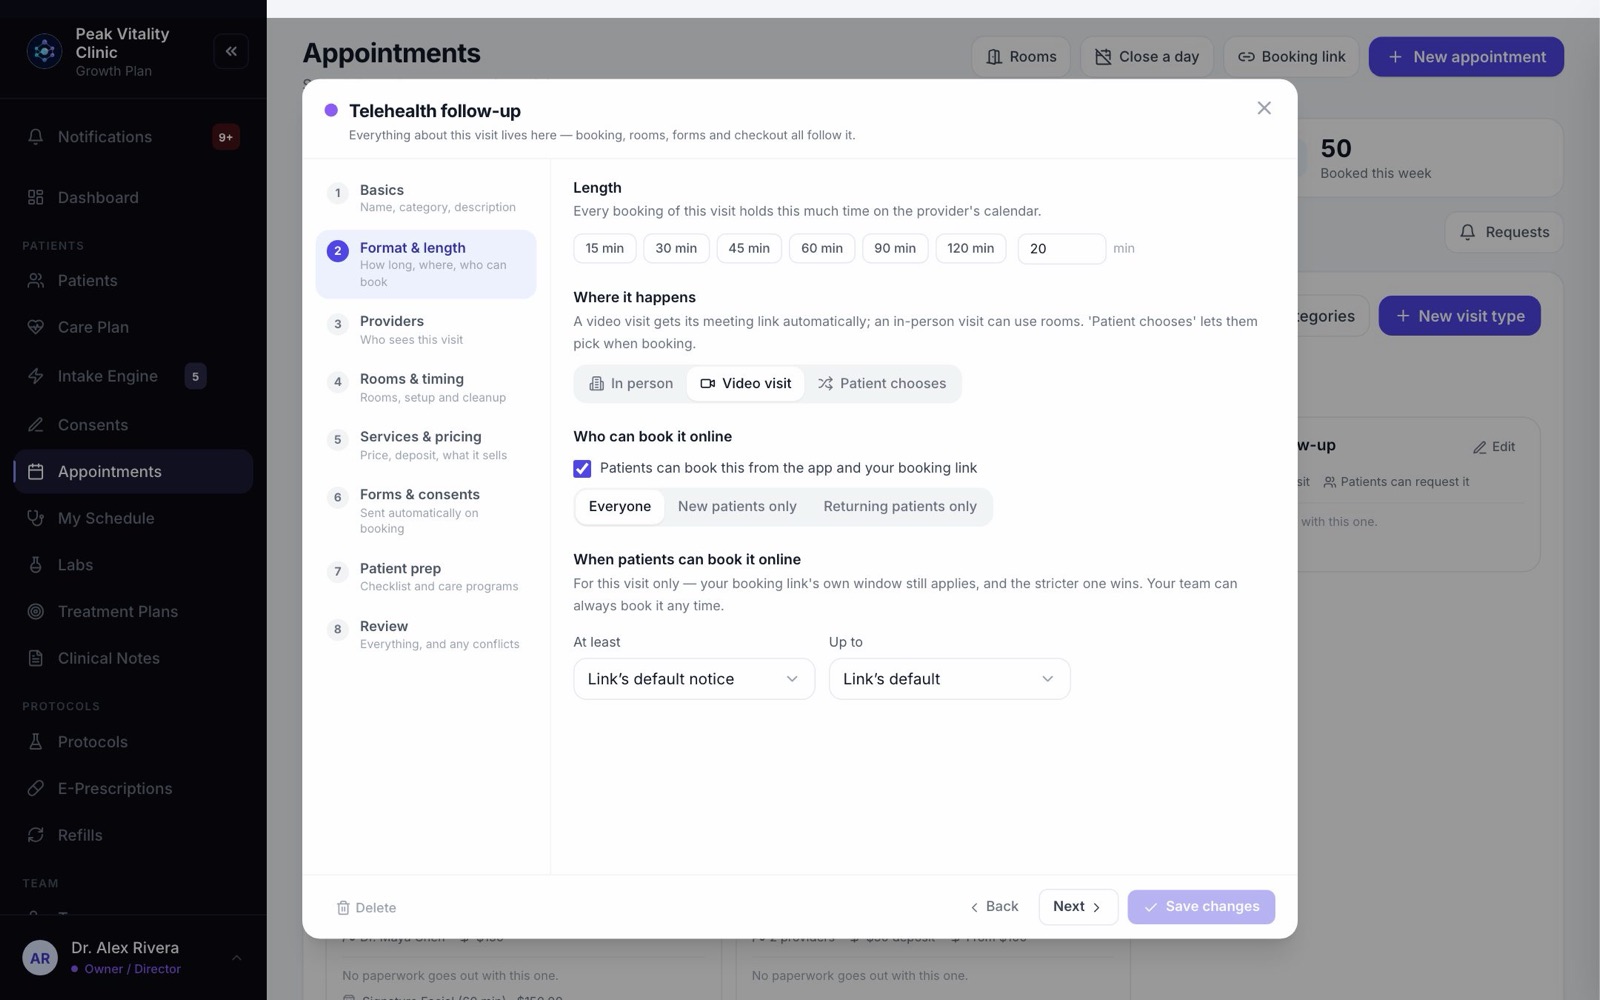
5Format and length
- 1Set the Length. Every booking holds this much time on the provider’s calendar.
- 2Choose Where it happens: in person, video, or let the patient choose. A video visit gets its meeting link automatically.
- 3Choose Who can book it online: everyone, new patients only, or returning patients only.
- 4Optionally set When patients can book it online, like at least 24 hours ahead. Your team can always book it any time.
6Providers
- 1Add every provider who sees this visit.
- 2With more than one, a time is offered when any of them is free, and the booking goes to whoever is.
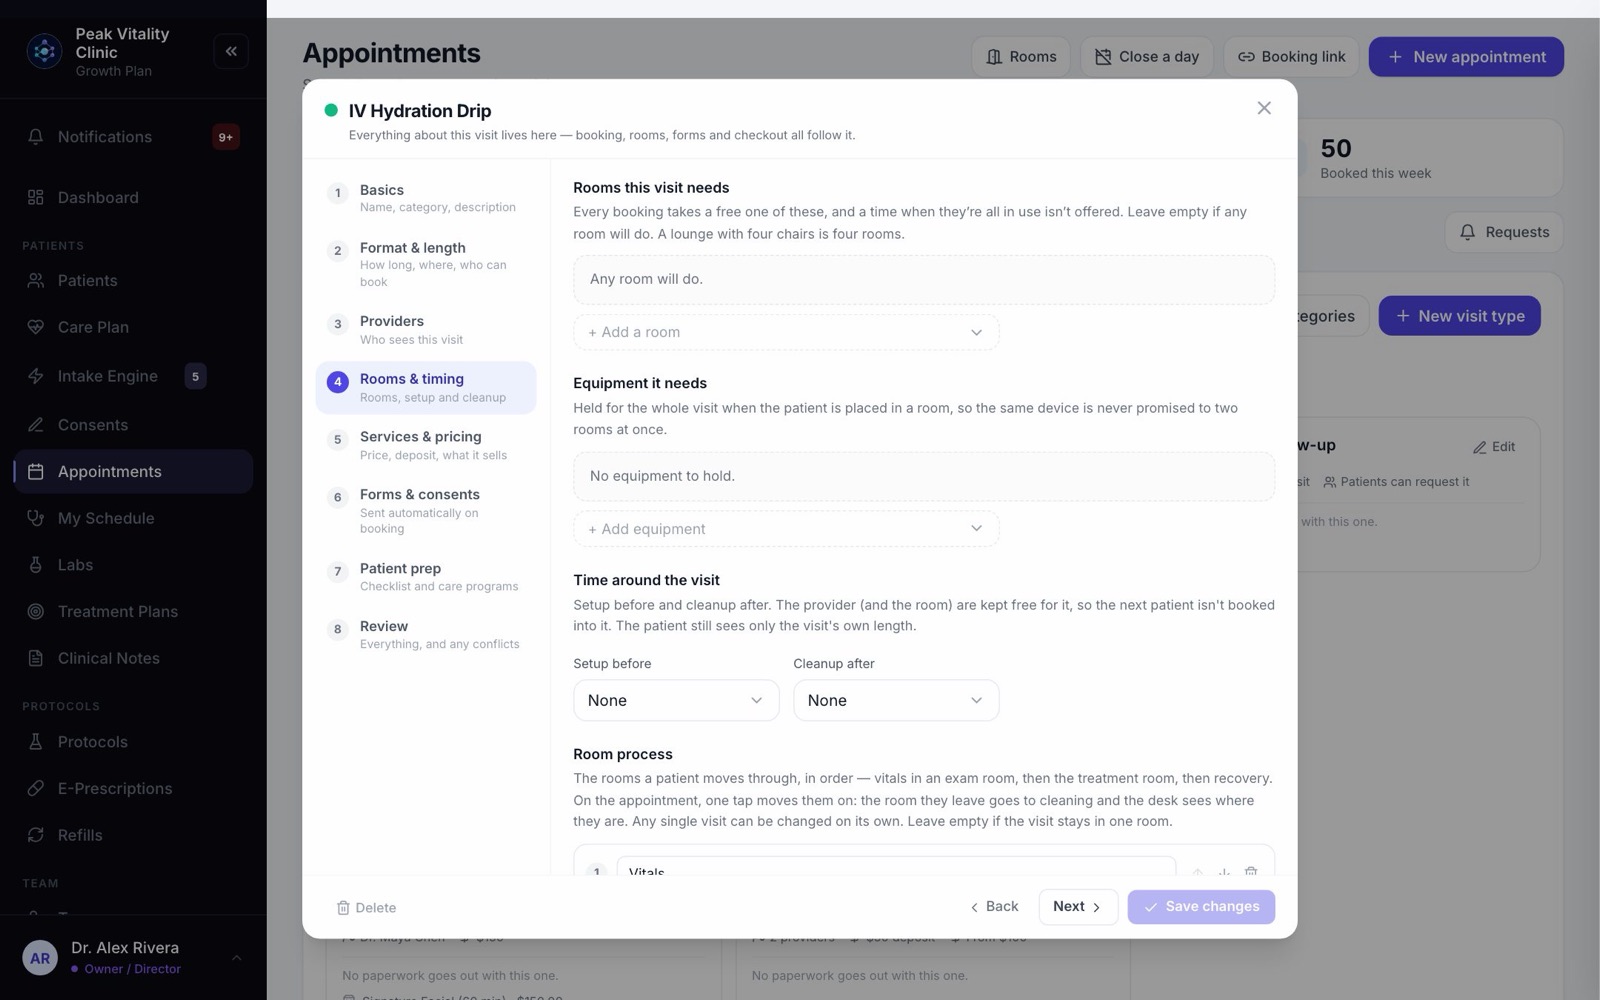
7Rooms and timing
- 1Under Rooms this visit needs, add the rooms it can use. Leave it empty if any room will do.
- 2Add Equipment it needs if a device, like a laser, must be free too.
- 3Set Time around the visit: setup before and cleanup after. The provider and room stay free for it, but the patient only sees the visit’s own length.
- 4If the patient moves through several rooms, add a Room process. See the Room steps manual.
8Services and pricing
- 1Set the Price shown to patients. It is only shown, never charged by itself.
- 2Add a Deposit at booking if you want one. The time is held until it is paid.
- 3Under What it sells at checkout, add the services and products that belong to this visit. They are already in the basket when the front desk checks the patient out.
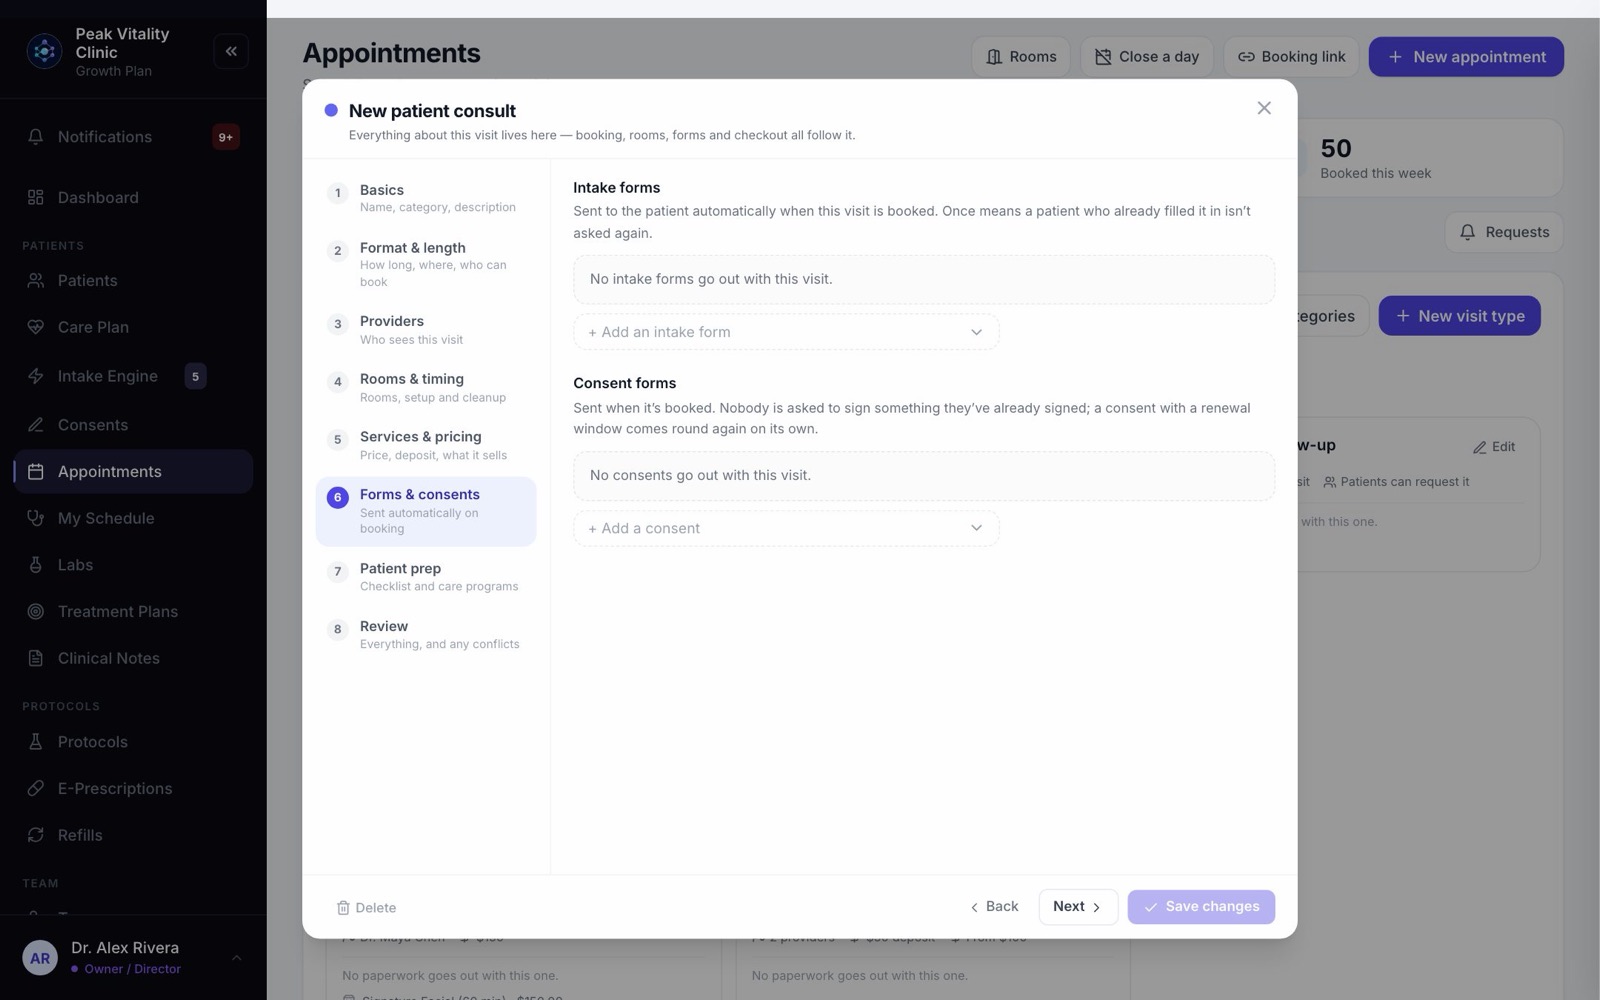
9Forms and consents
- 1Add the Intake forms that go out when this visit is booked. Choose Once so a patient who already filled it in isn’t asked again, or Every visit.
- 2Add the Consent forms to sign. Nobody is asked to sign one they already signed.
10Patient prep
- 1Add a Prep checklist: what the patient does before the visit, like “Drink water beforehand”.
- 2It goes out with the booking confirmation and reminders, and shows on the appointment in their app.
11Review and save
- 1Open Review to see everything about the visit on one page.
- 2Anything that doesn’t add up is flagged there, like a provider who has no open times.
- 3Press Create visit type. It’s ready to book. Editing one later, the button says Save changes.
12Turn on your booking link
- 1On Appointments, click Booking link.
- 2Press Turn on my booking link. It lists the visit types patients can book, with the real open times of each visit’s providers.
- 3Copy Everything you offer for your website, or copy A link for one visit to share one visit on its own.
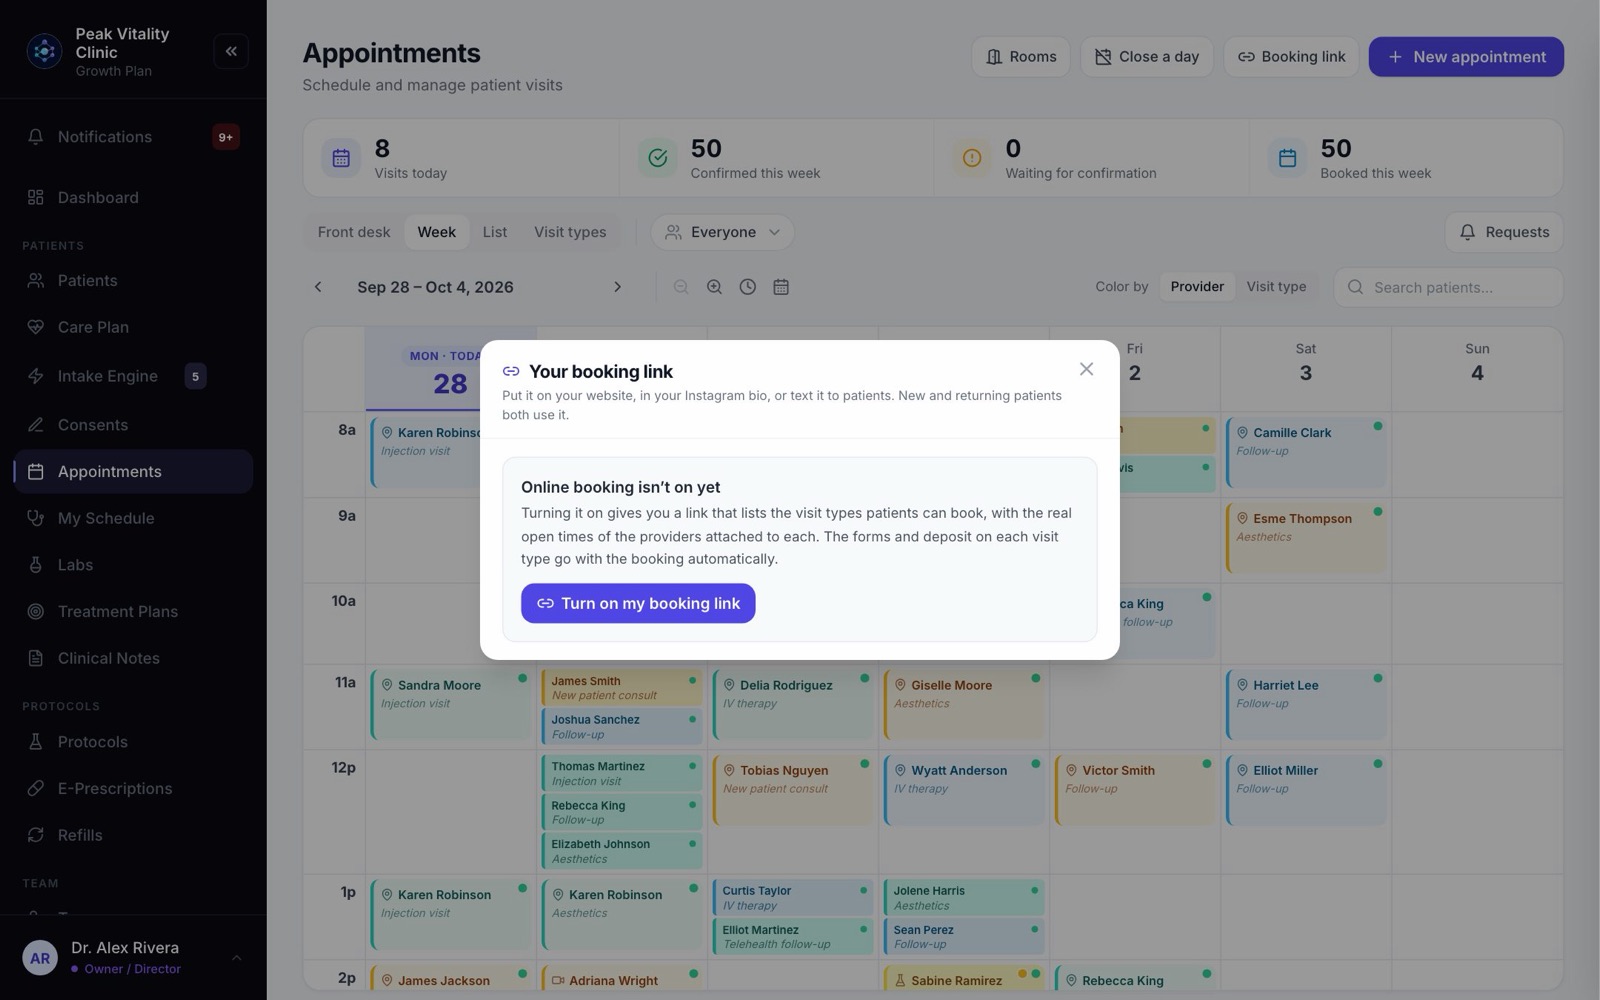
The link stays the same when you change your settings, so you never have to send it again.
13Set your booking rules and look
- 1Open Settings & look in the booking link panel.
- 2Choose Confirm instantly, or I approve each request to review each booking first.
- 3Set the Minimum notice, how far ahead people can Book up to, and Show times every.
- 4Pick which Clinicians on this link patients can book with.
- 5Under Look, add your colors and logo so the page looks like your clinic.
- 6Use Pause to close online booking for a while without turning the link off.
14Where the open times come from
The booking link has no hours of its own. It offers times when your providers are scheduled to work.
If you use Staff Scheduling, the shifts there decide it. If you don’t, it follows your opening hours in Settings and each provider’s hours under Team → Set Availability.
Seeing times you don’t open? Check the shifts in Staff Scheduling first. The standard full-day shift runs 8 to 5.
Keep going
Appointments
Every visit, for everyone. Book visits, run the front desk, and open any appointment to check a patient in, move it or charge it.
Read the guideRoom steps
For visits that move through more than one room: vitals, then treatment, then recovery. Set the steps once, then move the patient on with one tap.
Read the guideRather be shown?
Inside Aminova, the tutorial walks you through every page, and the Getting started checklist shows you each task click by click. Or book a live training session with our team.