1How an import works
You upload the files your old system gave you. Aminova reads them, works out who each record belongs to, and shows you what it found. Nothing goes into your clinic until you approve it, and nothing reaches your patients until you say so.
The import moves through six steps. You can close the page at any point, even on another computer, and come back to find it where you left it.
2Get your files from your old system
- 1Export everything your old system lets you: patient lists, spreadsheets, and zipped folders of scanned documents.
- 2A folder of charts needs the patient list beside it, so each chart can be matched to the right person.
- 3You don’t have to send it all at once. You can add more files later, in any order.
A product or stock list doesn’t go here. Bring it in from Products → Import instead.
3Open Data imports
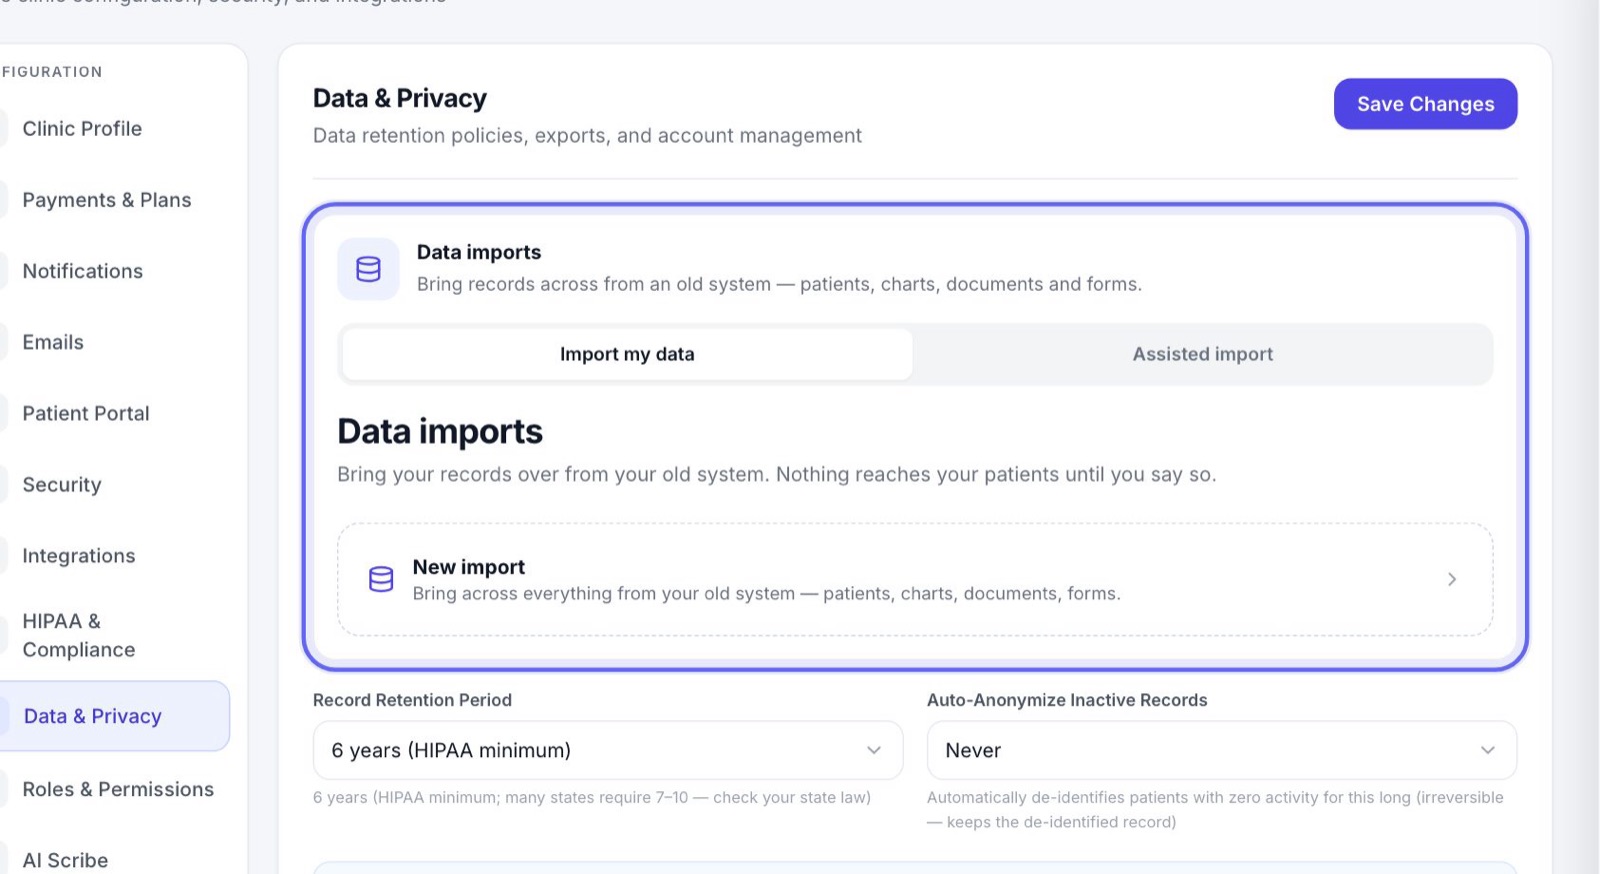
- 1Go to Settings and pick Data & Privacy.
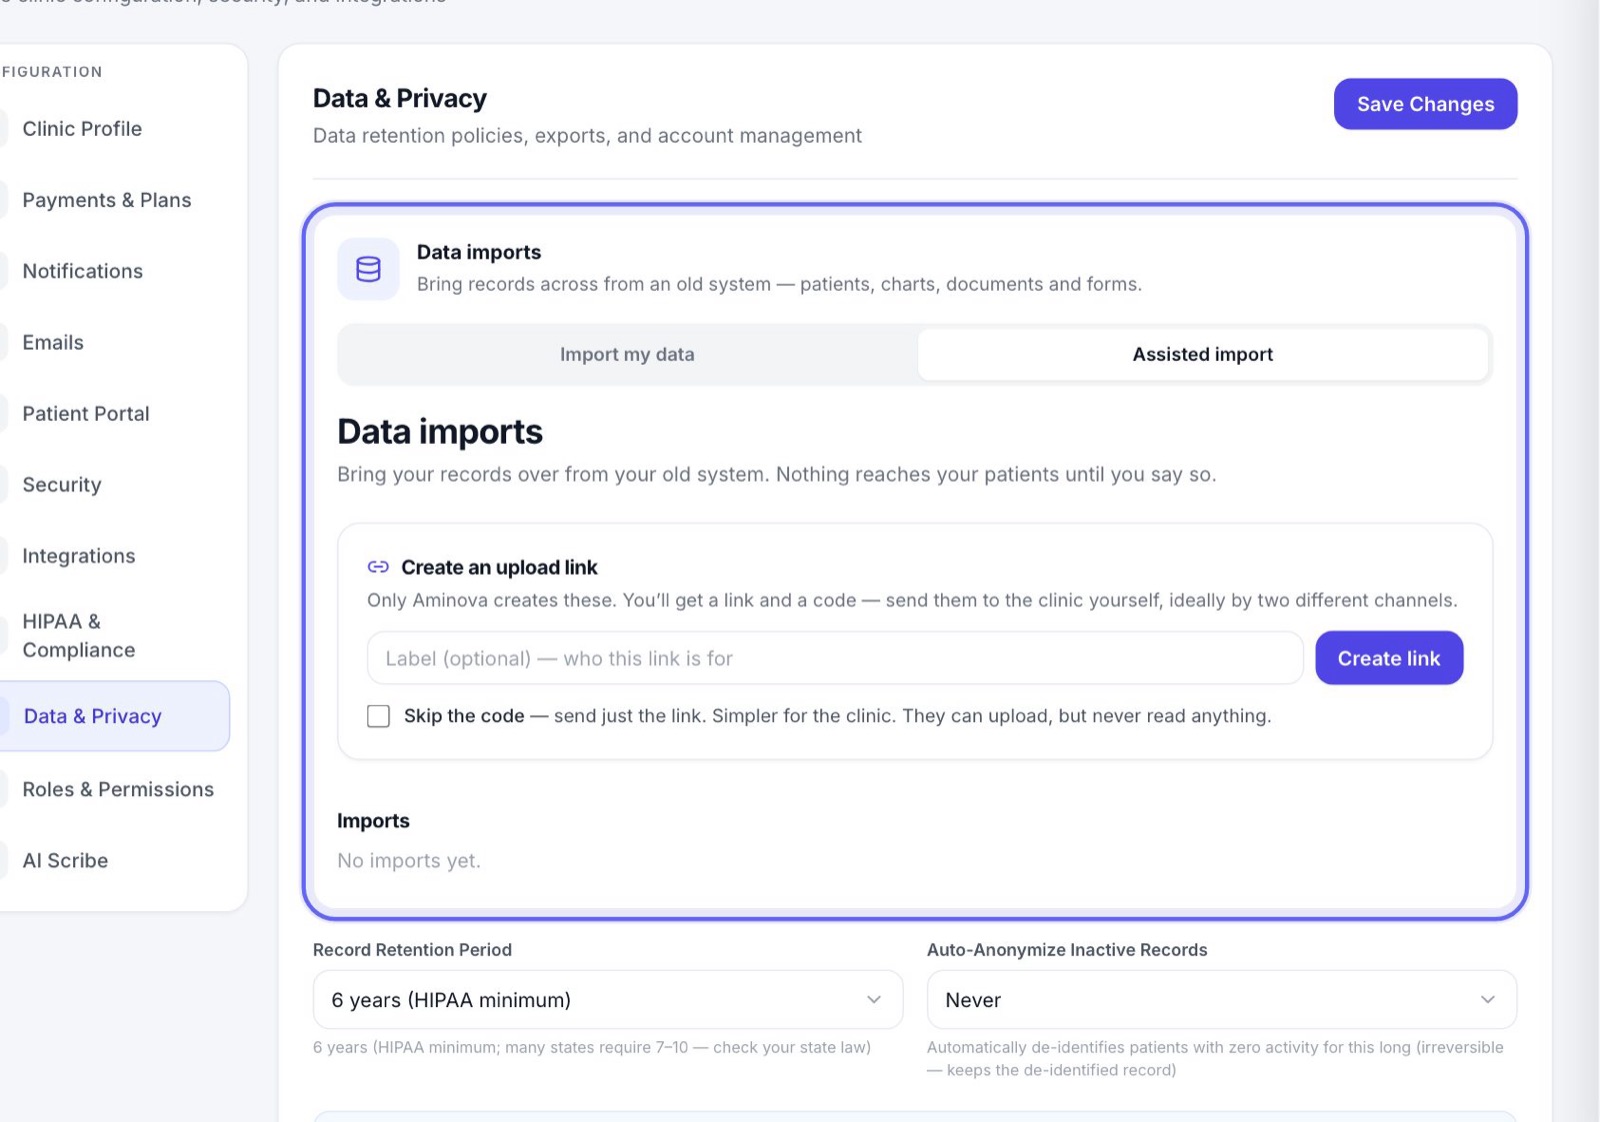
- 2At the top is Data imports, with two tabs: Import my data, where you upload the files yourself, and Assisted import, where you send someone a secure upload link.
- 3Stay on Import my data and press New import. If an import is already open, you see it instead.
- 4Each step has a ? that explains it in plain words. Contact support is at the bottom of every step.
4Add your files
- 1Press Choose files, or Choose a folder to send a whole export folder.
- 2Each file shows its progress, and a line under the list says when they have all arrived.
- 3Picked the wrong one? Press the × beside it to take it out.
- 4Press Add more files or Add a folder to send more. Nothing is read until you say so.
- 5When everything is up, press Read these files (or Read this file).
5Or send an upload link
- 1If someone else has the files, open the Assisted import tab.
- 2Give the link a label if you like, then press Create link.
- 3Copy the link and send it. Unless you ticked Skip the code, also send the code, in a separate message. The code is shown only once.
- 4The link works once, and stops working on the date shown. Five wrong codes switch it off.
- 5Whoever opens it can upload files, but can never read anything. What they send shows up in your imports on the same tab.
If your clinic has no patients in it yet, creating a link keeps everyone except owners and managers from signing in until the import is finished.
6Reading your files
Aminova opens every file and works out what is in it: who your patients are, which documents belong to whom, and what kind of document each one is. A bar shows how far along it is.
Nothing has gone into your clinic yet. You can close the page, and it keeps going without you.
7Check what we found
- 1Compare the numbers with what you expect, like how many patients you have.
- 2If the file lists someone twice, they get one chart, not two. The screen tells you how many.
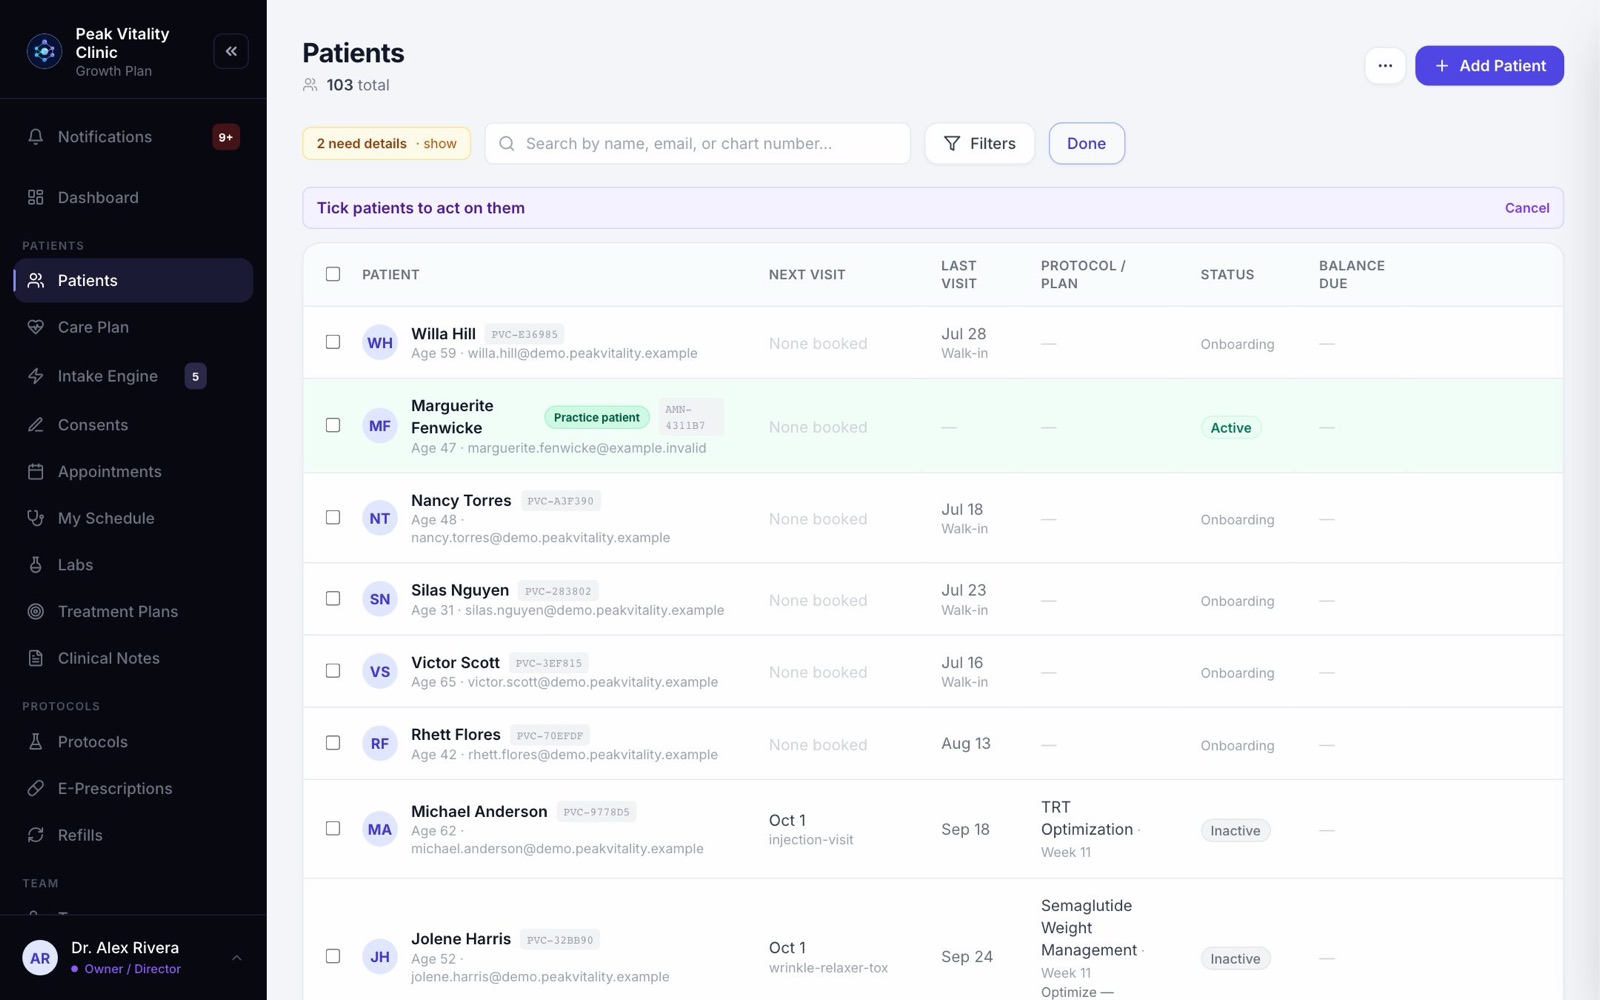
- 3People missing something, most often a date of birth, still come across. You’ll find them under need details on the Patients page.
- 4A few sample charts show what the imported charts will look like.
- 5Documents are counted by where they will be filed, like chart records, intake forms or lab results.
If you only uploaded a scan of your intake form, you’re offered Rebuild it as an intake form. It arrives as a draft, and nothing is published to your patients.
8Columns with nowhere to go
- 1Some columns in your files may have no place in Aminova. They’re listed with how many rows have something in them.
- 2Where there’s a good match, press its Keep as button to bring that column across.
- 3A column marked Clinical, like allergies or diagnoses, stops you until you tick the box saying you understand it won’t come across.
9Approve it, or start again
- 1If the numbers look right, press These numbers look right.
- 2If not, press Start again with different files. Nothing has reached your clinic yet, so starting again only clears what was read.
10Put it into your clinic
- 1Press Put it into my clinic.
- 2The patients are created and their records and documents are filed. The screen counts the records and documents as they go in.
- 3This can take hours for a large practice. You can close the page. It carries on by itself, and coming back picks up where it got to.
- 4If the import can’t go in, each reason is listed. One marked Stops the import has to be fixed in your export and read again. Send the list to support and we’ll tell you which column to change.
11Have a look around
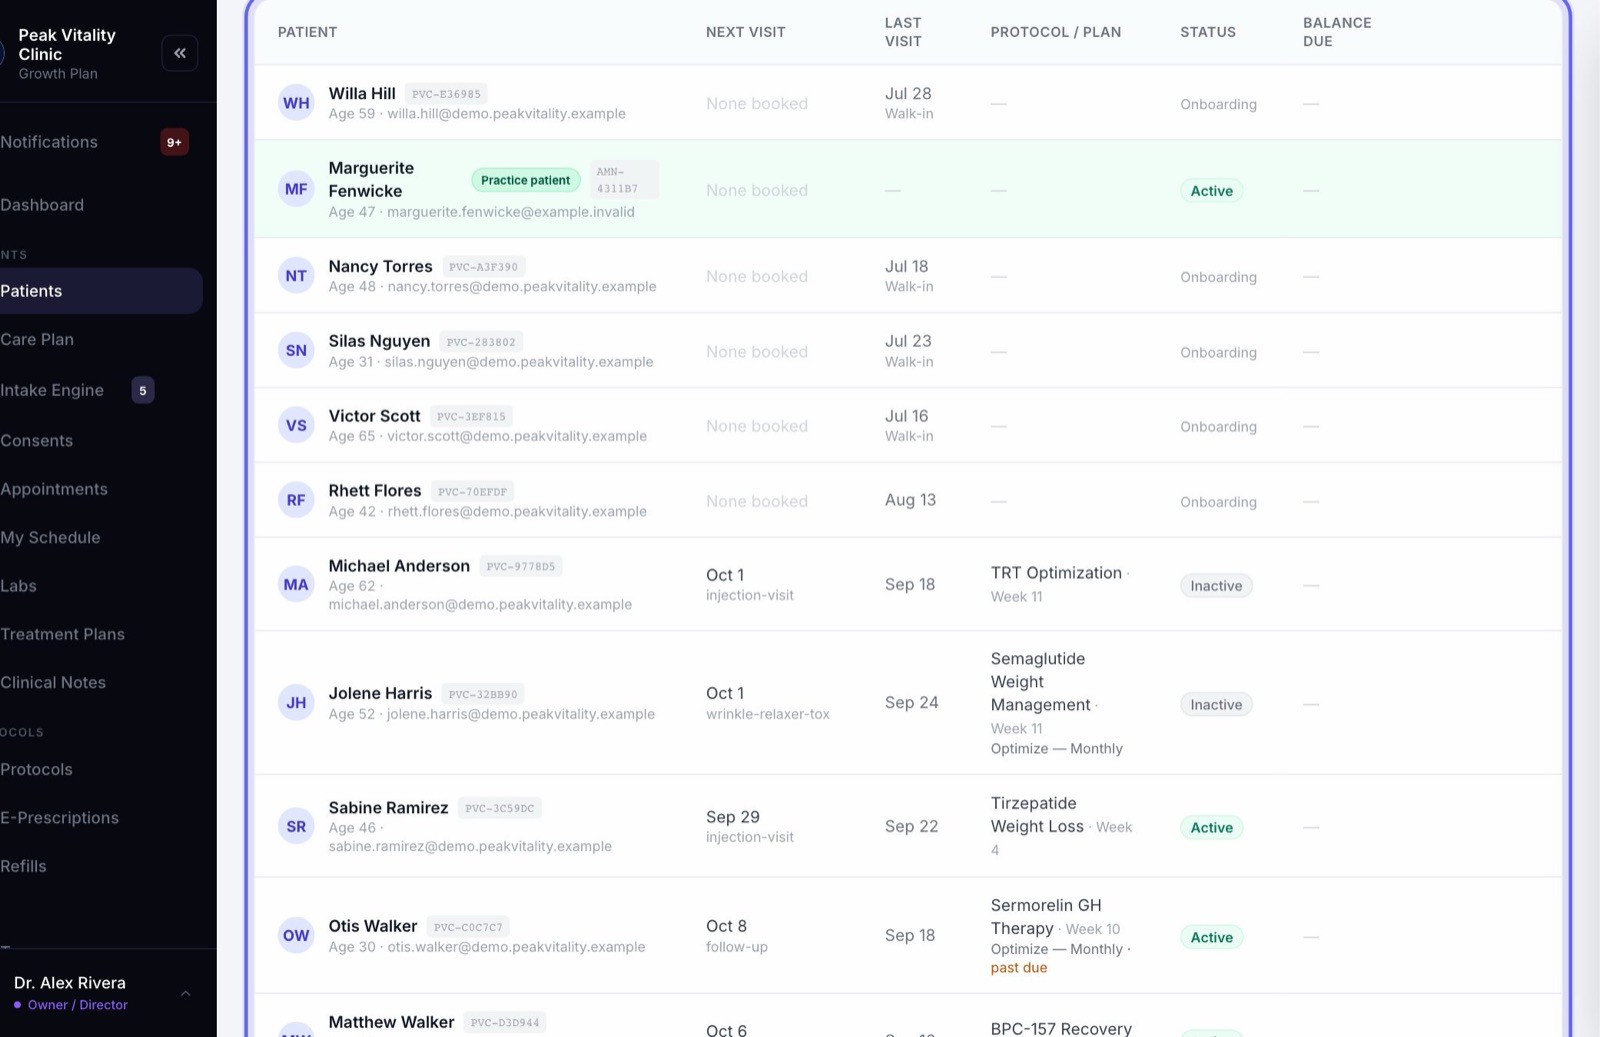
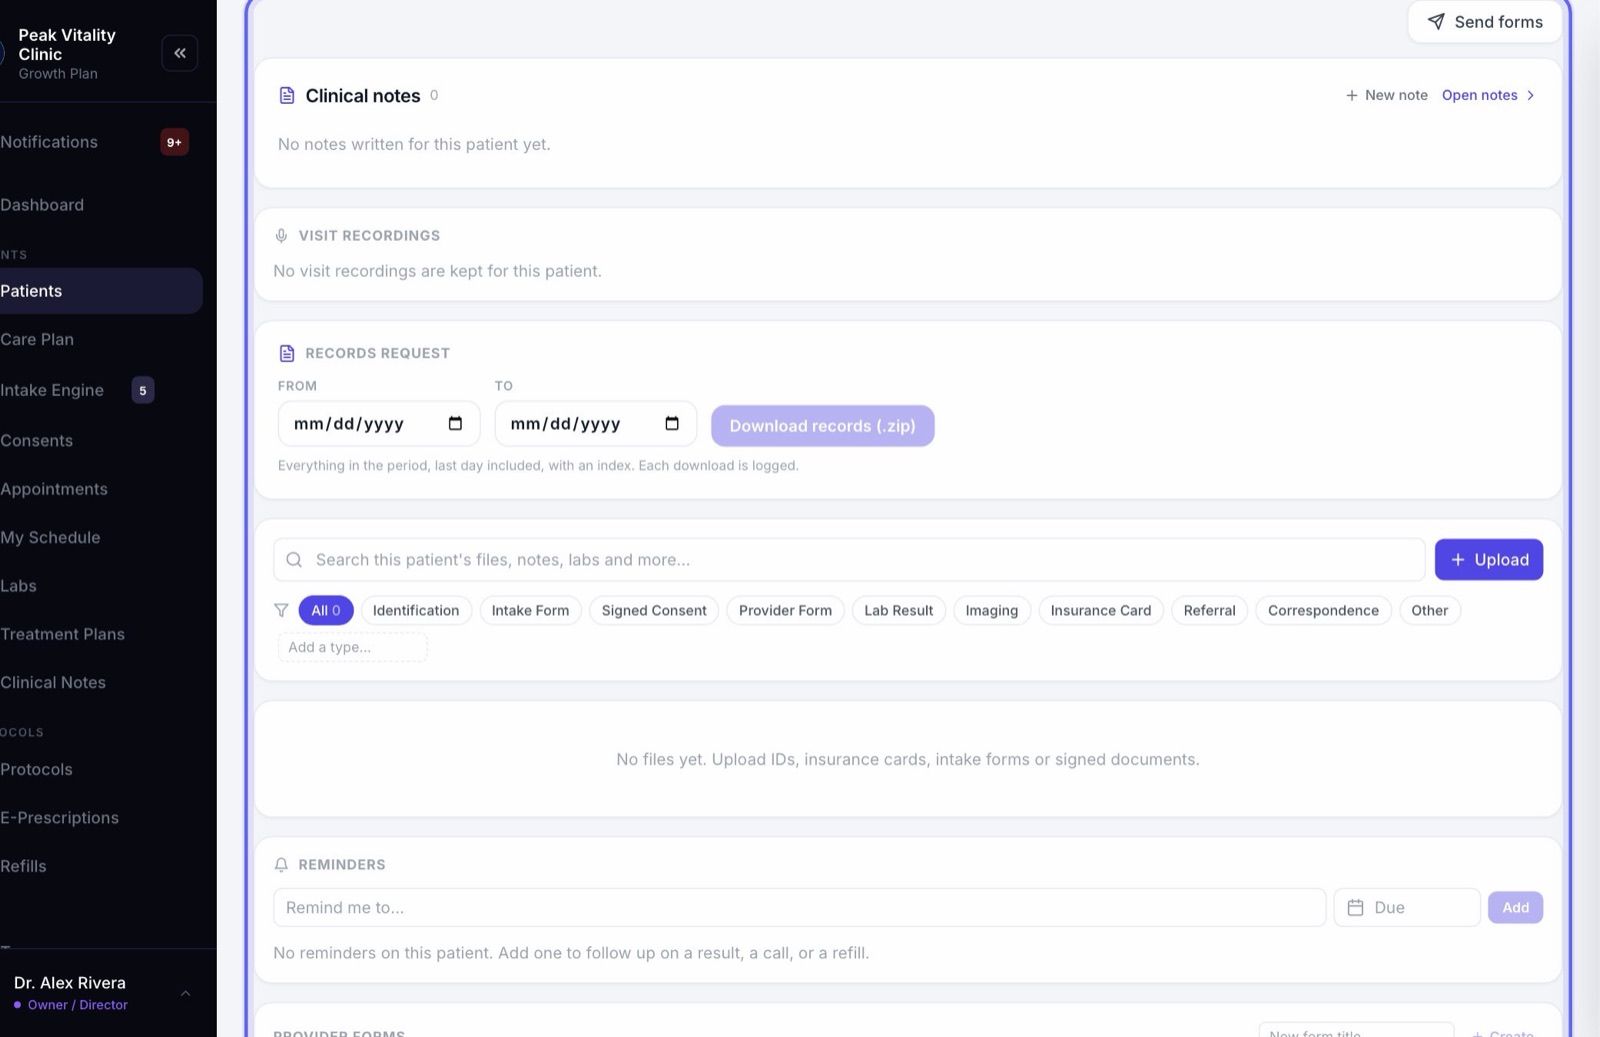
- 1Open a few patients. Look at their documents under Forms & Files, and check your forms.
- 2Nothing is final yet. Take your time; nothing runs out.
- 3If something is wrong, an owner presses Undo this import. It removes everything the import added.
- 4If it all looks right, an owner presses Everything looks right. A manager sees a note asking an owner to finish.
12Import complete
- 1Your import is now your clinic’s live data. It can no longer be undone.
- 2Your uploaded files are kept for 30 days, in case anything needs putting right. After that, you can press Remove the uploaded files.
- 3To bring over something else later, like appointments or a file you found, press Start another import. Anyone already in your clinic is matched to their chart, never added twice.
13Finish charts that need details
- 1On the Patients page, an amber button says how many patients need details. Click it to see only them.
- 2Each row says what is missing, like a date of birth or a phone or email.
- 3Open the chart, fill it in, and save. The patient’s portal ID is issued on its own.
14Tell your patients
- 1When you’re ready, go to Patients and press Select.
- 2Tick the patients, then press Email sign-in details. You can send to the ones you ticked or to everyone.
- 3You see how many will get one, and who is left out and why, before anything is sent. Patients who already set a password are left out.
- 4Or, on the last import step, press Ask us to send these and we’ll go through the list with you first.
Keep going
Patients
Every patient in your clinic. Find anyone, sort and filter the list, add a new patient, put patients in groups, and open a chart.
Read the guideThe patient chart
Everything about one patient on one page. The header says who they are and what’s next; the tabs below hold each part of their record.
Read the guideBring in your intake forms
Upload the PDFs you use today and check each one, or start from our template. Then publish them and attach them to your visit types.
Read the guideSet up your consent forms
Bring in the consent PDFs you use today, place the signature boxes, and decide who signs each one and how often. Then attach them to your visit types.
Read the guideProducts
Everything you sell, and what you charge for it. Add compounds, services, supplies and supplements, set their cost and price, and see every patient order.
Read the guideSettings
How your clinic runs: your details and hours, payments, what patients are told, the patient app, security, connected tools and who can do what.
Read the guideRather be shown?
Inside Aminova, the tutorial walks you through every page, and the Getting started checklist shows you each task click by click. Or book a live training session with our team.