1The page at a glance
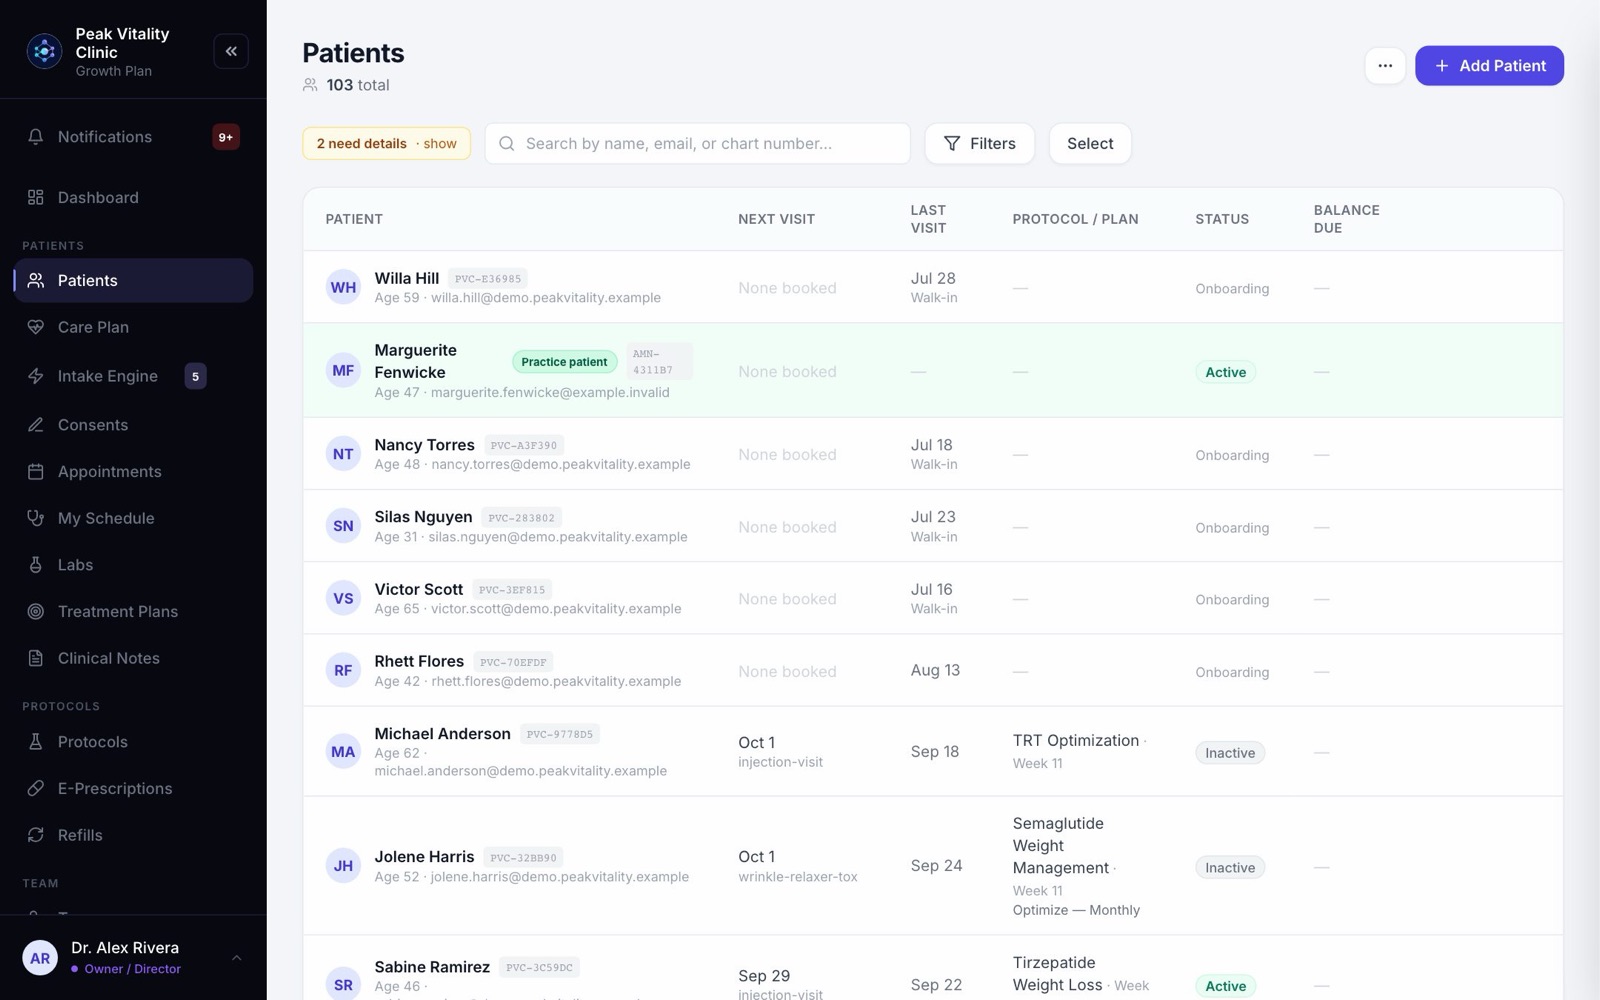
At the top is how many patients you have, with Add Patient and a … menu on the right. Under that are the search box, Filters and Select. The list of patients fills the rest.
If your role can’t see full charts, the page says Demographics view and each row shows only the phone, status and next appointment.
2Find a patient
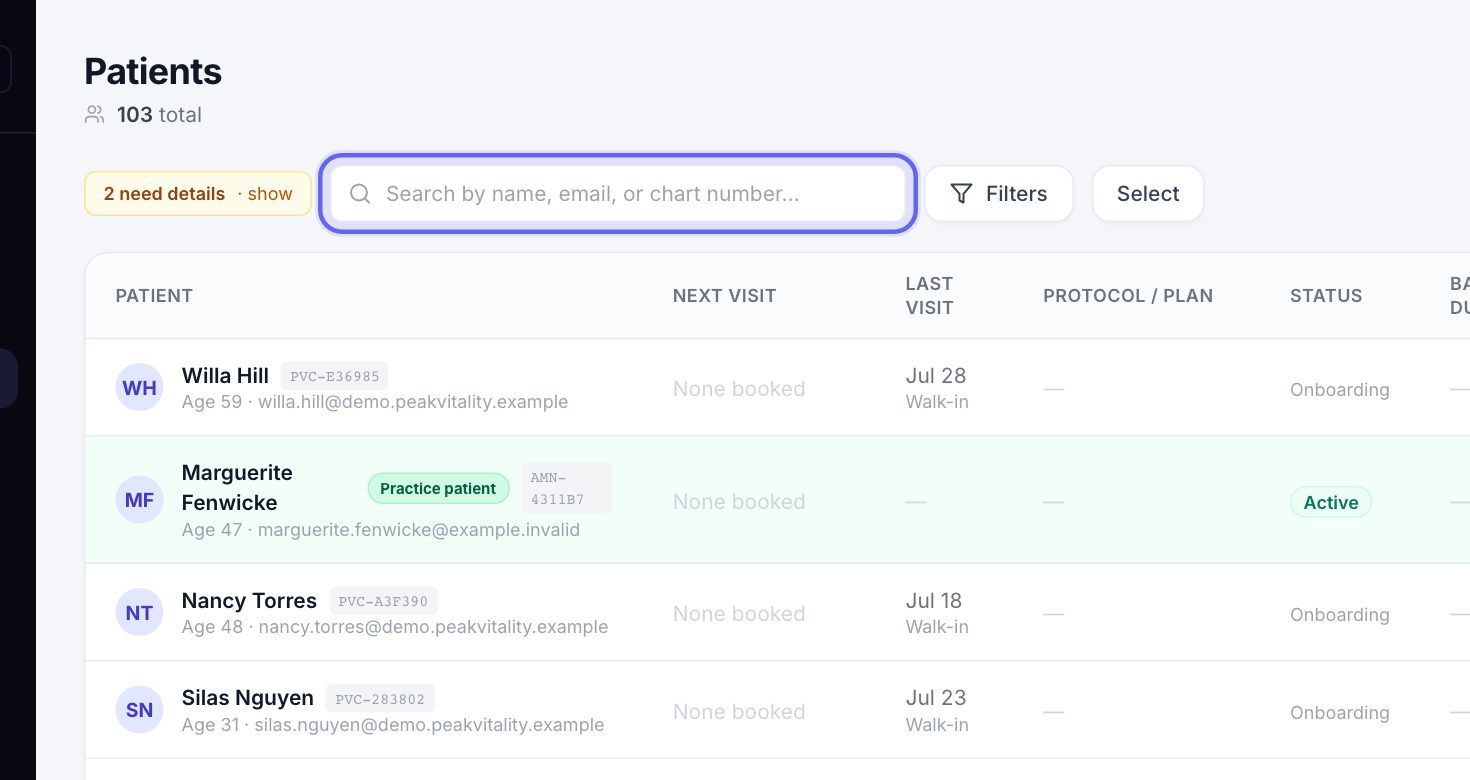
- 1Type in the search box: a name, email, chart number or portal ID.
- 2It searches every patient in the clinic, not just the page you’re on.
- 3Press the × in the box to clear it.
3The list
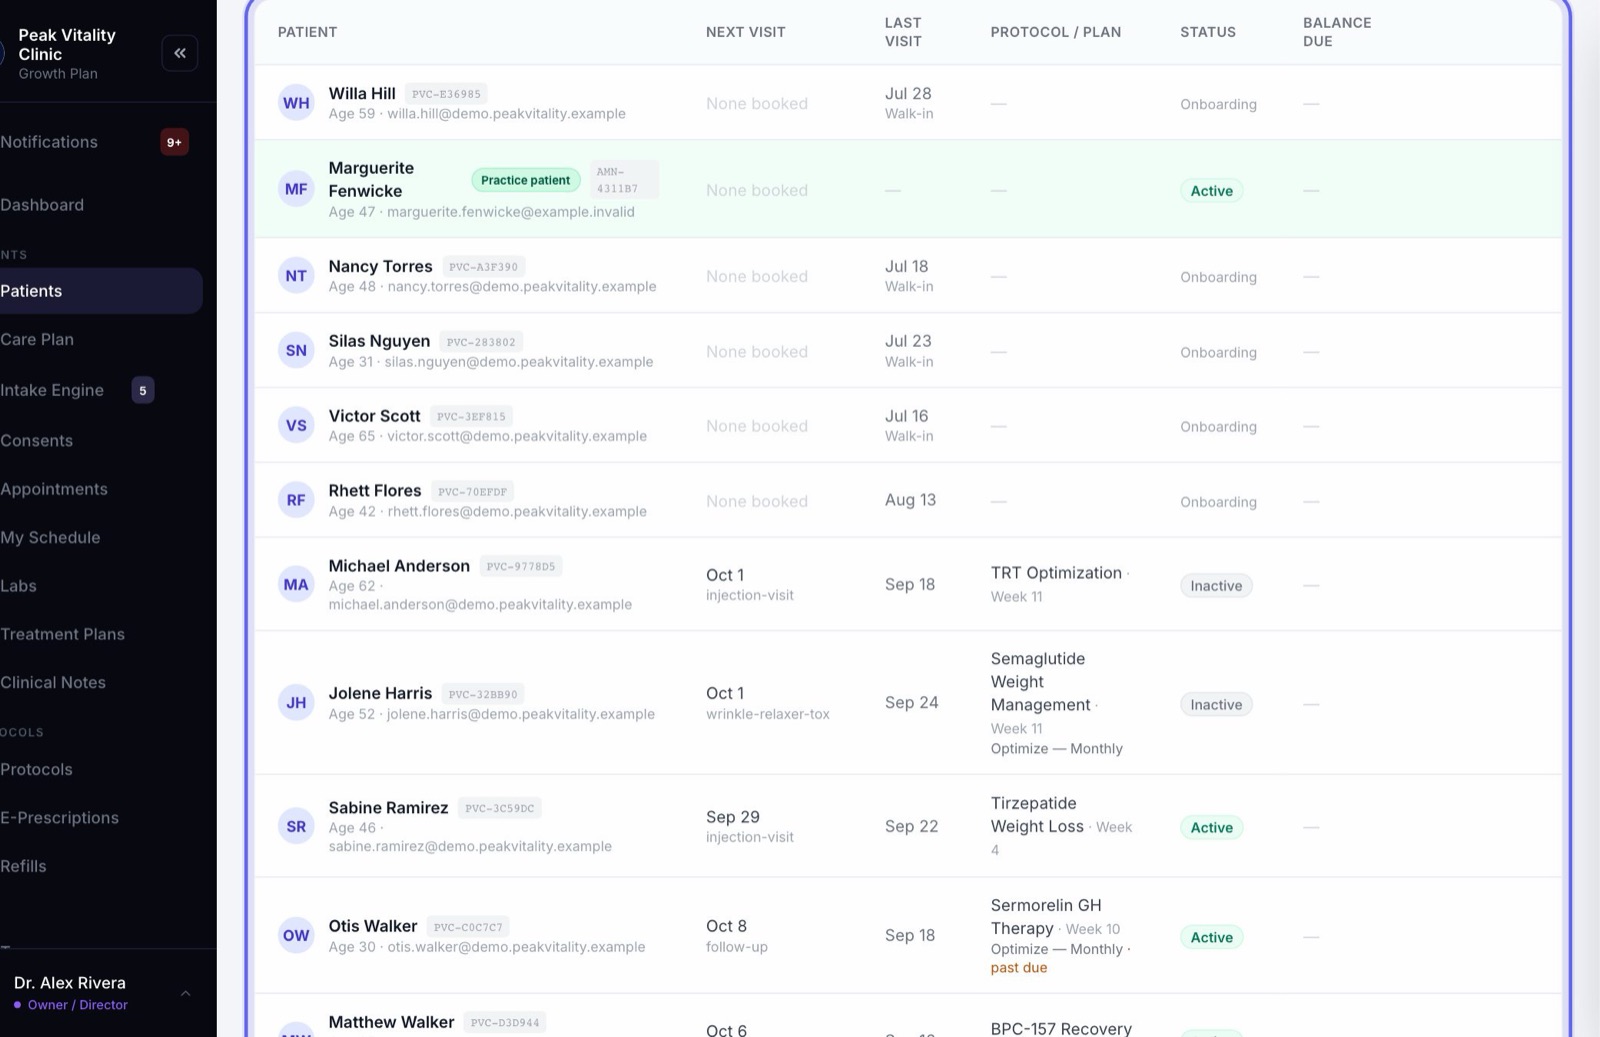
- 1Each row shows the patient, their Next visit, Last visit, Protocol / plan and Status. People who can see money also get Balance due.
- 2Beside the name is their portal ID, which they use to sign in to the patient app. No portal ID yet means they don’t have one yet. Under the name are their chart number, age and email.
- 3A cake icon means it’s their birthday today.
- 4Hover a row for shortcuts to Messages and Appointments.
- 5Click a row to open the chart. The list shows 50 at a time; use Prev and Next for more.
4The practice patient
A green row with a Practice patient badge is not a real person. It’s there so you and your team can try things safely: open the chart, book a visit, write a note.
A practice patient never gets emails, texts or bills.
5Sort and filter
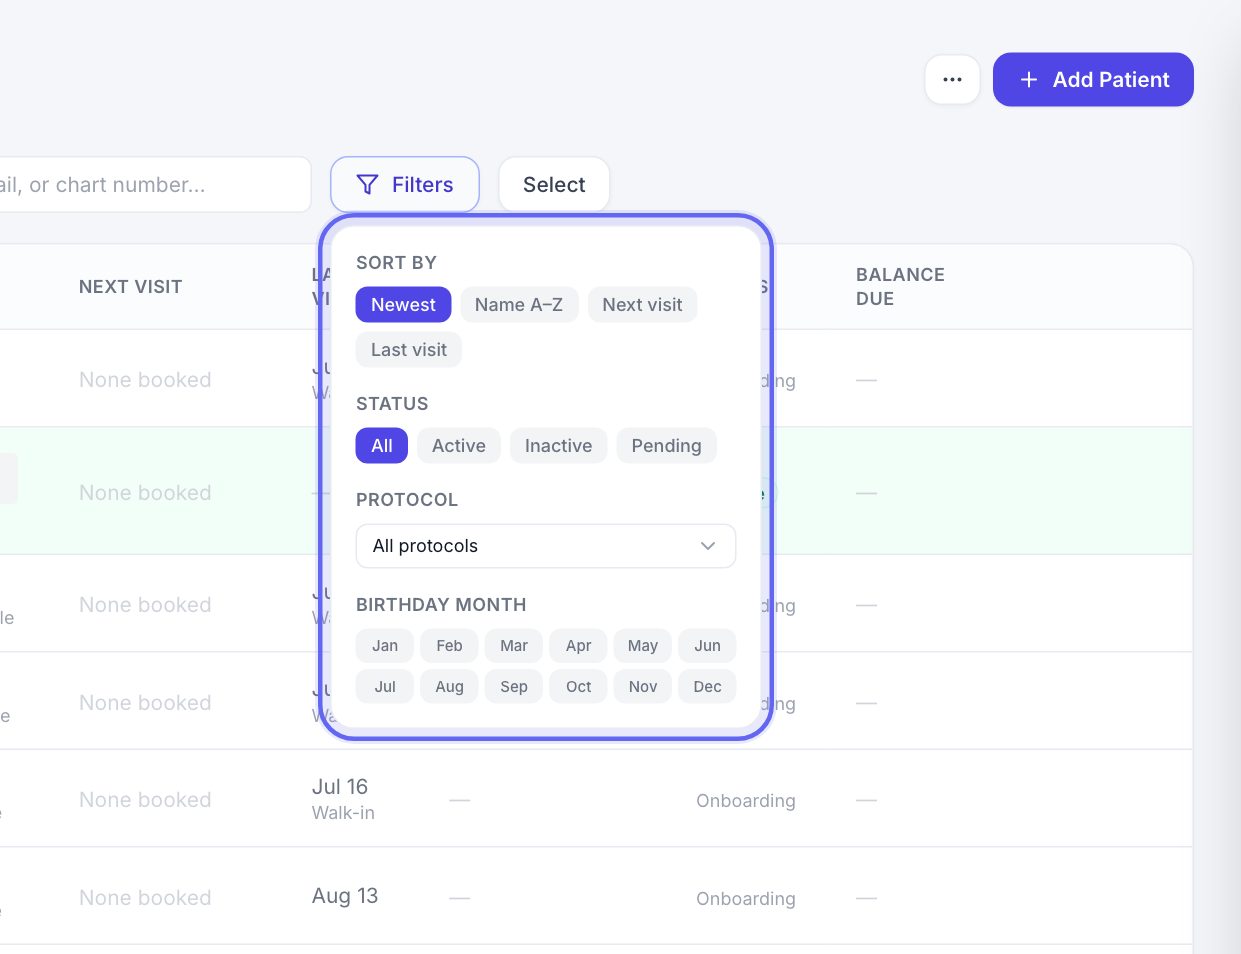
- 1Click Filters.
- 2Under Sort By, pick Newest, Name A–Z, Next visit or Last visit.
- 3Narrow the list by Status, Protocol or Birthday Month. Each filter shows as a chip you can clear with its ×, or press Clear all filters.
- 4Filters work on the page you’re looking at. To find someone on another page, use search.
- 5Your filters stay put while you open charts and come back.
6Charts that need details
Patients brought over from an old system sometimes arrive without a date of birth, or without a phone or email. When that happens, an amber button says how many need details. Click it to see only those patients.
Each of those rows says what is missing. Open the chart, add it, and save. The patient’s portal ID is issued on its own.
7Add a patient
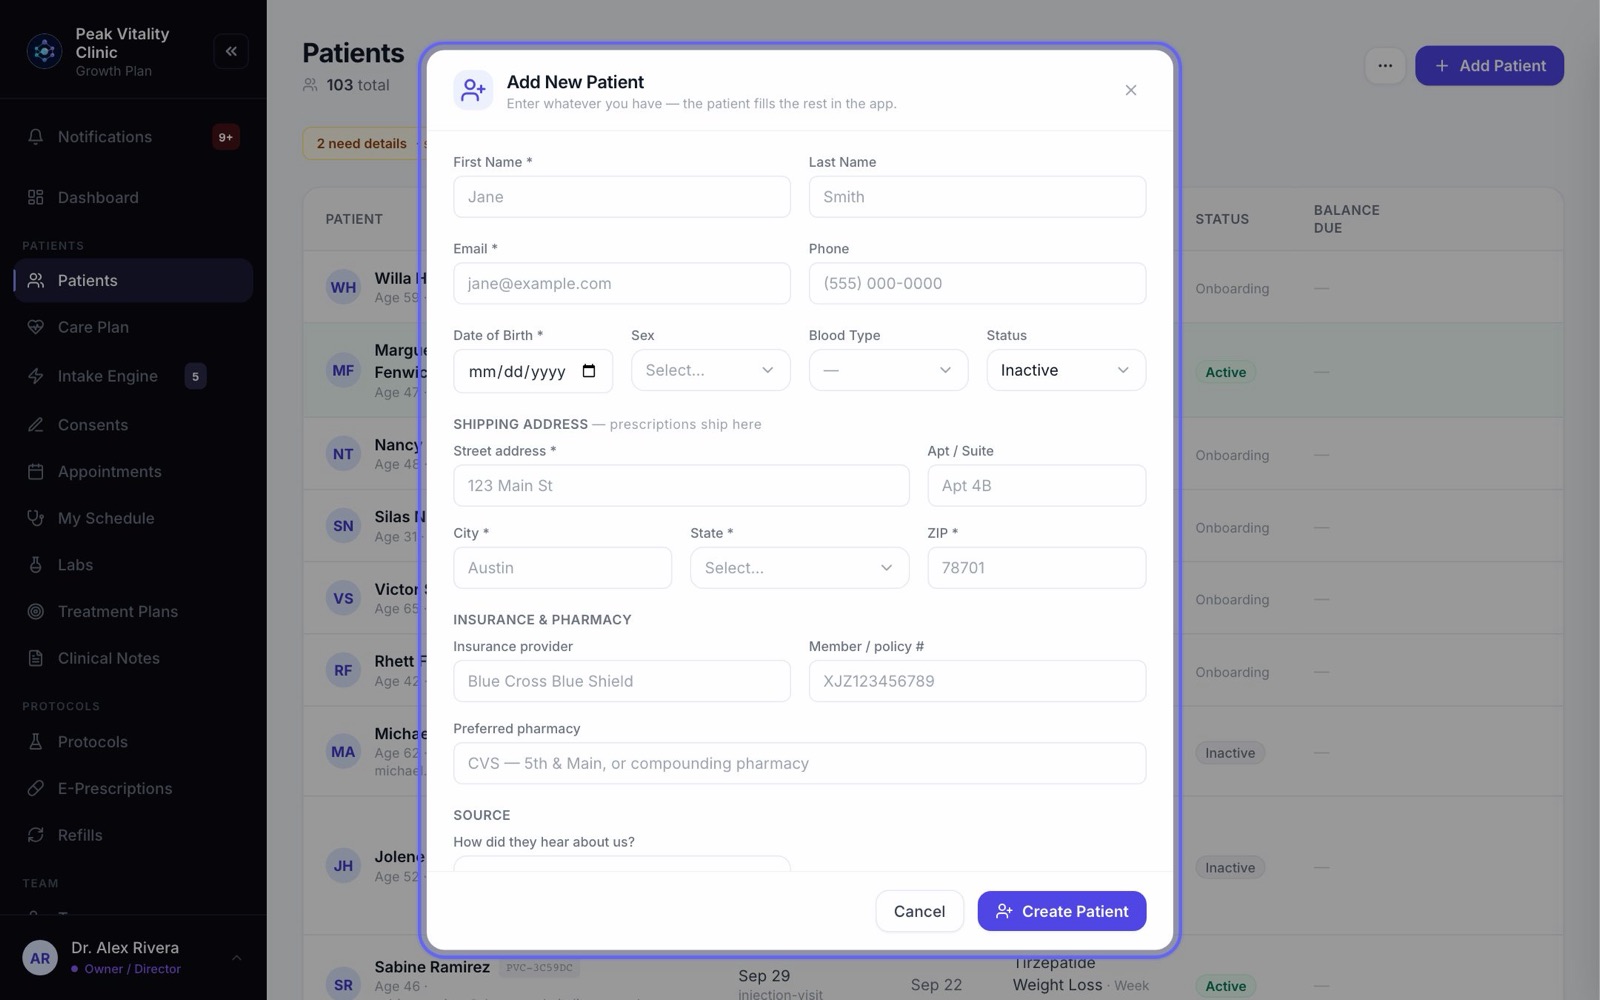
- 1Click Add Patient.
- 2Fill in the fields marked with a star: First Name, Email, Date of Birth, and the street address, city, state and ZIP.
- 3For a patient under 18, add a guardian’s name and a phone or email for them.
- 4Add anything else you have, like phone, insurance, allergies or a provider. The patient can fill in the rest in their app.
- 5Press Create Patient. If they might already be in your clinic, you’re asked first: Open existing chart or Create anyway.
8After you add one
- 1You see their Activation details: your Clinic code and their User ID.
- 2They open the patient app, choose to activate their account, and enter both with their date of birth.
- 3Press Copy activation details to paste them to the patient, or use the email button under them to send them by email.
- 4If your clinic asks new patients to pay first, a payment link is emailed instead. Their app account opens once they pay.
- 5Press Open chart to go to their chart.
9The … menu
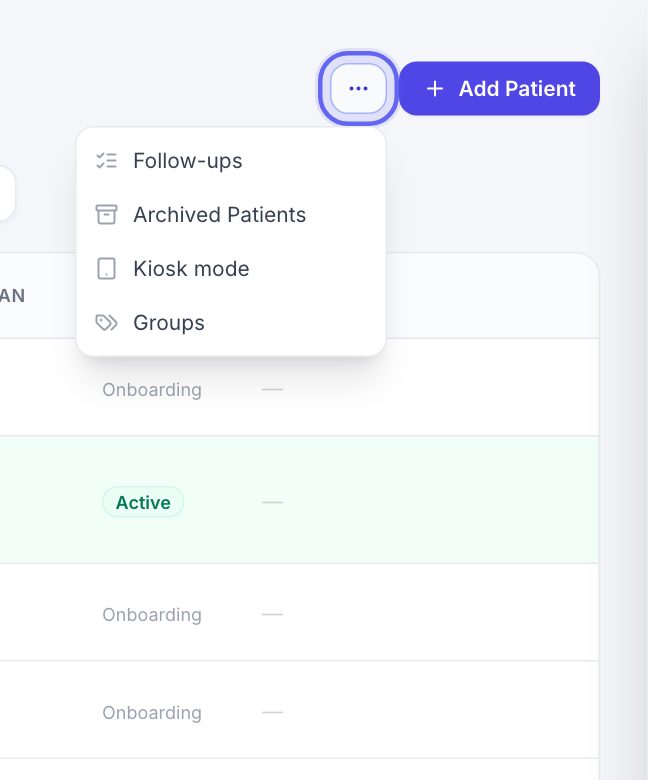
- 1Follow-ups opens the follow-up queue for recommended plans.
- 2Archived Patients lists patients you’ve archived. Click one to open their chart.
- 3Kiosk mode opens a full-screen tablet screen in a new tab, where patients fill in forms and sign consents themselves.
- 4Groups opens your patient groups.
10Patient groups
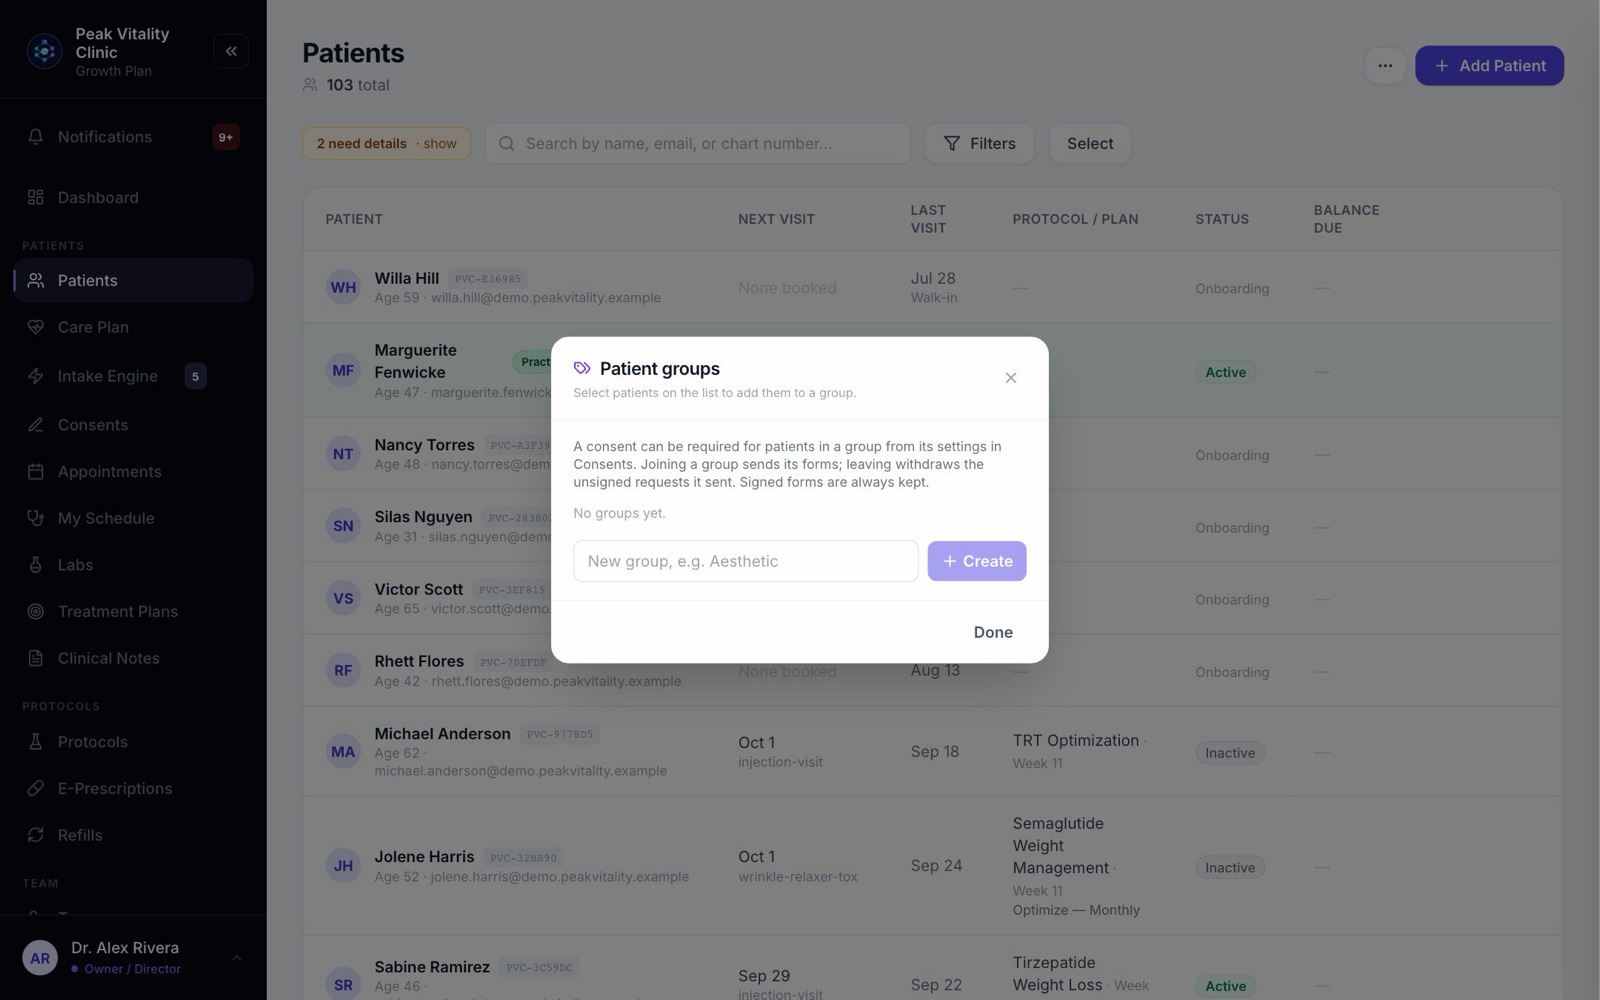
- 1A group is a set of patients, like everyone on one program. Owners and managers create, rename and delete them.
- 2To make one, open Groups from the … menu, type a name in the box at the bottom, and press Create.
- 3You choose which consents a group needs on the Consents page. Joining a group sends them. Leaving it takes back any it sent that weren’t signed. Signed forms are always kept.
- 4Once you have groups, an All groups menu appears beside the search box. Pick a group to see only its patients.
11Act on many patients at once
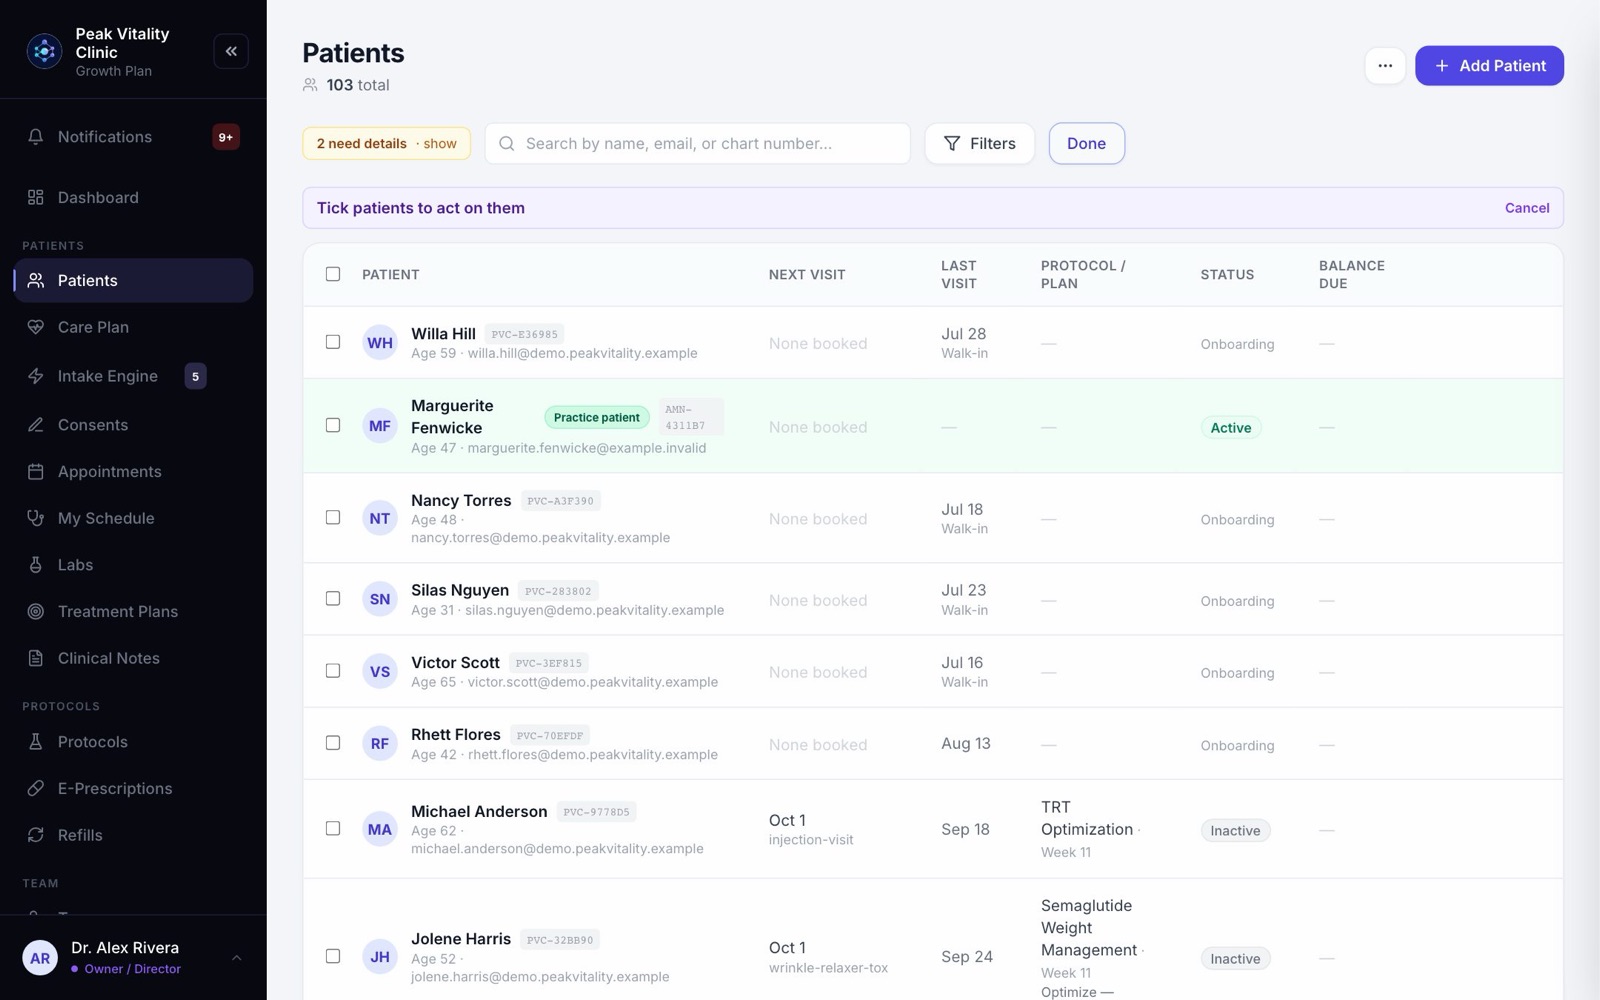
- 1Press Select. A tick box appears on every row.
- 2Tick the patients you want. The tick box at the top ticks the whole page.
- 3Press Add to a group or remove to put them in a group, or take them out.
- 4Press Email sign-in details to send each one their portal ID, your clinic code and the steps to set a password. Send to the ones you ticked, or to everyone. You see how many will get it, and who is left out and why, before anything is sent.
- 5Press Done when you’re finished.
Patients who have already set a password are left out of sign-in emails.
Keep going
The patient chart
Everything about one patient on one page. The header says who they are and what’s next; the tabs below hold each part of their record.
Read the guideBring your patients over from your old system
Move your patients, charts, documents and forms into Aminova. Upload the files, check what was found, approve it, then look around before you make it final.
Read the guideAppointments
Every visit, for everyone. Book visits, run the front desk, and open any appointment to check a patient in, move it or charge it.
Read the guideMessages
One inbox for every conversation with your patients and your team. Reply, hand a message to the right person, and leave notes only your team can see.
Read the guideConsents
Your consent forms, and who has signed them. Send forms, hand the tablet over in the office, and keep your library of forms in order.
Read the guideRather be shown?
Inside Aminova, the tutorial walks you through every page, and the Getting started checklist shows you each task click by click. Or book a live training session with our team.