1The page at a glance
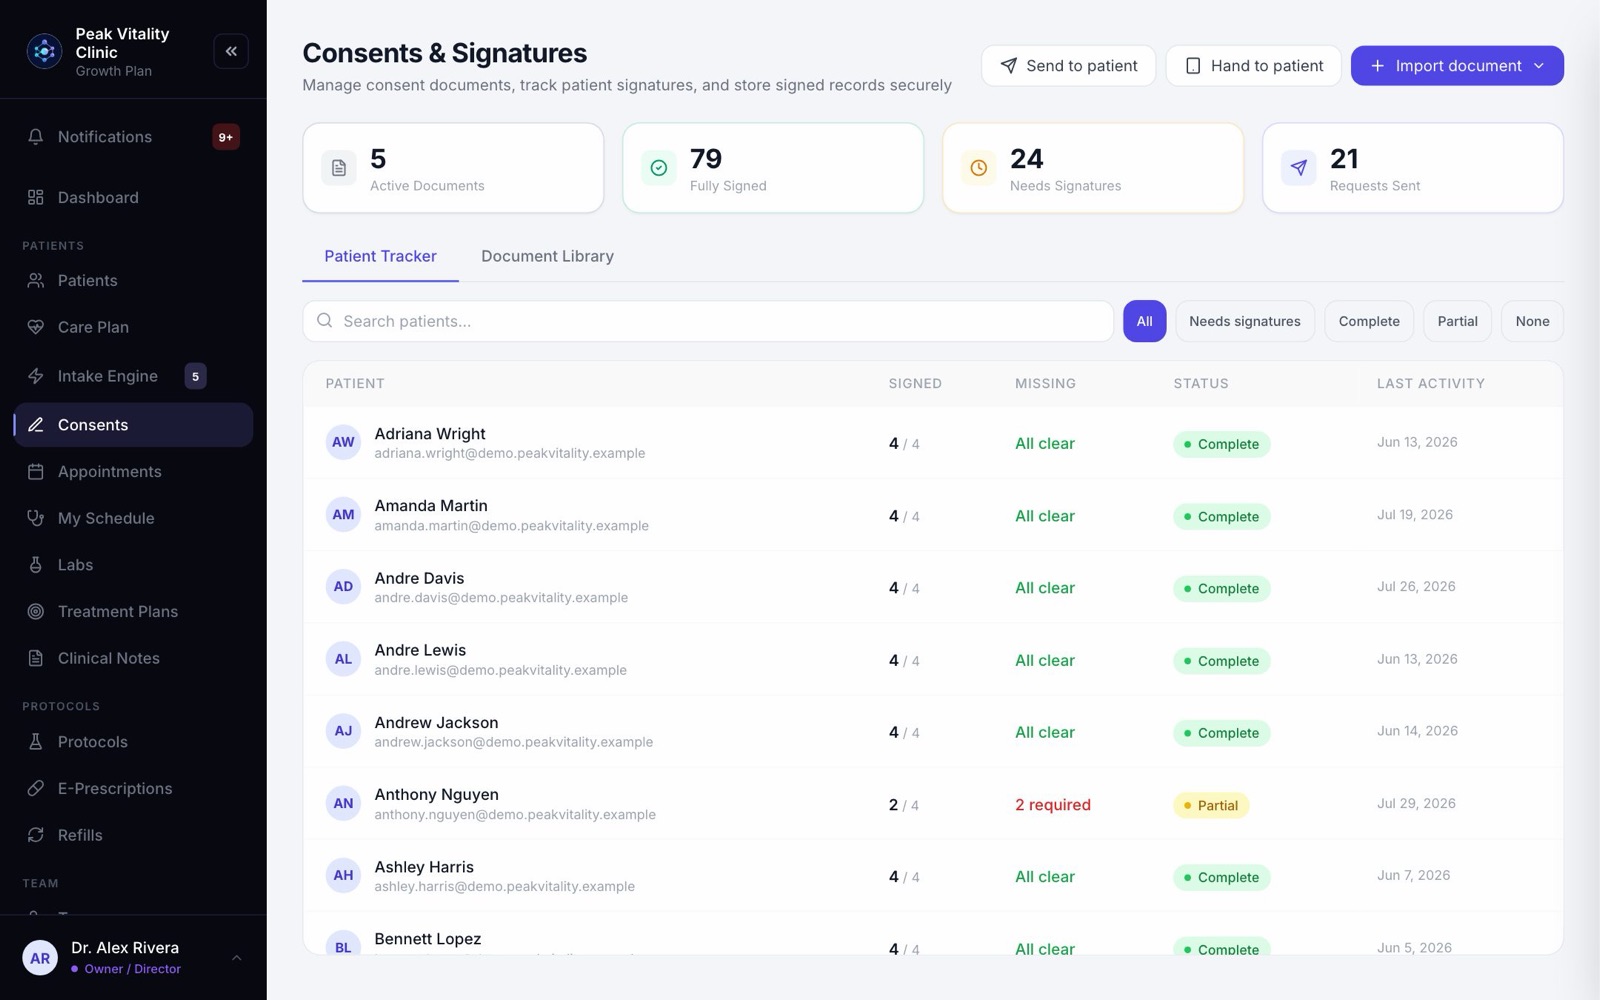
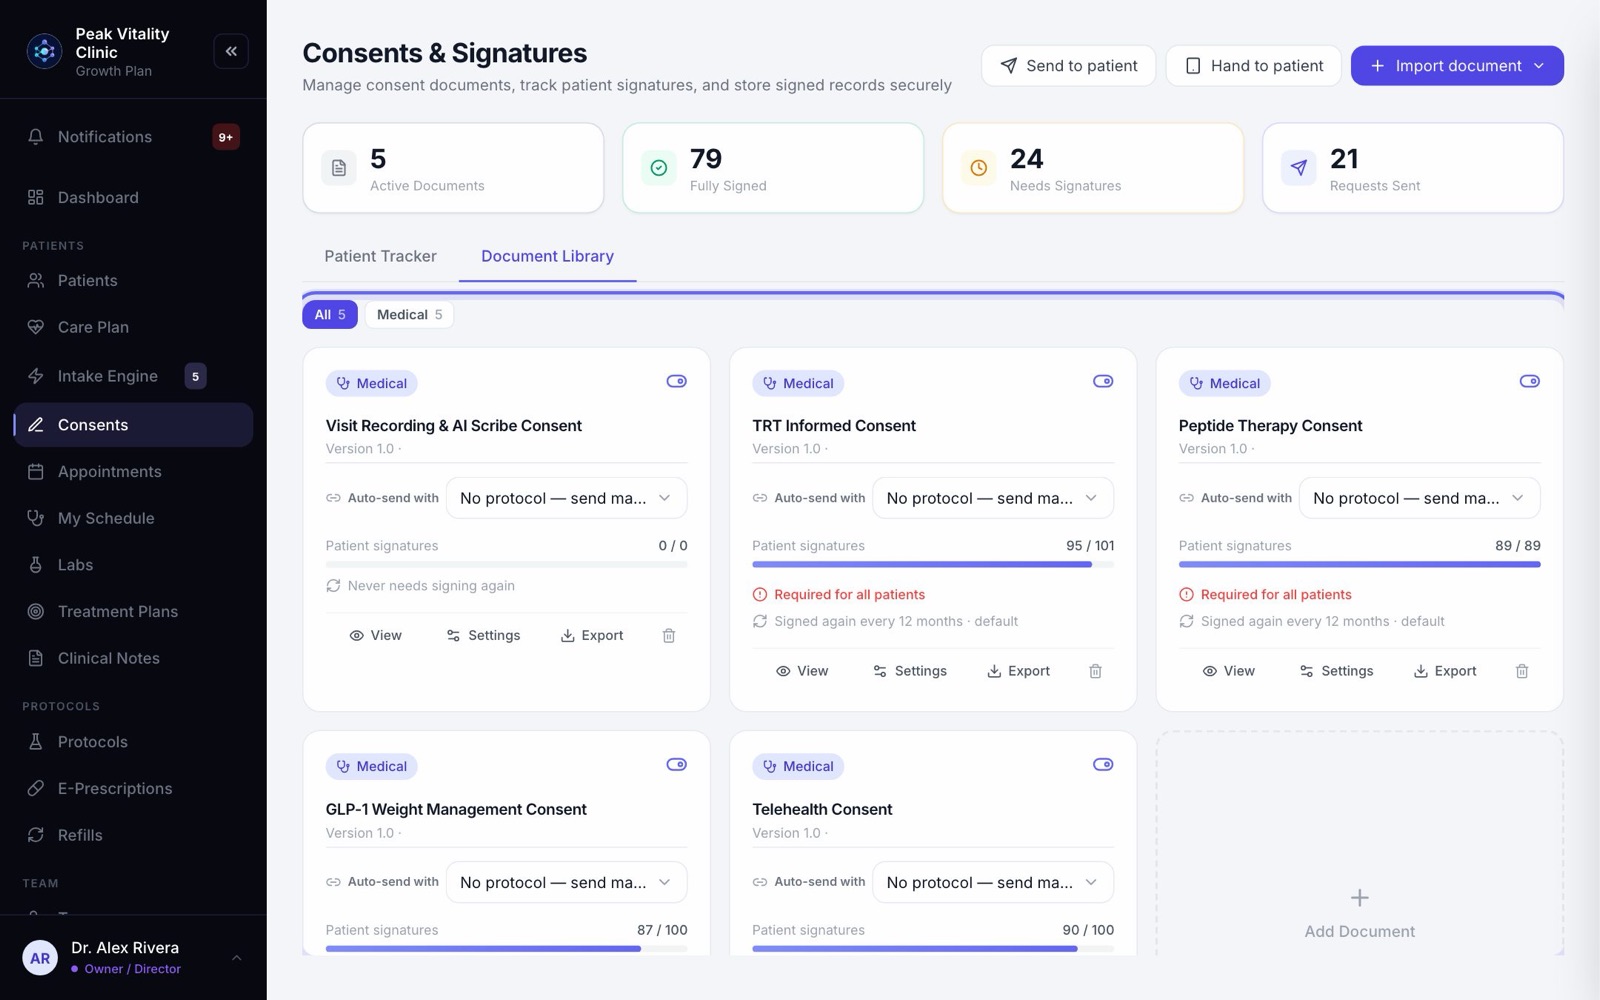
Consents is where every consent form lives, and where you see who has signed what. Across the top are the buttons to send, to sign in the office, and to bring in forms. Below them are the numbers, then two tabs: Patient Tracker and Document Library.
Only an owner or manager can change the library. Everyone else sees the same buttons, switched off, with the reason.
2The numbers
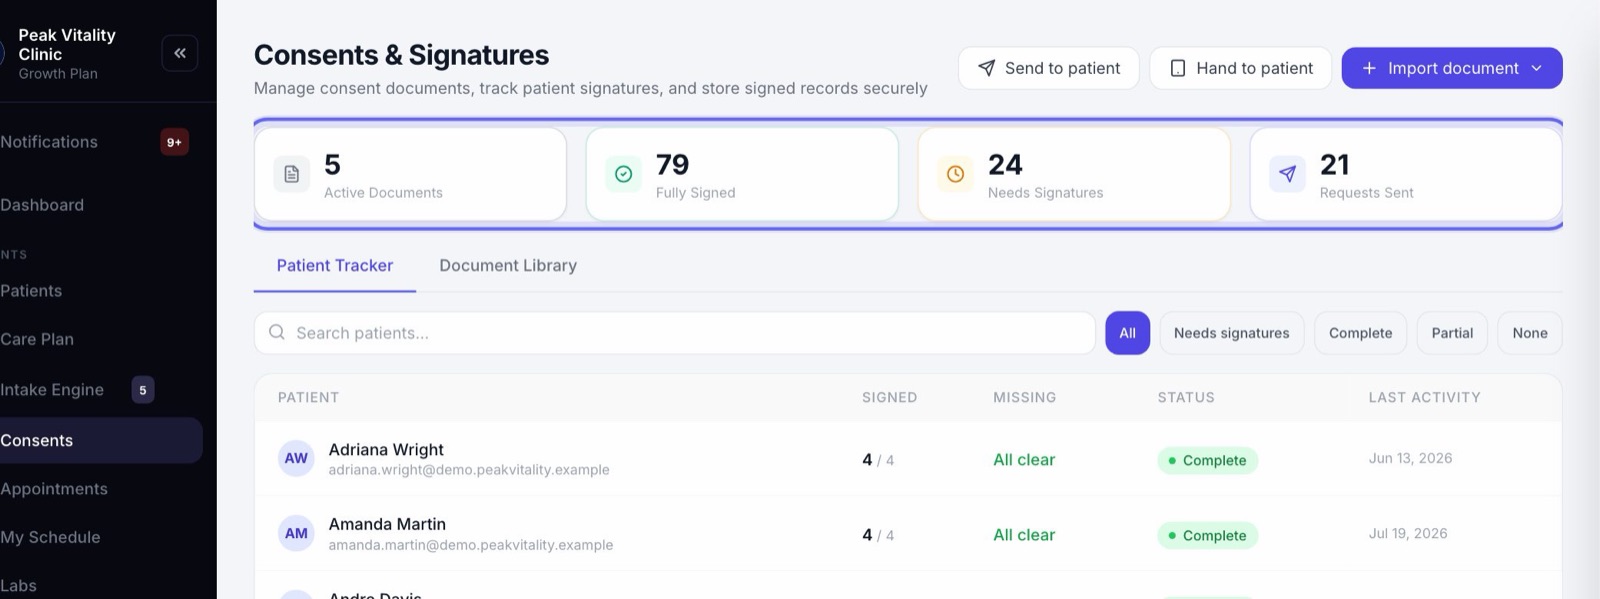
- 1Active Documents is how many forms are switched on.
- 2Fully Signed is how many patients have signed every required form.
- 3Needs Signatures is how many patients still owe one.
- 4Requests Sent is how many forms are out, waiting to be signed.
3Newly signed
When someone signs, a Newly signed box shows above the numbers for seven days. Click a name to open that patient. When nothing is new, the box is hidden.
4Send forms to a patient
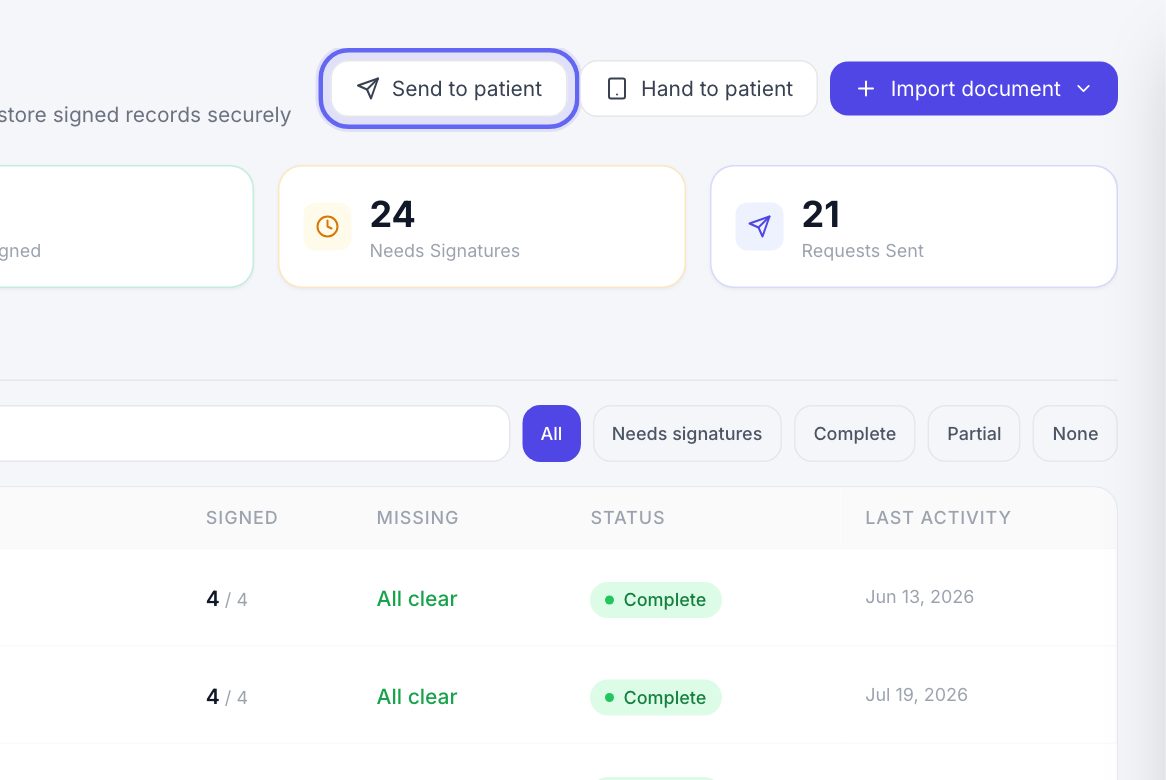
- 1Click Send to patient and pick the patient.
- 2Tick the forms. The Consents and Intake forms tabs share one list, so you can send both kinds at once.
- 3A form they already signed says Already signed, and one waiting with them says Already sent. Neither goes again.
- 4Press Send. They get one email with a link, and the forms wait in their patient app.
Visit types send their own forms when a visit is booked. Use this for the one-off.
5Sign in the office
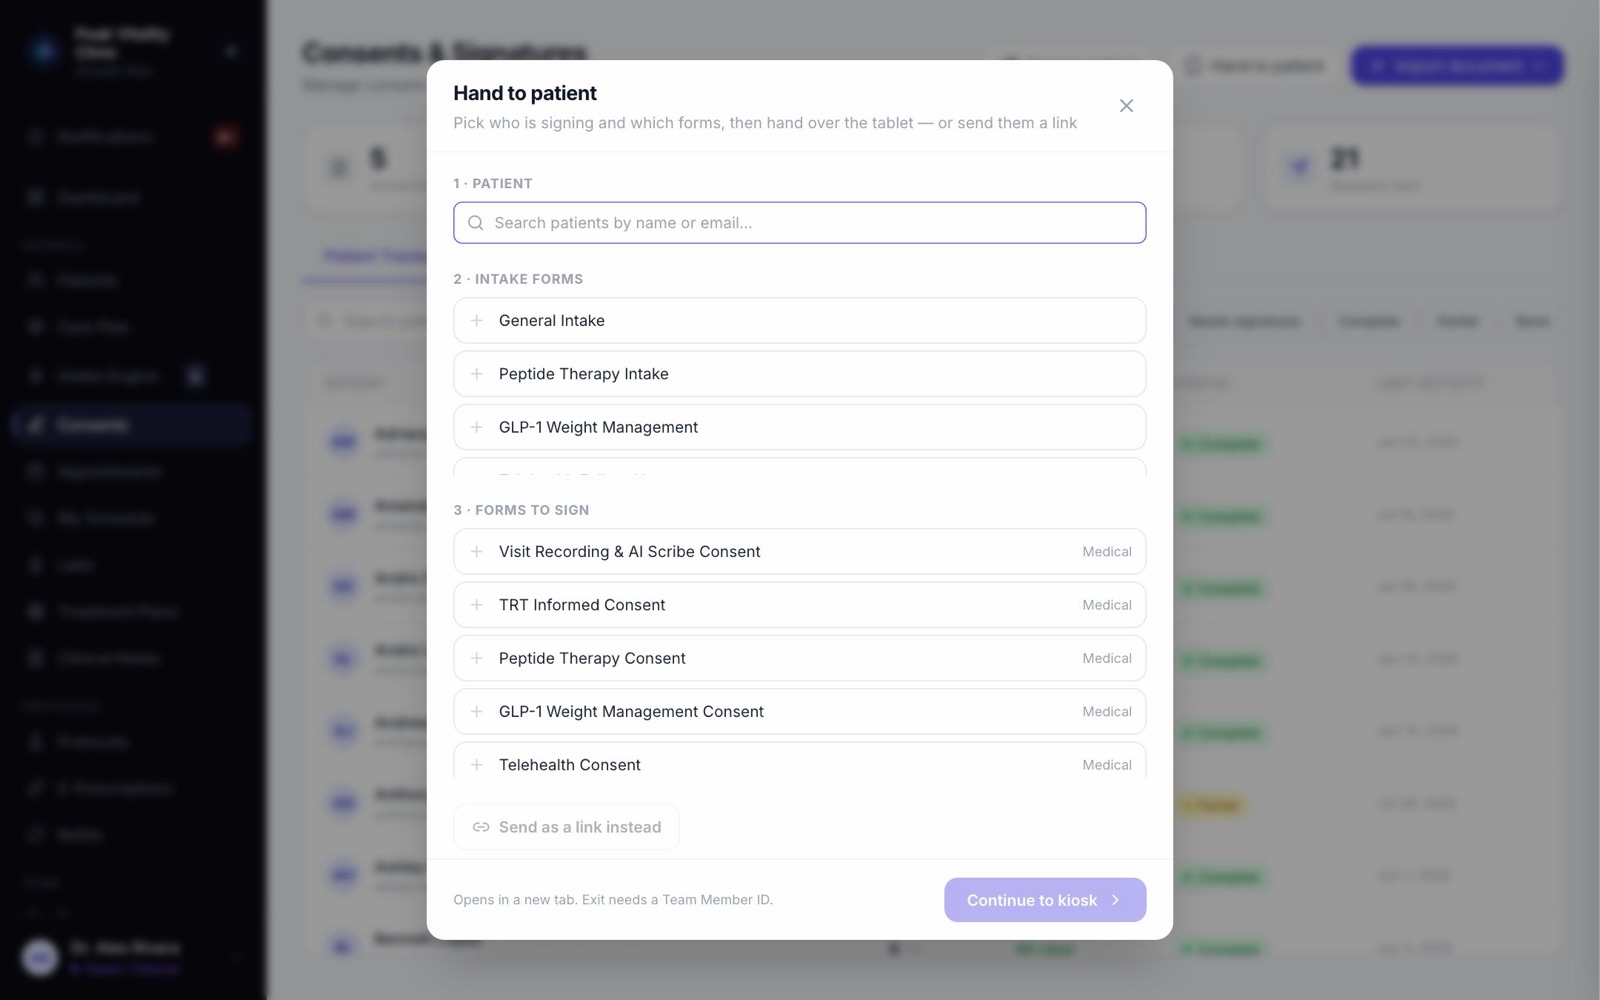
- 1Click Hand to patient.
- 2Pick the patient. Then add forms under 2 · Intake forms and 3 · Forms to sign, in the order you want them. Use the arrows to reorder.
- 3Press Continue to kiosk. It opens in a new tab and shows only those forms.
- 4Hand over the tablet. To leave the tablet screen, staff enter their Team Member ID.
6Or send the same forms as a link
For someone who isn’t in the building, press Send as a link instead in the same window. Copy the link and send it to them.
The link works once, and stops working after a while. It opens only those forms. It is shown one time, so copy it before you close the window.
7Bring in your forms
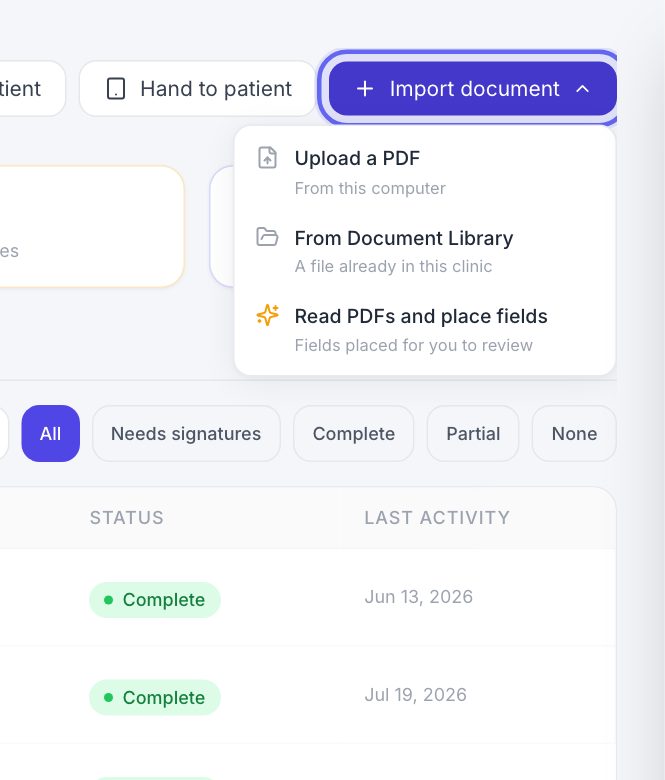
- 1Click Import document.
- 2Upload a PDF brings in one form from your computer.
- 3From Document Library uses a PDF already saved in your clinic.
- 4Read PDFs and place fields takes many PDFs at once and places the signature, date, text and check boxes for you to review.
The consent forms setup guide walks through each one.
8Find a patient
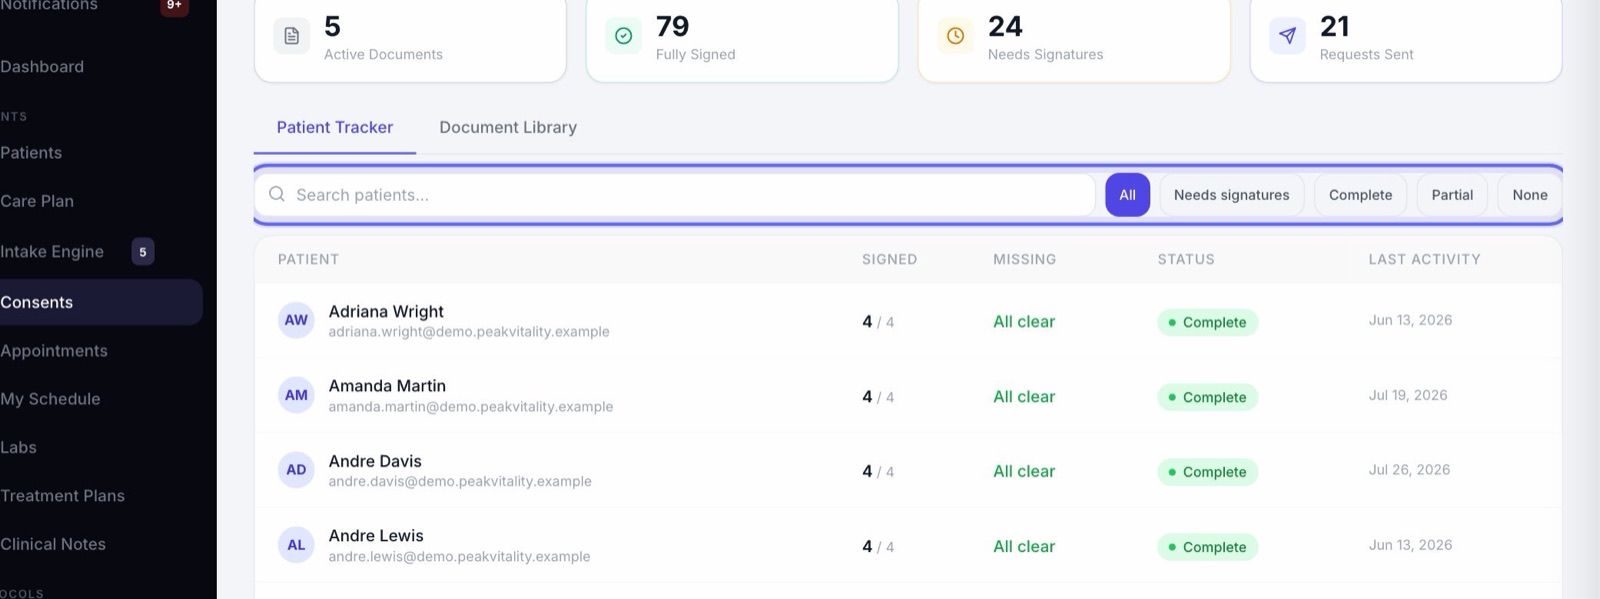
- 1Type a name or email in Search patients….
- 2Filter to Complete, Partial or None to see who has signed everything, some, or nothing.
9The Patient Tracker
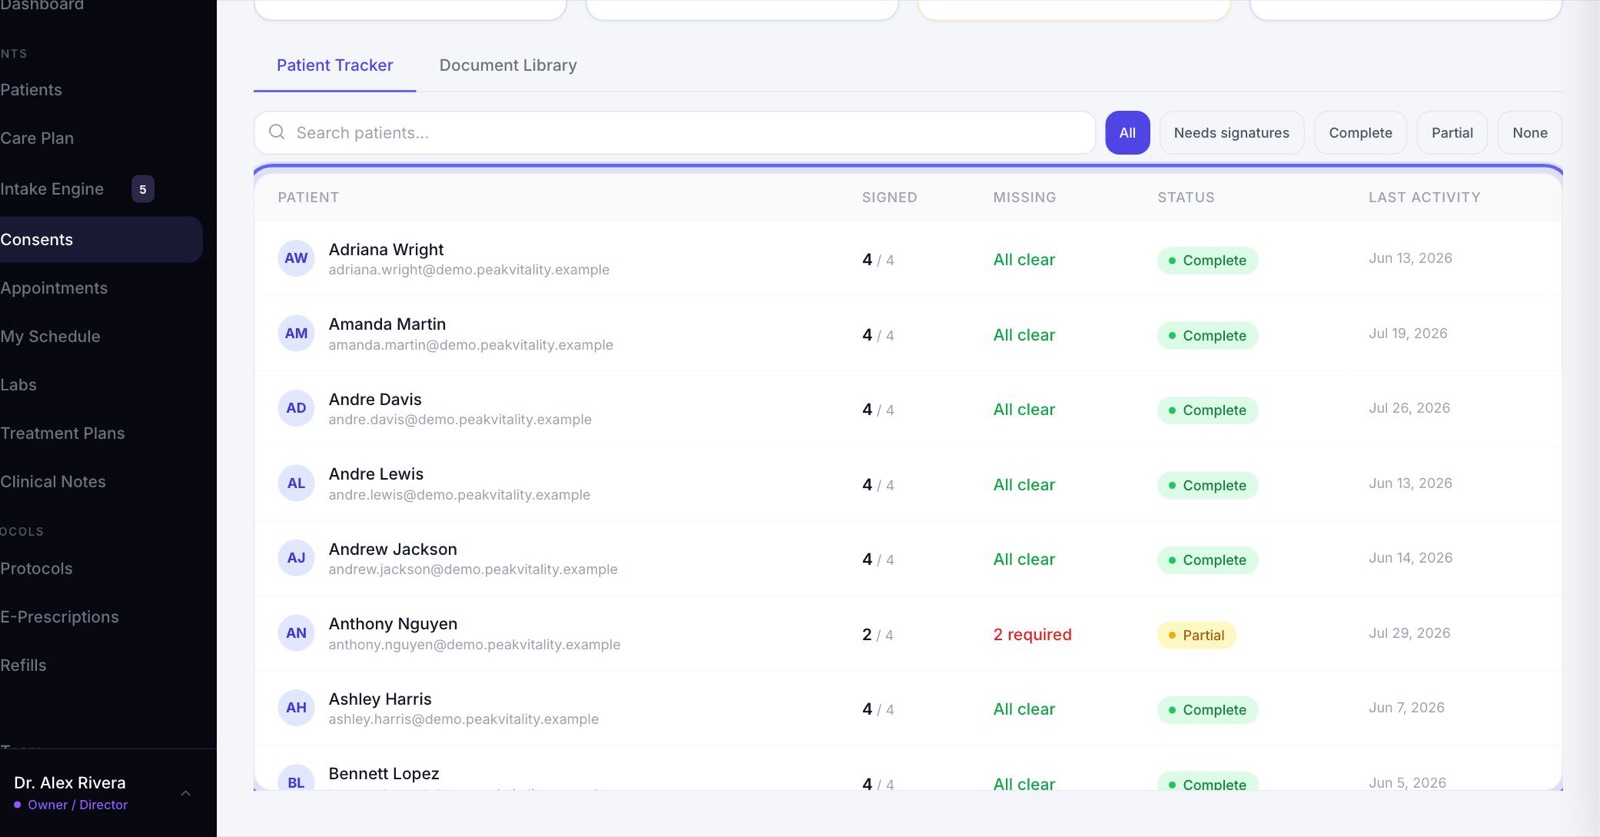
One row per patient. Signed is how many forms they signed. Missing counts the required forms they still owe, or says All clear. Status is Complete, Partial or Not Started, and Last Activity is when they last signed.
10One patient’s forms
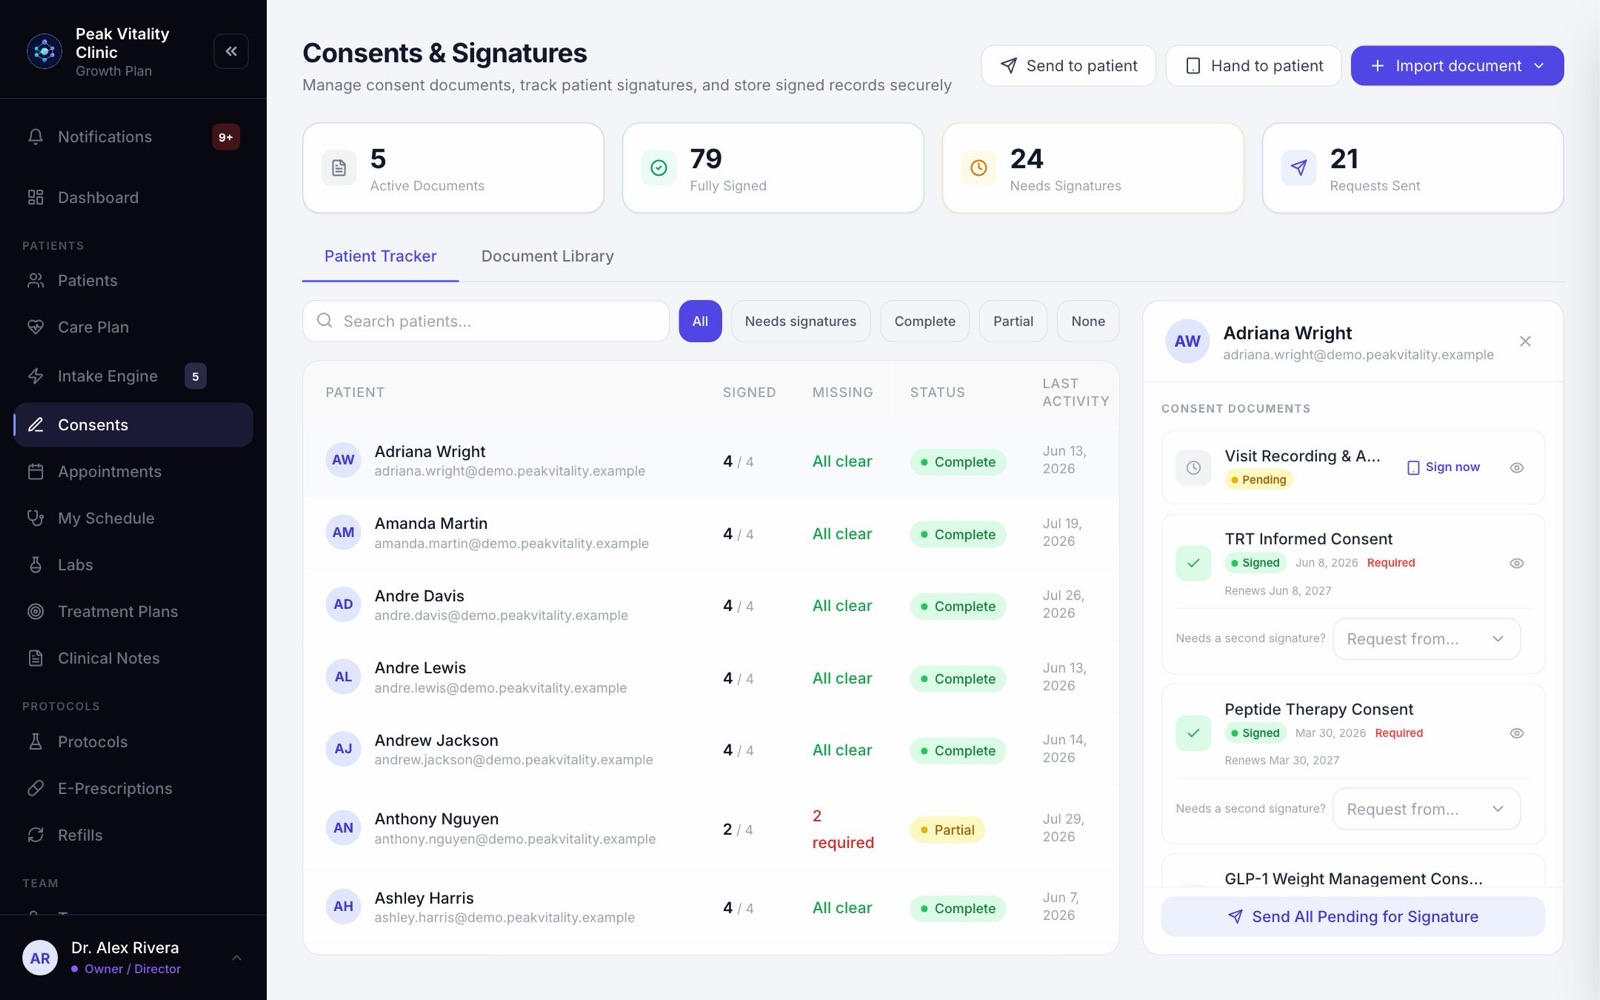
- 1Click a patient. A panel opens with every active form and where it stands: Signed, Sent, Pending or Expired.
- 2A form that renews shows when it Renews, or Expired — re-sign once it has lapsed.
- 3Click the eye to open a form. A signed one opens the signed copy.
- 4Send All Pending for Signature sends every form they haven’t signed, in one email.
11When the clinic signs too
- 1Some forms have boxes for the clinic to fill in. Once the patient signs, the form says Awaiting your signature until you do.
- 2Press Sign clinic fields on a PDF form, or Sign for the clinic on a form written in the app, and sign.
- 3Need a second clinician to review it? Under Needs a second signature?, choose Request from… and pick them. They press Co-sign now.
12The Document Library
Every consent form you use, as a card. Each card shows its category, whether it is switched on, how many patients have signed it, and how often it is signed again.
Click a category at the top to see only those forms. All shows every one.
13What each card does
- 1The switch in the corner turns the form on or off. A form that is off stays in the library.
- 2Place fields puts signature and date boxes on a PDF. Once placed, it says Edit fields. Fields placed for you say Review placed fields until someone checks them.
- 3Settings changes the name, category, who must sign it, and how often.
- 4Export opens the PDF, or downloads the wording of a form written in the app.
- 5Auto-send with links a form to a protocol, so anyone enrolled in it gets the form.
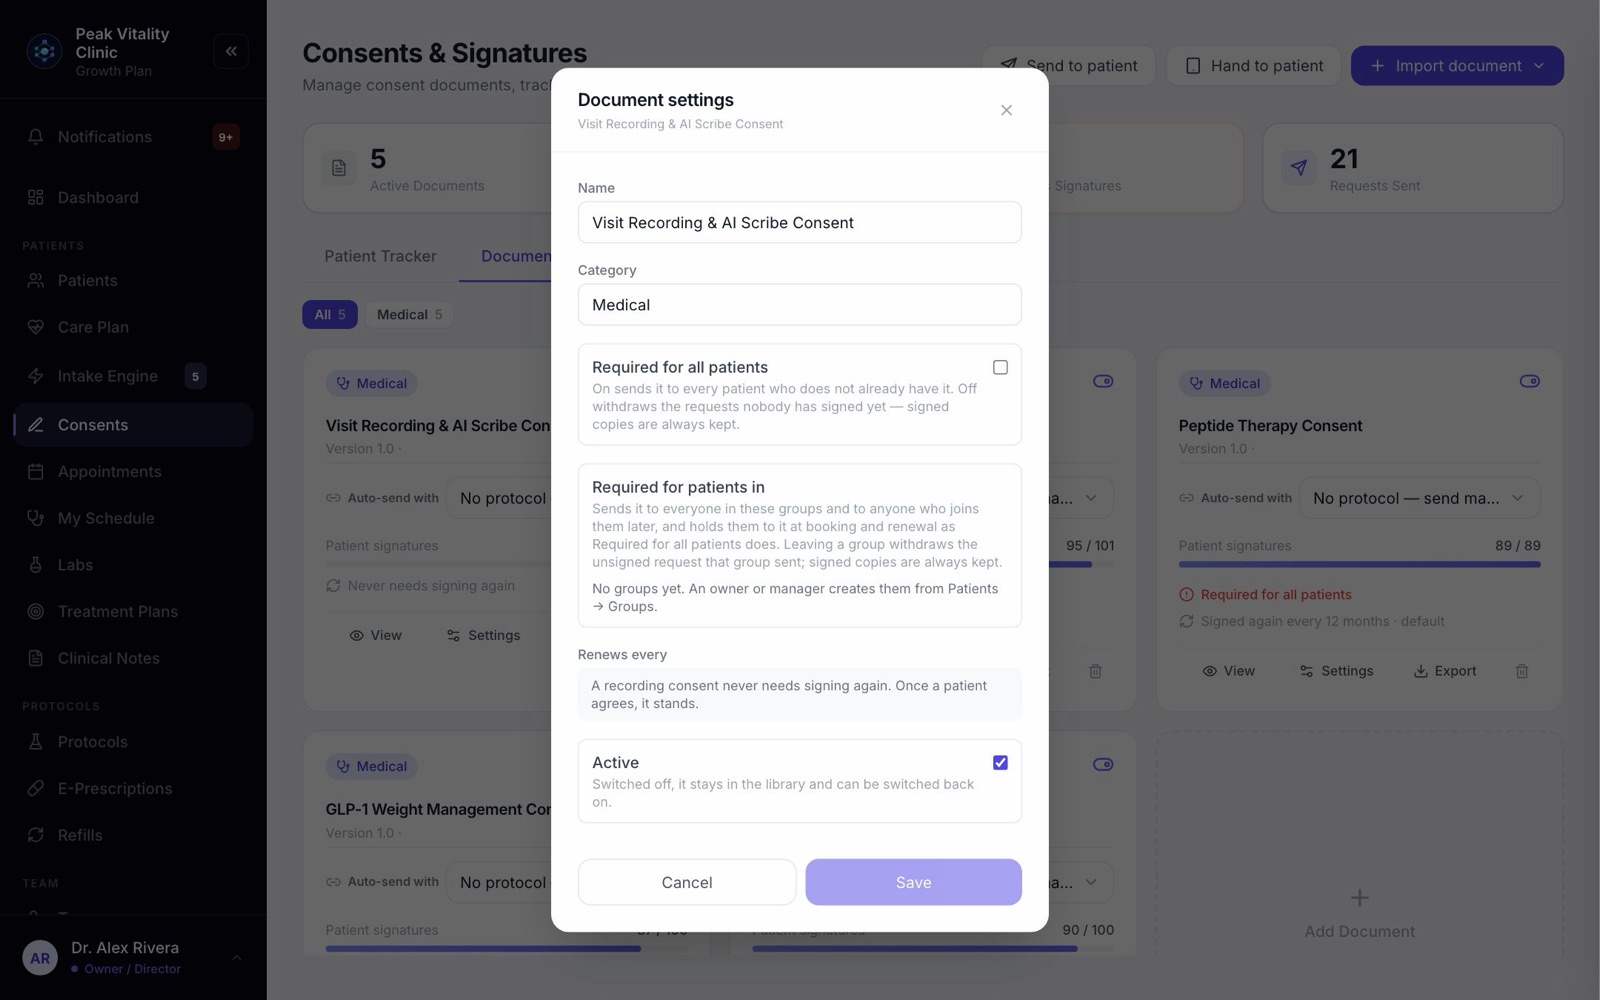
14Document settings
- 1Change the Name and Category. You can type a category of your own.
- 2Required for all patients sends it to everyone who doesn’t have it yet. Turning it off takes back the requests nobody has signed. Signed copies are always kept.
- 3Required for patients in does the same for the patient groups you tick.
- 4Renews every sets how often patients sign it again.
- 5Press Save.
15Add one more form
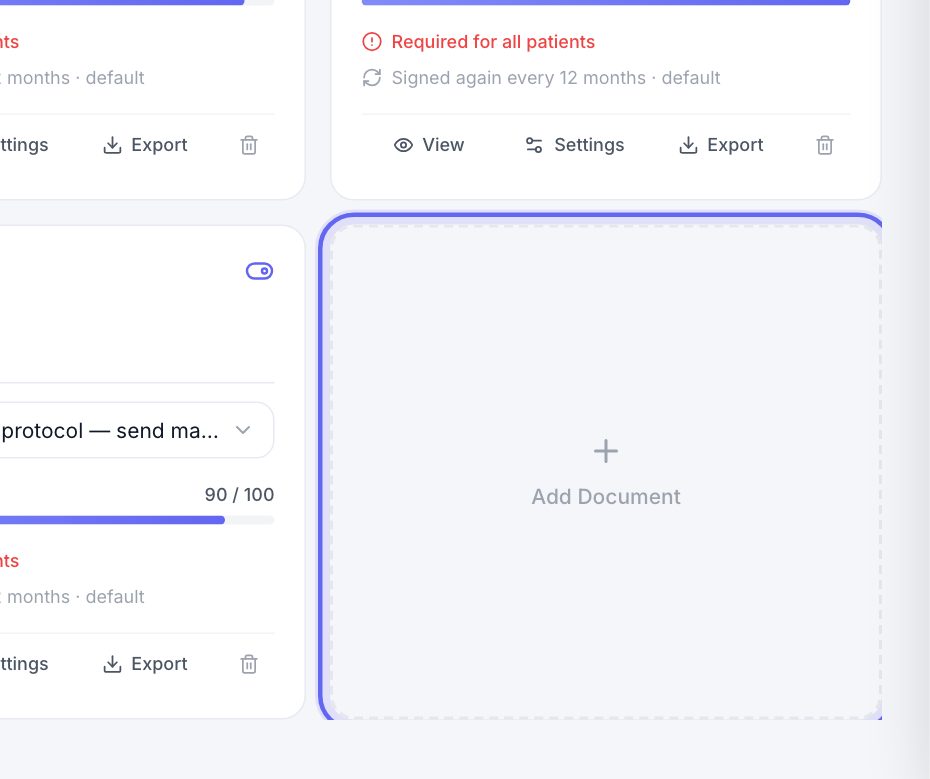
The Add Document card at the end of the library uploads one more consent form as a PDF, the same way as Upload a PDF.
Keep going
Set up your consent forms
Bring in the consent PDFs you use today, place the signature boxes, and decide who signs each one and how often. Then attach them to your visit types.
Read the guideForms and consents, start to finish
A visit is booked, its paperwork goes out, the patient fills it in at home or on a tablet, and the answers come back to you. Here is every step, and what your team signs.
Read the guideIntake Engine
Build the forms patients fill in, choose where their answers go, and review what they send you.
Read the guideCo-signatures
Everything waiting on your signature as a reviewer, oldest first. Read it, co-sign it or decline it, and choose whether you get an email when something new arrives.
Read the guideSet up your visit types and booking link
Build each kind of visit once: its length, providers, rooms, price and forms. Then turn on the link patients book from.
Read the guideRather be shown?
Inside Aminova, the tutorial walks you through every page, and the Getting started checklist shows you each task click by click. Or book a live training session with our team.