1The page at a glance
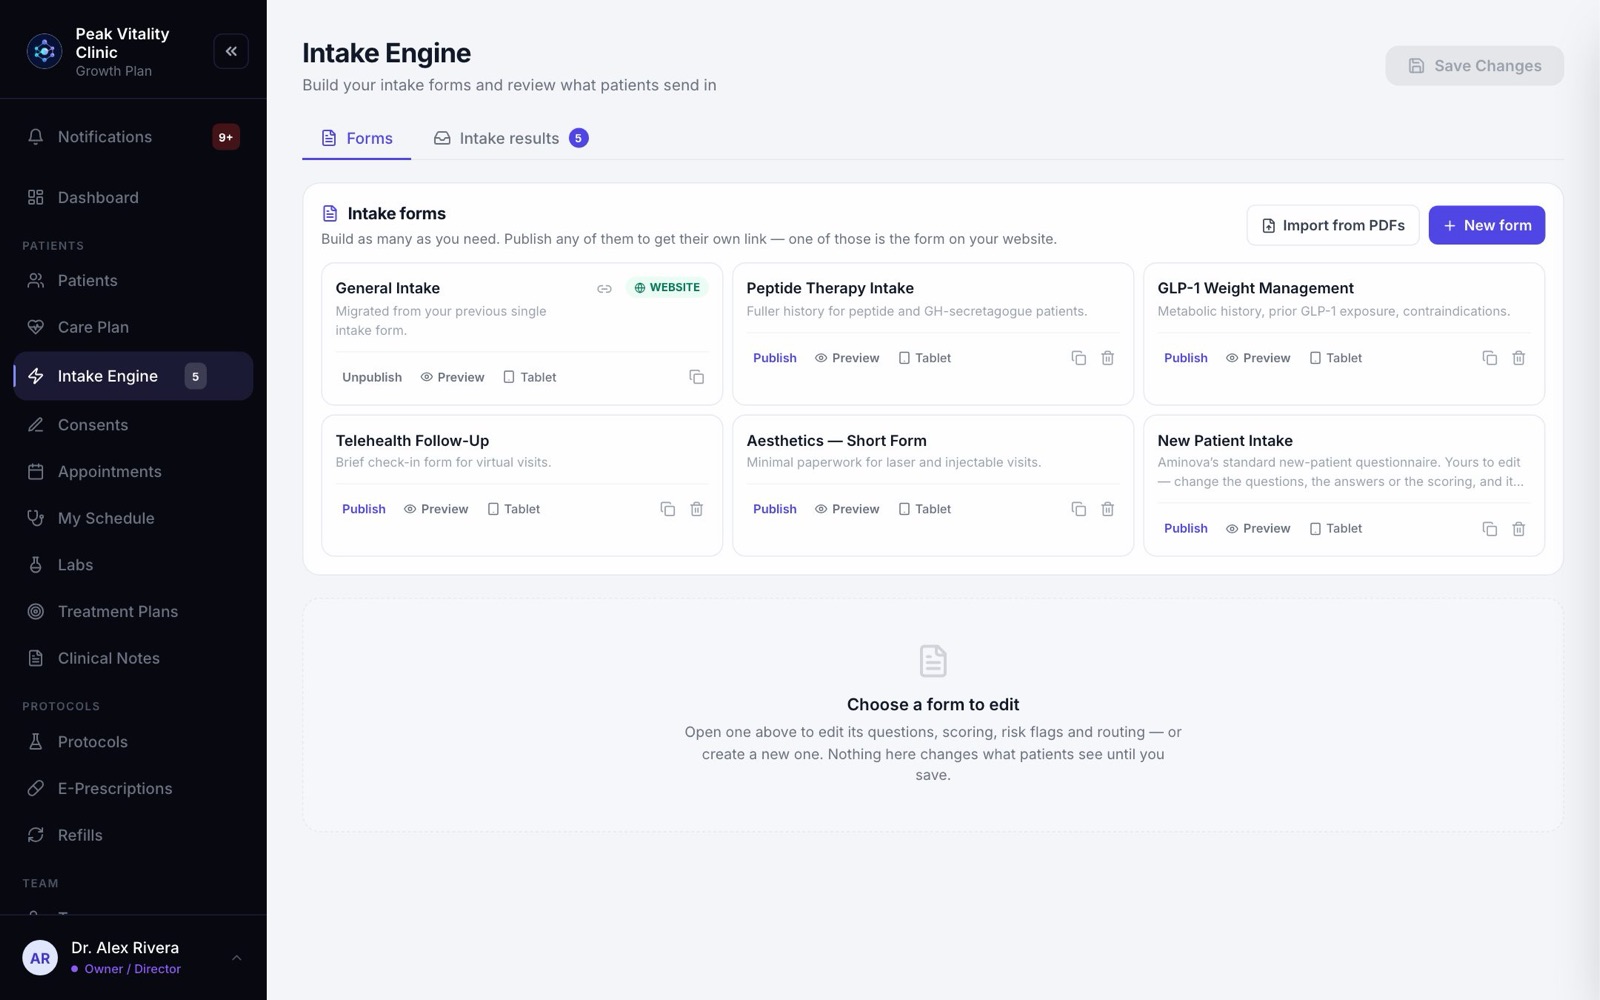
Intake Engine has two tabs. Forms is your library of intake forms, and the builder for the one you open. Intake results is what patients have sent in.
Only an owner or manager can change a form. Everyone else can open and preview forms, but not edit them. Nurses reach Intake results from Intake in the sidebar.
2Your intake forms
- 1Every form is a card. Click its name to open it in the builder below.
- 2A green WEBSITE tag means it is the form on your website link. LIVE means it has its own link. DRAFT means it was brought in from a PDF and isn’t live yet.
- 3The link icon beside a live form’s name copies its link.
- 4Along the bottom of each card: Publish or Unpublish, Use on website, Preview to see it as a patient does, and Tablet to hand it over in the office. The last two icons duplicate or delete the form.
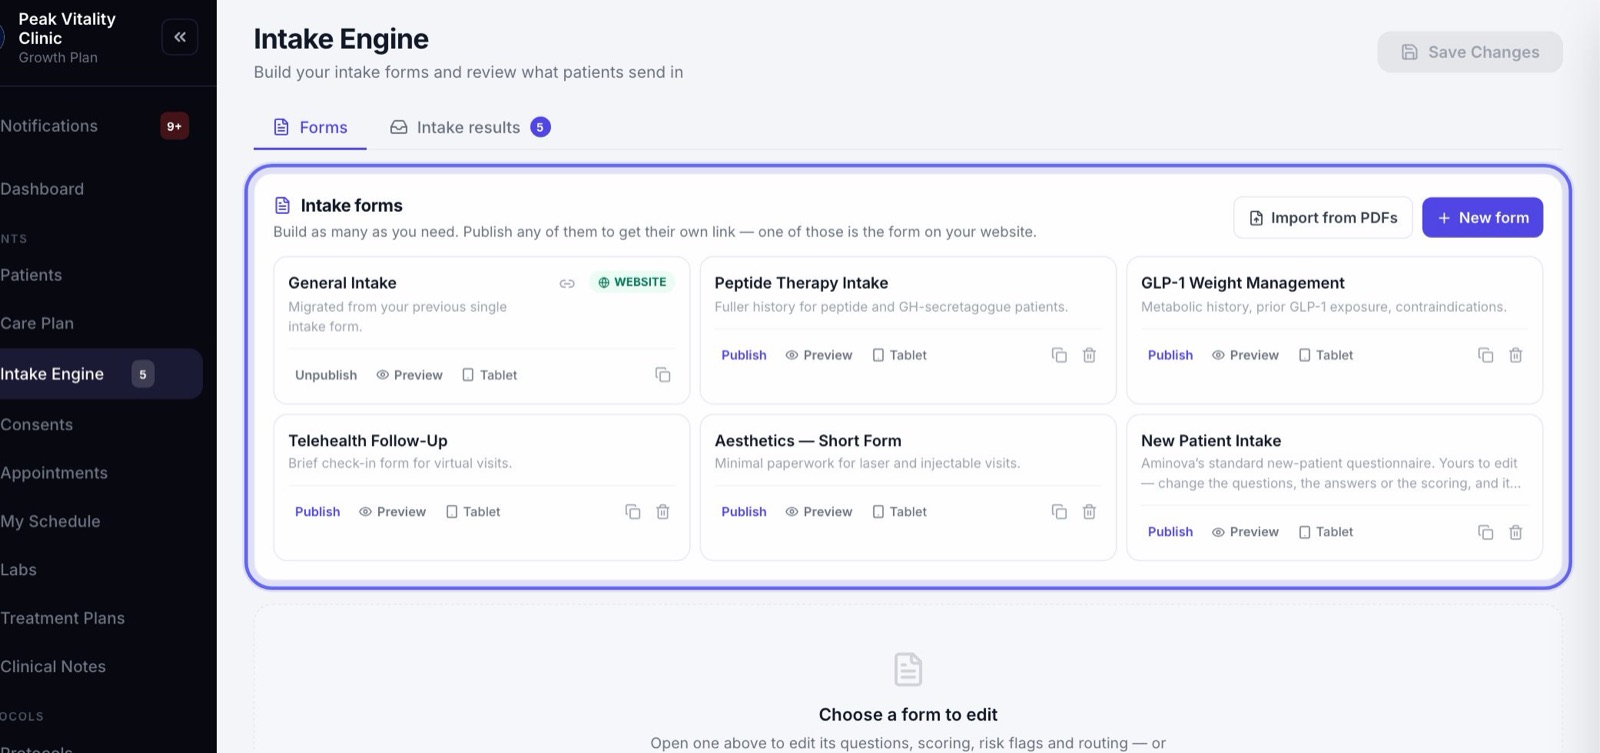
Only a form that isn’t live can be deleted. Answers already sent in on it are kept.
3Make a new form
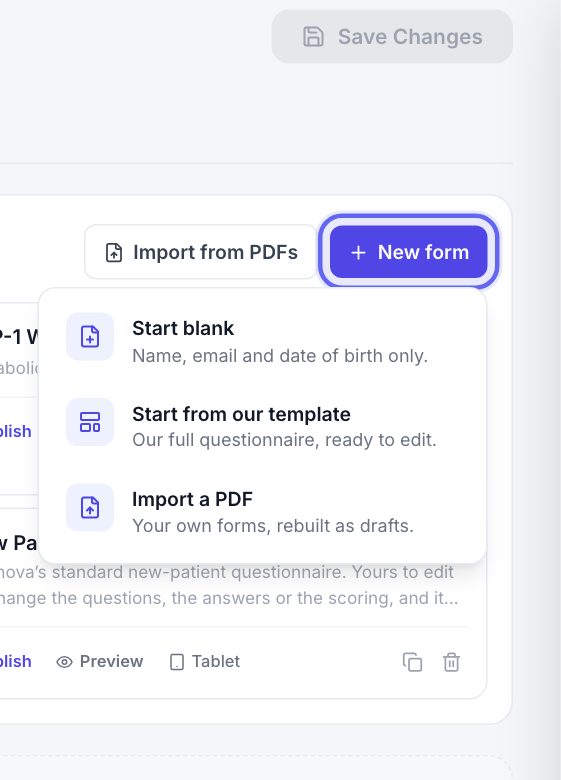
- 1Click New form.
- 2Start blank gives you a form with name, email and date of birth only.
- 3Start from our template gives you a full questionnaire to cut down.
- 4Import a PDF rebuilds your own form from a PDF.
- 5The new form opens with its name ready to change. Type a name and press Enter.
4Import from PDFs
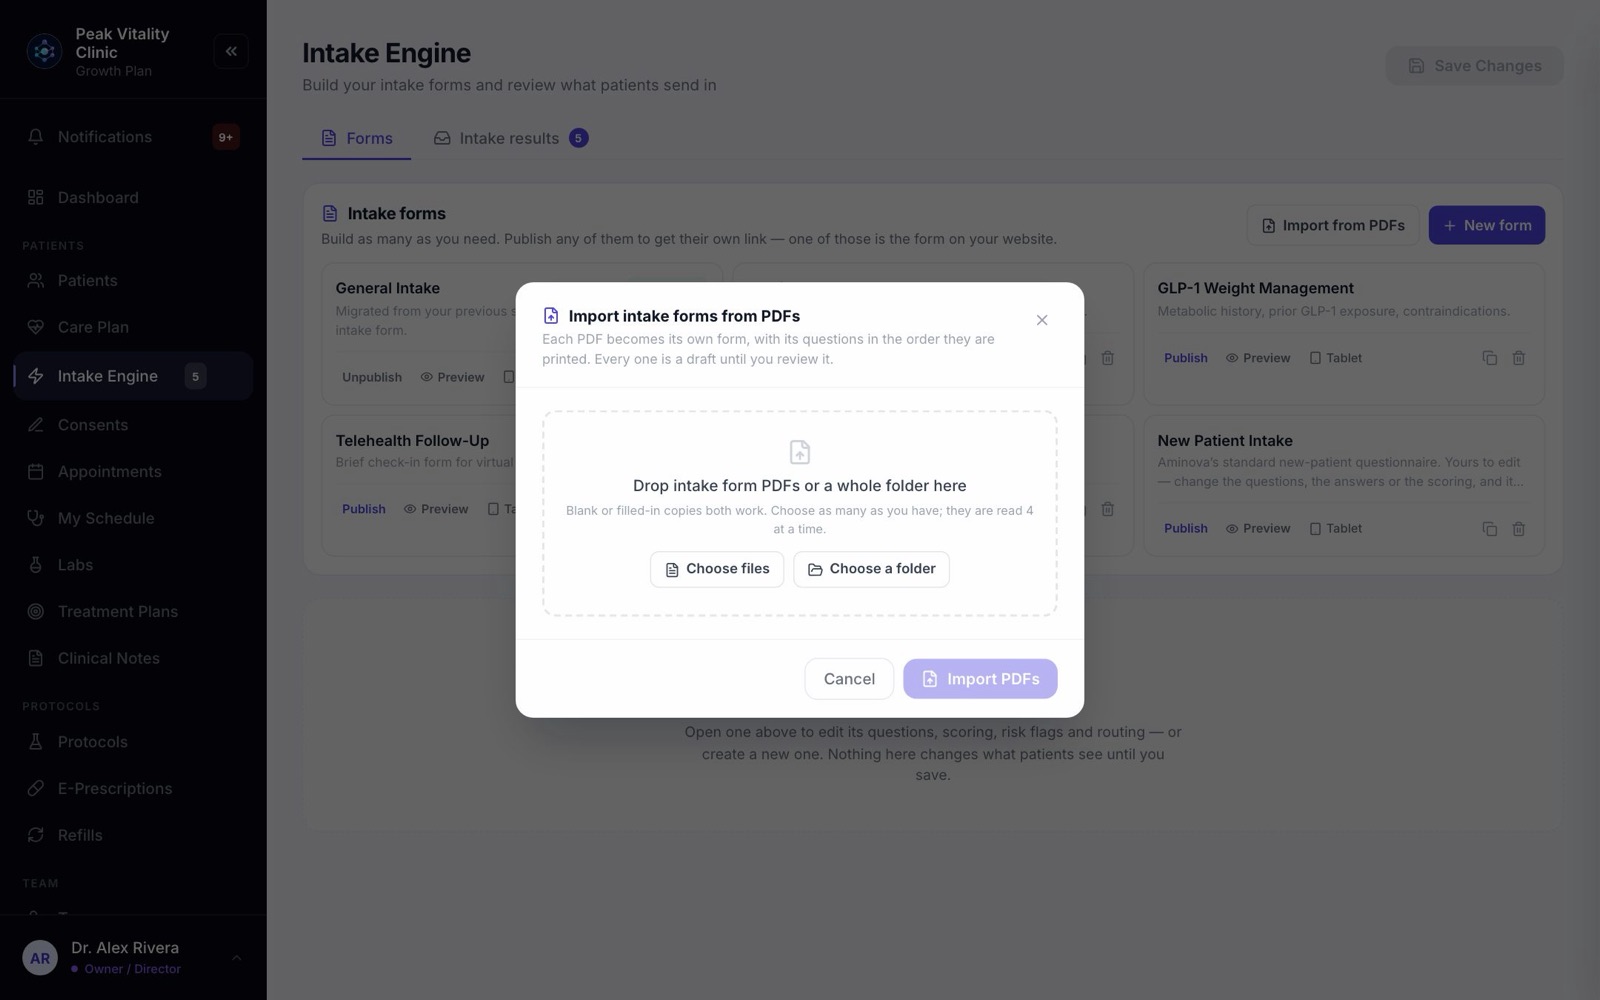
- 1Click Import from PDFs and drop in your forms, or a whole folder.
- 2Press the button that counts your files, like Import 3 PDFs. Each PDF becomes its own form, with its questions in the order they are printed.
- 3Each one comes back as a draft. Press Review to open it and check every question.
5The bar above an open form
- 1The form’s name, and a tag that says whether it is live. A form that isn’t says NOT PUBLISHED, with a Publish button right there.
- 2Live preview shows the patient’s form beside the builder. It shows what you last saved.
- 3Ask patients to complete this again every asks patients to fill it in again after the months you set, and emails them the link.
- 4Close puts the form away. If you have unsaved changes, it asks first.
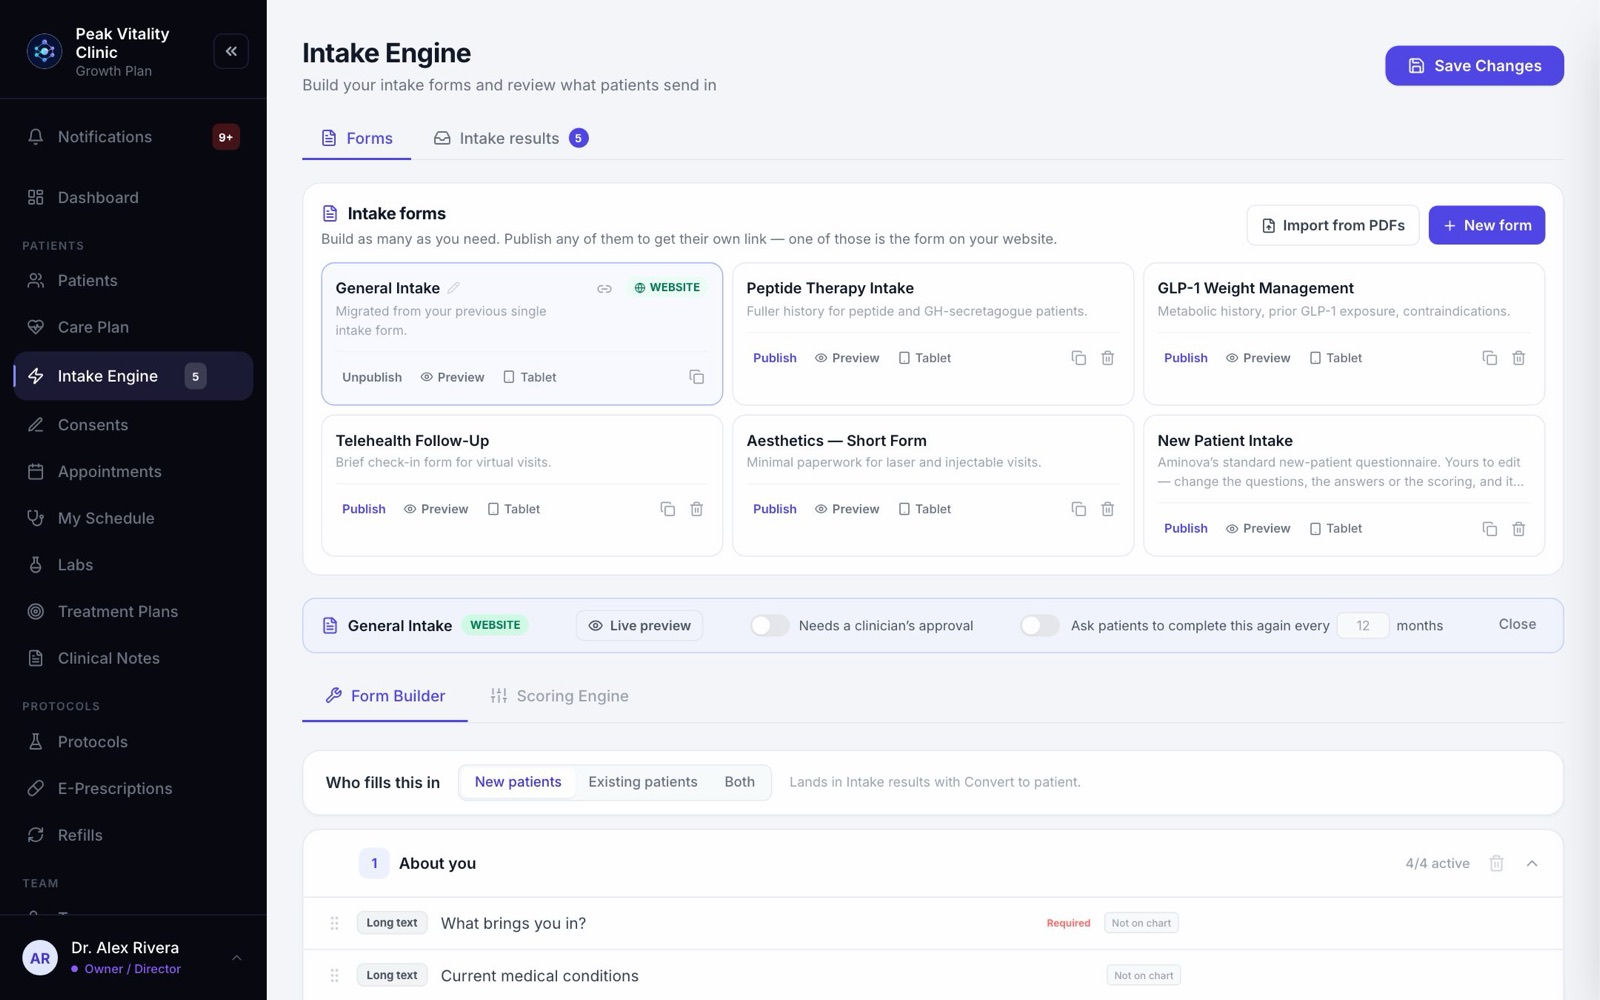
6Who fills this in
- 1New patients: answers land in Intake results with Convert to Patient.
- 2Existing patients: it is filed to the patient’s chart. There is no convert.
- 3Both: whoever reviews each one chooses to convert it or file it.
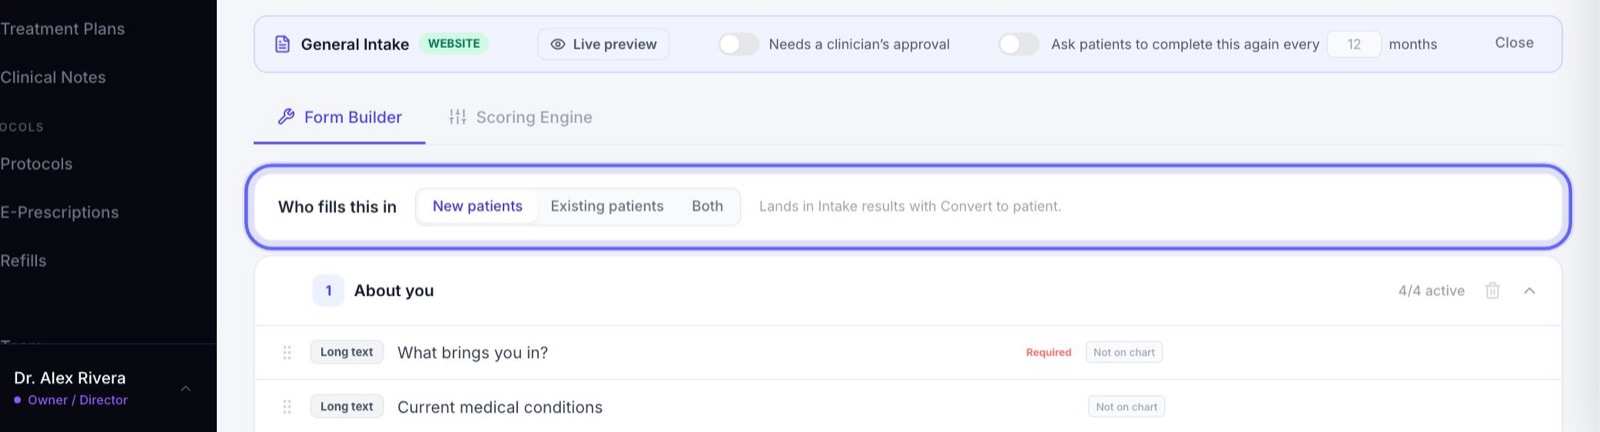
7Sections and questions
- 1Click a section to open or close it. Hover its header for arrows that move it up or down. Click its name to rename it. The bin deletes it.
- 2Drag a question to reorder it. Hover a question for its controls: Move to another section, Edit the wording, answer type and options, Show if to show it only after a certain answer, and Required or Optional.
- 3The switch turns a question off without deleting it. The bin deletes it.
- 4Name and email can’t be deleted. The patient’s record is made from them.
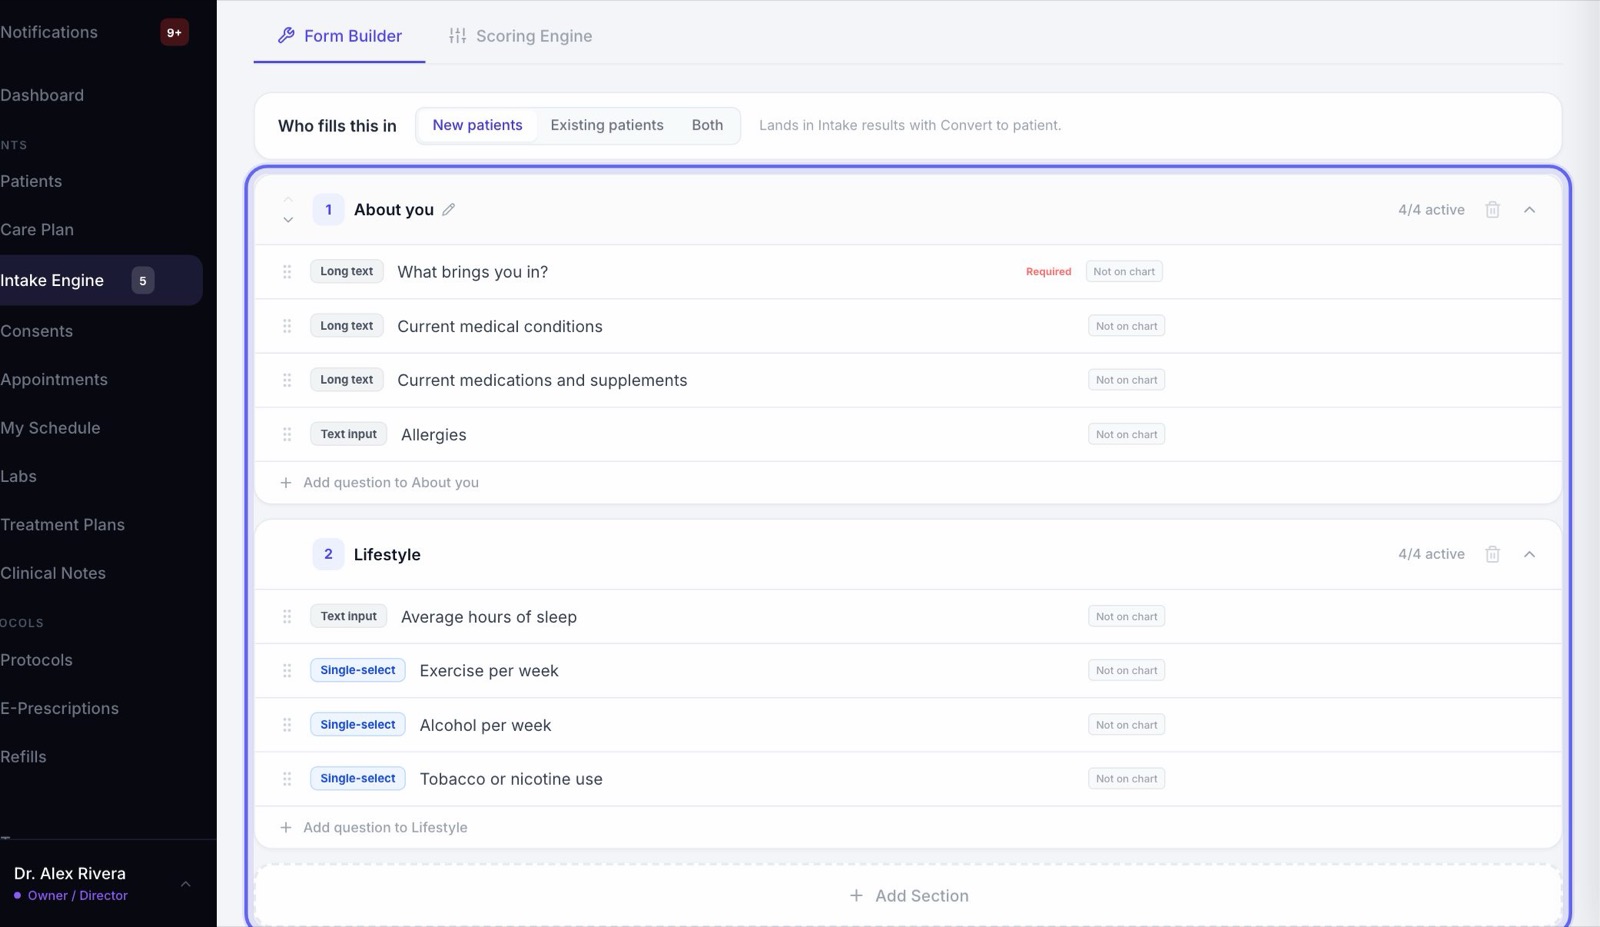
8Add a question or a section
- 1At the bottom of a section, click its Add question to … line.
- 2Type the Question Text and pick the Question Type, like text, a choice, a date, a file upload or a signature. Choice questions need at least two options.
- 3Turn on Required field if it can’t be skipped.
- 4Optionally, pick Save to the chart as and Show only if. Press Add Question.
- 5To add a whole section, click Add Section at the bottom of the form.
A Consent question shows one of your consent forms inside the intake, and the patient agrees to it there. It lands on their chart as a signed consent when they become a patient.
9Send answers to the chart
- 1A question you added or imported shows Not on chart until you map it. Hover it and click Chart.
- 2Pick where the answer belongs on the chart, like allergies or medications.
- 3It then shows where it saves. If the form needs a clinician’s approval, the answer reaches the chart once a clinician clears it.
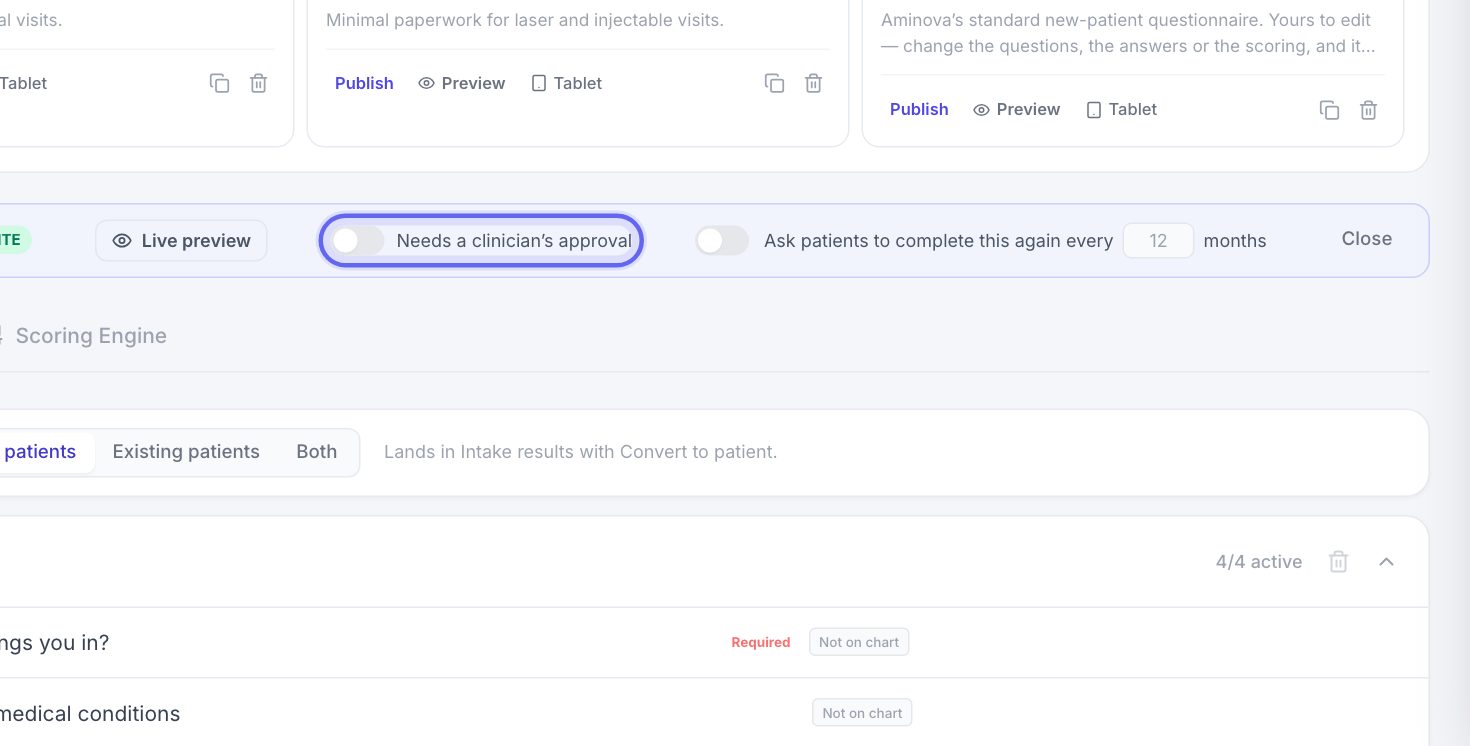
10Clinician approval
- 1Turn on Needs a clinician’s approval and every submission of this form must be cleared by a clinician. The patient can’t be checked in until it is.
- 2Choose who is told: Notify all staff, A specific person, or Whoever holds a role.
- 3This switch saves the moment you flip it. You don’t need to press Save.
11When a submission becomes a patient
For a form new patients fill in, When converted to a patient sits under the questions. Set the Patient status the new chart starts with, and whether to Send a welcome email with their sign-in. You can also tag them from their goals or how they found you, and have a protocol suggested.
12Scoring
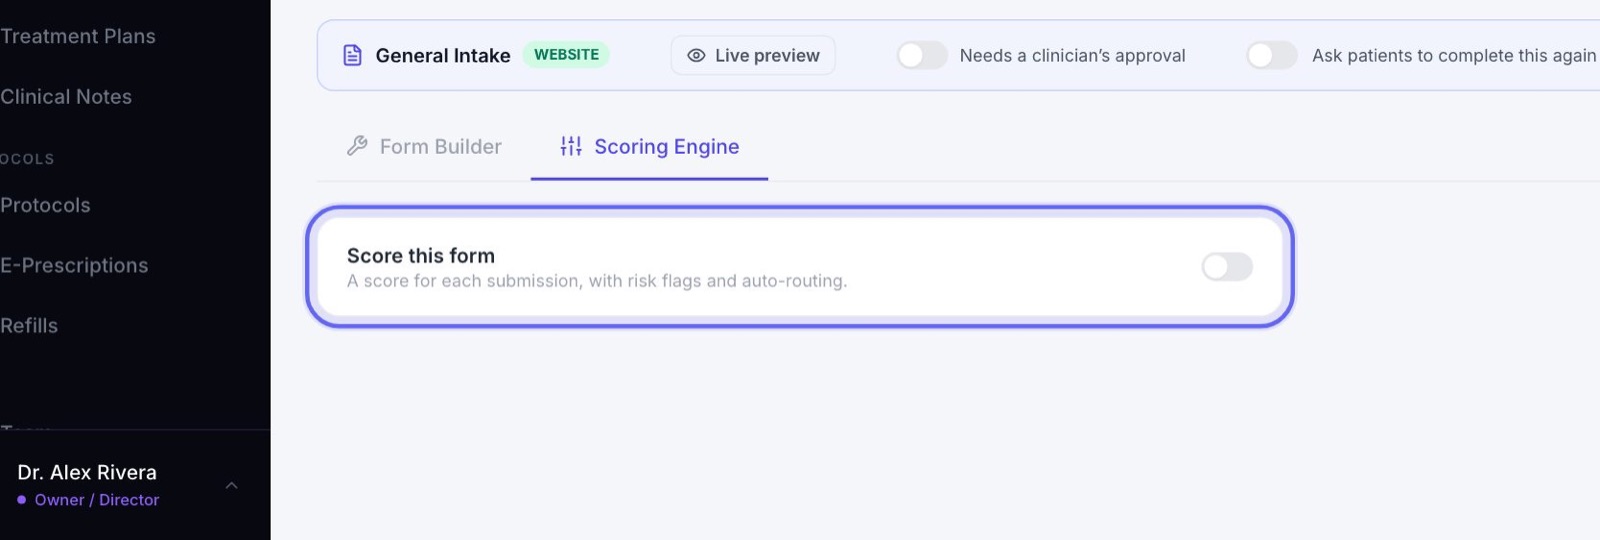
- 1Open the Scoring Engine tab and turn on Score this form to give each submission a score.
- 2Score sets the points for each answer, with a simulator to test them.
- 3Risk flags marks submissions whose answers match, like high stress.
- 4Auto-routing moves a new submission to a stage when its rule matches. Conversion sets the lowest score to convert.
13Save your changes
Question and scoring changes reach patients only after you press Save Changes at the top of the page. Until then, it says Unsaved changes.
If you leave without saving, the next time you open the form it offers to Restore what you were doing.
14Intake results
- 1Open the Intake results tab. A number on the tab says how many are new.
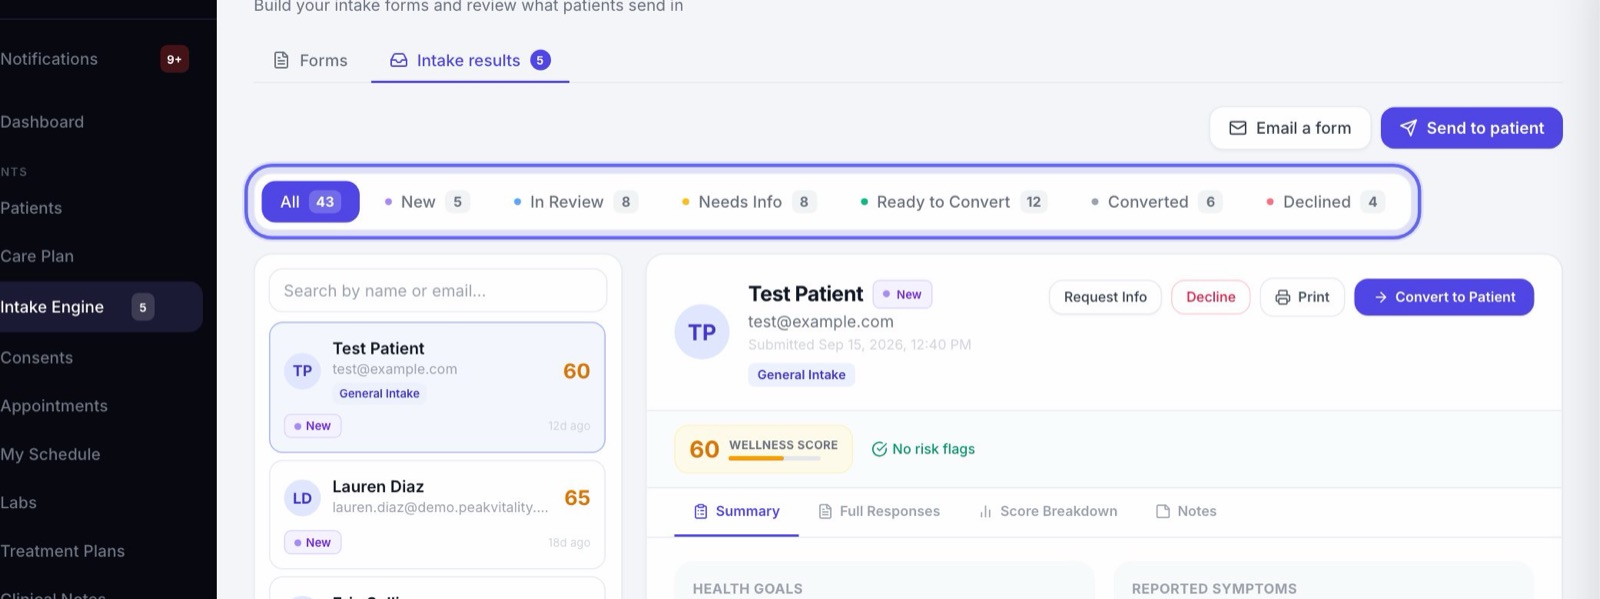
- 2The stages across the top are New, In Review, Needs Info, Ready to Convert, Converted and Declined. Click one to see only those.
- 3Search by name or email. Each row shows the form, the score if there is one, the stage, and any risk flags.
15Read a submission
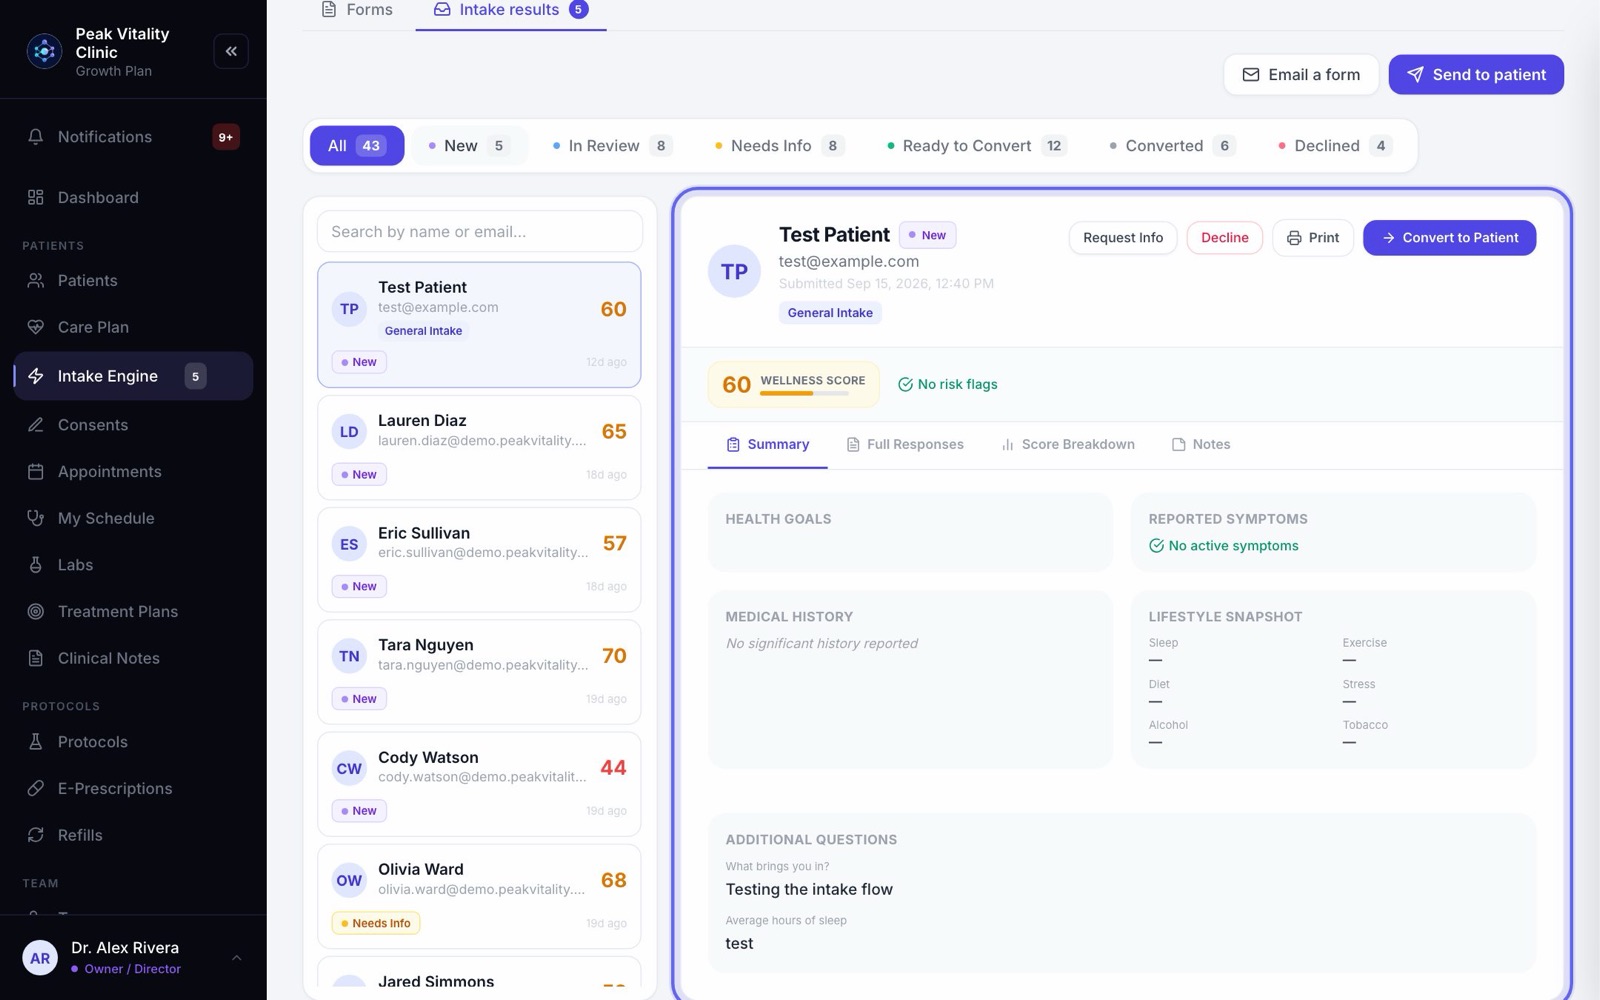
Click one to read it. Summary gives the key answers, Full Responses gives every answer, and Notes holds notes only your team can see. A scored form also has Score Breakdown.
16Act on a submission
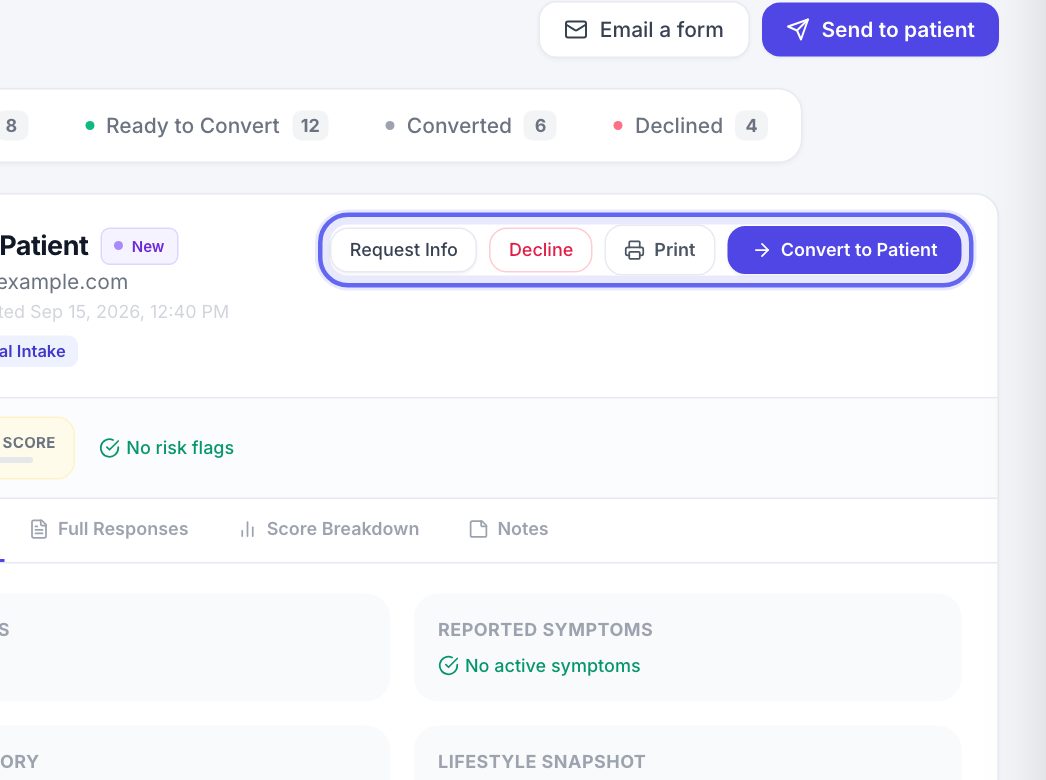
- 1Convert to Patient makes a new chart from it. File to chart puts it on a patient you already have. Which you see depends on who the form is for.
- 2Request Info moves it to Needs Info, so your team knows to follow up.
- 3Decline asks for a reason, and records it.
- 4Print prints it or saves it as a PDF.
- 5To send a form, use Email a form for anyone, even someone with no chart, or Send to patient for their patient app.
Keep going
Bring in your intake forms
Upload the PDFs you use today and check each one, or start from our template. Then publish them and attach them to your visit types.
Read the guideForms and consents, start to finish
A visit is booked, its paperwork goes out, the patient fills it in at home or on a tablet, and the answers come back to you. Here is every step, and what your team signs.
Read the guideConsents
Your consent forms, and who has signed them. Send forms, hand the tablet over in the office, and keep your library of forms in order.
Read the guideCo-signatures
Everything waiting on your signature as a reviewer, oldest first. Read it, co-sign it or decline it, and choose whether you get an email when something new arrives.
Read the guideRather be shown?
Inside Aminova, the tutorial walks you through every page, and the Getting started checklist shows you each task click by click. Or book a live training session with our team.