1What you’ll set up
An intake form is the questionnaire a patient fills in before a visit: who they are, their health history, their goals. You can have as many as you like, like a long one for new patients and a short one for a single treatment.
When you’re done, each form is live, and the right ones go out on their own when a visit is booked.
2Open the Intake Engine
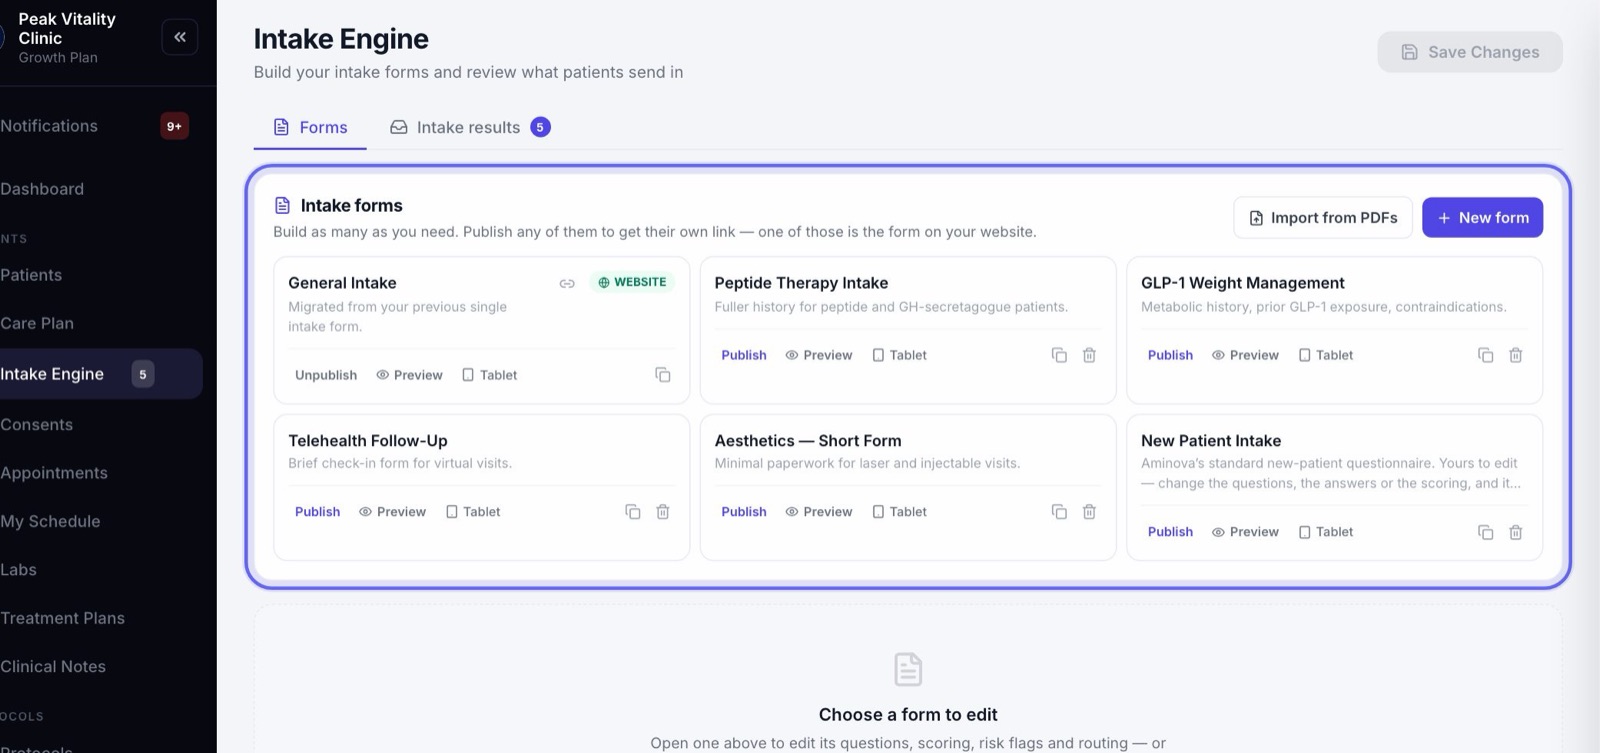
- 1Go to Intake Engine in the sidebar.
- 2Stay on the Forms tab. Your forms are listed at the top.
3Upload your PDFs
- 1Click Import from PDFs.
- 2Drop in your forms, or a whole folder. Blank or filled-in copies both work.
- 3Press the button that counts your files, like Import 3 PDFs. Keep the window open while it reads them.
- 4Each PDF becomes its own form, with its questions in the order they are printed. Anything worth a look is listed under it.
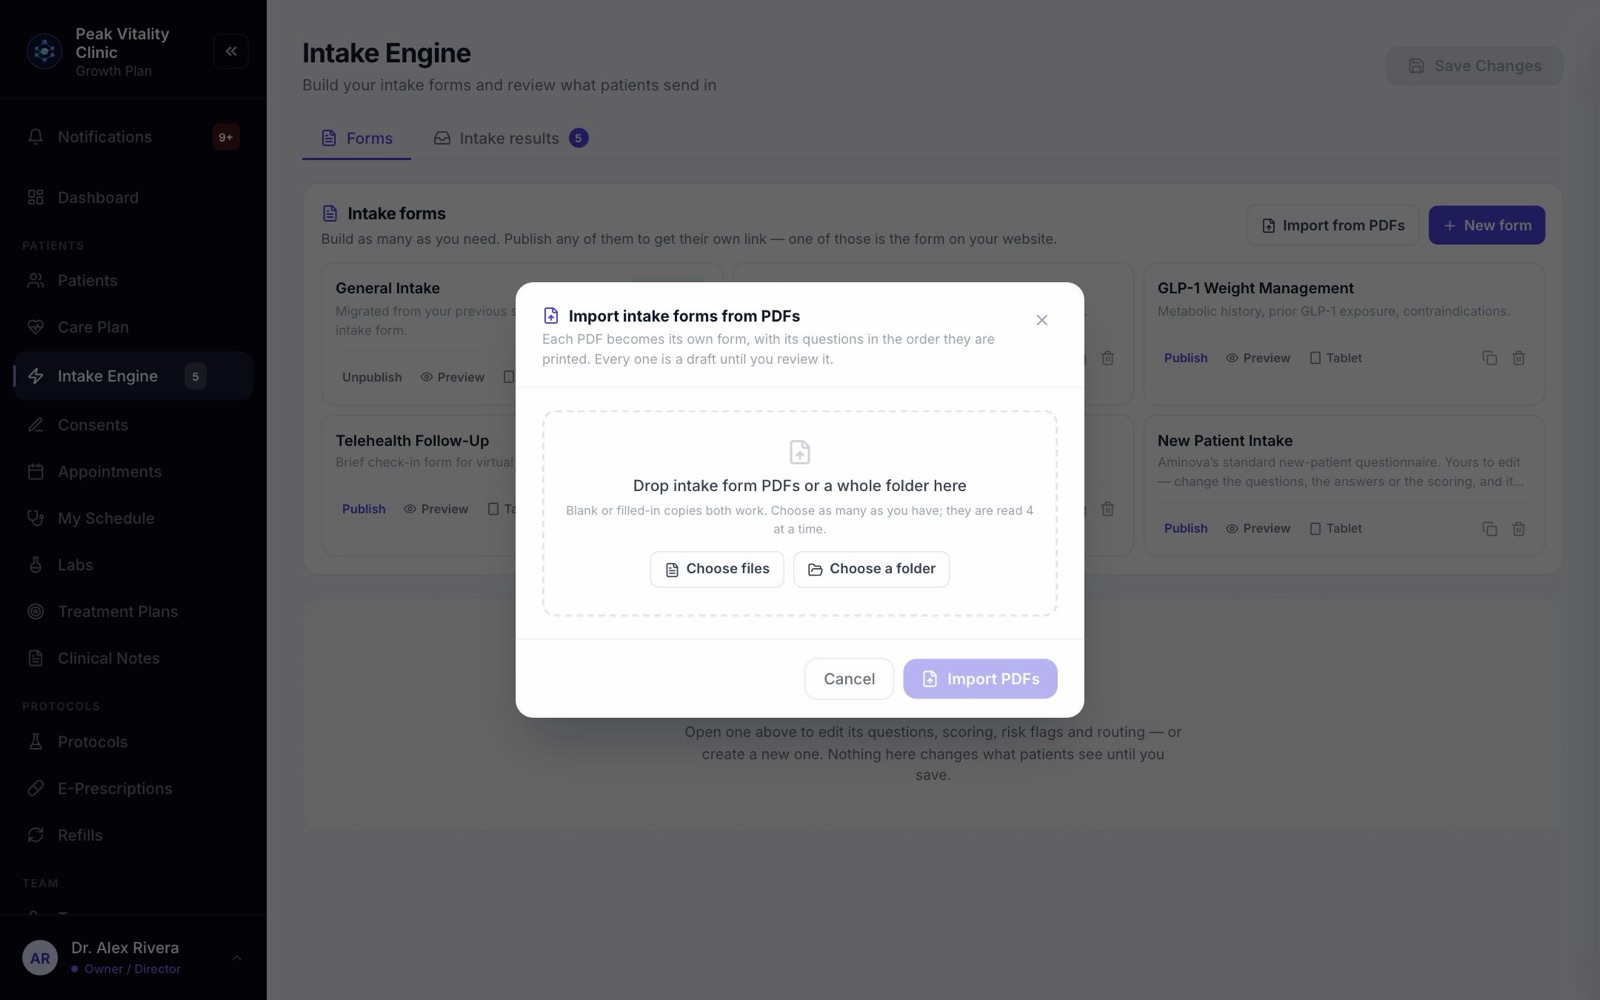
Nothing reaches a patient yet. Each form is saved as a draft, switched off and not on any link.
4Check each draft
- 1Press Review beside a form, or click its card in the list. It has a DRAFT tag.
- 2Read every question. Hover one and click Edit to fix its wording, its answer type or its choices.
- 3A question marked No answer options — patients get a text box needs its choices added in Edit.
- 4Use Move to put a question in another section, and the arrows on a section to reorder the form.
- 5Switch off or delete anything you don’t need.
5Or start from a template
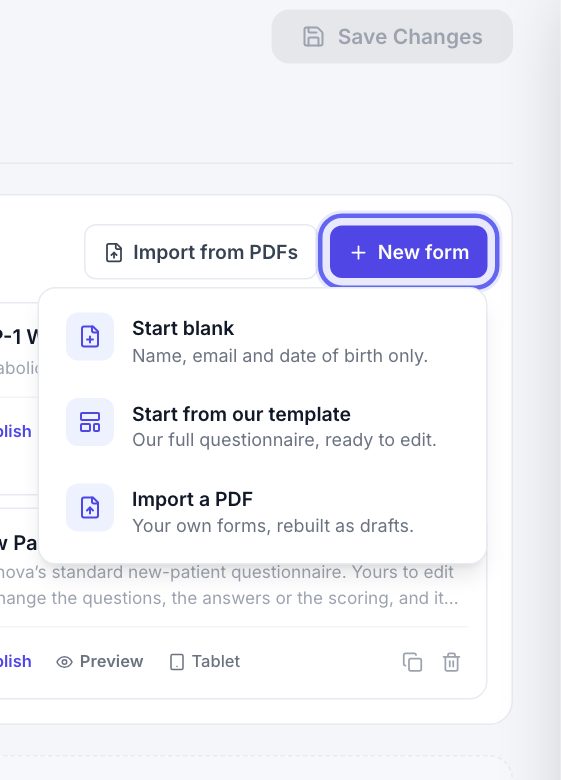
- 1Click New form.
- 2Choose Start from our template for a full questionnaire you cut down, or Start blank for just name, email and date of birth.
- 3The name is ready to change. Type yours and press Enter.
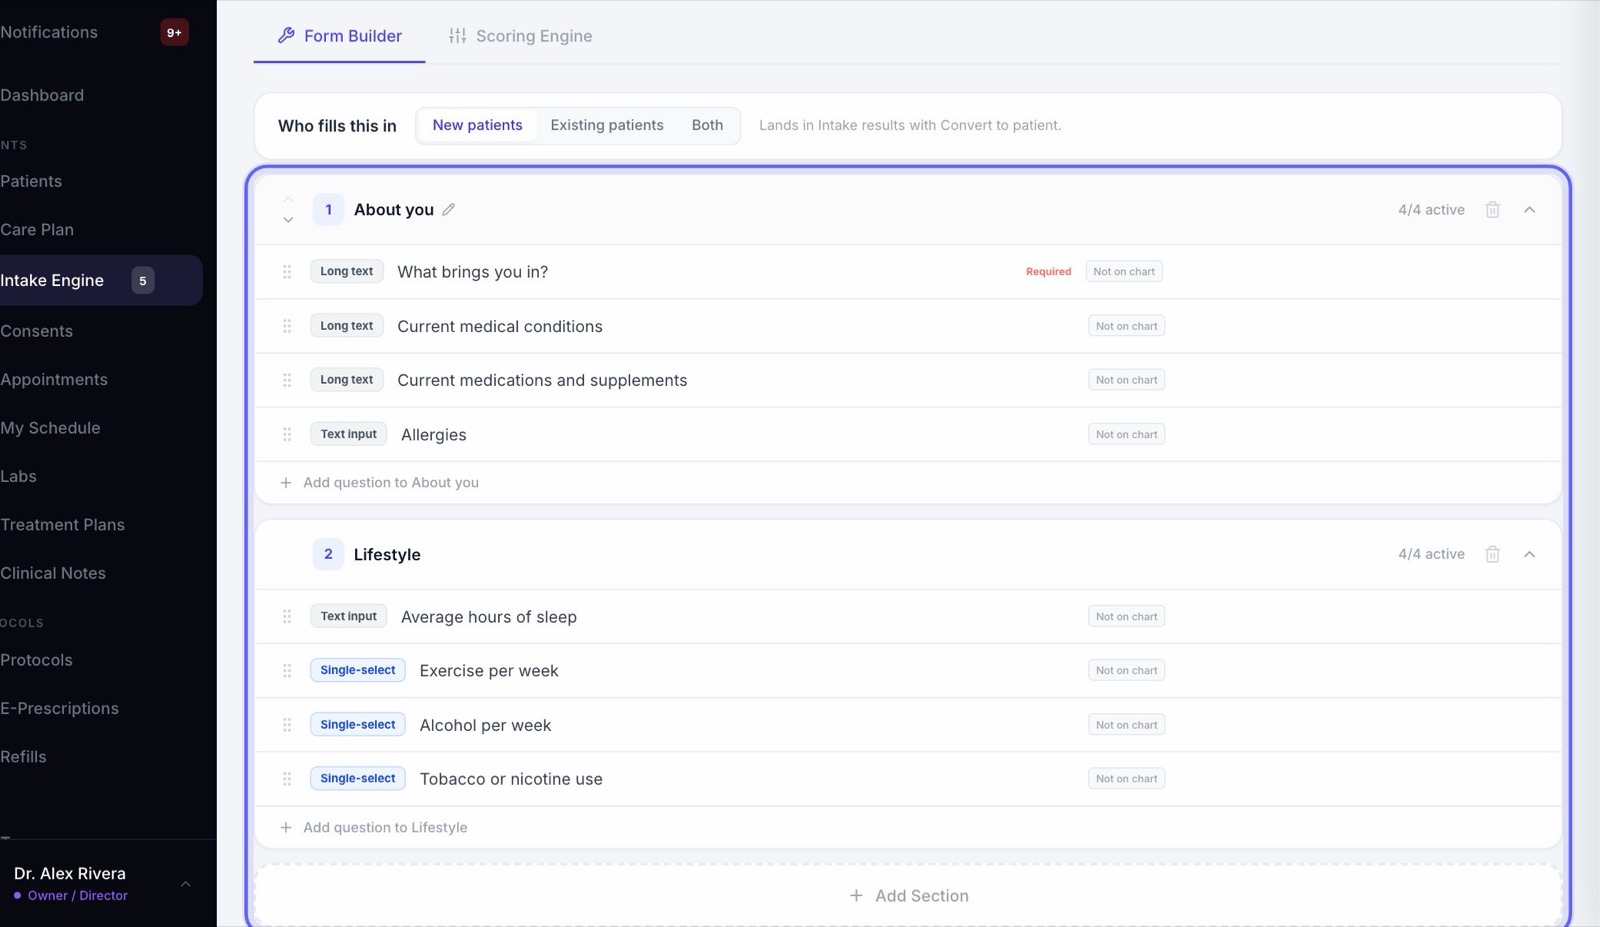
- 4Add sections with Add Section, and questions with each section’s Add question to … line.
6Choose who fills it in
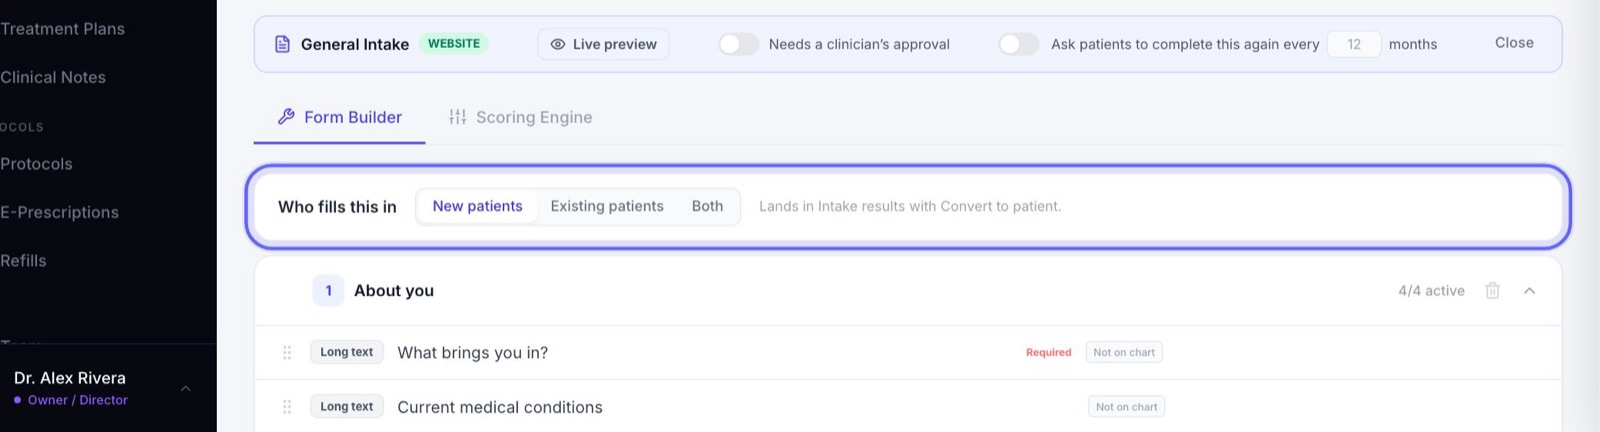
- 1At the top of the builder, find Who fills this in.
- 2Pick New patients for a form that makes a new chart, Existing patients for one that goes on a chart you already have, or Both.
7Send answers to the chart
- 1A question that shows Not on chart keeps its answer with the form only.
- 2Hover it and click Chart, then pick where it belongs, like allergies or medications.
- 3Do this for every answer your providers need on the chart.
8Decide if a clinician approves it
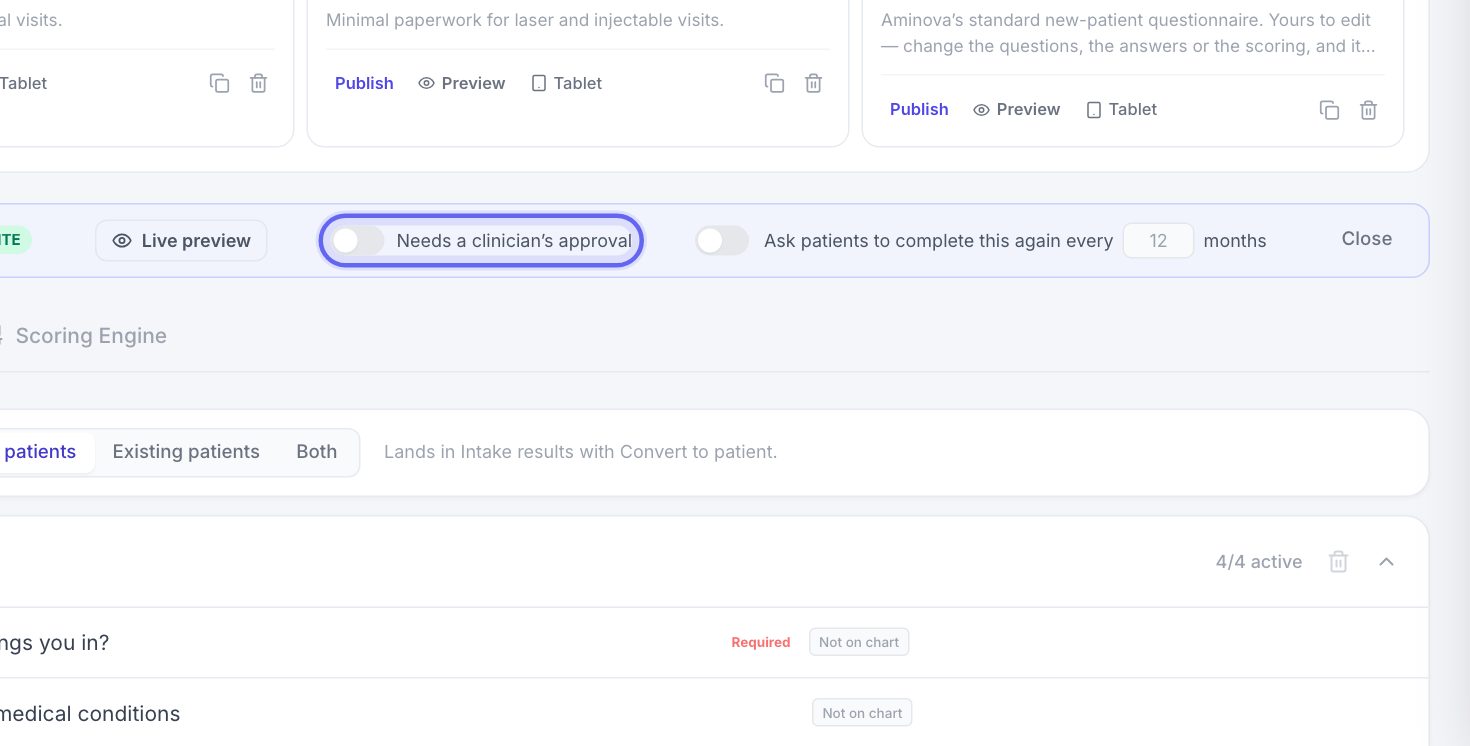
- 1If a clinician must review each submission before treatment, turn on Needs a clinician’s approval.
- 2Choose who is told: Notify all staff, A specific person, or Whoever holds a role.
- 3This saves as soon as you flip it.
9Save and preview
- 1Press Save Changes at the top of the page. Your changes reach patients only after you save.
- 2Click Live preview to see the form beside the builder, or Preview on its card to open it the way a patient does.
10Publish it
- 1Press Publish on the form’s card, or beside NOT PUBLISHED above the builder.
- 2It now says LIVE and has its own link. Click the link icon beside its name to copy it.
- 3For the form on your website, press Use on website on its card. It gets the WEBSITE tag.
A draft from your PDFs can’t be sent to patients until you publish it.
11Attach it to your visit types
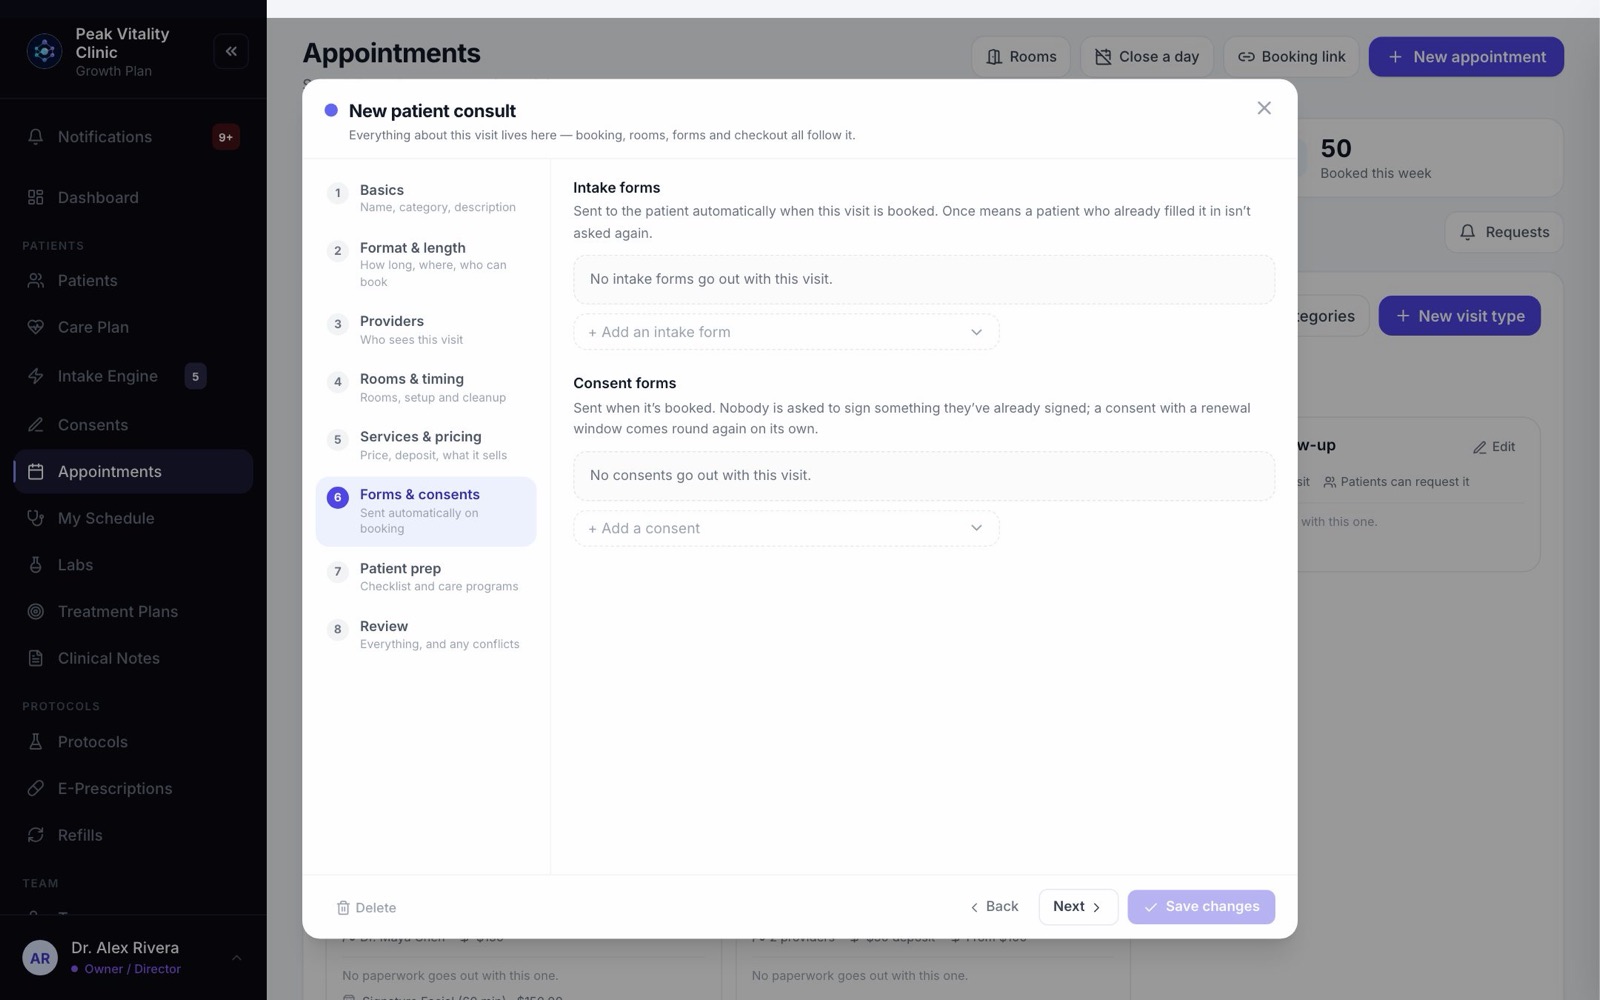
- 1Go to Appointments → Visit types and press Edit on a visit.
- 2Open Forms & consents and click Add an intake form.
- 3Choose Once, so a patient who already filled it in isn’t asked again, or Every visit for a check-in form.
- 4Press Save changes. From now on the form goes out on its own when this visit is booked.
12Ask again every year, if you need to
Some forms need filling in again, like a yearly health history. Open the form and turn on Ask patients to complete this again every, then set the months. Patients whose answers are older than that are asked again and emailed the link.
That’s it. Your intake forms are ready.
Keep going
Intake Engine
Build the forms patients fill in, choose where their answers go, and review what they send you.
Read the guideSet up your visit types and booking link
Build each kind of visit once: its length, providers, rooms, price and forms. Then turn on the link patients book from.
Read the guideForms and consents, start to finish
A visit is booked, its paperwork goes out, the patient fills it in at home or on a tablet, and the answers come back to you. Here is every step, and what your team signs.
Read the guideSet up your consent forms
Bring in the consent PDFs you use today, place the signature boxes, and decide who signs each one and how often. Then attach them to your visit types.
Read the guideRather be shown?
Inside Aminova, the tutorial walks you through every page, and the Getting started checklist shows you each task click by click. Or book a live training session with our team.