1What you’ll set up
A consent form is a document the patient signs, like a treatment consent or a financial policy. Each one lives in your Document Library, with boxes placed where the patient, and sometimes the clinic, signs.
When you’re done, patients sign them in their patient app or on a tablet in the office, and they come round again when they need renewing.
2Open the Document Library
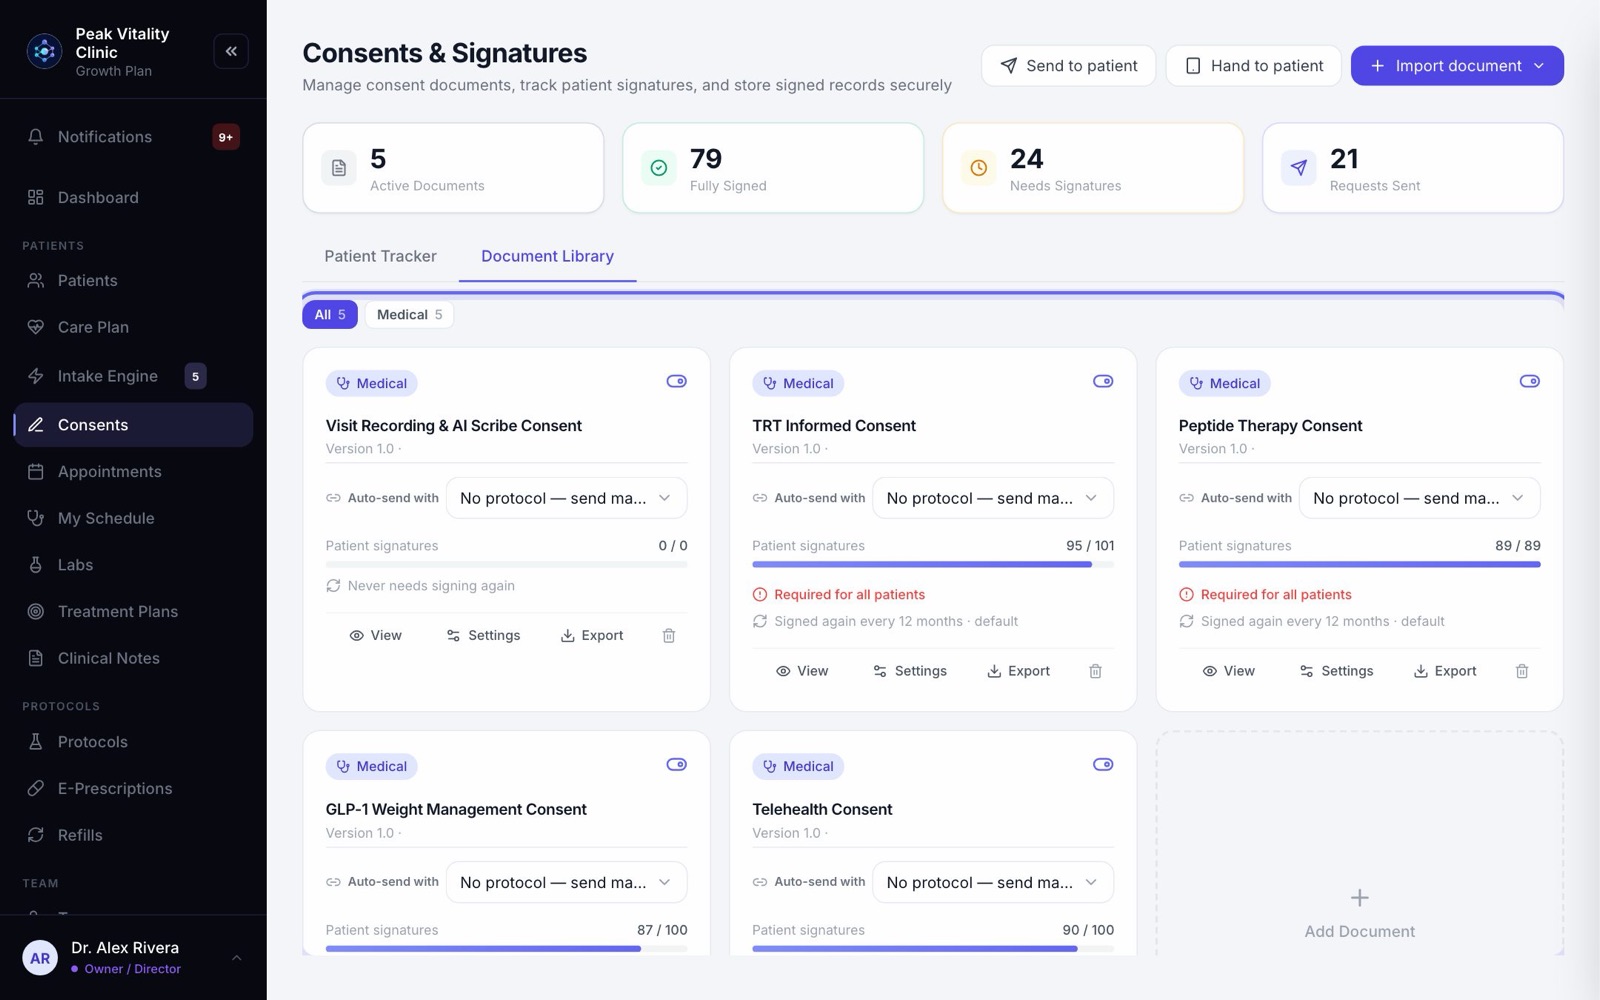
- 1Go to Consents in the sidebar.
- 2Click the Document Library tab. Each form is a card.
3Upload one PDF
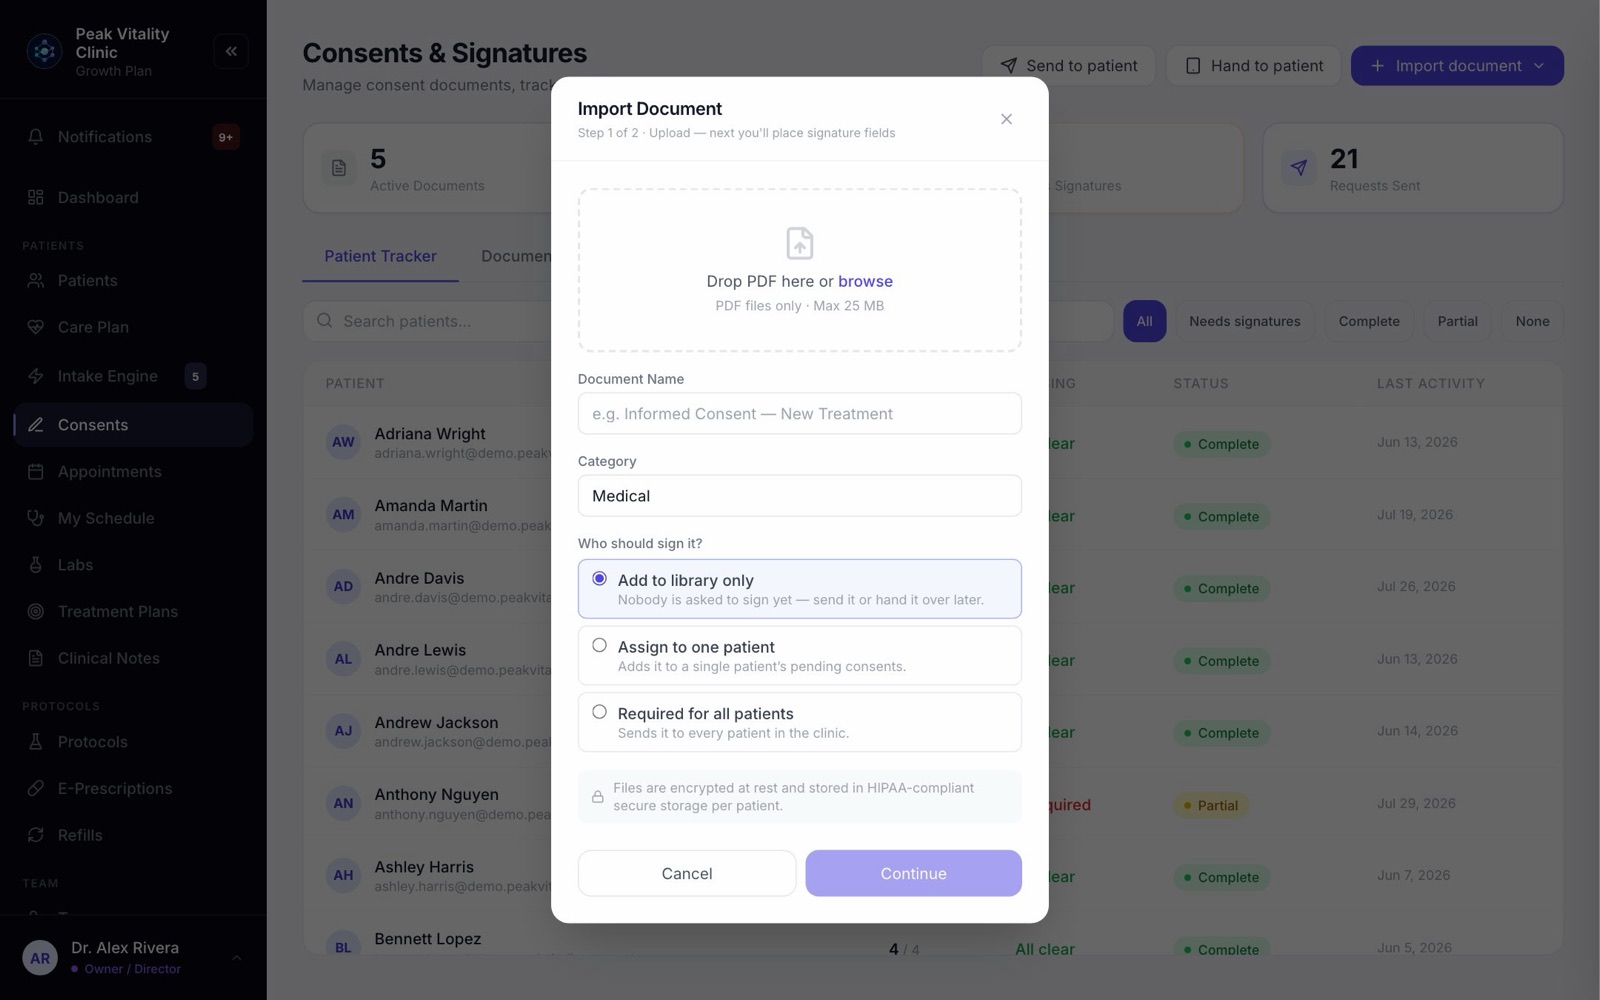
- 1Click Import document, then Upload a PDF.
- 2Drop in the PDF, or click to choose it.
- 3Check the Document Name, and pick a Category. You can type a category of your own.
- 4Under Who should sign it?, choose Add to library only, Assign to one patient, or Required for all patients. Not sure? Pick the first. You can change it later.
- 5Press Continue.
4Place the signature boxes
- 1The document opens for step 2. First choose who you’re placing for: Patient or Clinic / Staff.
- 2Pick Signature, Date, Text or Check, then click the page where it goes.
- 3Drag a box to move it, and its corner to resize it. Its tag says REQ or OPT. Click the tag to switch between required and optional.
- 4Press Save. The form is ready to sign.
Boxes for the clinic are for your team to fill in after the patient signs. The patient only fills in their own.
5Many PDFs at once
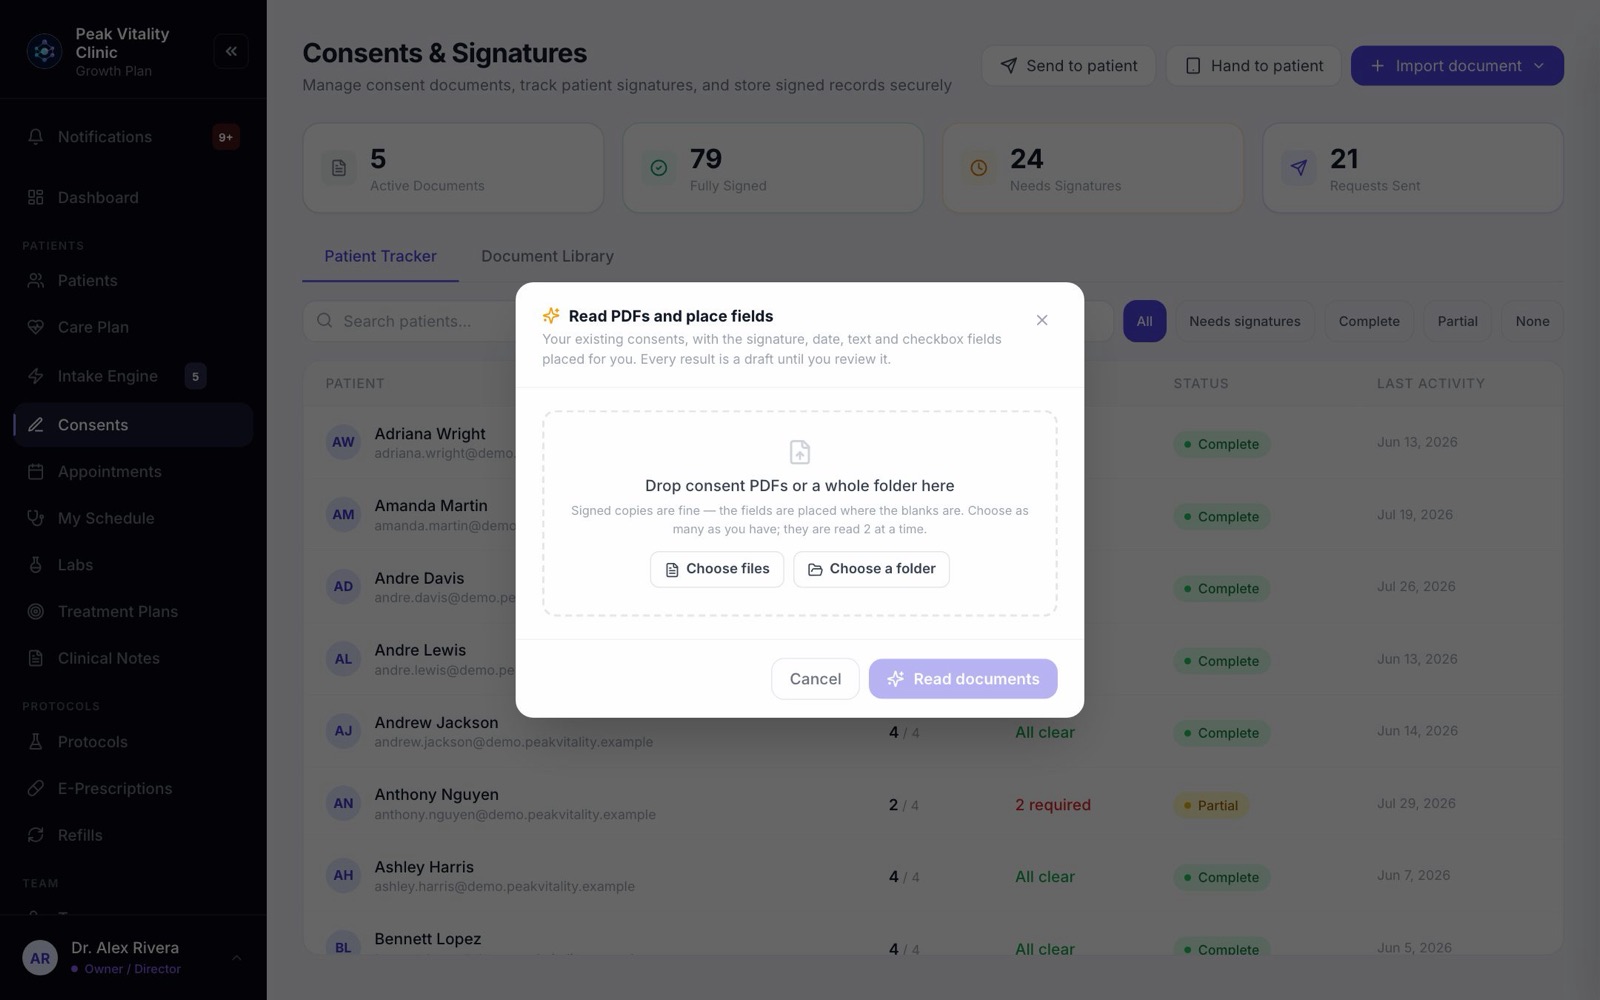
- 1Click Import document, then Read PDFs and place fields.
- 2Drop in your consent PDFs, or a whole folder. Signed copies are fine.
- 3Press the button that counts them, like Read 12 documents. Keep the window open while it works.
- 4Each PDF comes back with its boxes already placed, saved switched off. Press Review on each one.
6Check the placed boxes, then switch it on
- 1In the library, a form that still needs checking says Review placed fields.
- 2Open it. Check each box is on the right line and belongs to the right person. Fix any that aren’t, then press Save.
- 3Turn on the switch in the card’s top corner. Now patients can be asked to sign it.
7A PDF already in your Documents
If the form is already saved in your clinic’s Documents, choose Import document → From Document Library and pick it. It then goes through the same steps as an upload. A PDF that is already a consent says Already a consent, so you don’t add it twice.
8Decide who must sign it
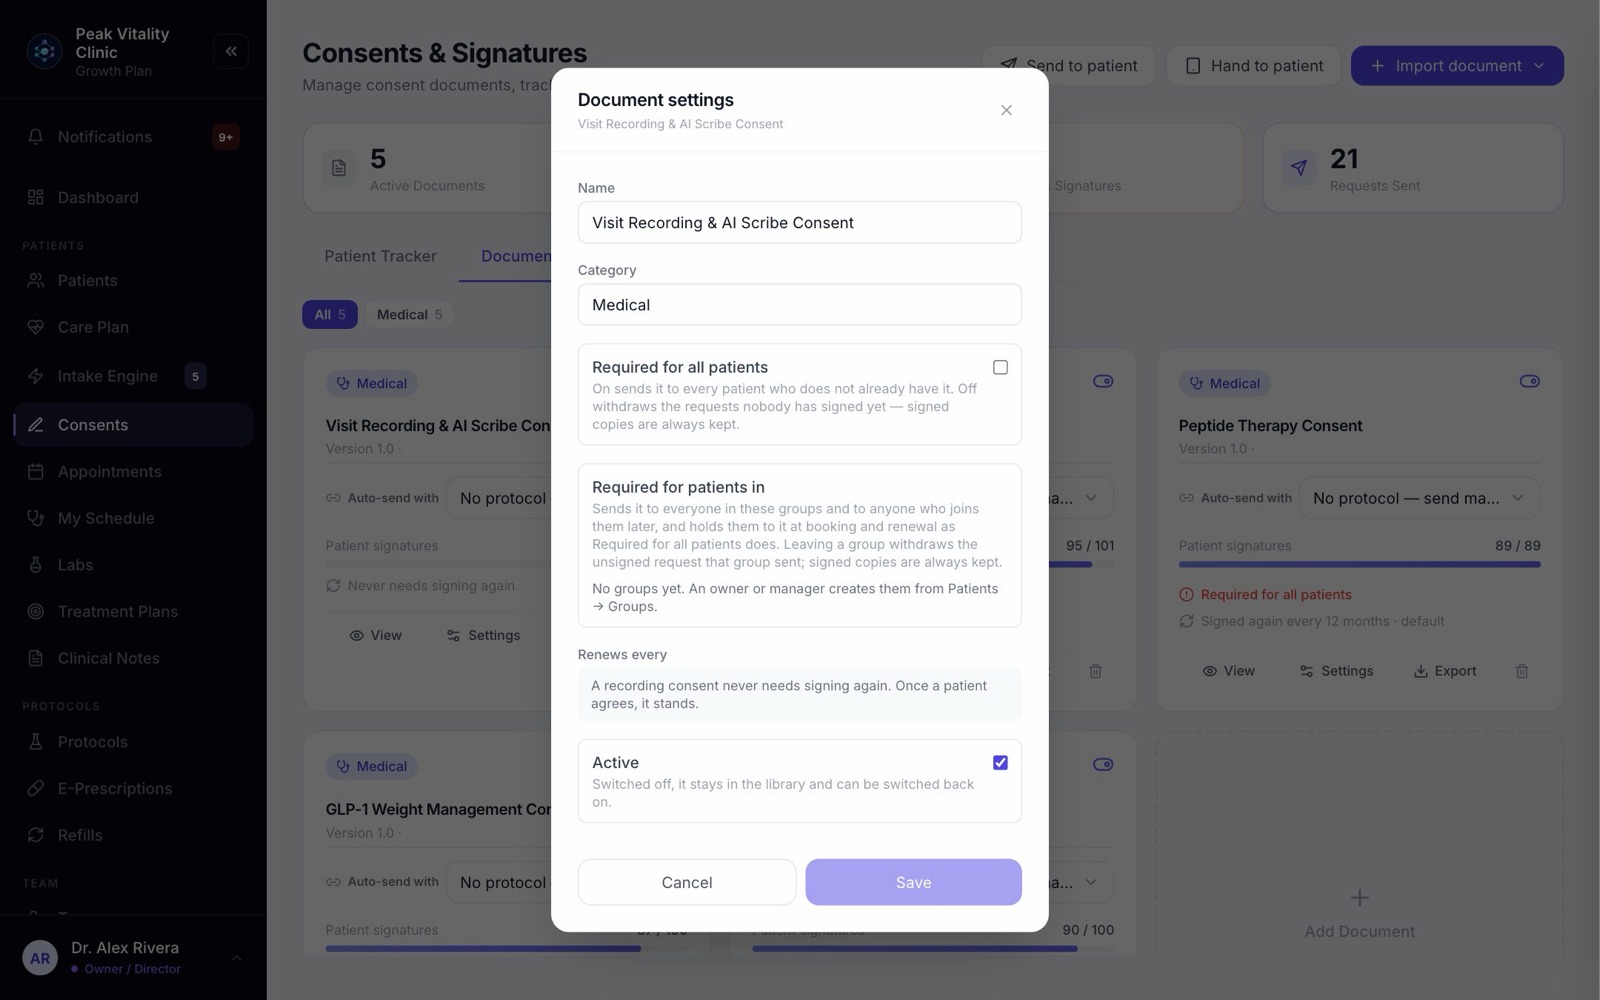
- 1Press Settings on the form’s card.
- 2Turn on Required for all patients for a form everyone signs, like your privacy notice. It goes to every patient who doesn’t have it yet.
- 3Or tick groups under Required for patients in. You make groups under Patients → Groups.
- 4Leave both off for a form that only goes with certain visits.
9Set how often it is signed again
- 1In the same Settings, choose Renews every.
- 2Default means required forms every 12 months, and other forms never. Or pick Never, 6 months, 12 months, 24 months, or Custom number of months.
- 3Press Save. The card now says how often it is signed again.
- 4When a signature lapses, the form goes back into the patient’s app to sign again, and the tracker says Expired — re-sign.
Making the time shorter lapses every older signature the moment you save, and those patients are asked to sign again.
10Attach it to your visit types
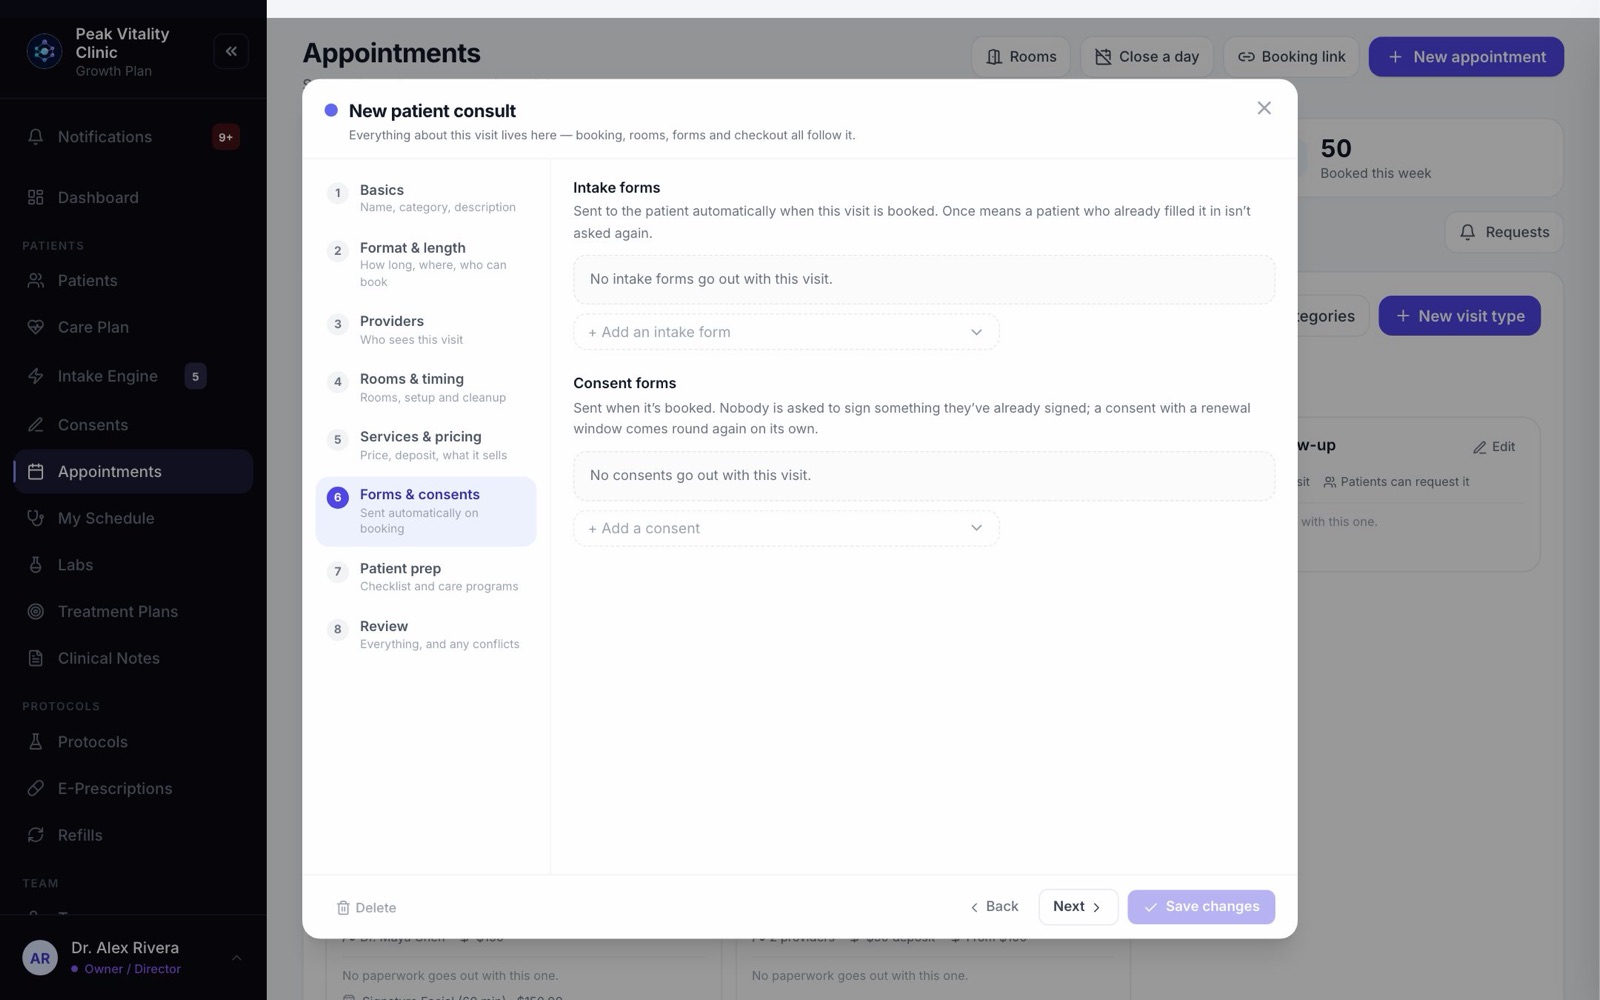
- 1Go to Appointments → Visit types and press Edit on a visit.
- 2Open Forms & consents and click Add a consent.
- 3Press Save changes. The consent goes out on its own when this visit is booked. Nobody is asked to sign one they already signed.
11Send it with a protocol, if you like
On the form’s card, Auto-send with links it to a protocol. Anyone enrolled in that protocol from then on gets the form. You’re asked if it should also go to patients already on it.
12See who has signed
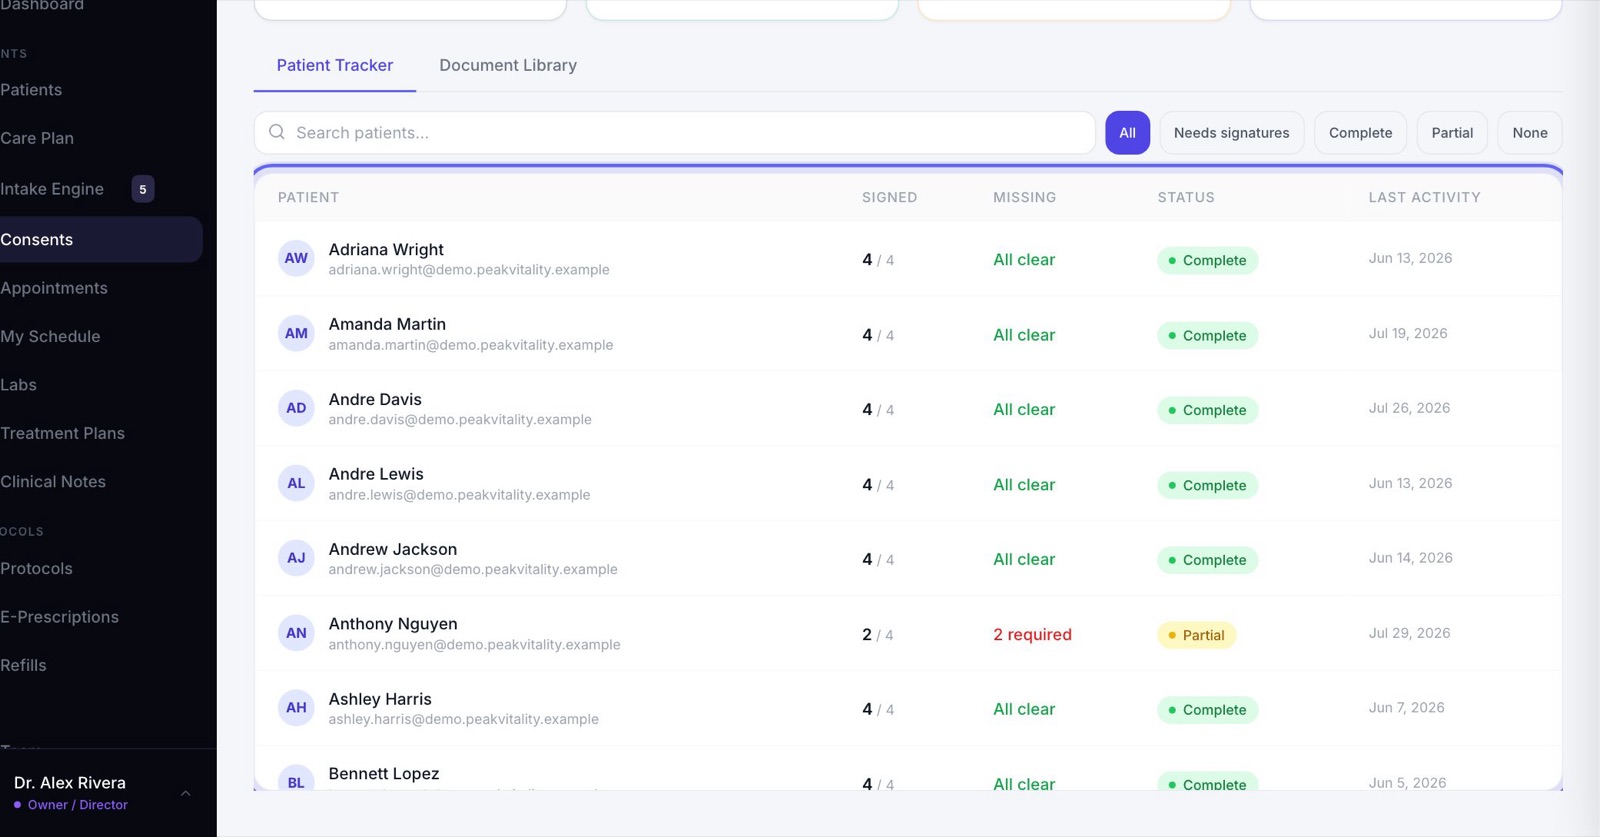
Open the Patient Tracker tab. Each patient shows what they signed and which required forms they still owe.
That’s it. Your consent forms are ready.
Keep going
Consents
Your consent forms, and who has signed them. Send forms, hand the tablet over in the office, and keep your library of forms in order.
Read the guideSet up your visit types and booking link
Build each kind of visit once: its length, providers, rooms, price and forms. Then turn on the link patients book from.
Read the guideForms and consents, start to finish
A visit is booked, its paperwork goes out, the patient fills it in at home or on a tablet, and the answers come back to you. Here is every step, and what your team signs.
Read the guideBring in your intake forms
Upload the PDFs you use today and check each one, or start from our template. Then publish them and attach them to your visit types.
Read the guideRather be shown?
Inside Aminova, the tutorial walks you through every page, and the Getting started checklist shows you each task click by click. Or book a live training session with our team.