1The page at a glance
Open a chart by clicking a patient on the Patients page. At the top is the header: who they are, how to reach them, and your quick actions. Below it is a row of tabs, one for each part of their record.
You only see the tabs your role can open. Back to Patients at the top left takes you back to the list.
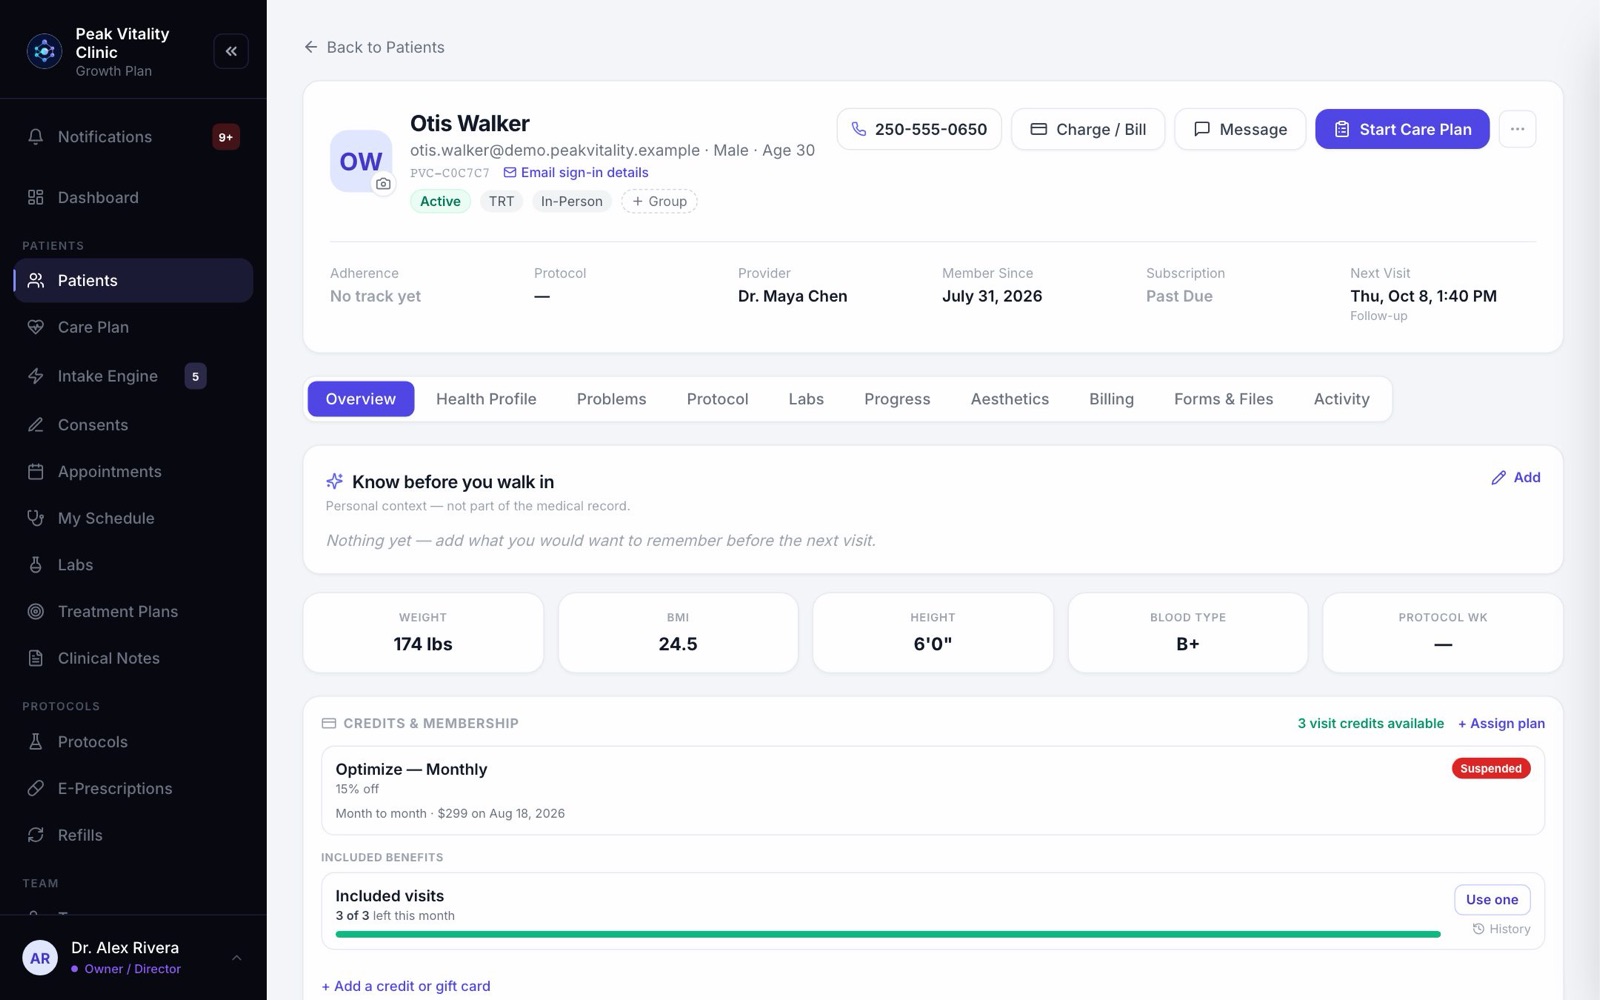
2The header
- 1Click the photo to add or change it.
- 2Under the name are their email, sex and age, then their portal ID with a button to email them their sign-in details.
- 3If the chart has no portal ID yet, an amber note says what is missing. Add it and save, and the ID is issued on its own.
- 4The colored tags show their status, protocols, tags and groups. Press Group, the dashed tag with a plus, to add them to a group.
- 5The strip along the bottom shows Adherence, Protocol, Provider, Member Since and Next Visit, plus Subscription for people who see money. Hover Provider and click the pencil to switch provider.
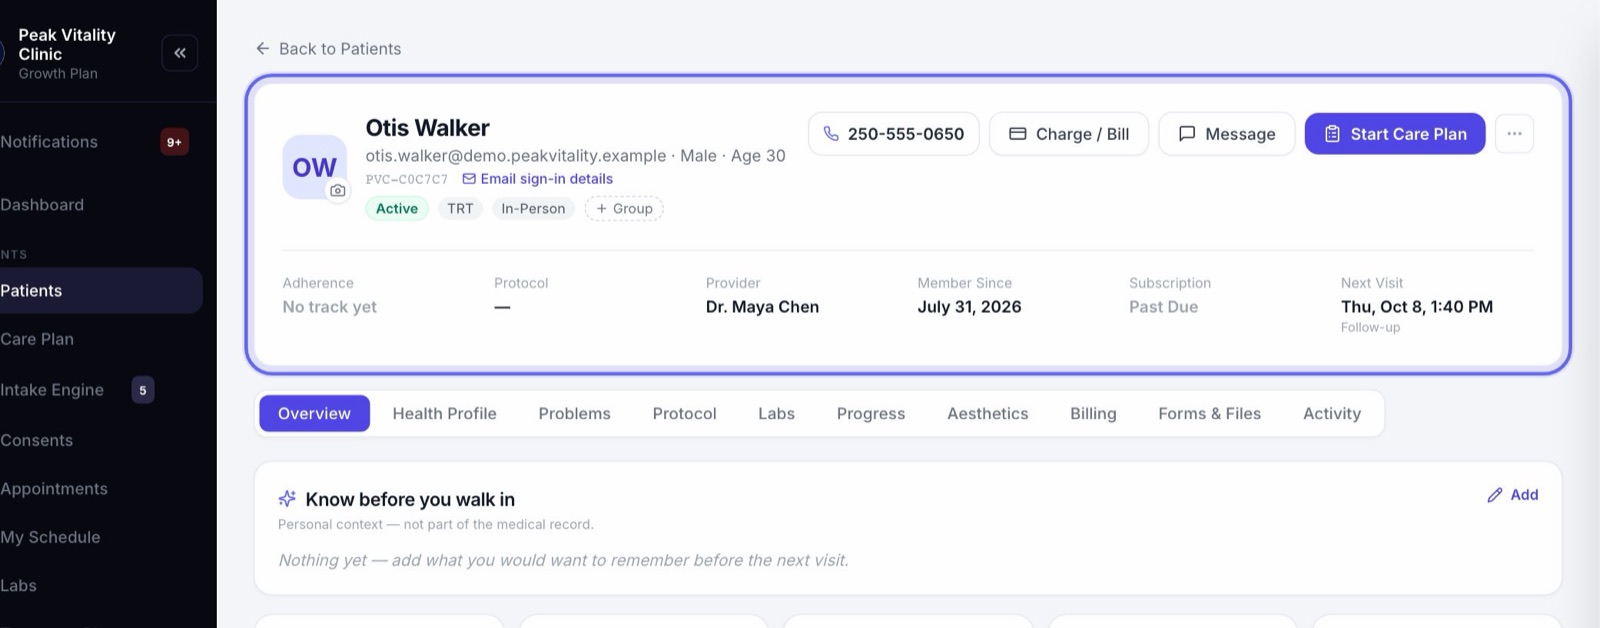
3Quick actions
- 1Click their phone number to call them from your own phone. Afterwards, pick how the call went and add a note if you like. It’s saved to the chart. Closing the question saves nothing.
- 2Charge / Bill opens Collect payment: Charge a card now, or Email a bill they pay later. A practice patient never gets a bill.
- 3Message opens a small chat window. What you send goes to their patient app.
- 4Start Care Plan opens the Care Plan page for this patient.
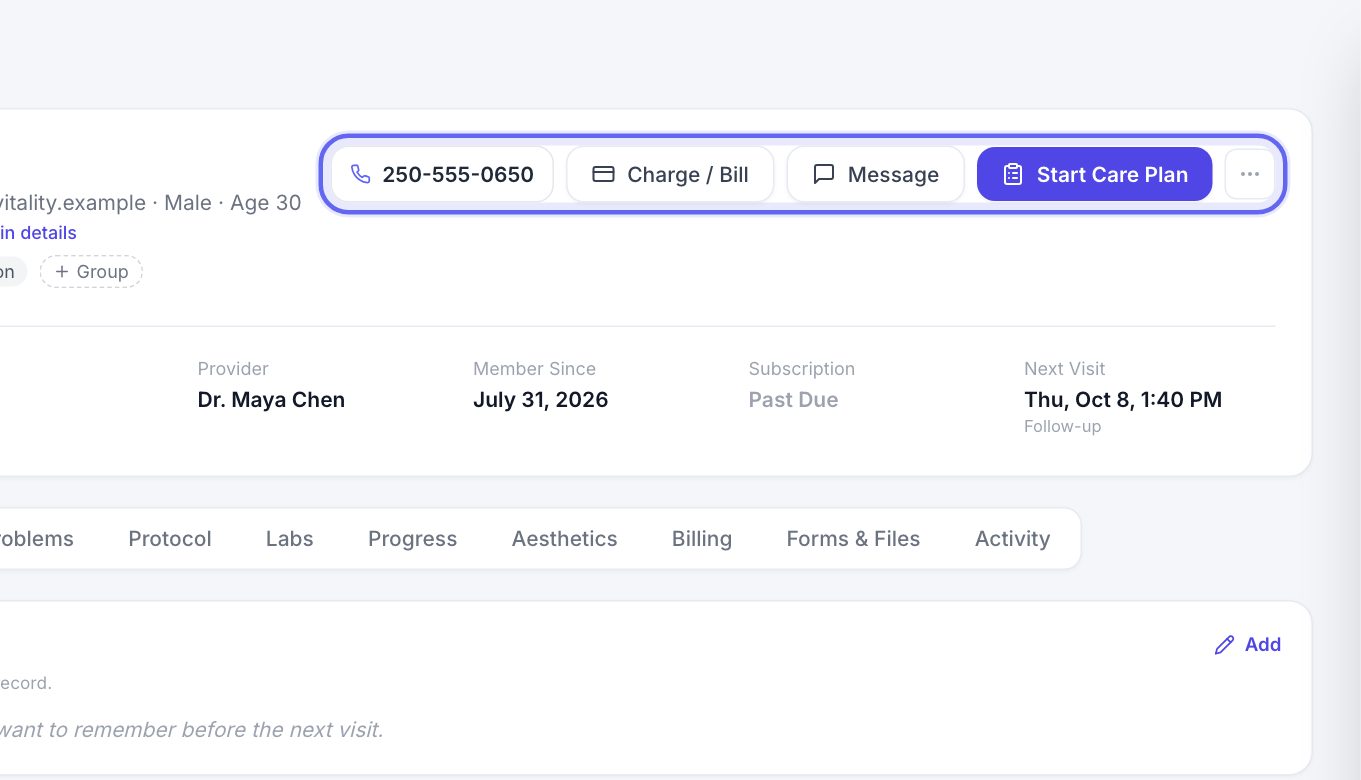
4The three-dot menu
- 1Edit Profile opens their Health Profile ready to change. Change Status sets them Active, Pending, Inactive or Archived. Assign Provider picks their provider.
- 2Send Message opens the chat. Request Refill starts a refill for them.
- 3Prescribers also see Record Outside Rx, for a prescription written somewhere else.
- 4Discharge / Transfer marks them discharged or transferred, with a reason. A banner then shows on the chart, with Reactivate to undo it.
- 5Archive Patient moves them to Archived Patients. Owners and managers also see Delete Patient.
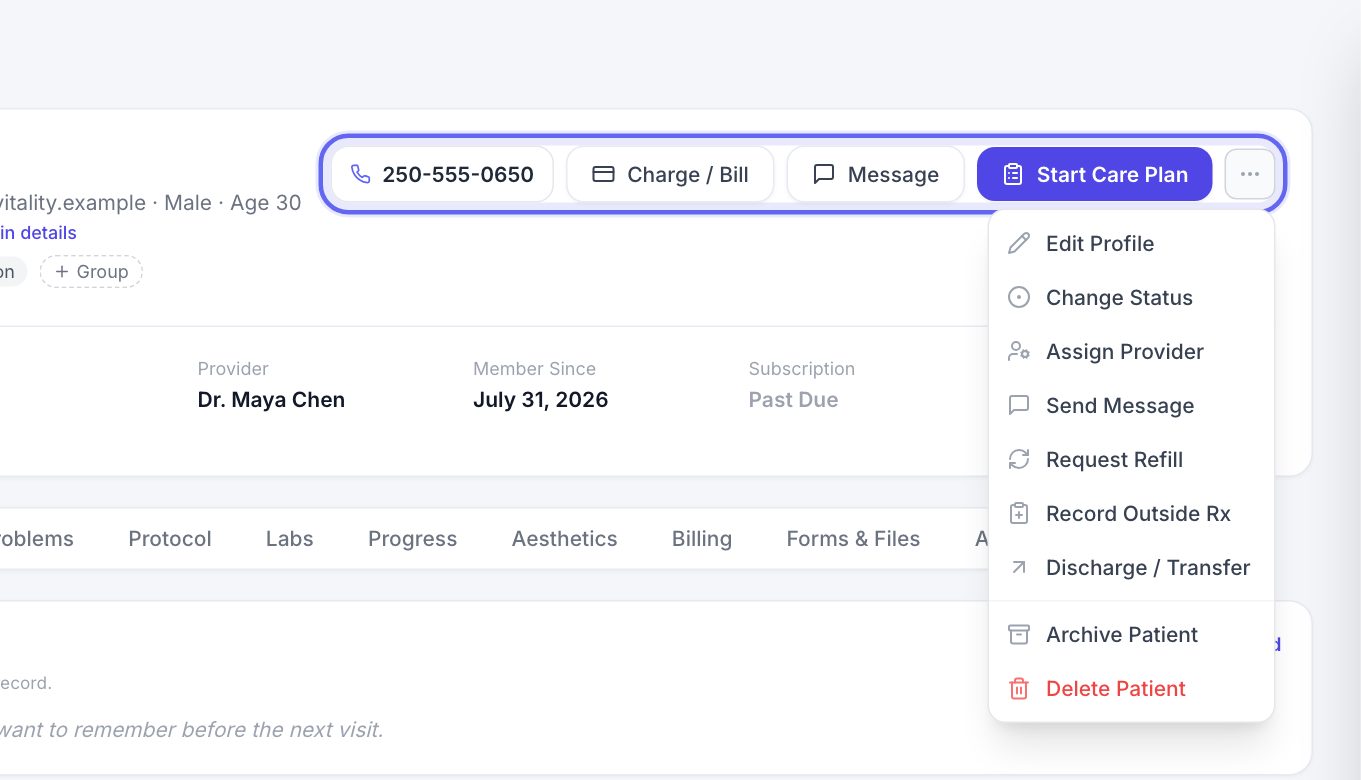
5Overview
- 1Know before you walk in is for personal things worth remembering, like their kids’ names or a trip. It isn’t part of the medical record. Press Add or Edit.
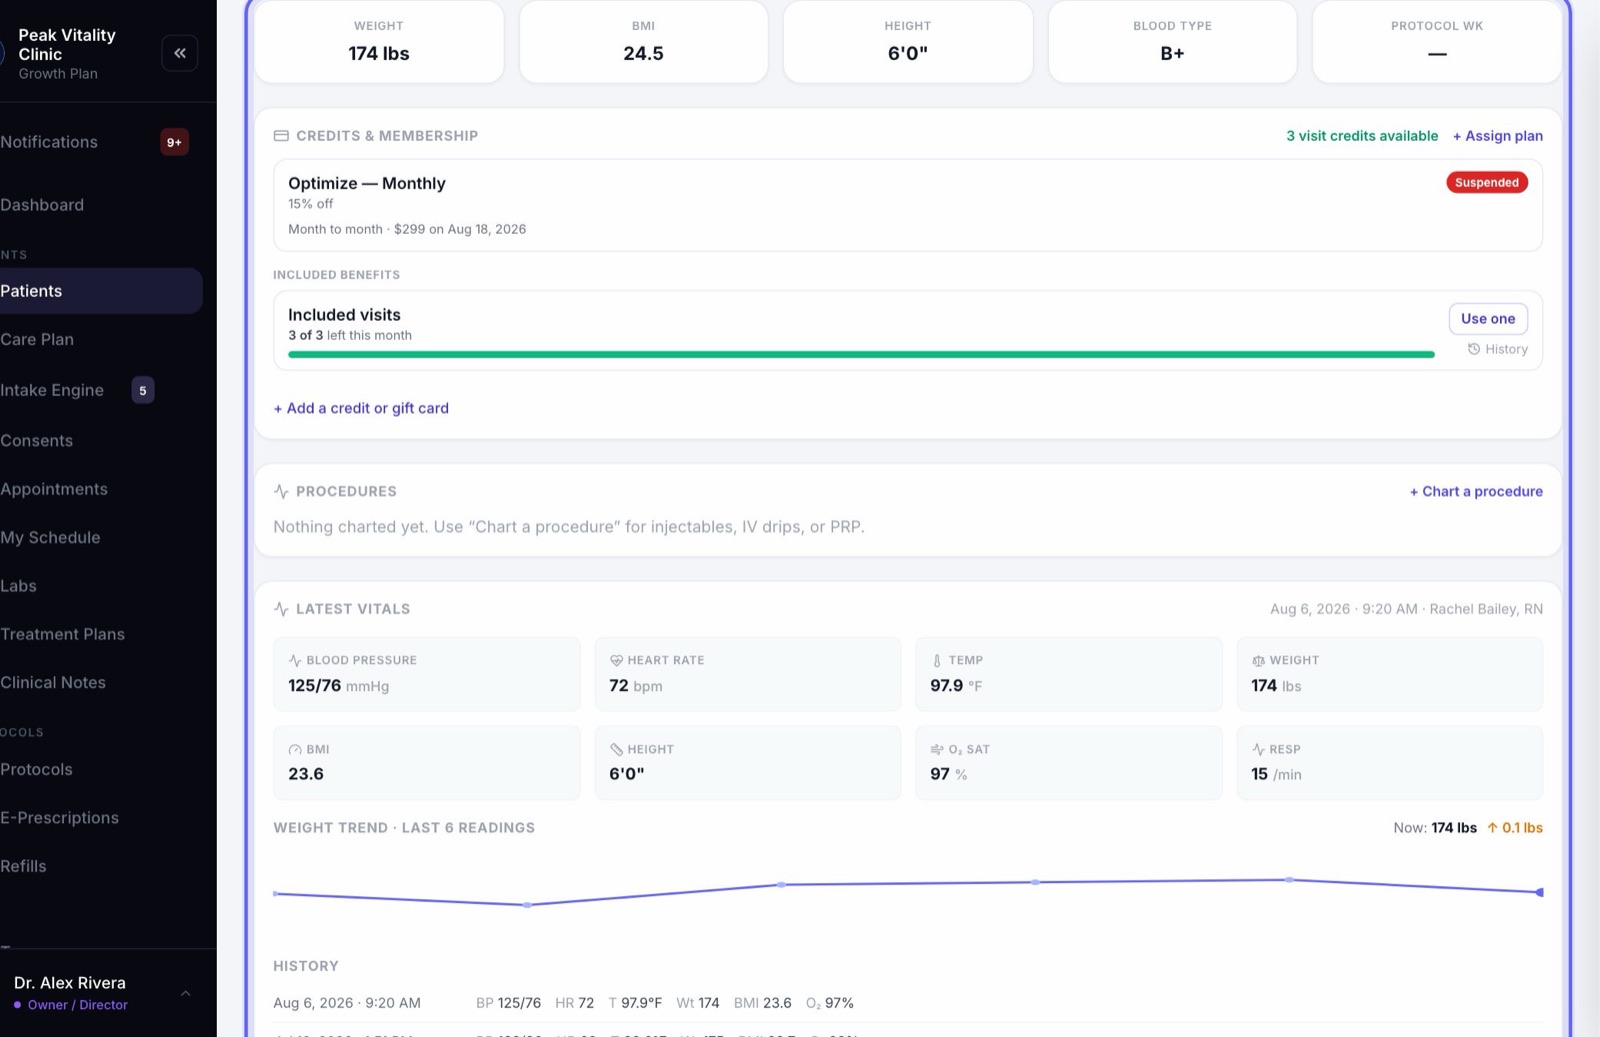
- 2Next come their weight, BMI, height, blood type and protocol week.
- 3Credits & Membership shows their visit credits and memberships. + Assign plan gives them a membership or package.
- 4Procedures lists charted procedures. + Chart a procedure records one, like an injectable or an IV drip.
- 5Vitals shows the latest reading, the weight trend and recent history. With none recorded yet, Record Vitals adds the first.
6Further down the Overview
- 1Amber and red flags point out things to check, like no active protocol or a lab value out of range.
- 2Adherence History shows how well they kept to their protocol, week by week.
- 3Active Medications lists what they take. If e-prescribing is set up, Full history shows what they’ve been prescribed anywhere, including at other practices.
- 4Upcoming Appointments and Recent Activity show what’s next and what happened lately.
- 5Automations, at the bottom, shows the workflows they’re in and what was sent to them.
7Health Profile
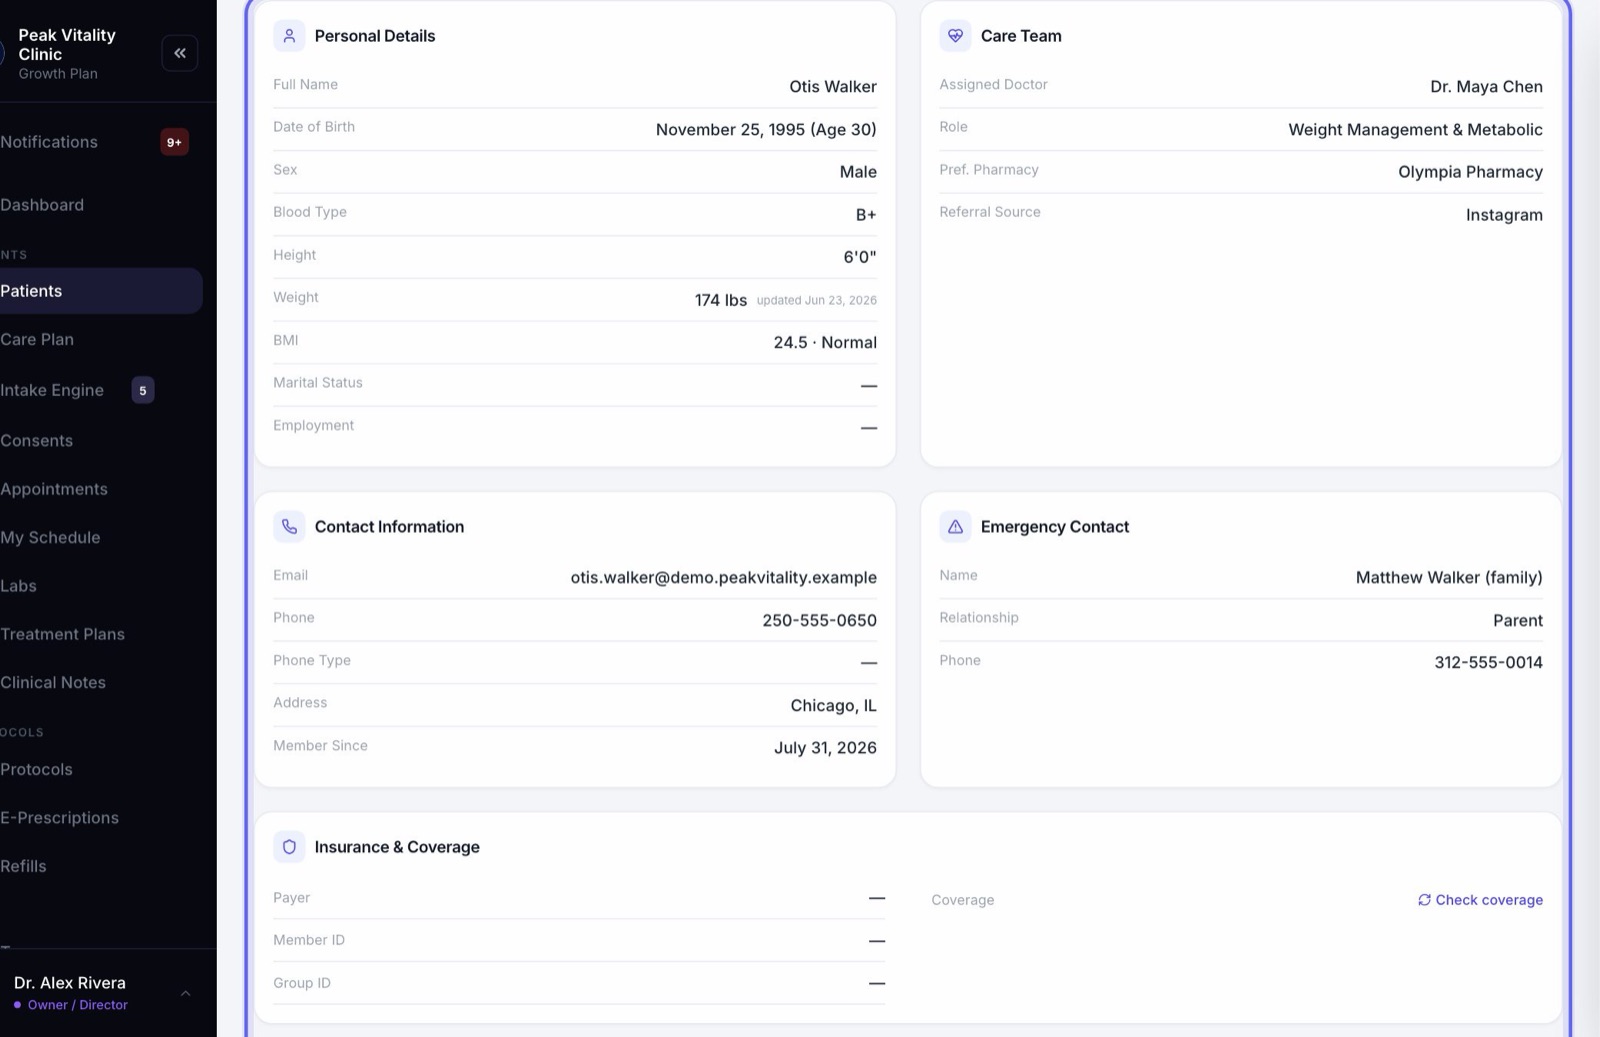
- 1Cards hold their personal details, care team, contact details, emergency contact and insurance.
- 2Health Profile holds their goals, conditions and allergies. Below it are their current medications and supplements.
- 3Lifestyle Snapshot fills in from an intake form or their app. If it’s empty, Send an intake form asks them for it.
- 4Press Edit Profile to change anything, then Save Changes.
- 5Kiosk Mode turns the screen over to the patient. They see only the fields still blank, and what they type saves straight to the chart.
8Problems
The Problem List shows their active and resolved problems. Press Add problem to add one.
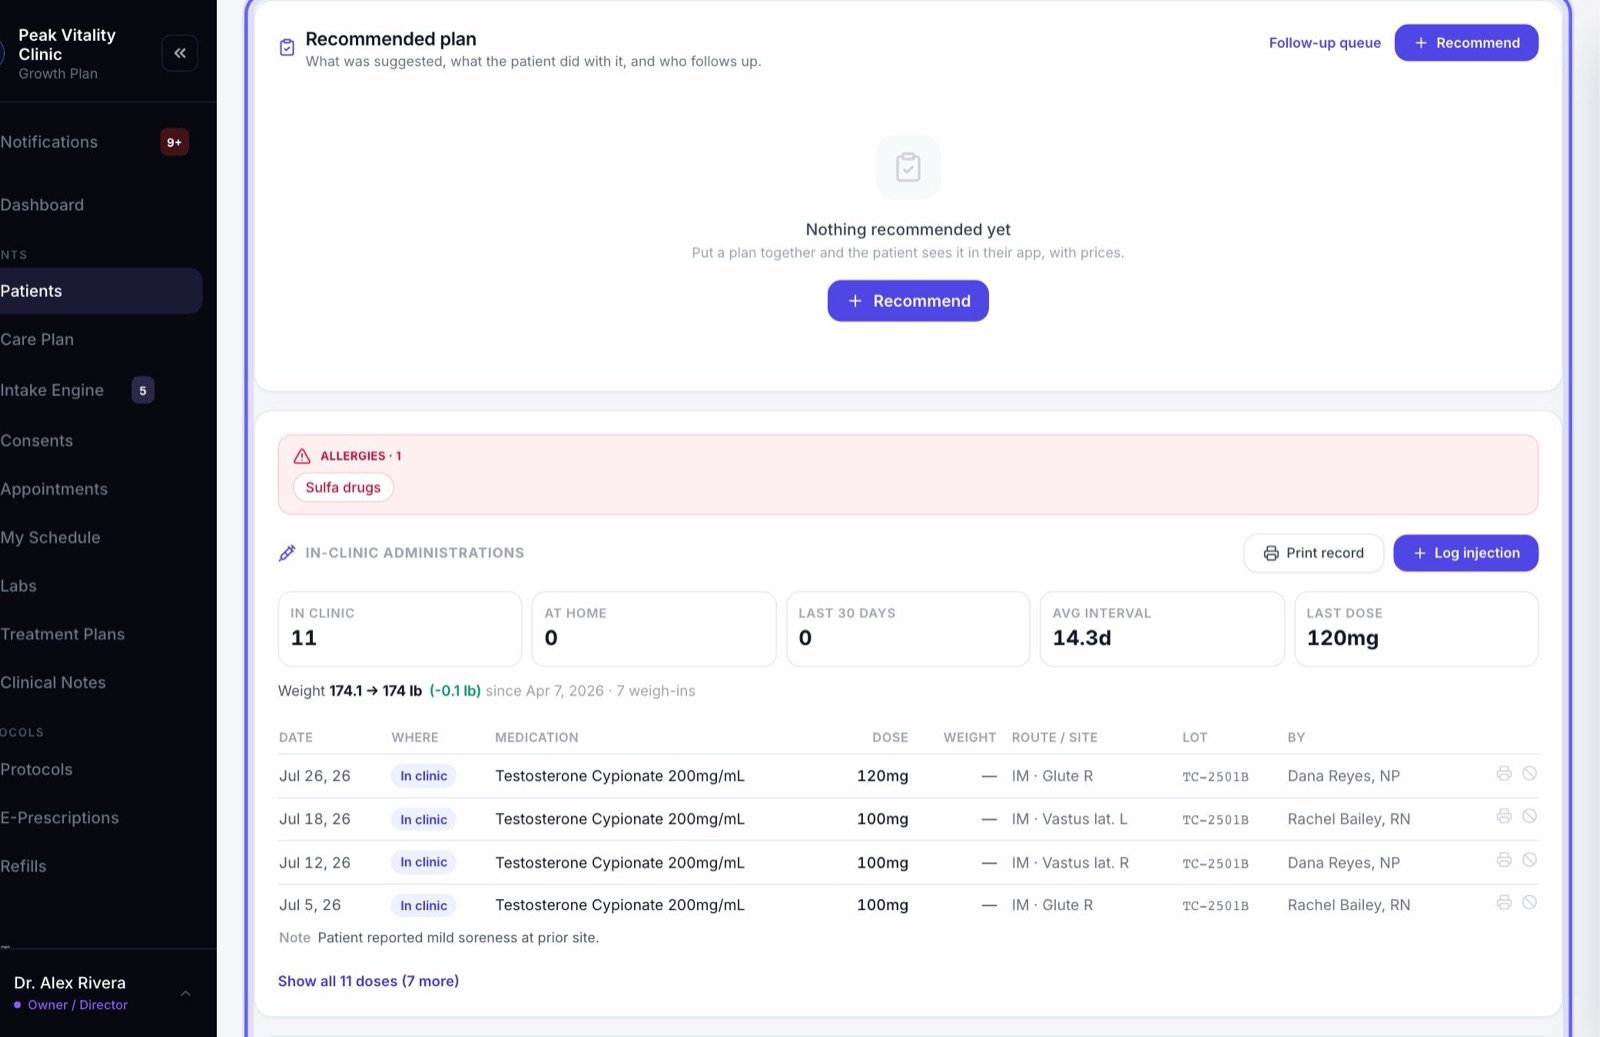
Their allergies show at the top so nobody misses them. You change allergies on the Health Profile tab.
9Protocol
- 1Recommended plan is what you’ve suggested and what the patient did with it. Recommend adds a new one. Follow-up queue opens everyone’s follow-ups.
- 2In-clinic administrations lists injections given here. Log injection records one, and Print record prints the log.
- 3Patient check-ins shows what the patient logged themselves, kept apart from what your team records.
- 4Below are the treatment plans they’re on, phase by phase. Assign Protocol puts them on one.
10Labs
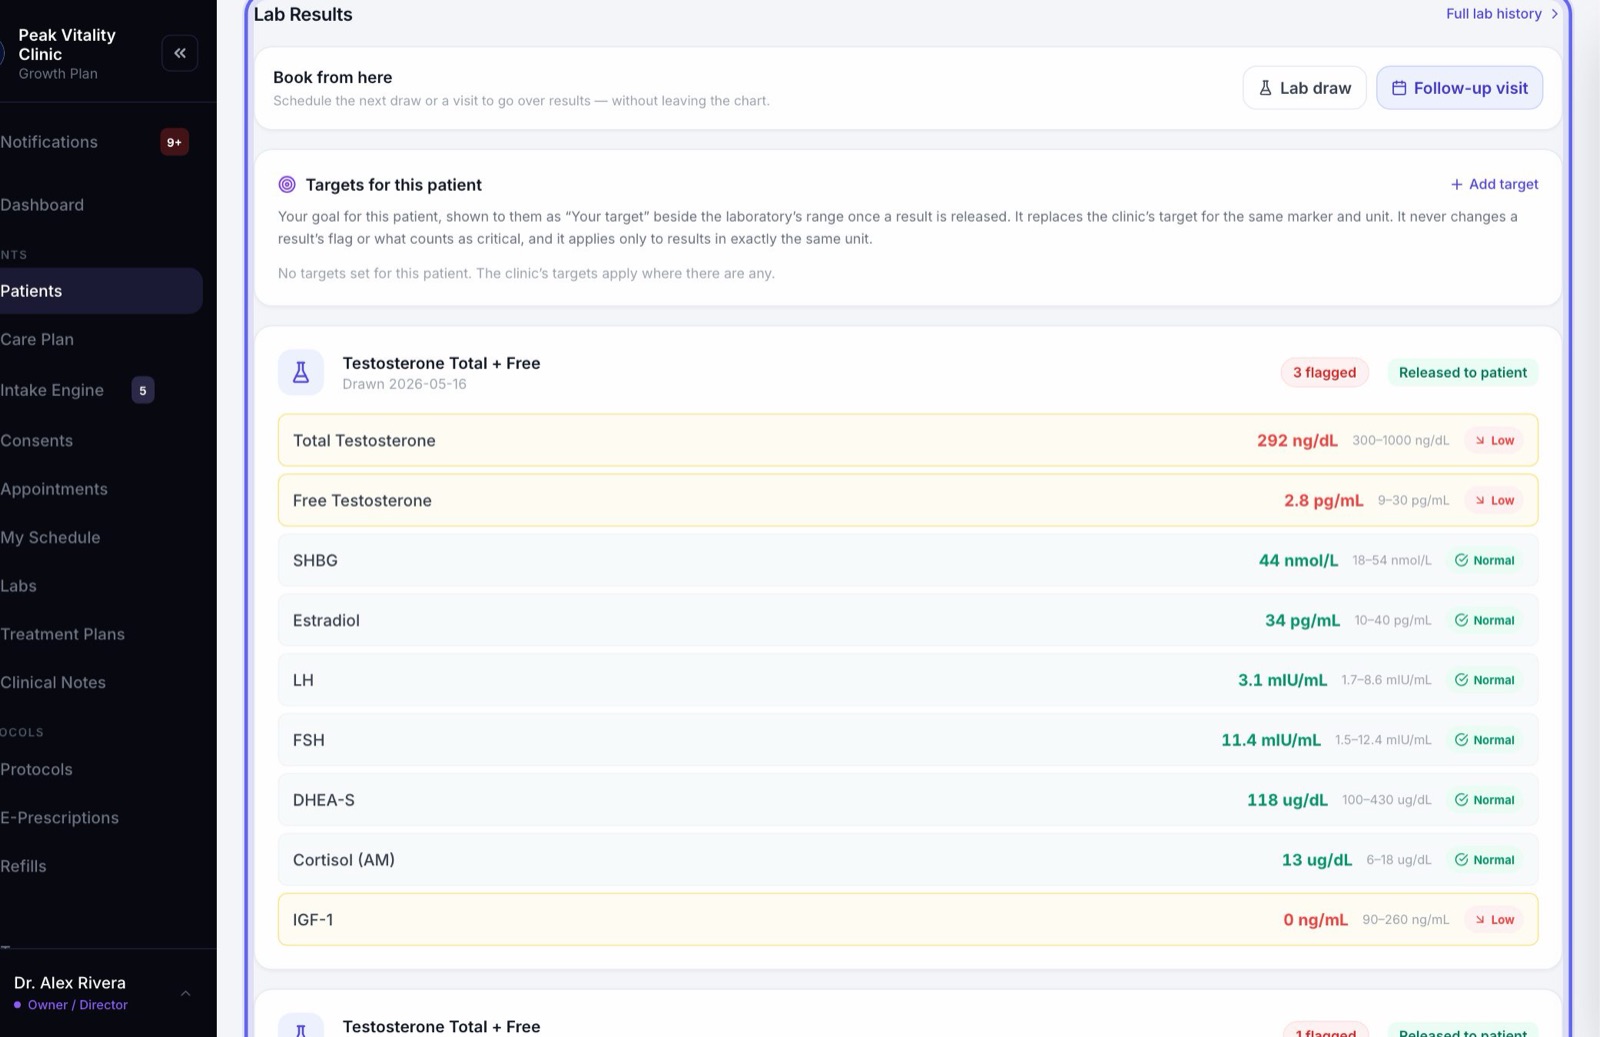
- 1Each lab panel shows the date it was drawn, its status, and how many values are flagged as out of range.
- 2Book from here books a Lab draw or a Follow-up visit without leaving the chart.
- 3Targets for this patient sets goal ranges just for them.
- 4Full lab history opens the Labs page.
11Progress
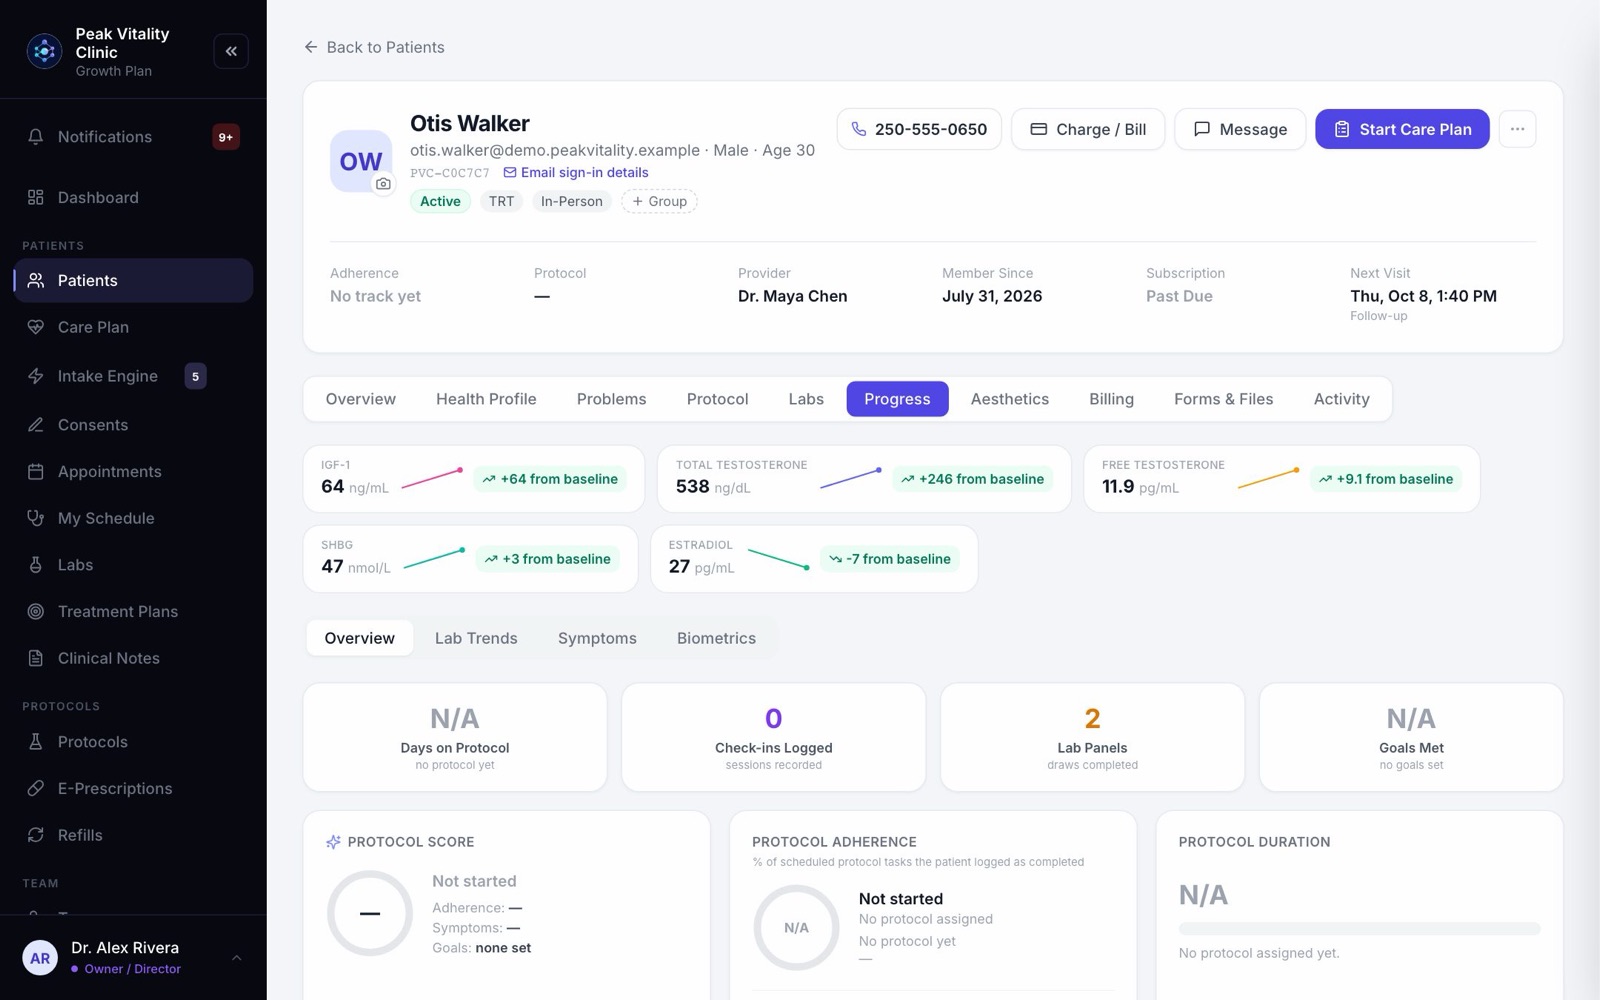
Progress shows whether their protocol is working, from the day it started. Switch between Overview, Lab Trends, Symptoms and Biometrics.
12Aesthetics
For injectables and other aesthetic work. Injection mapping records where each product went on the face. Photos holds before-and-after pictures, History their past sessions, and Safety their safety screening and any reactions.
13Billing
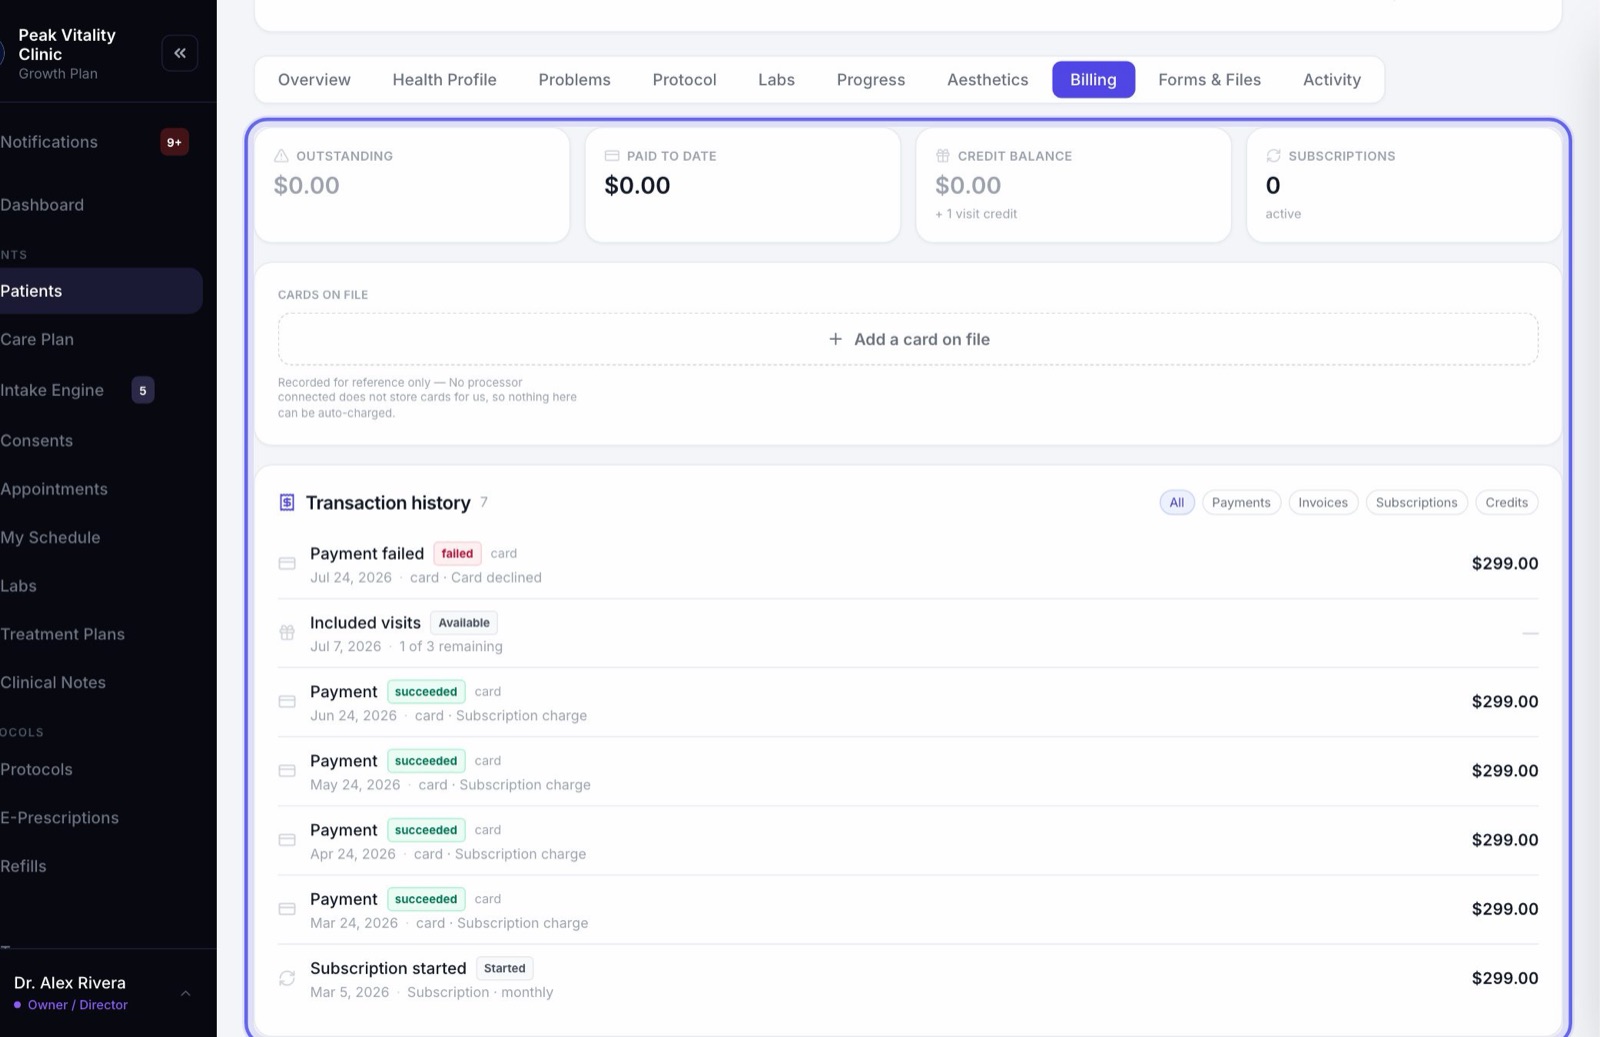
Four boxes show what they owe (Outstanding), Paid to date, their Credit balance and their Subscriptions. Below is their Transaction history, newest first.
14Forms & Files
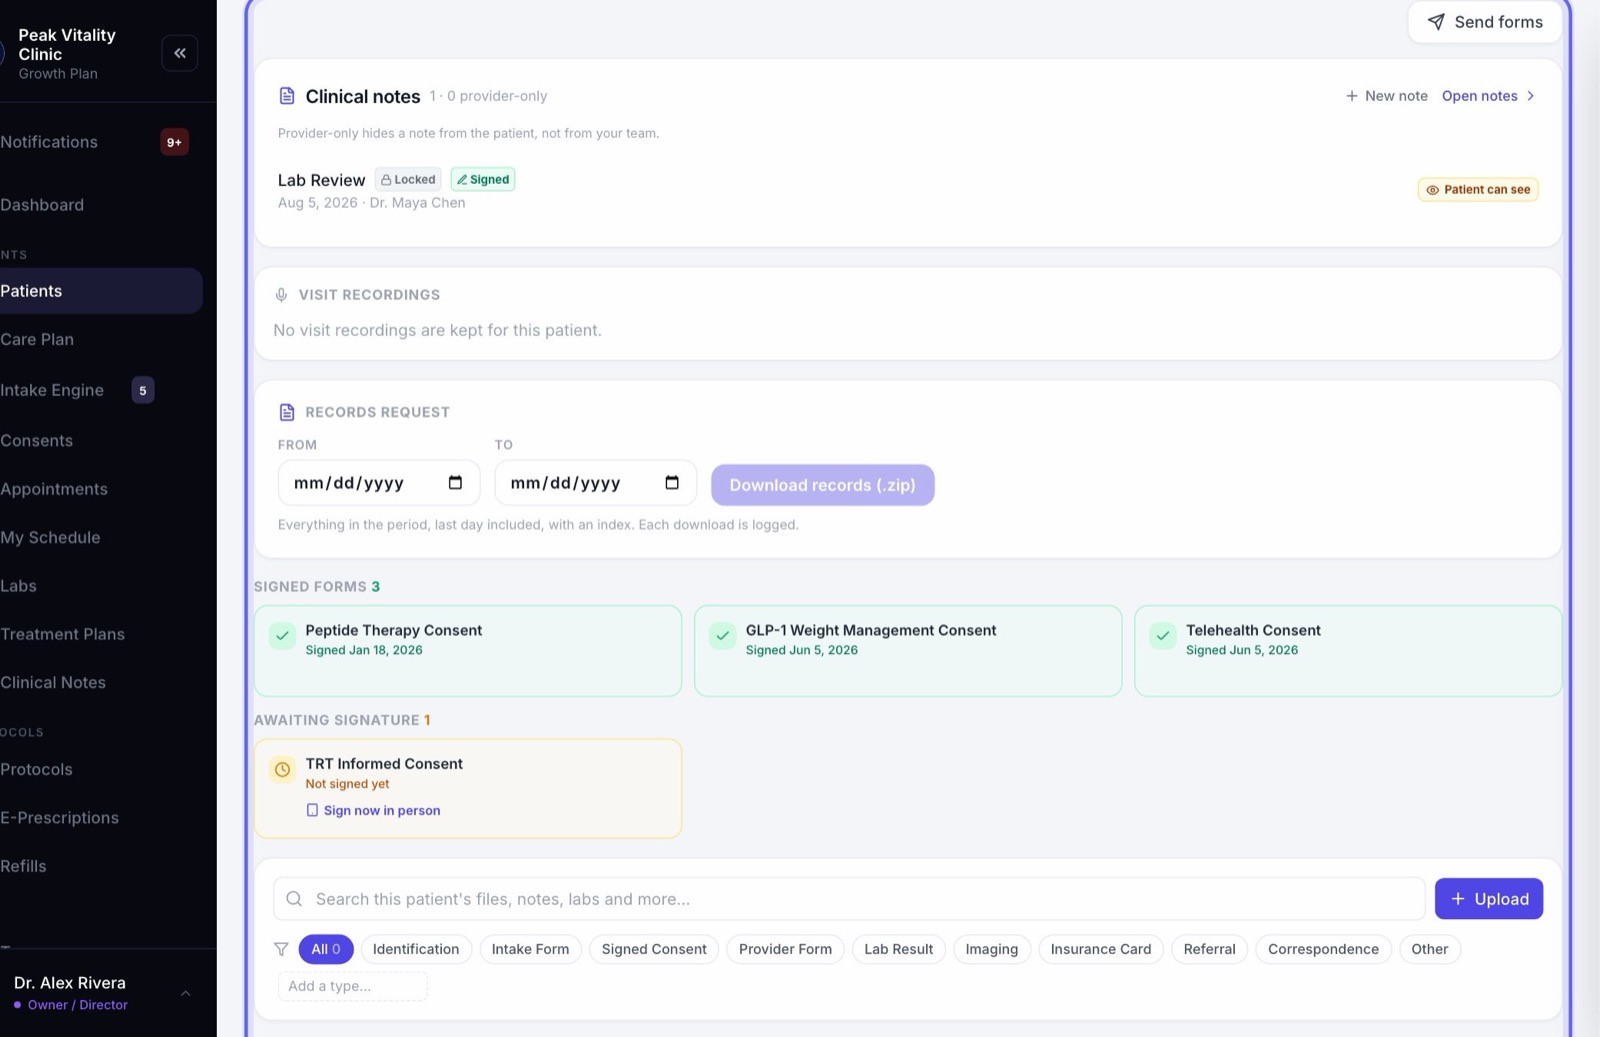
- 1Send forms asks them to fill in or sign a form.
- 2Upload adds a file, like an ID, an insurance card or a scan.
- 3The search box looks through this patient’s files, notes, labs and more.
- 4Signed forms, forms waiting for their signature, and forms waiting for yours are listed apart. You sign yours on the Consents page.
- 5Under Records request, pick From and To, then press Download records (.zip) to download the chart’s records for those dates. Each download is logged.
15Activity
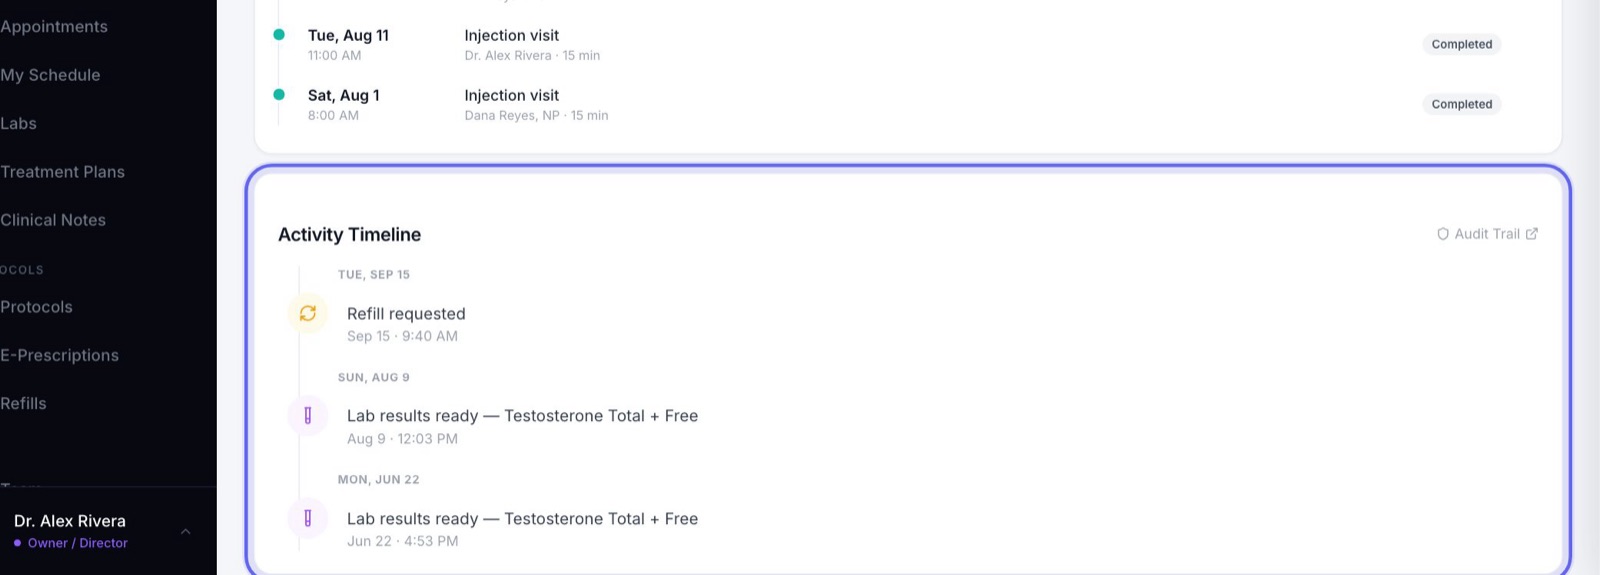
Their appointment history, their call log, and an Activity Timeline of the ten latest things that happened, grouped by day.
Audit Trail opens the audit log for this patient.
Keep going
Patients
Every patient in your clinic. Find anyone, sort and filter the list, add a new patient, put patients in groups, and open a chart.
Read the guideCare Plan
A visit, one step at a time: pick the patient, choose a protocol, build and sign the plan, record vitals, write prescriptions, and finish.
Read the guideClinical Notes
Every note for every patient, in one place. Write a note, sign it, find it again later, and change a signed note the right way.
Read the guideLabs
Order tests, bring results in, and review them before patients see them. Every lab in the clinic, on one page.
Read the guideBilling
Bill patients, take payments and keep track of what’s owed. Make invoices, record and refund payments, print receipts, and set up your discounts.
Read the guideConsents
Your consent forms, and who has signed them. Send forms, hand the tablet over in the office, and keep your library of forms in order.
Read the guideProtocols
Your treatment programs. Build one step by step, price it, publish it, and see who is on each one and how they are doing.
Read the guideRather be shown?
Inside Aminova, the tutorial walks you through every page, and the Getting started checklist shows you each task click by click. Or book a live training session with our team.