1The page at a glance
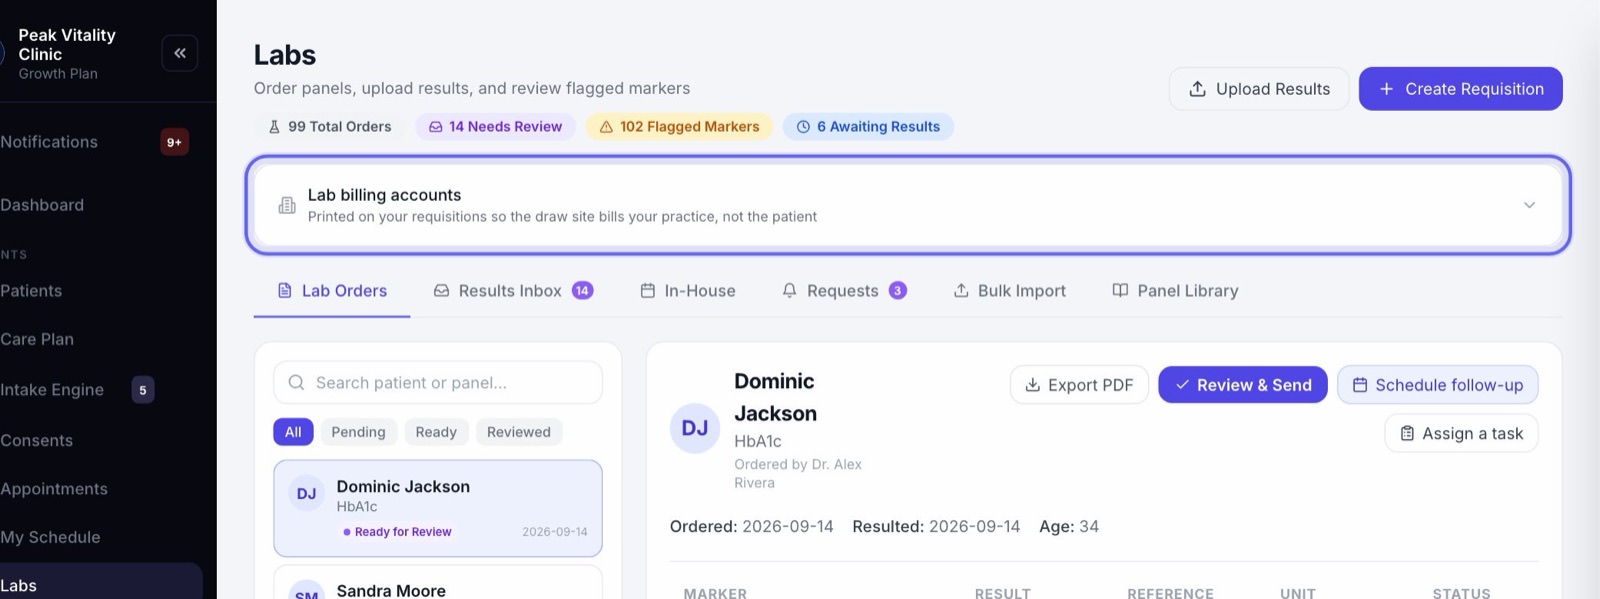
Labs is where every lab order and result in the clinic lives. Across the top are the numbers and the two main buttons. Below them is your lab billing accounts card, then six tabs.
A result never reaches a patient on its own. Someone on your team has to review it and release it first.
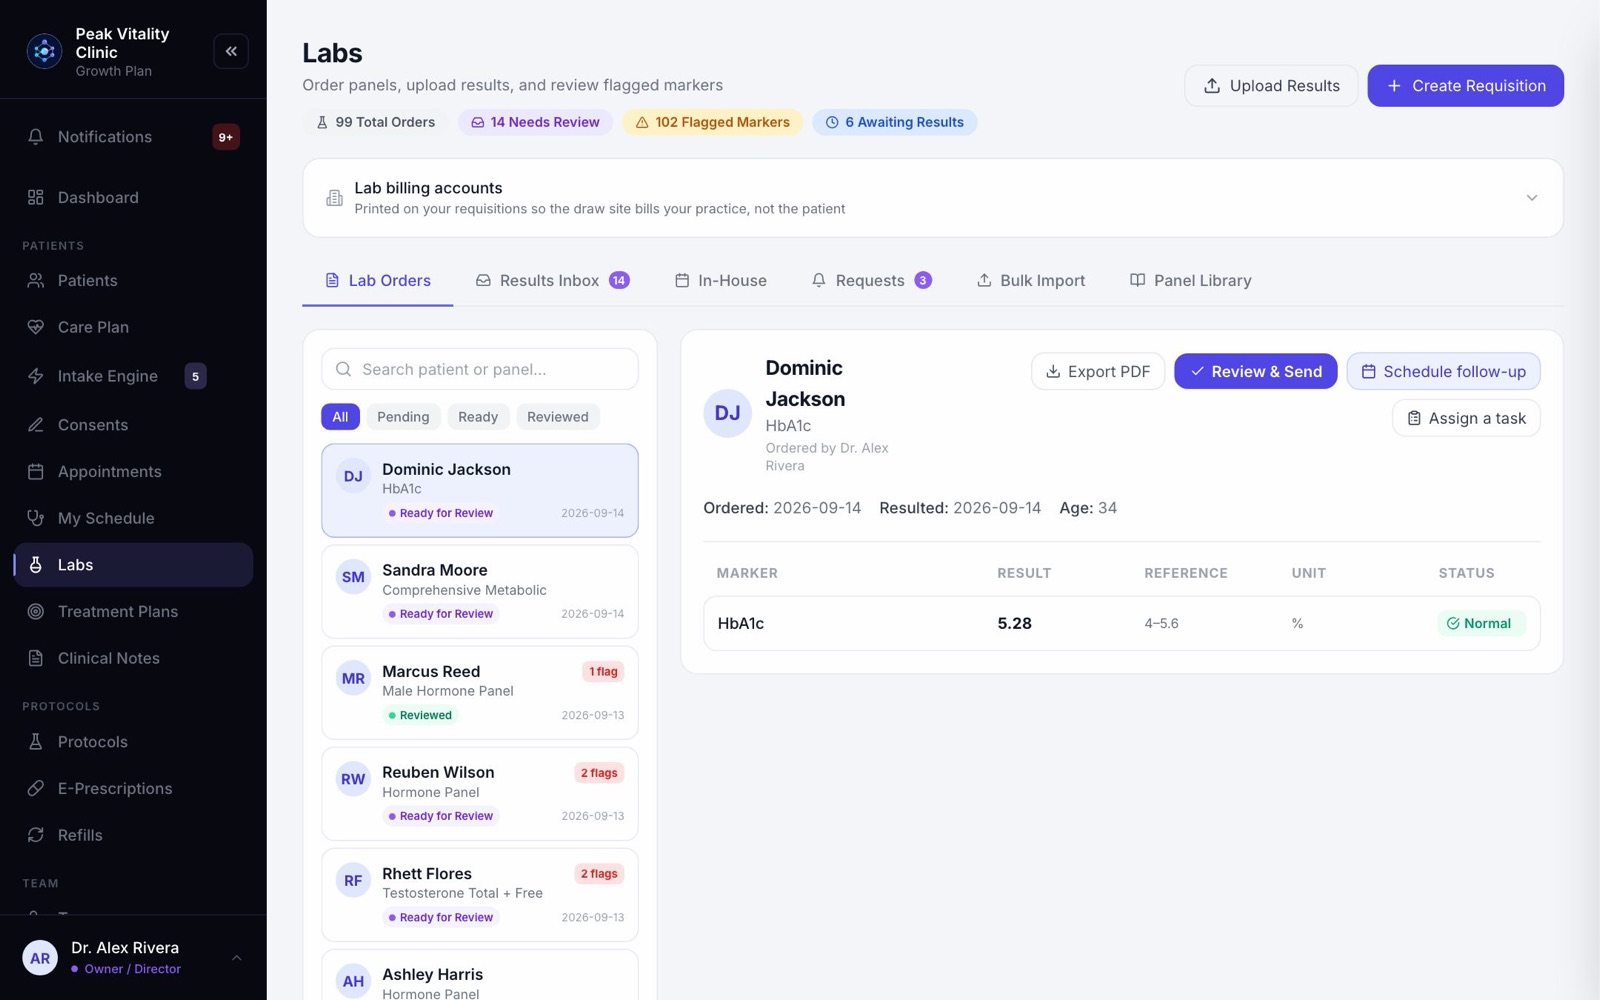
2The numbers at the top
- 1Total Orders counts every lab you can see.
- 2Needs Review counts results waiting for someone to read them, including ones waiting for a chart.
- 3Flagged Markers counts values outside their range.
- 4Awaiting Results counts orders still out with the lab.
- 5When patients send in their own results, a count of those shows here too.
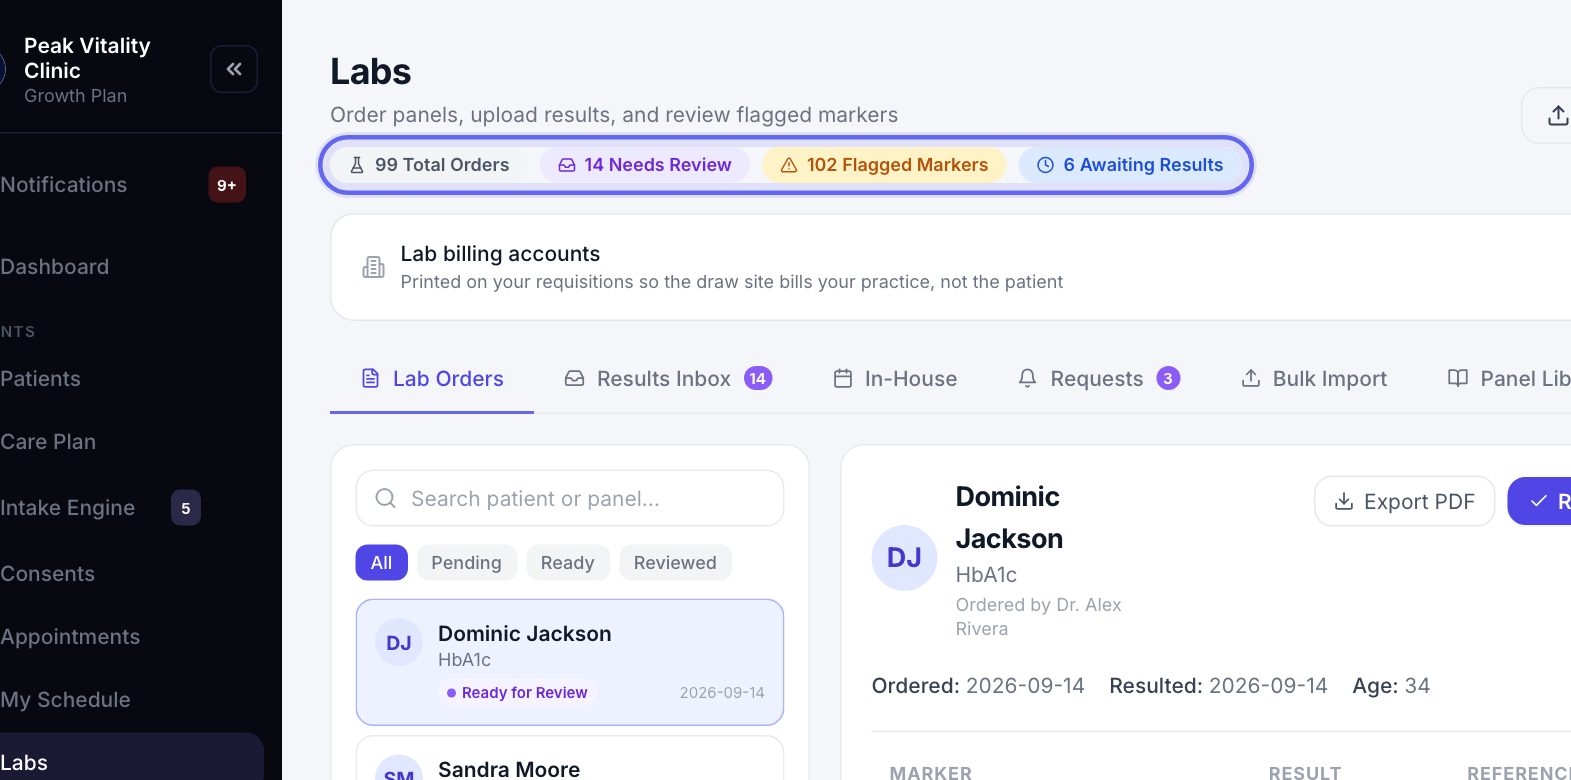
3Order labs
- 1Click the order button at the top right. It says Create Requisition, or Order labs if your clinic orders through a connected lab.
- 2Pick the Patient and the panel.
- 3A requisition is a sheet to print or fax for the draw site. Through a connected lab, the order goes straight to the lab.
- 4The Lab orders and results manual walks through every field.
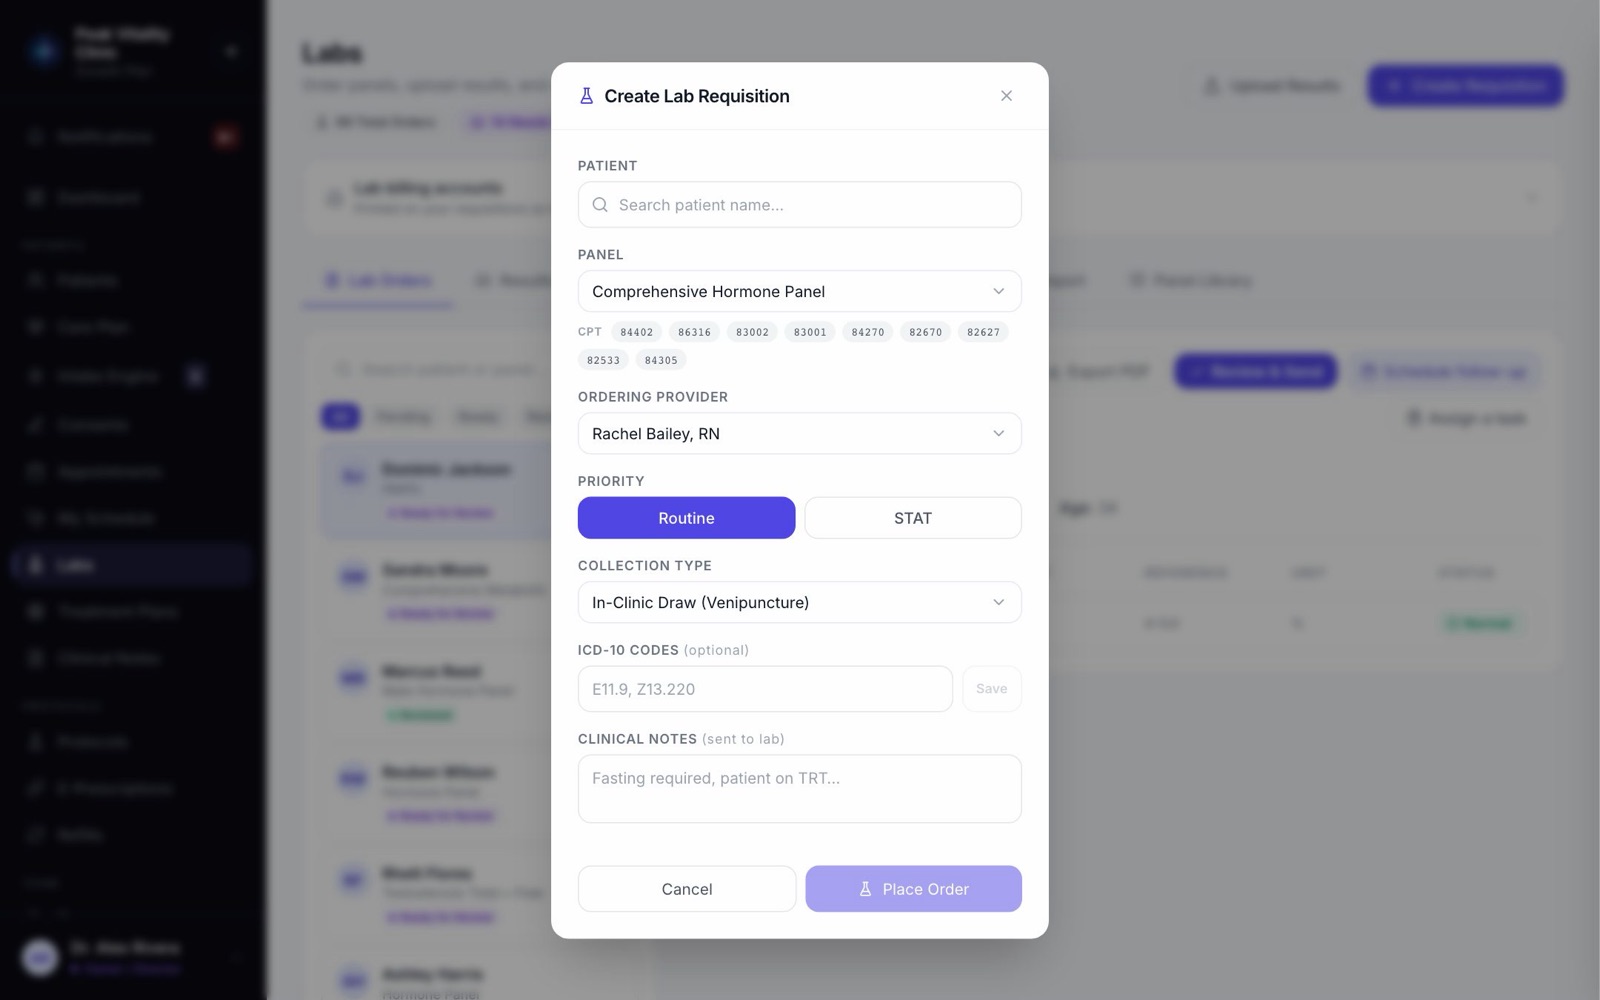
Only people whose role can order labs see this button and Upload Results.
4Upload a result
- 1Click Upload Results.
- 2Drop in the report, or click to pick it. A PDF or a photo both work.
- 3Pick the Patient. The Ordering Provider fills in with their own provider, if they have one.
- 4Press Scan Document. The values are read off the page, and the result is saved to the chart.
- 5Check each value against the page with Extracted values and Source document, then press Done. You land on the result you just saved.
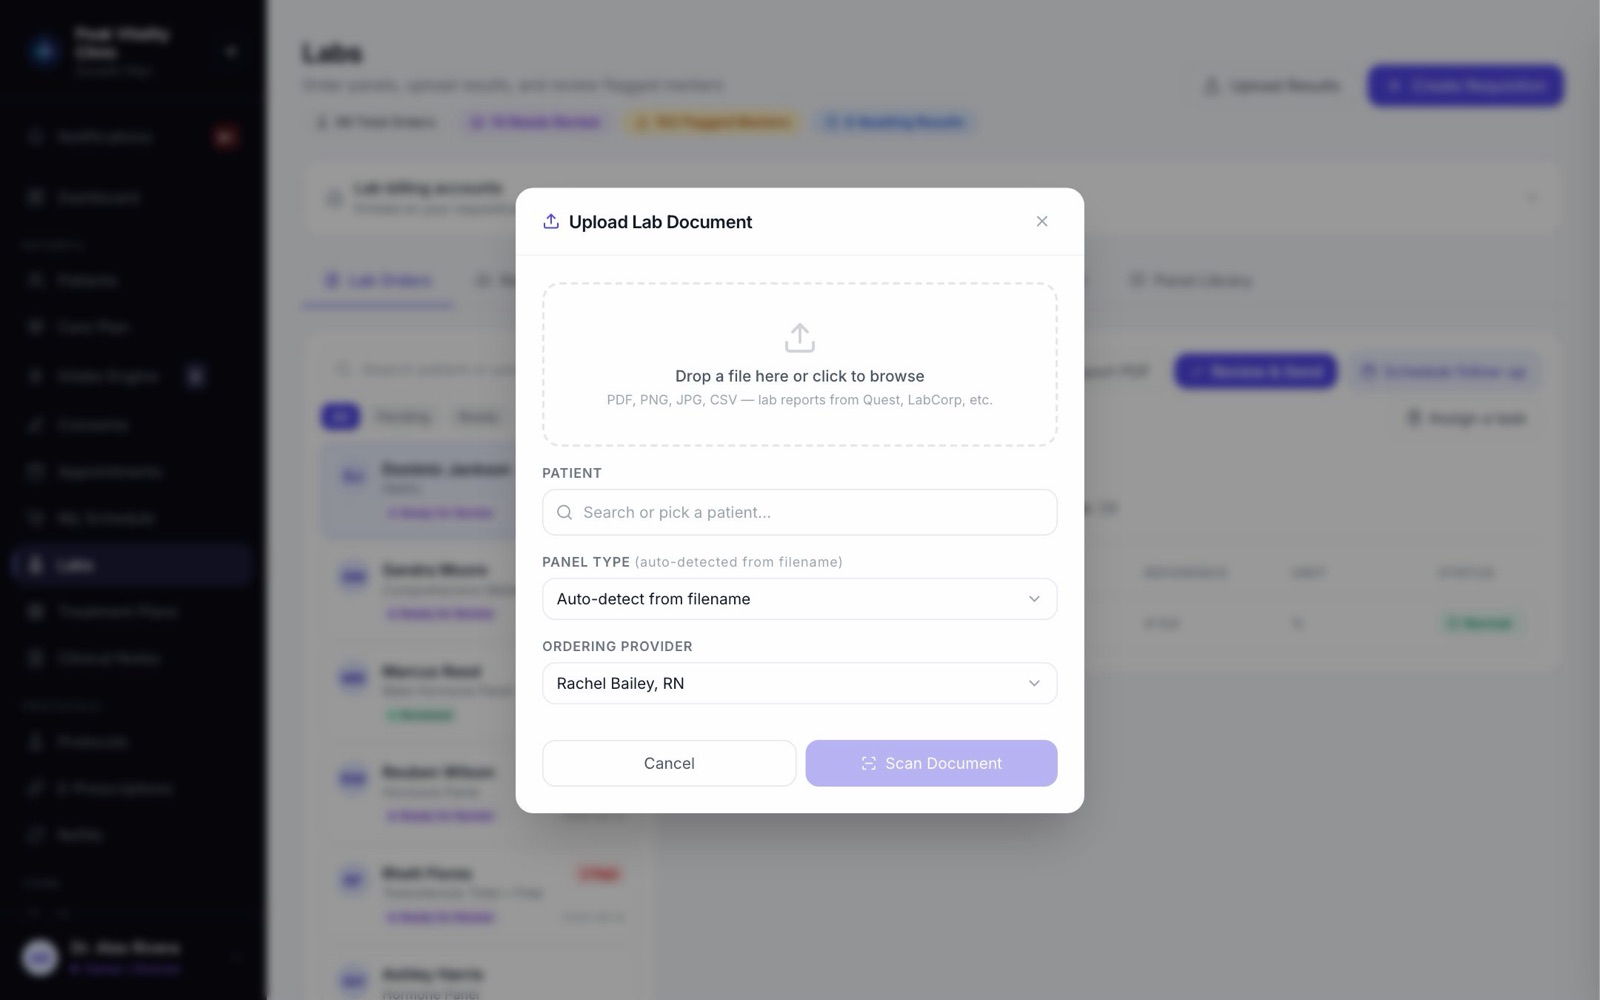
If the name or date of birth on the report doesn’t match the chart you picked, it stops and asks you before saving anything.
5Lab billing accounts
Click Lab billing accounts to open it. It holds your account number with each lab, printed on your requisitions so the draw site bills your practice, not the patient.
It also holds the lab’s fax number for sending requisitions, and your order codes. Owners and managers fill it in; the labs setup guide shows how. An account number doesn’t send orders or bring results back.
6Lab Orders: every order
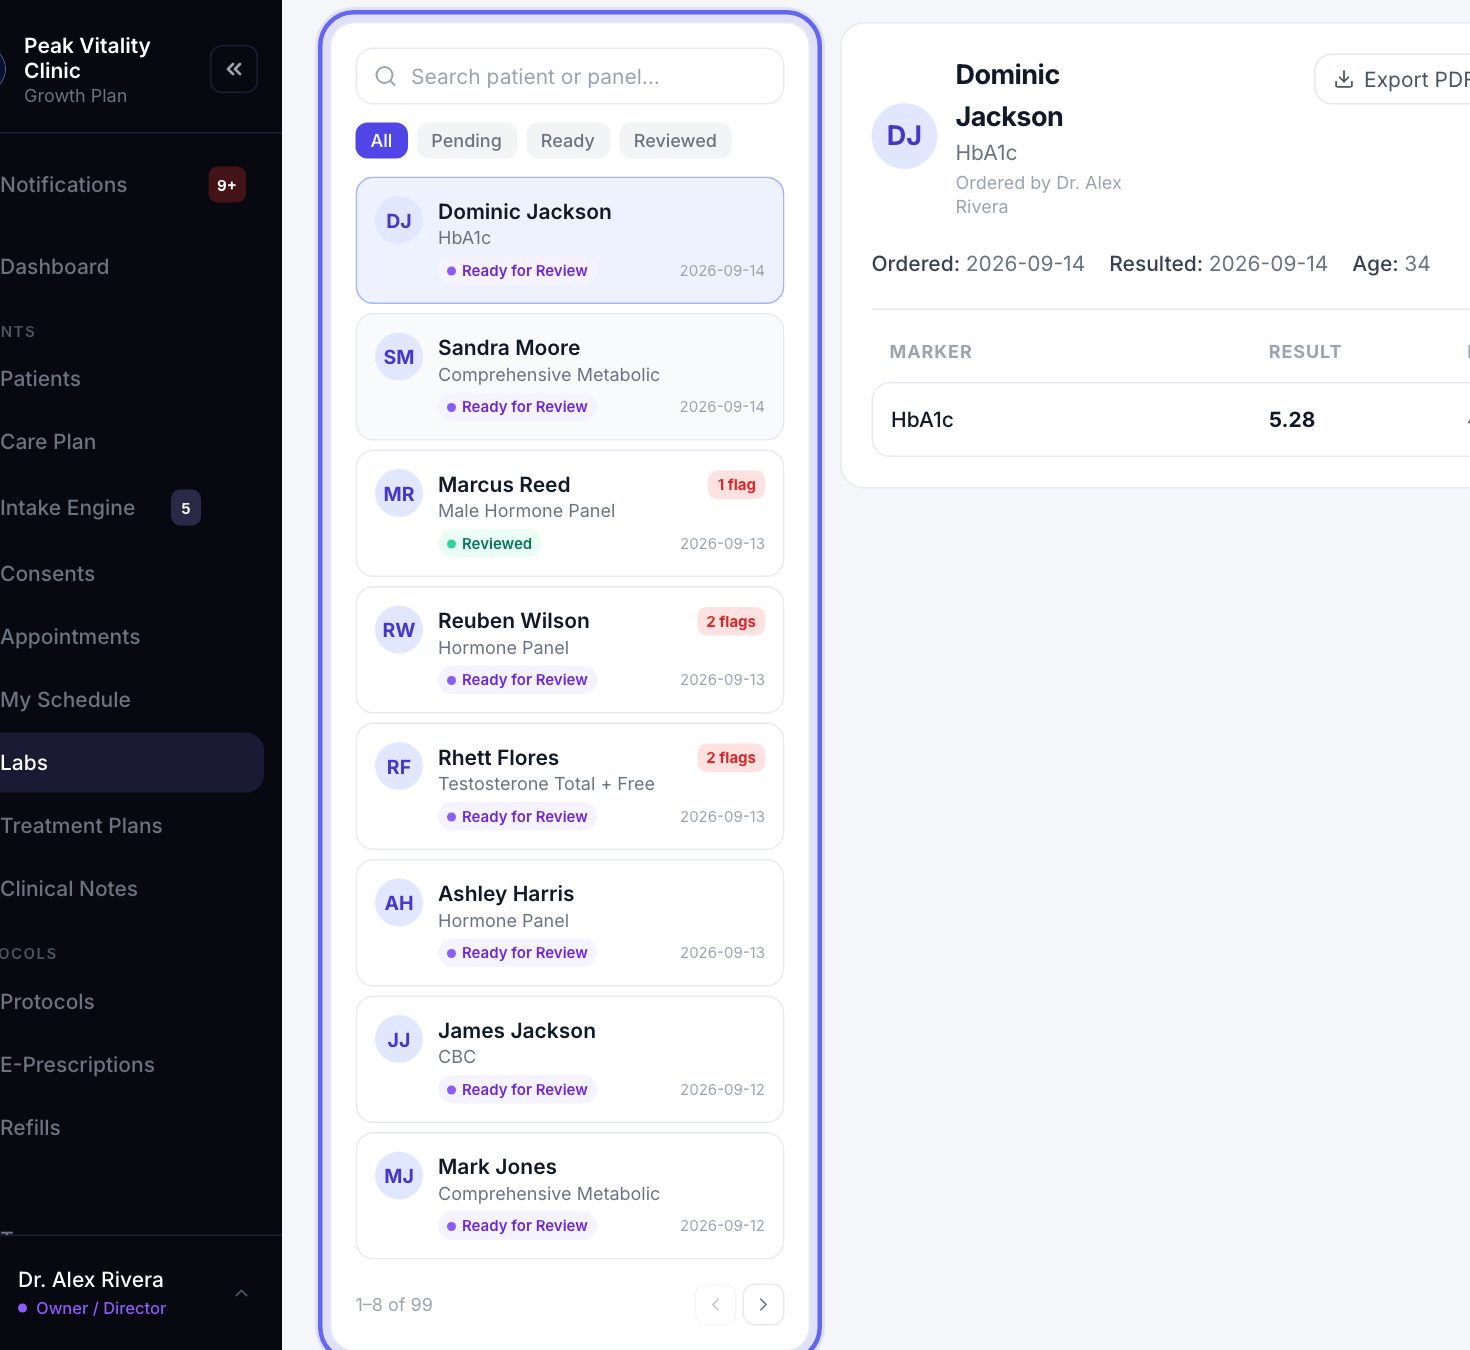
- 1The Lab Orders tab lists every order and result, newest first, eight at a time.
- 2Search by patient or panel, or filter by All, Pending, Ready or Reviewed.
- 3Each row shows where it stands: Ordered, Processing, Sent by patient, Ready for Review or Reviewed.
- 4An order open three days or more shows how long it has waited, in amber, then red after two weeks.
- 5Click a row to open it on the right.
7Open an order
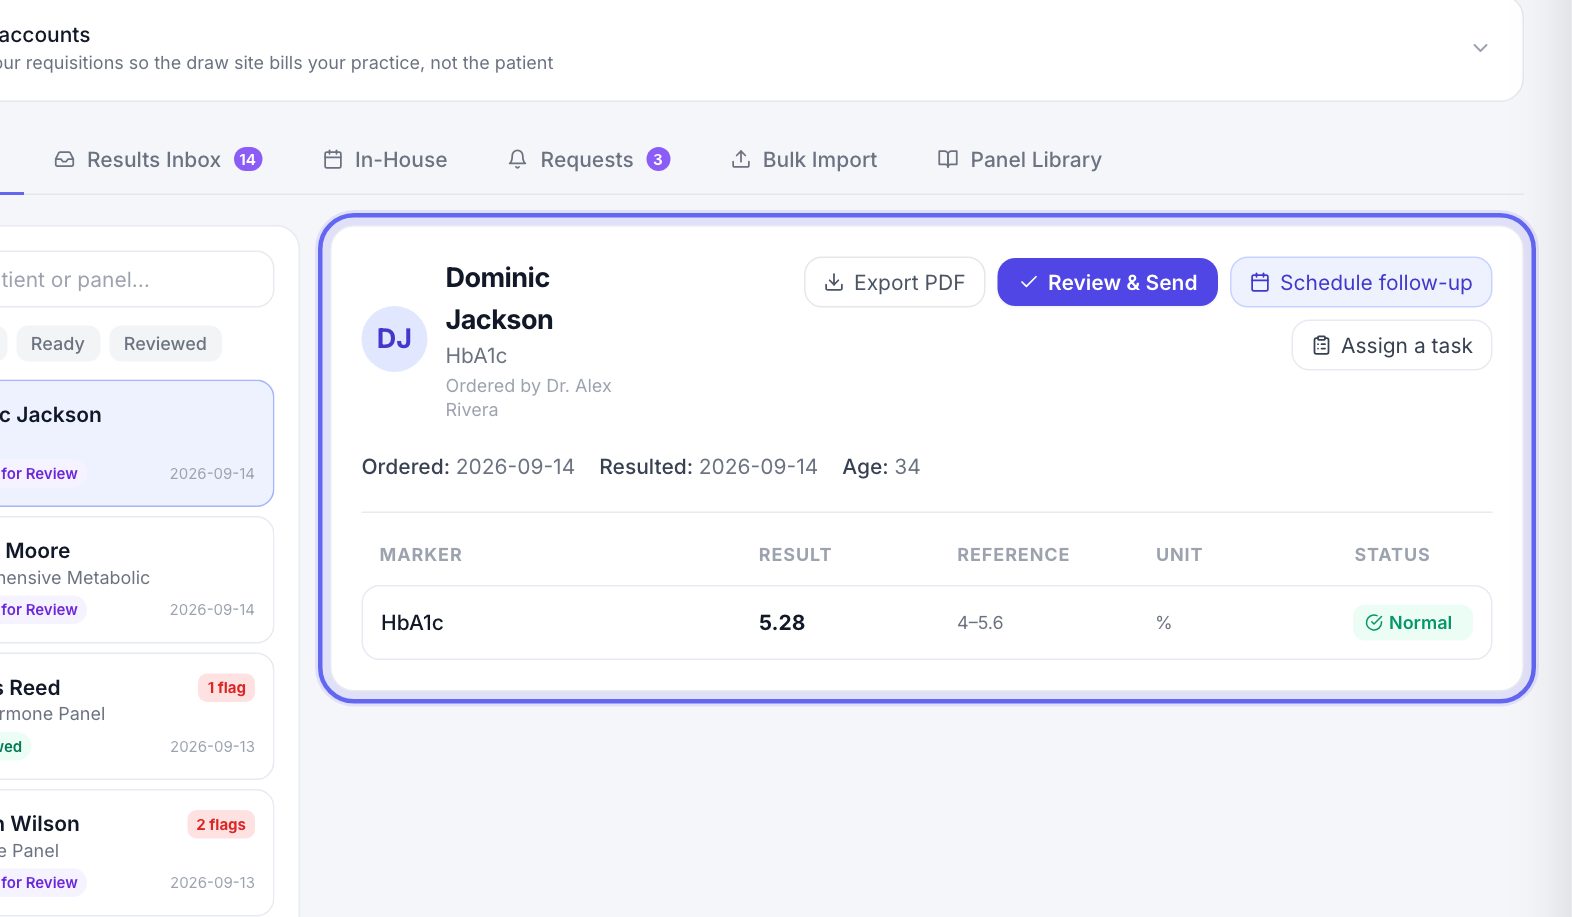
- 1The right side shows the patient, the panel and who ordered it, with the order and result dates.
- 2Once it has resulted, each marker shows its result, reference range, unit and a flag.
- 3The buttons across the top change with the order: View original opens the page it came from, Requisition prints one, and Export PDF saves the result as a PDF.
- 4While it waits for a draw, press Mark Collected (Processing) at the bottom once the sample is taken.
- 5When it is ready, press Review & Send. On a resulted lab, Schedule follow-up and Assign a task are here too.
8Results Inbox
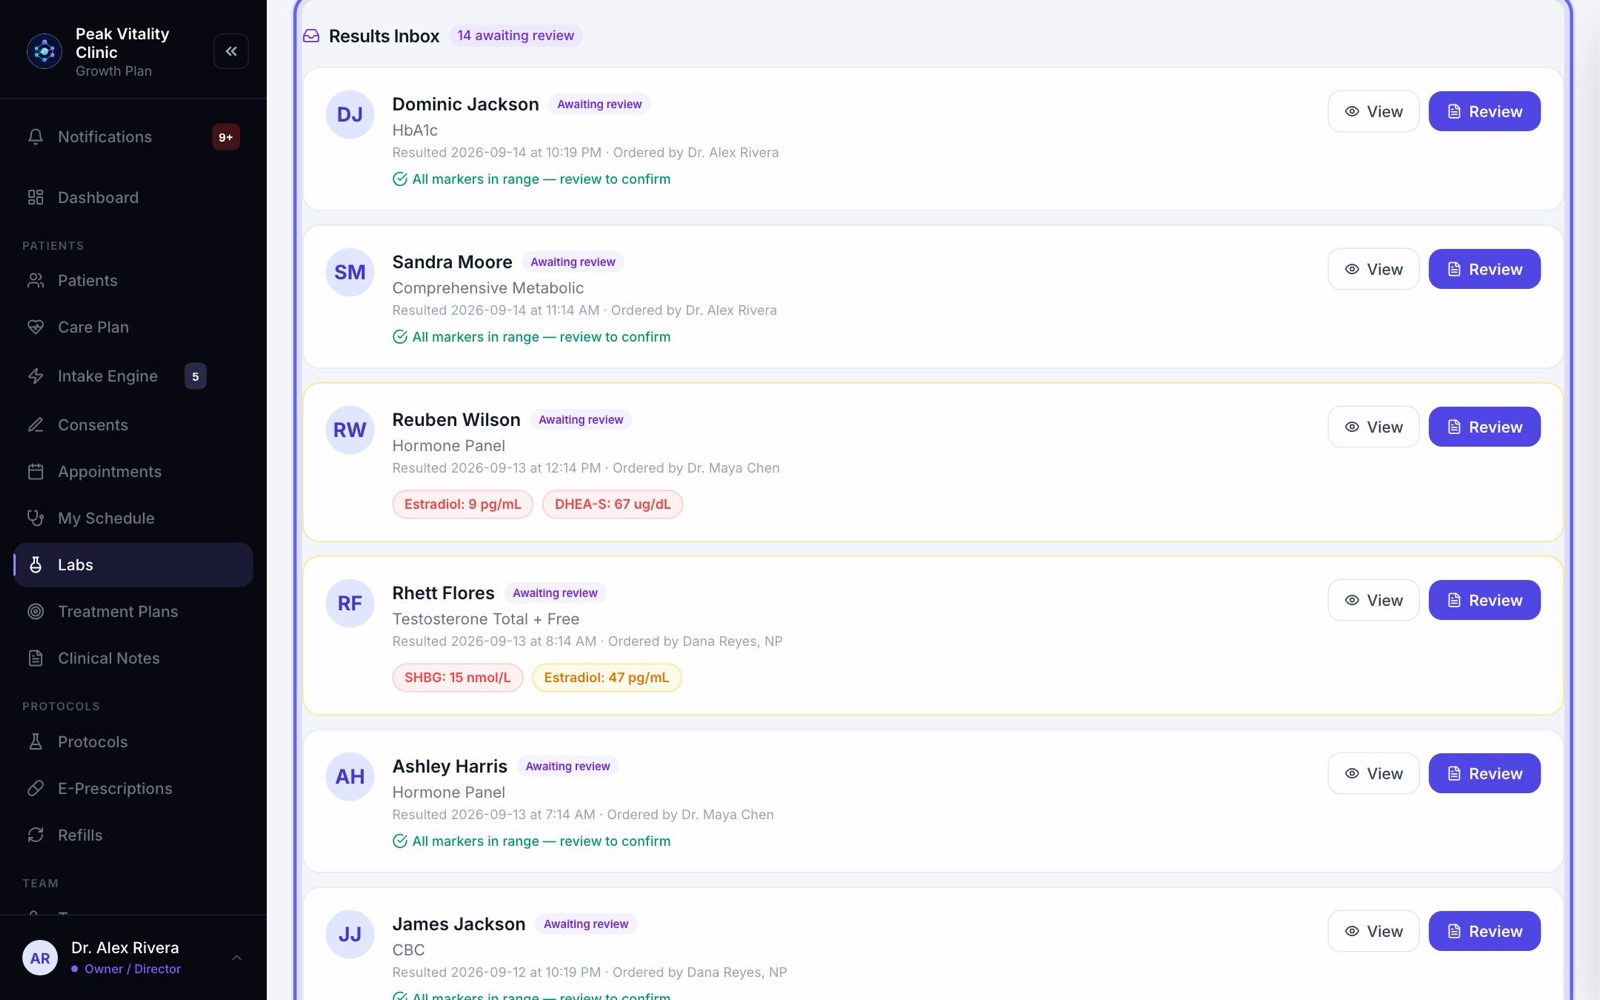
- 1Open the Results Inbox tab. It lists results waiting for review, and results filed but not yet released.
- 2Each card is Awaiting review or Filed · not released, with any out-of-range values shown as chips.
- 3Press View to see every marker, or Review to sign it off.
- 4Results that came in with no matching order sit on top, under Waiting for a chart. Press Review, pick the patient, and press File to chart.
9The review popup
- 1It lists the out-of-range markers, and any the report printed no range for.
- 2If the result came with a page, switch to Original report to read it. Your note is kept while you look.
- 3Write what you decided under Provider Review Notes.
- 4Press File to chart to sign it off and keep it hidden from the patient. Press Release to patient to let them see it.
- 5Tick On release, also send my note to their messages to send your note along with it.
A critical value must be acknowledged before anything else. Until someone does, the result shows a red Acknowledge button instead of Review.
10Fix a value
- 1In Results Inbox, press View on the result.
- 2Press Edit results, correct or add the values, and press Save results.
- 3The flags are worked out again from what you enter.
11In-House
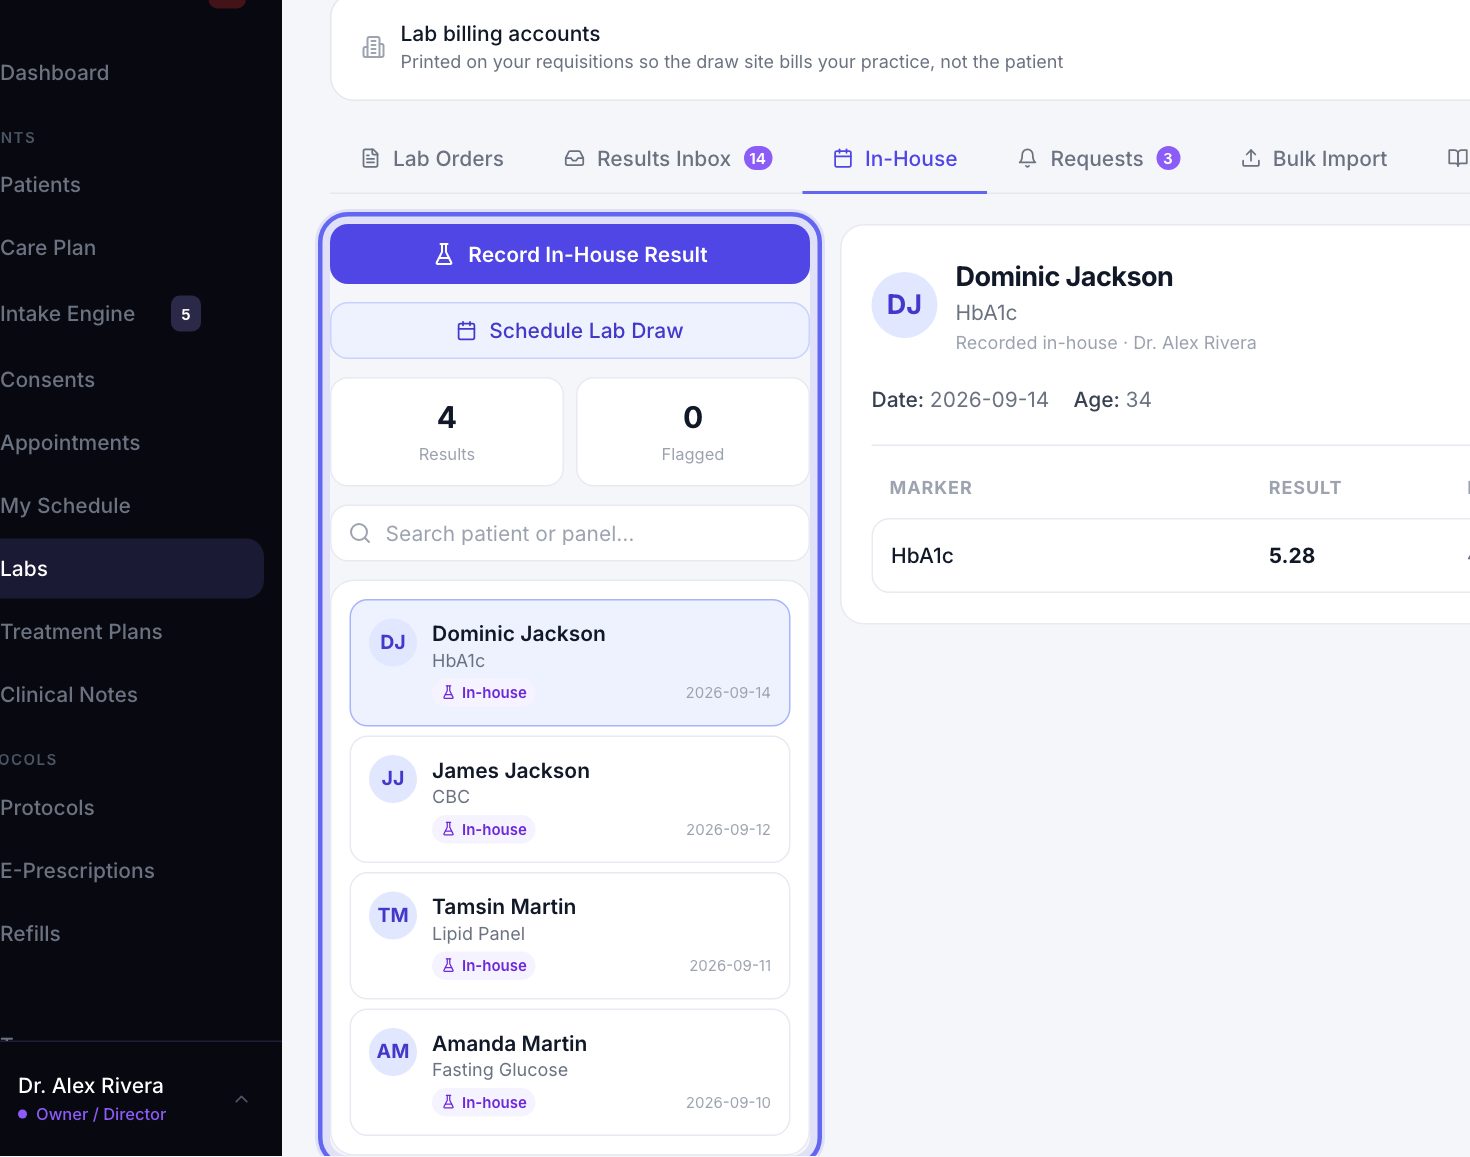
- 1The In-House tab holds tests you ran in the clinic.
- 2Press Record In-House Result. Pick the patient and a panel. The markers and their usual ranges fill in.
- 3Type each value, add more with Add marker, and press Save result. It goes to the chart and to Results Inbox.
- 4Press Schedule Lab Draw to book a patient in for a draw.
12Requests
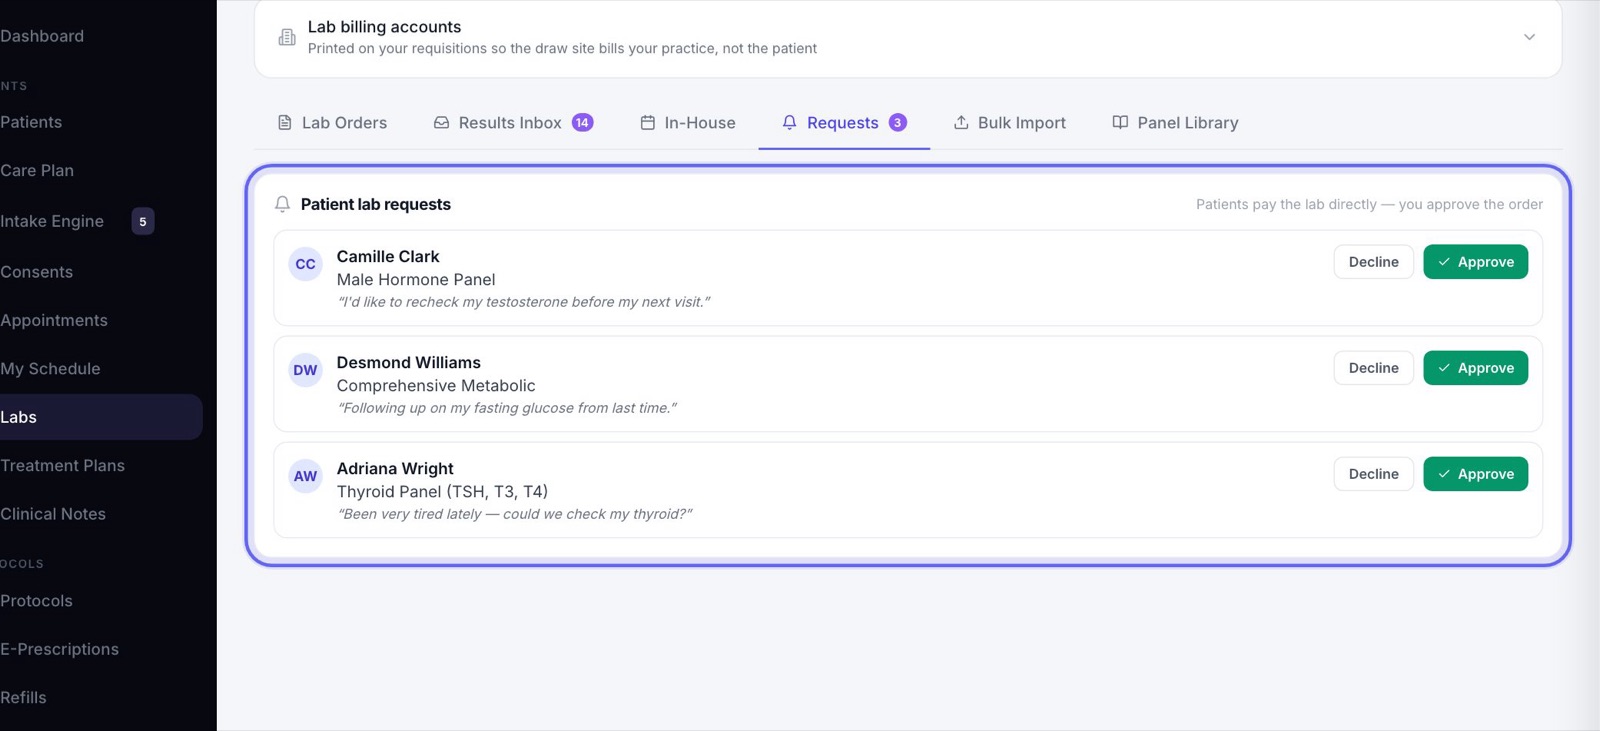
- 1The Requests tab shows panels patients asked for in their app. A count shows on the tab when one is open.
- 2Press Approve. Or press Decline, type a reason the patient will read, and press Send decline.
- 3The patient is told either way. They pay the lab directly.
- 4Only people who can order labs can decide. Others see Needs a clinician.
13Bulk Import
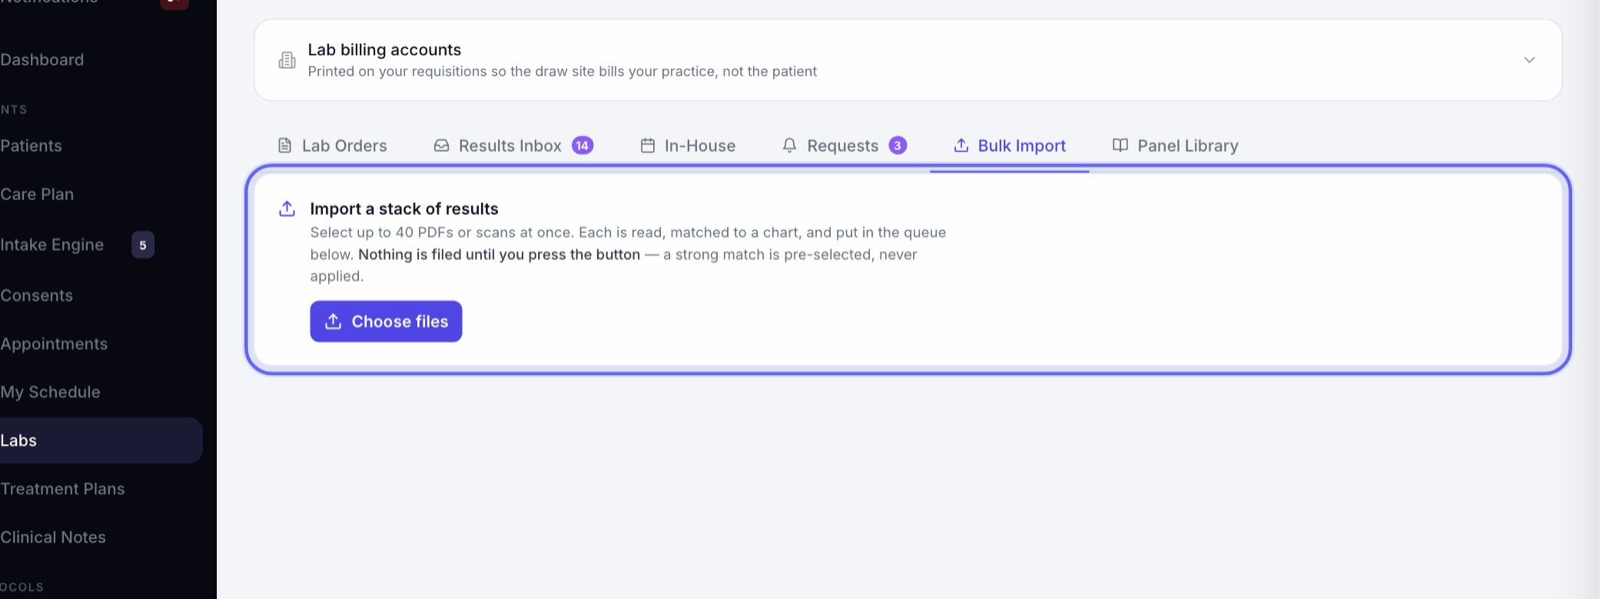
- 1Open Bulk Import and press Choose files. Pick up to 40 PDFs or scans at once.
- 2Each file is read and listed, so you can see which ones worked.
- 3Under Waiting to be filed, check the chart picked for each, or choose one. Quick view shows the values and the page.
- 4Press Save to chart for each one. Nothing is filed until you do. Dismiss takes one off the list, with a reason.
14Panel Library
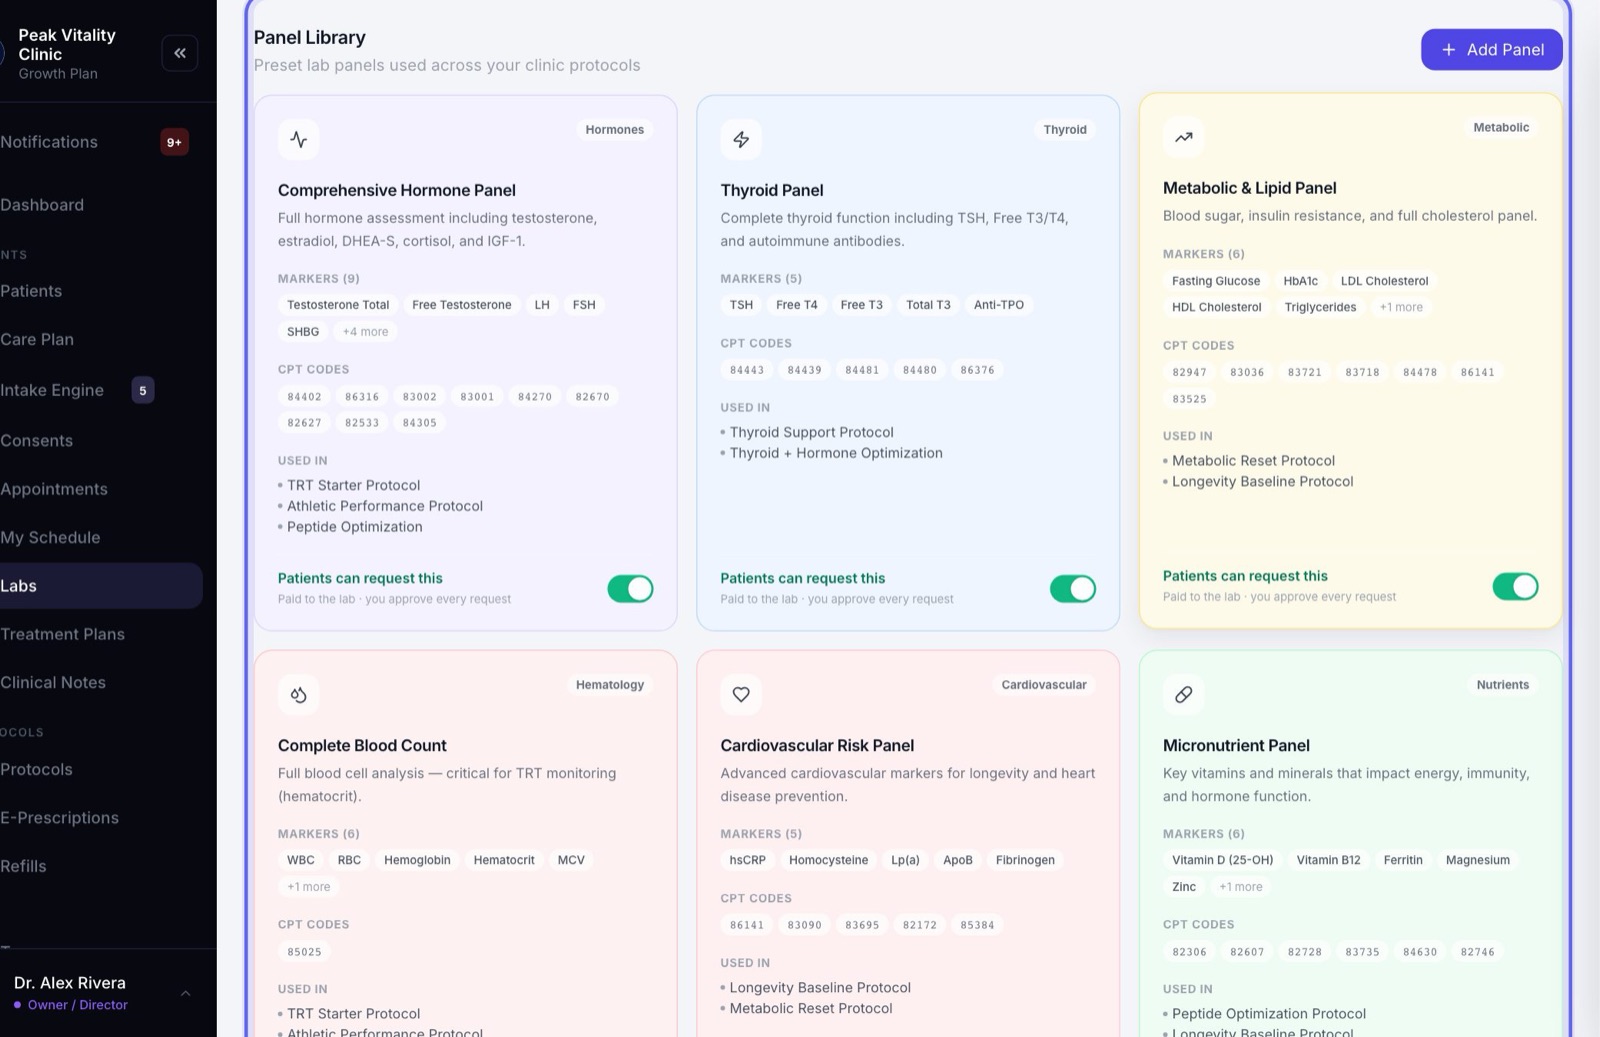
- 1The Panel Library tab shows your lab panels, each with its markers and codes.
- 2Press Add Panel to make your own: a name, category, color, icon, markers and codes. Press Save Panel.
- 3The switch on each panel lets patients ask for it in their app. Only owners and managers can change it.
- 4To delete one of your own panels, press Edit, then the red bin on it. The built-in panels stay.
Keep going
Set up labs
Add your lab accounts and order codes, choose how results get in, and decide which panels patients can ask for.
Read the guideLab orders and results
One lab, start to finish: the order, the draw, the result coming back, your review, and the moment the patient gets to see it.
Read the guideThe patient chart
Everything about one patient on one page. The header says who they are and what’s next; the tabs below hold each part of their record.
Read the guideRather be shown?
Inside Aminova, the tutorial walks you through every page, and the Getting started checklist shows you each task click by click. Or book a live training session with our team.