1The page at a glance
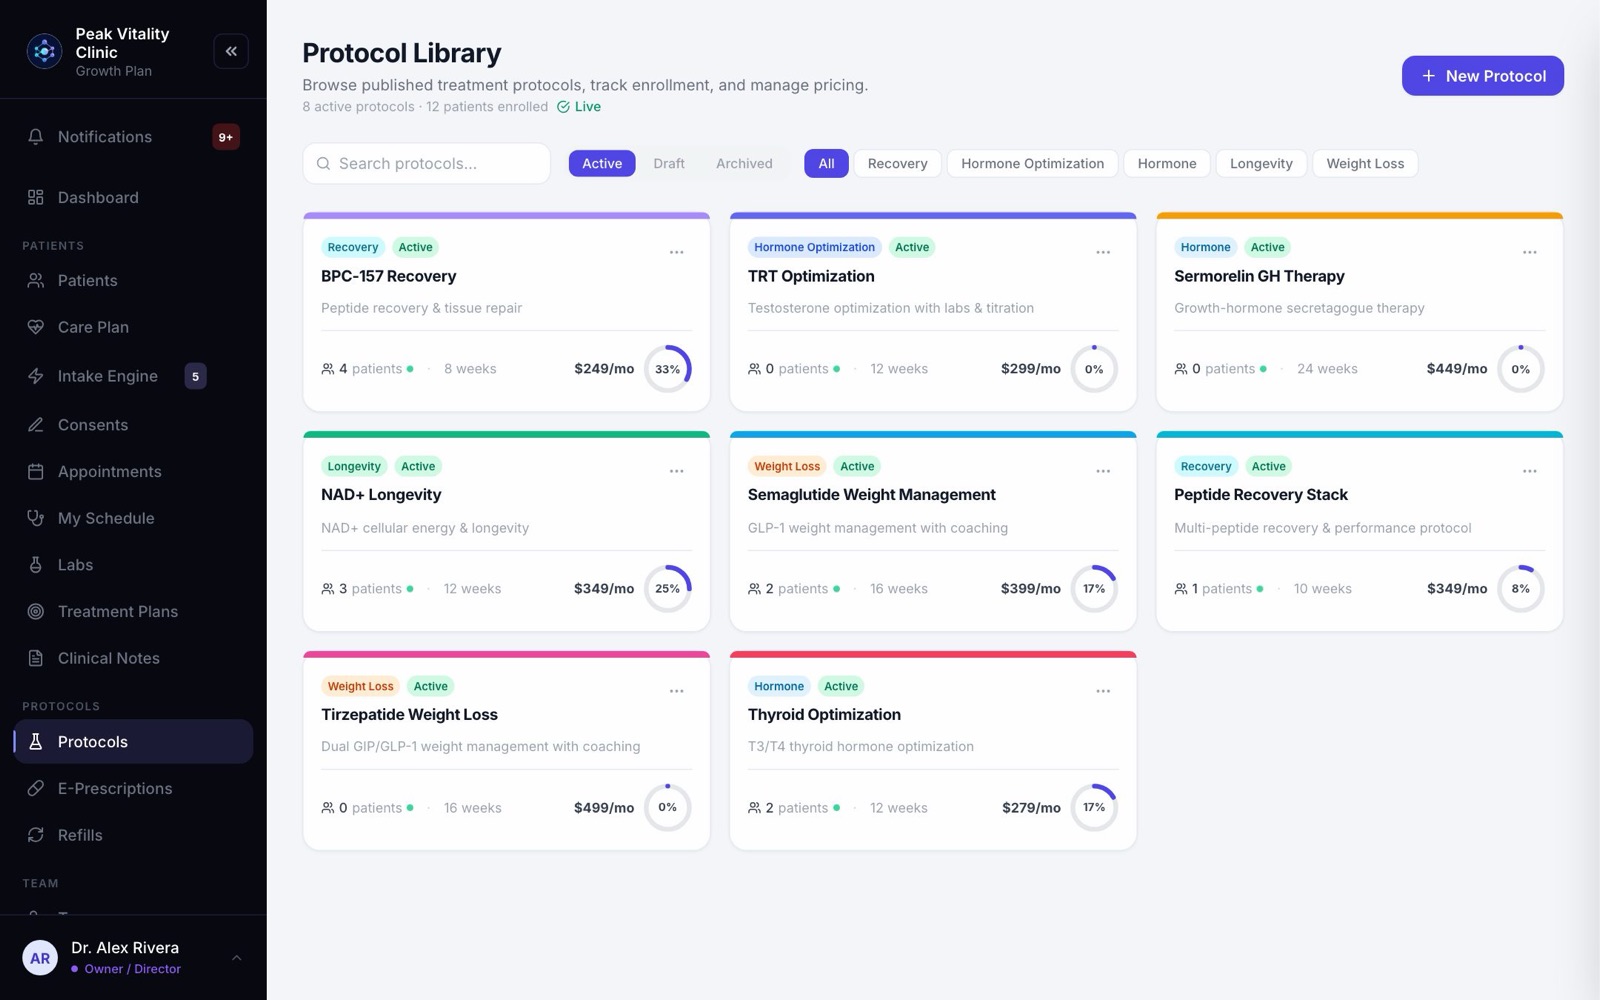
Open Protocols in the sidebar. The page is your protocol library: every treatment program your clinic offers, one card each.
Under the title you see how many protocols are active and how many patients are on them. If your role can only look, the page says View only and the buttons that change things are hidden.
2Find a protocol
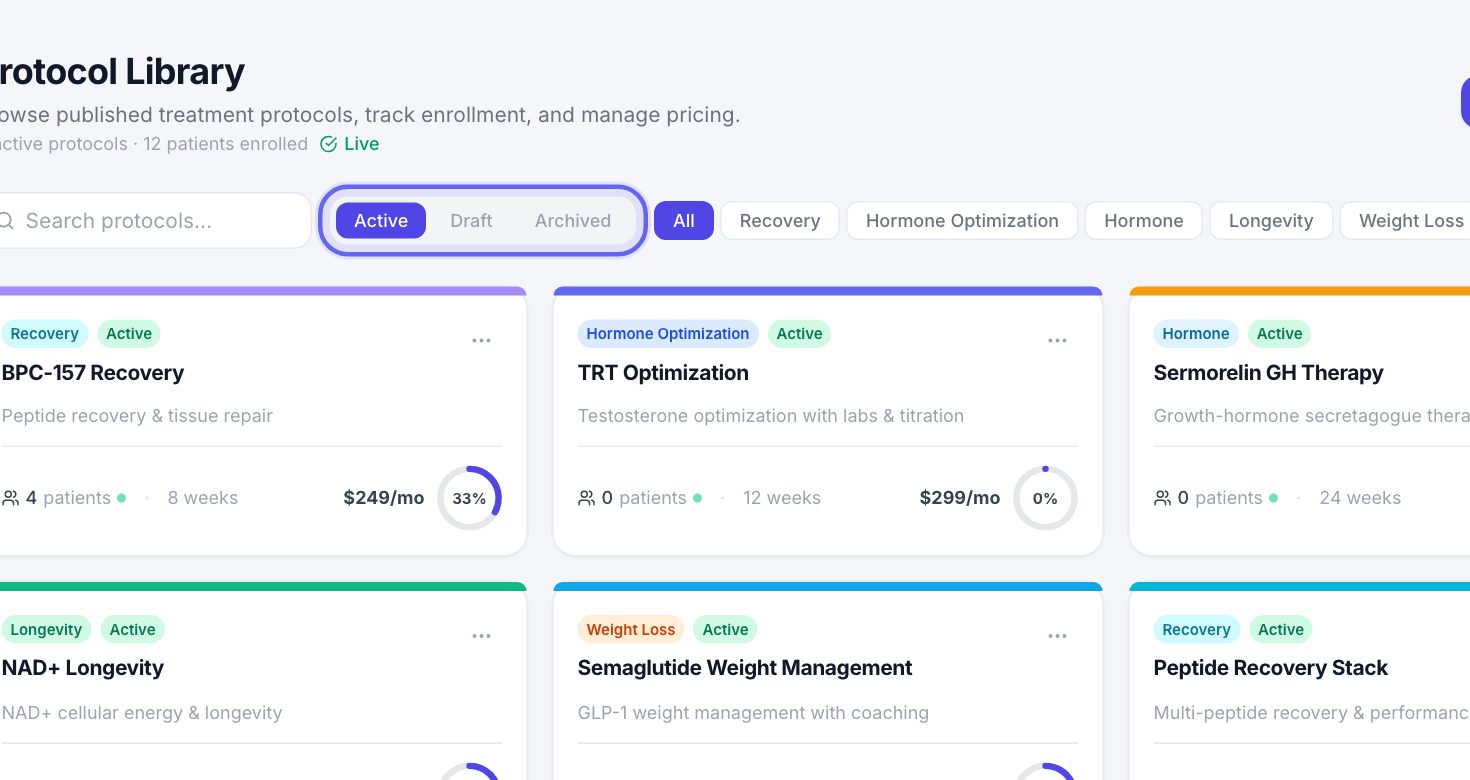
- 1Pick Active, Draft or Archived. Active ones are in use. Drafts aren’t published yet. Archived ones take no new patients.
- 2Click a category button to see only those protocols. All shows every category again.
- 3Type part of a name in Search protocols… to find one fast.
3The protocol cards
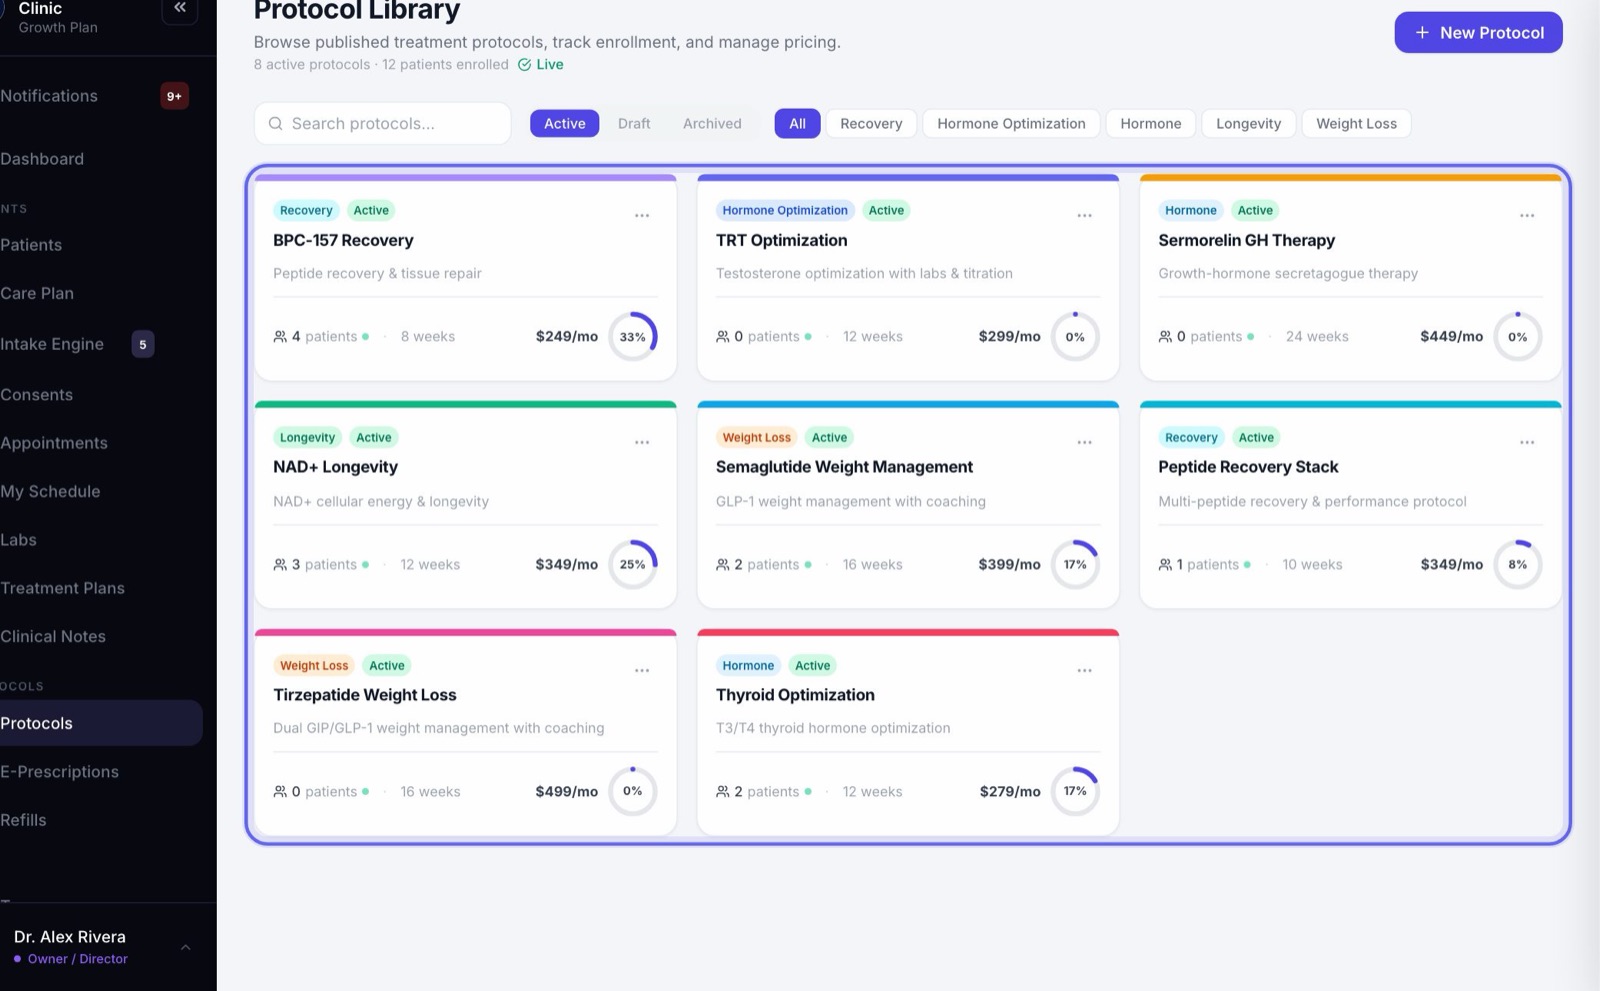
- 1Each card shows the category, the status and the name, with a short description.
- 2Along the bottom: how many patients are on it, how long it runs, and its monthly price if you set one.
- 3The ring shows what share of all your patients on protocols are on this one.
- 4Click a card to open it.
4Build a new protocol
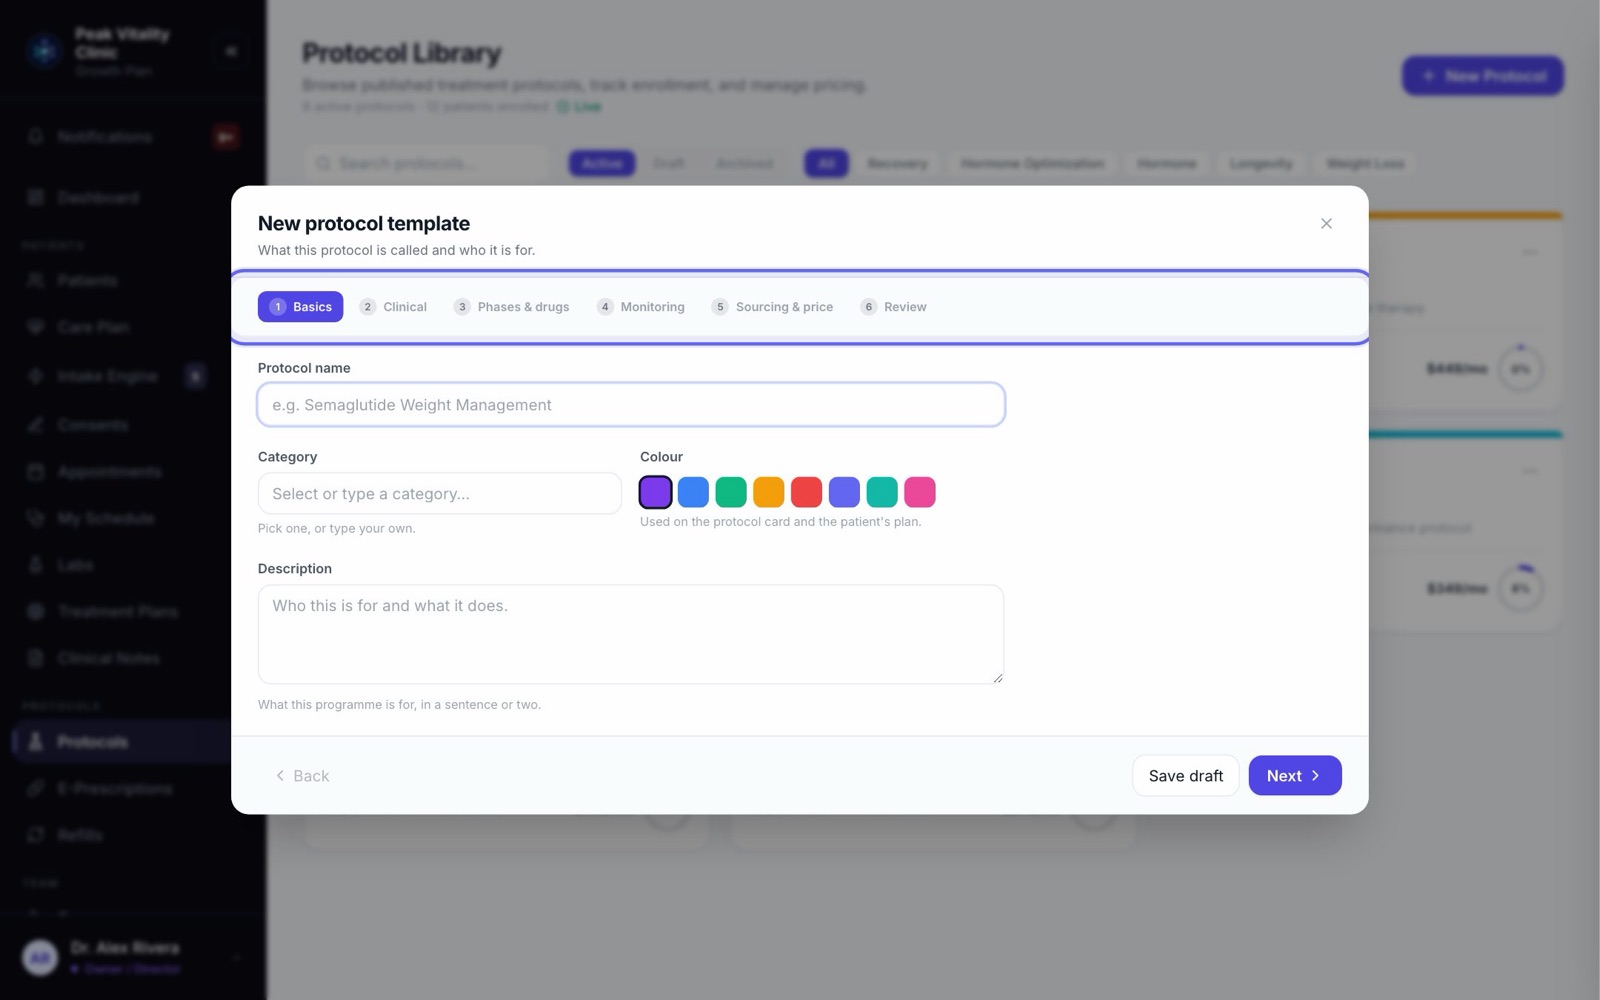
- 1Click New Protocol. The builder opens with six steps across the top.
- 2Move with Next and Back, or click any step to jump to it.
- 3Press Save draft any time to keep your work and finish later. A draft only needs a name.
- 4If you close with unsaved changes, you’re asked first, so one wrong click can’t lose your work.
5Basics and Clinical
- 1In Basics, give it a Protocol name and a Category. Pick a category from the list, or type your own.
- 2Pick a color. It shows on the protocol card and on the patient’s plan. Add a short Description.
- 3In Clinical, fill in Eligibility, Contraindications, Baseline labs and Target outcomes. Press Enter after each one.
- 4If a medicine in this protocol is one of your products, that product’s contraindications are offered under the field. Click one to add it.
6Phases & drugs
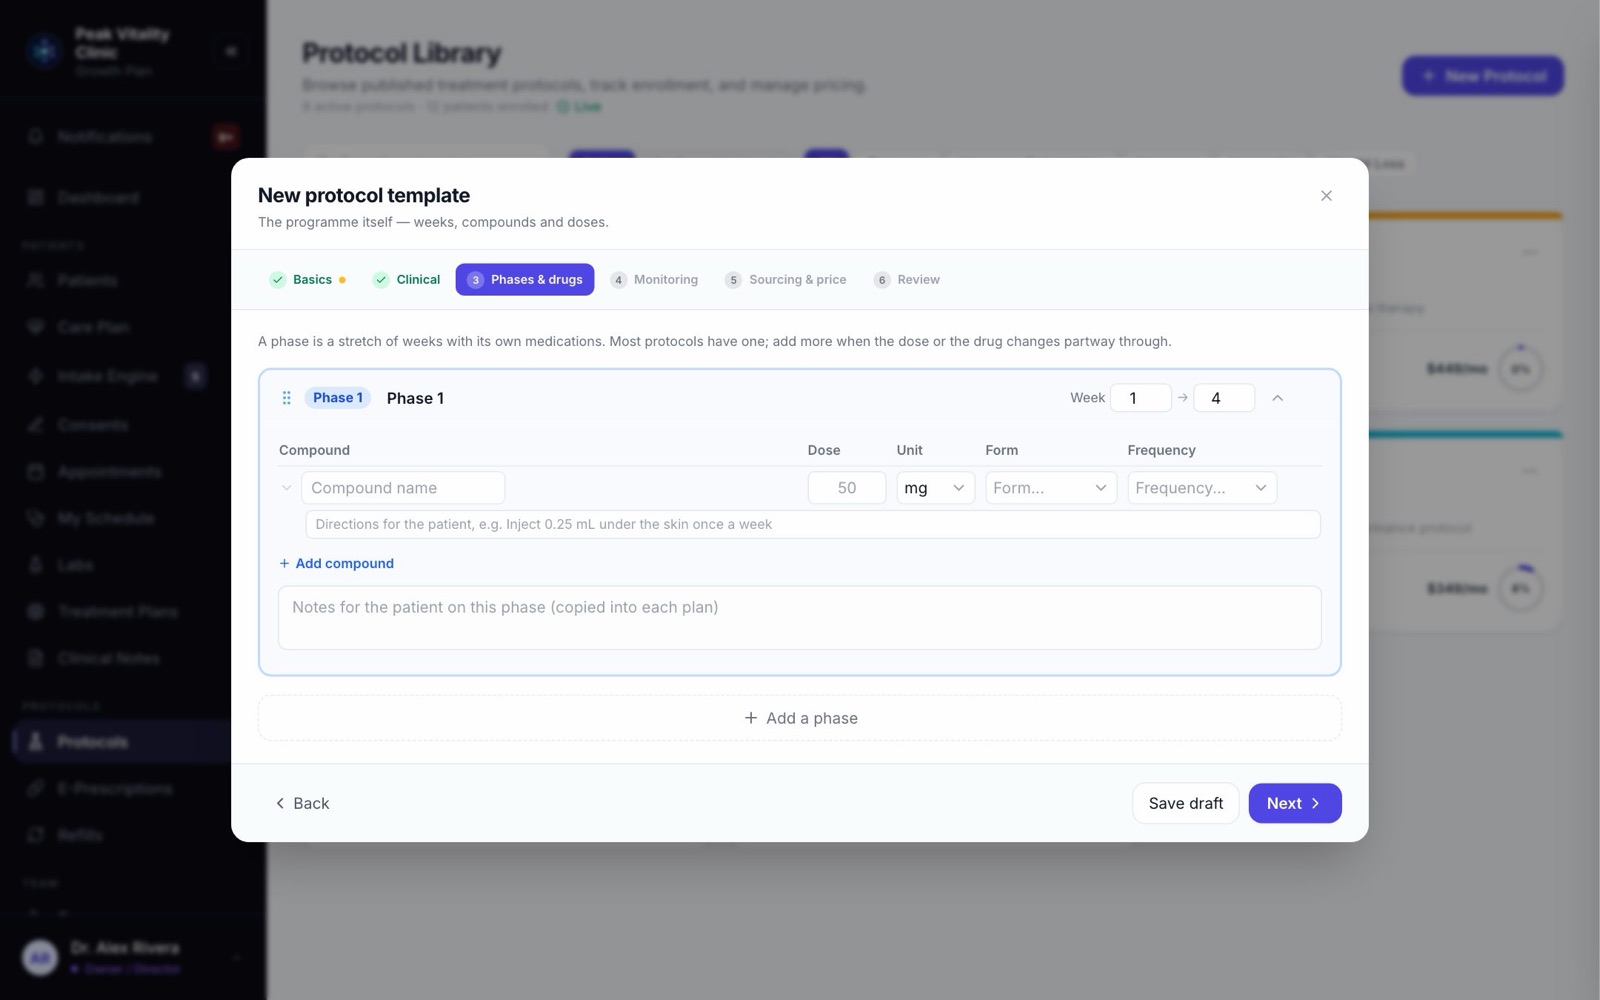
- 1A phase is a stretch of weeks with its own medicines. Most protocols have one. Set its weeks with the two Week boxes.
- 2Pick the medicine in the Compound column. Your own products come first. Then add the dose, unit, form and frequency.
- 3Write the directions for the patient on the line under it. They carry into each patient’s plan.
- 4Click the small arrow next to the name for Route, Refills and DEA Schedule.
- 5Press Add compound for another medicine, or Add a phase when the dose or drug changes partway through. Drag a phase to reorder it.
7Monitoring
- 1Choose a Check-in frequency, or None. It prints on the protocol so everyone knows the plan. It doesn’t schedule anything by itself.
- 2Under Follow-up labs, press Add a timepoint, like “Week 6”, and list the labs for it.
- 3Add Monitoring notes for anything the care team should watch for.
To really schedule check-ins for everyone on a protocol, use the Monitoring tab on the published protocol. See “A check-in schedule for everyone” below.
8Sourcing & price
- 1This step is optional, and it never bills anyone.
- 2Set a Monthly price, a Setup fee and Pricing notes. The monthly price shows on the card, and all of them print on the protocol. The monthly price also fills in when someone starts a subscription from this protocol, and they can change it.
- 3Under Sourcing, press Add a sourcing row to note where a medicine comes from and what it costs you. It works out your margin, for your own planning only.
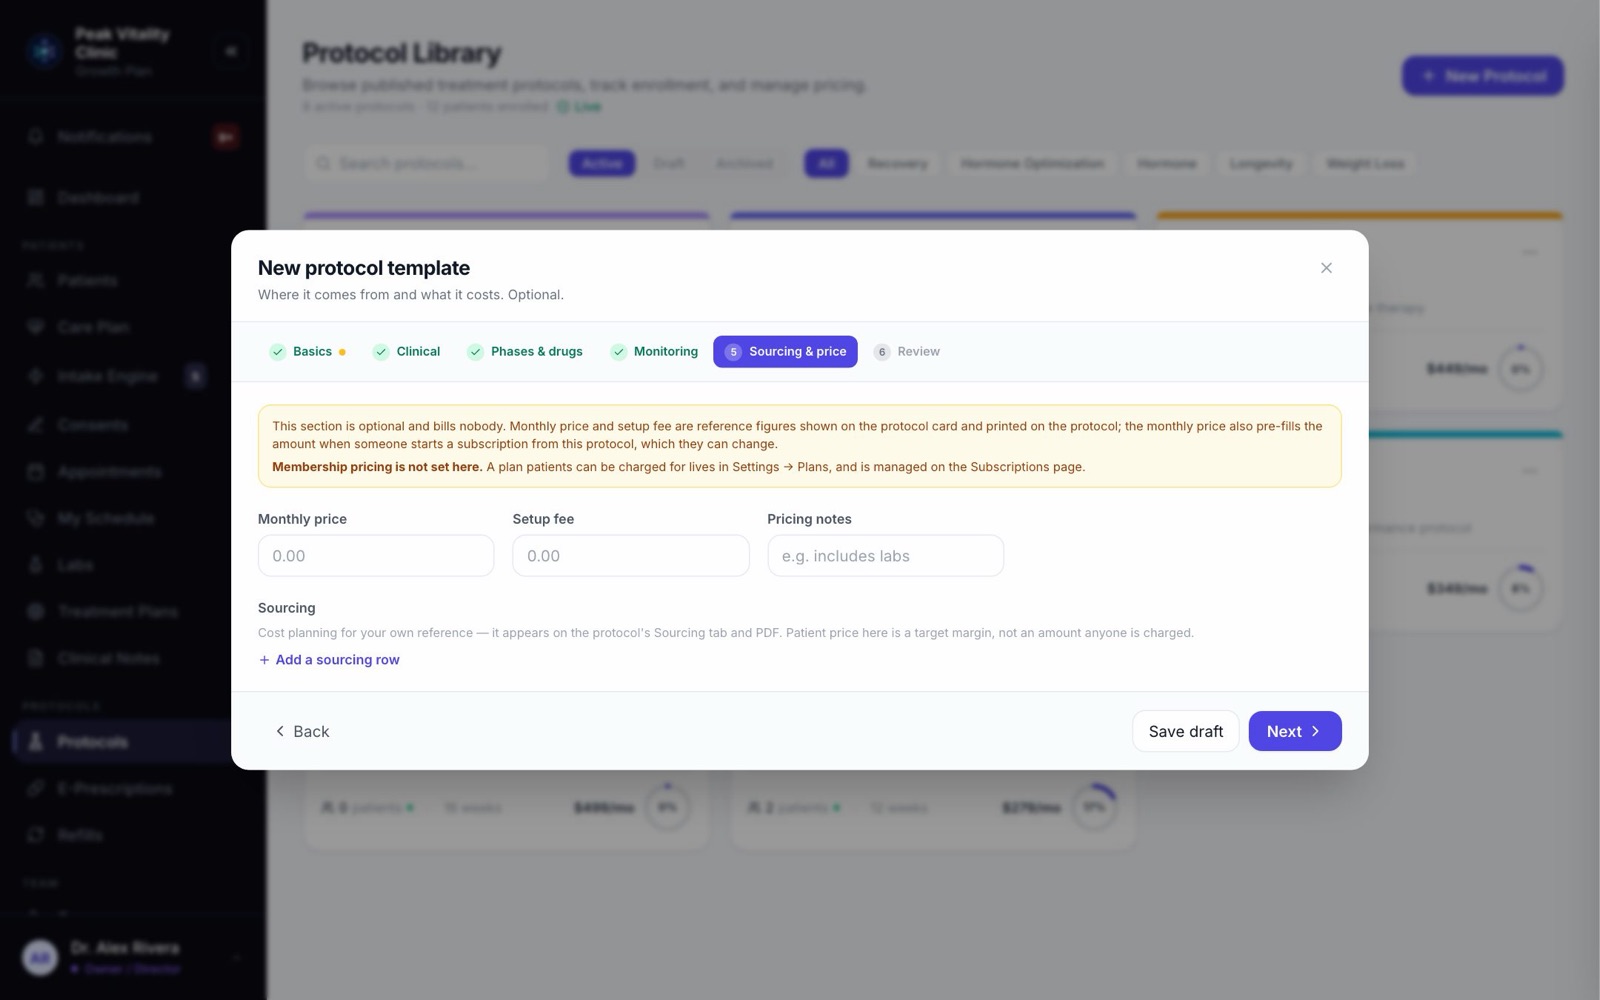
Membership plans that patients pay for are set up separately, not here.
9Review and publish
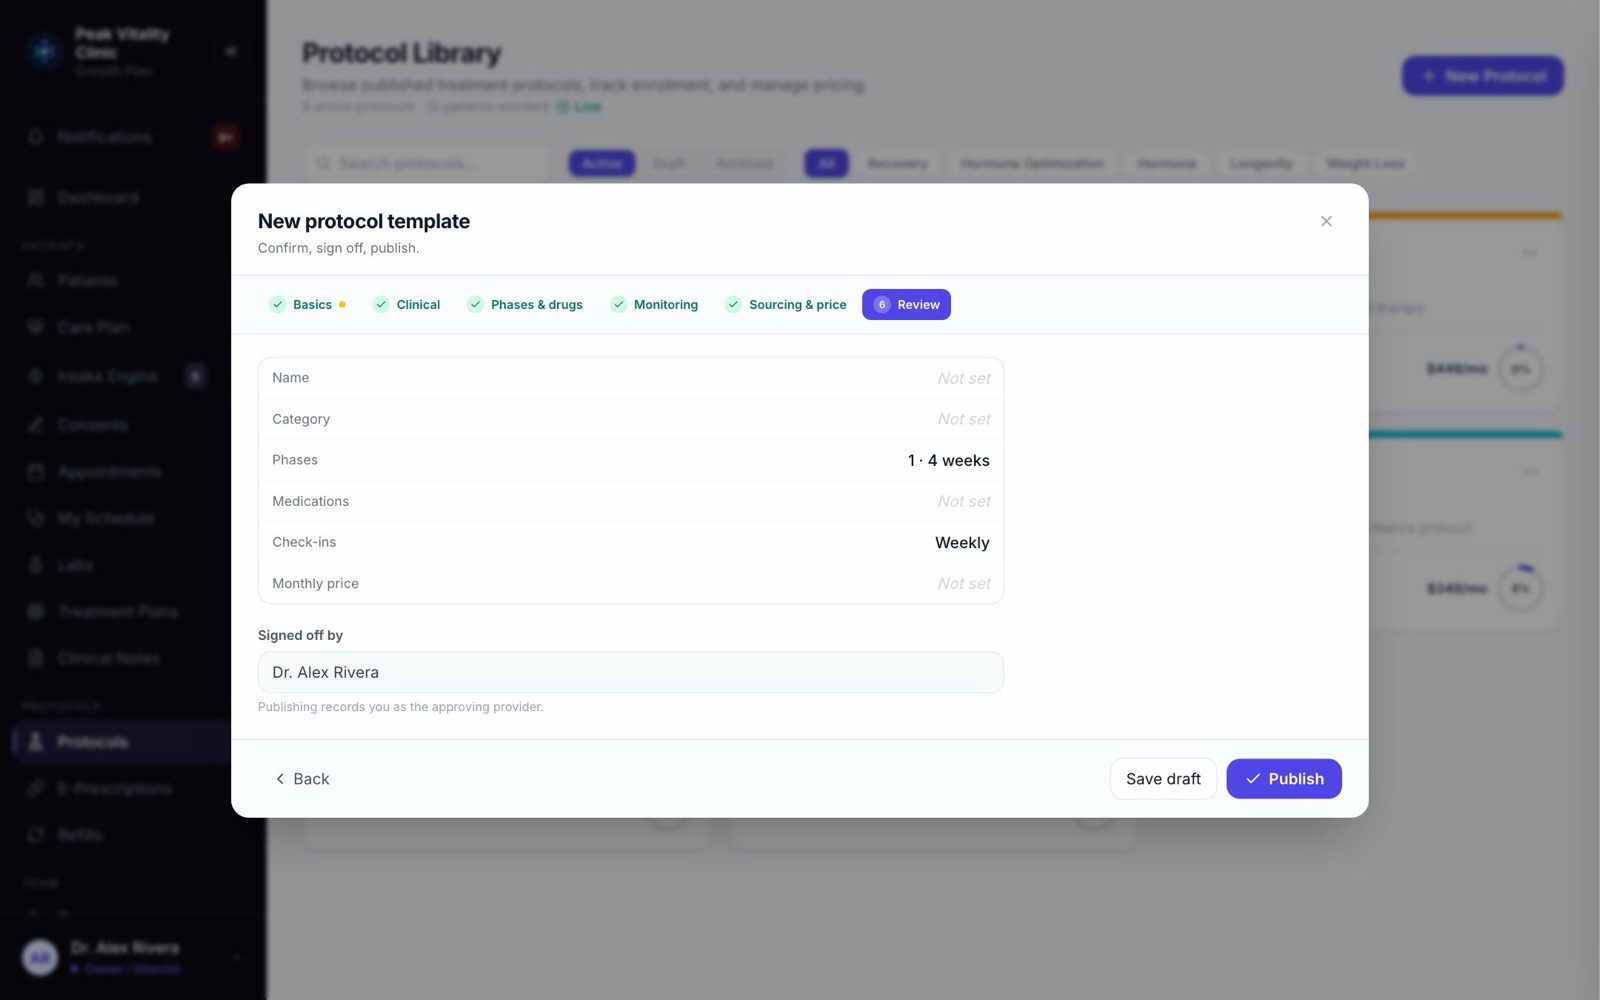
- 1Open Review to see the name, category, phases, medicines, check-ins and price in one place.
- 2Signed off by shows your name. Publishing records you as the approving provider.
- 3Press Publish. If anything is missing, a list called Fix these before publishing tells you what. An amber dot on a step also means something there needs a look.
- 4To publish, it needs a name, a category, at least one medicine with a dose, directions on any controlled medicine, and phases whose weeks don’t overlap. Your own name must be on your account in Team, since it goes on the sign-off.
10Open a protocol
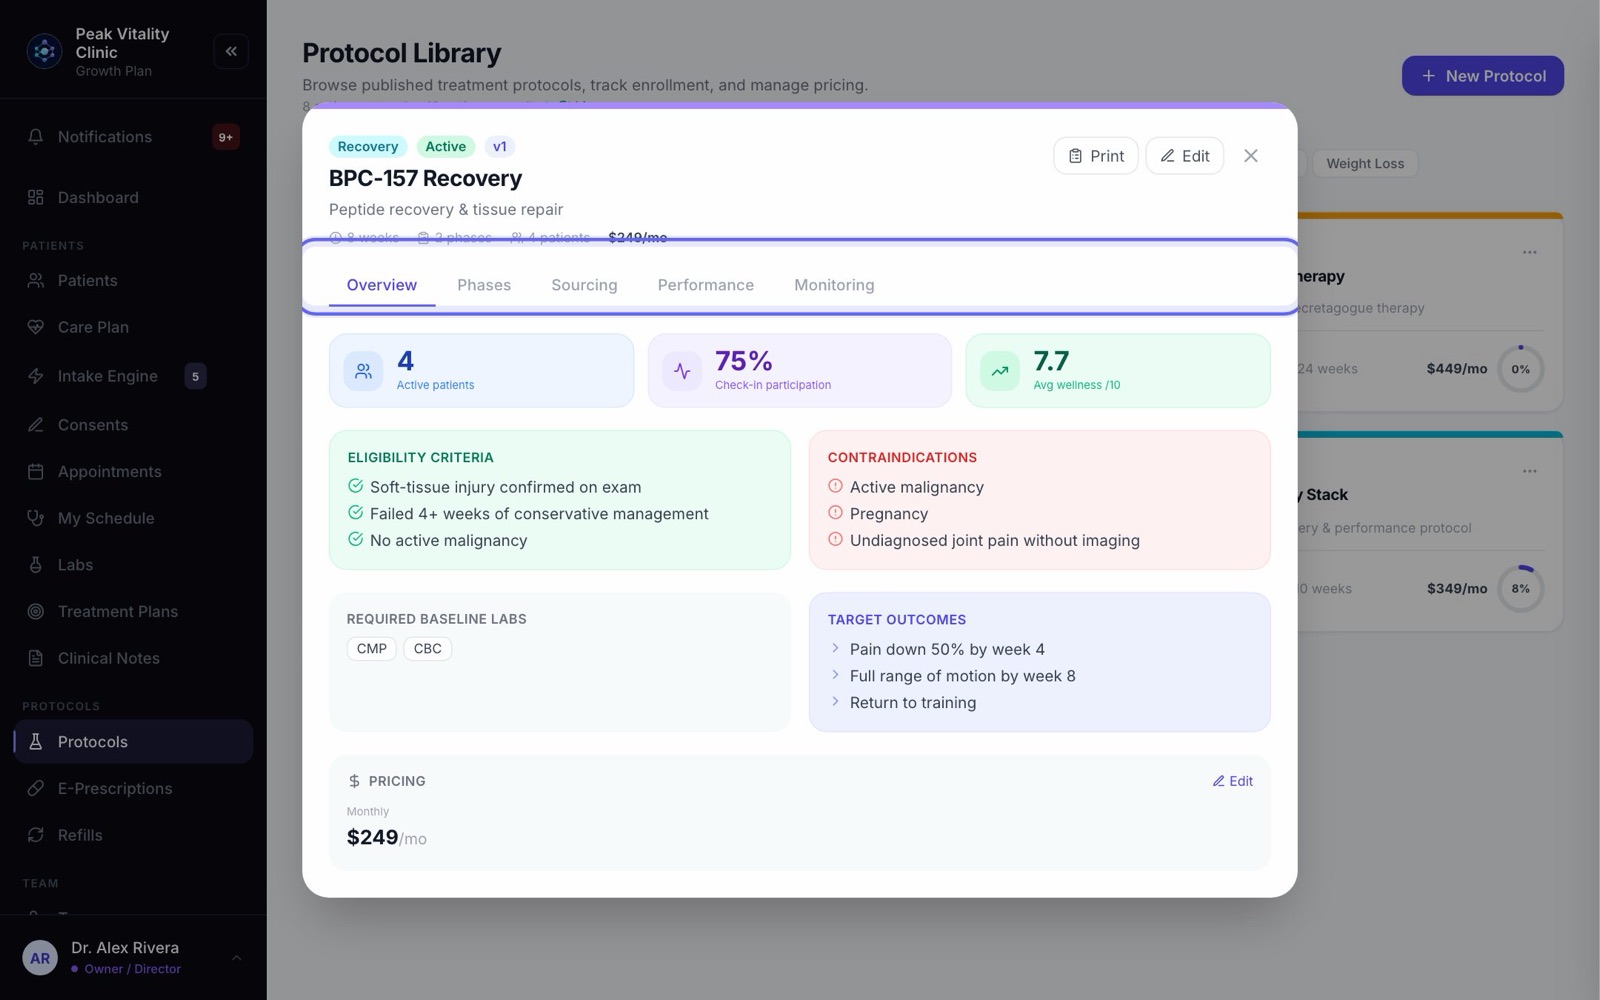
- 1Click a card. The protocol opens with five tabs: Overview, Phases, Sourcing, Performance and Monitoring.
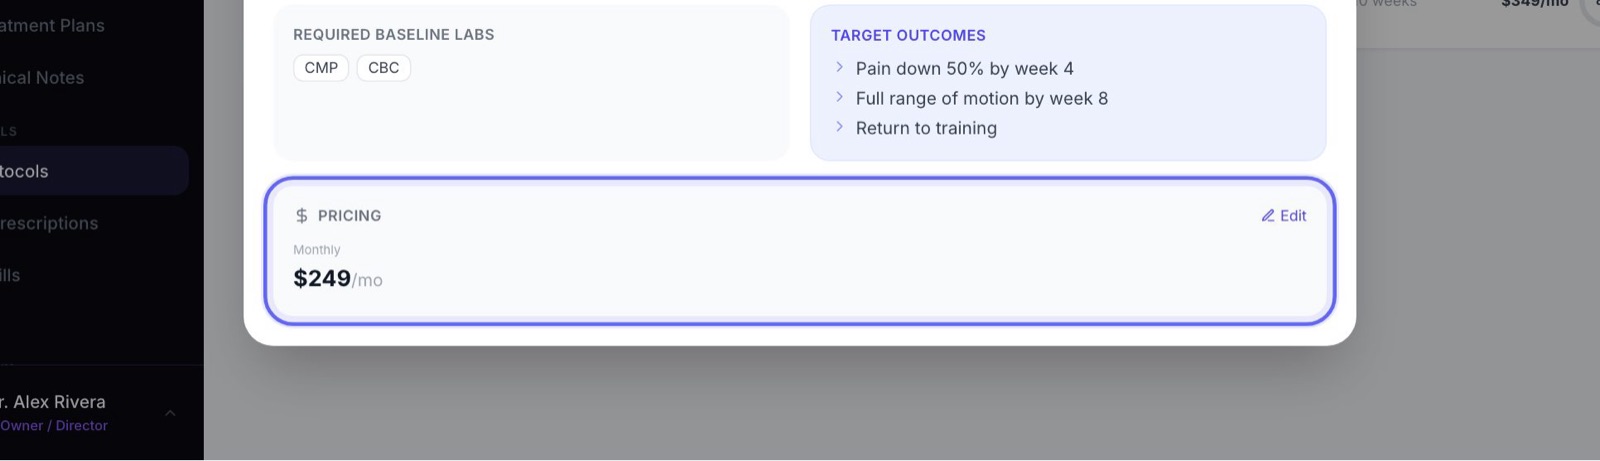
- 2Overview has who qualifies, who must not, the baseline labs, the goals and the price.
- 3Phases shows the timeline and each phase’s medicines. Sourcing shows costs and margin.
- 4Print makes a PDF of the protocol. Edit opens it in the builder.
11Change the price
- 1Open the protocol. On Overview, find Pricing.
- 2Click Edit. Change the Setup Fee ($), the Monthly Price ($) or the Pricing Notes.
- 3Click Save. The new price shows on the card right away.
12Who is on each protocol
- 1Open the protocol and click Performance.
- 2At the top: Active patients, Check-in participation (the share who sent a check-in in the last 30 days) and Avg wellness /10 from those check-ins.
- 3Below, each patient shows the week they’re on. “Past end” means they’ve gone past the protocol’s length. Click a name to open their progress.
- 4A patient joins a protocol when you assign it: on their chart’s Protocol tab, or when you build their care plan from it.
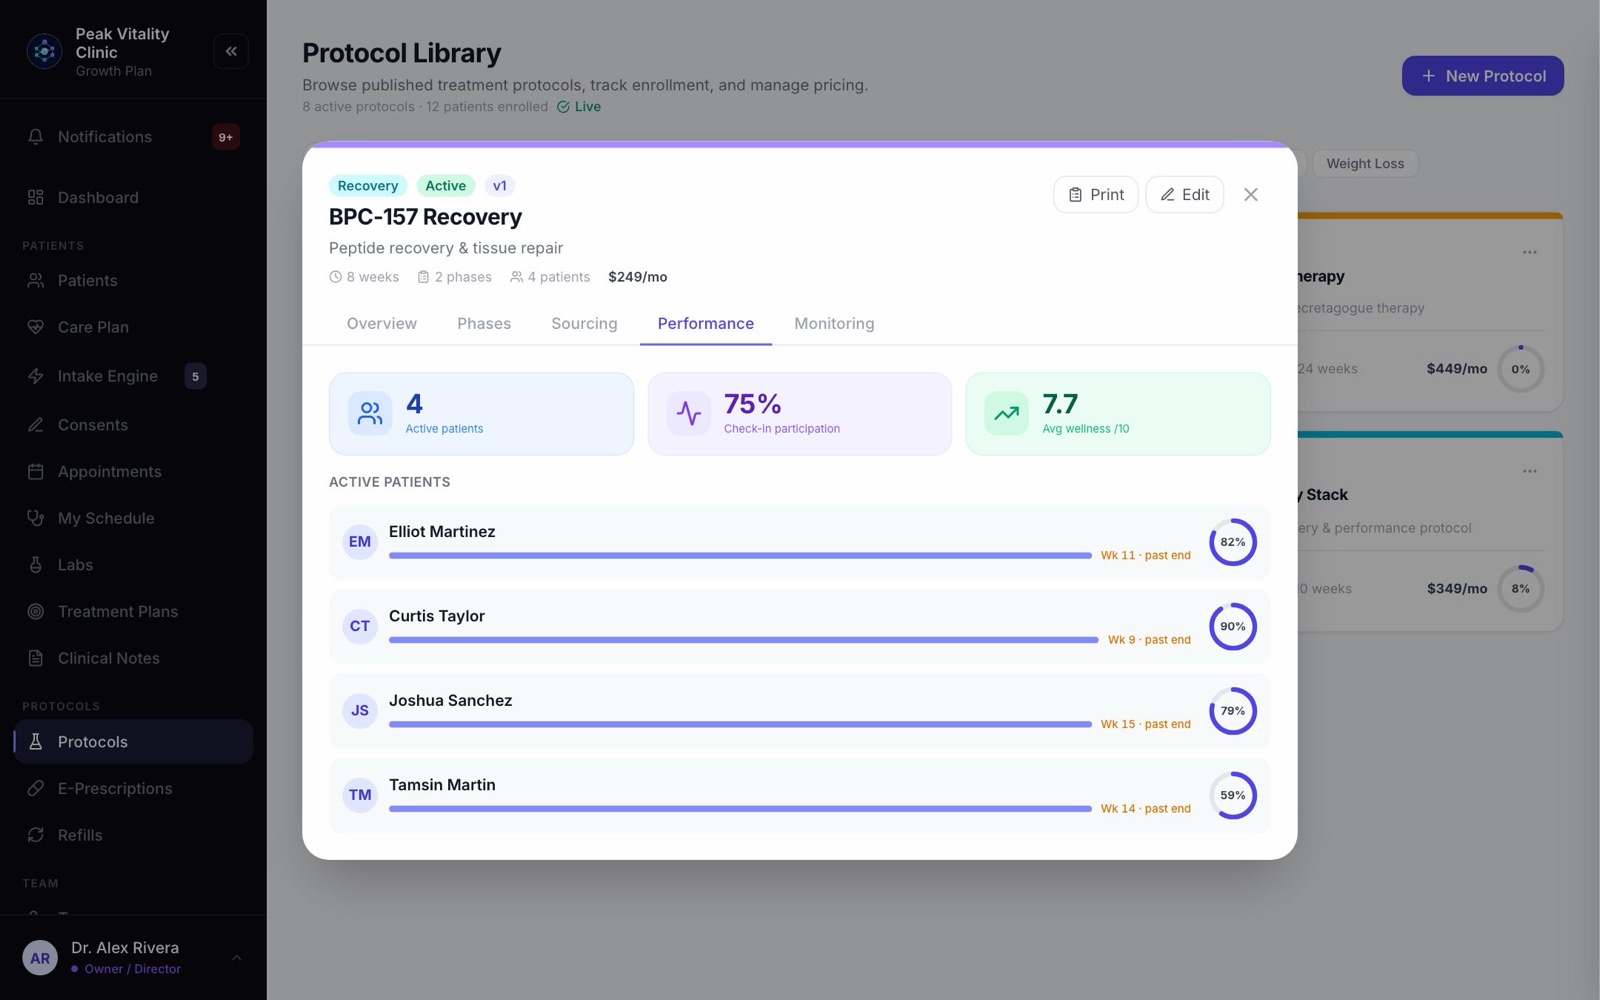
Patient names only show for roles that can see full patient charts. Everyone else sees the counts.
13A check-in schedule for everyone
- 1Open the protocol and click Monitoring. Find Cohort check-in schedule.
- 2Pick Daily, Every other day, Weekly or Every two weeks. For weekly ones, pick a day or Any day.
- 3You see each patient and whether they’d change. Untick anyone who should keep their own schedule.
- 4Press the apply button. It says how many patients will change, and sets the schedule on each one’s own care plan.
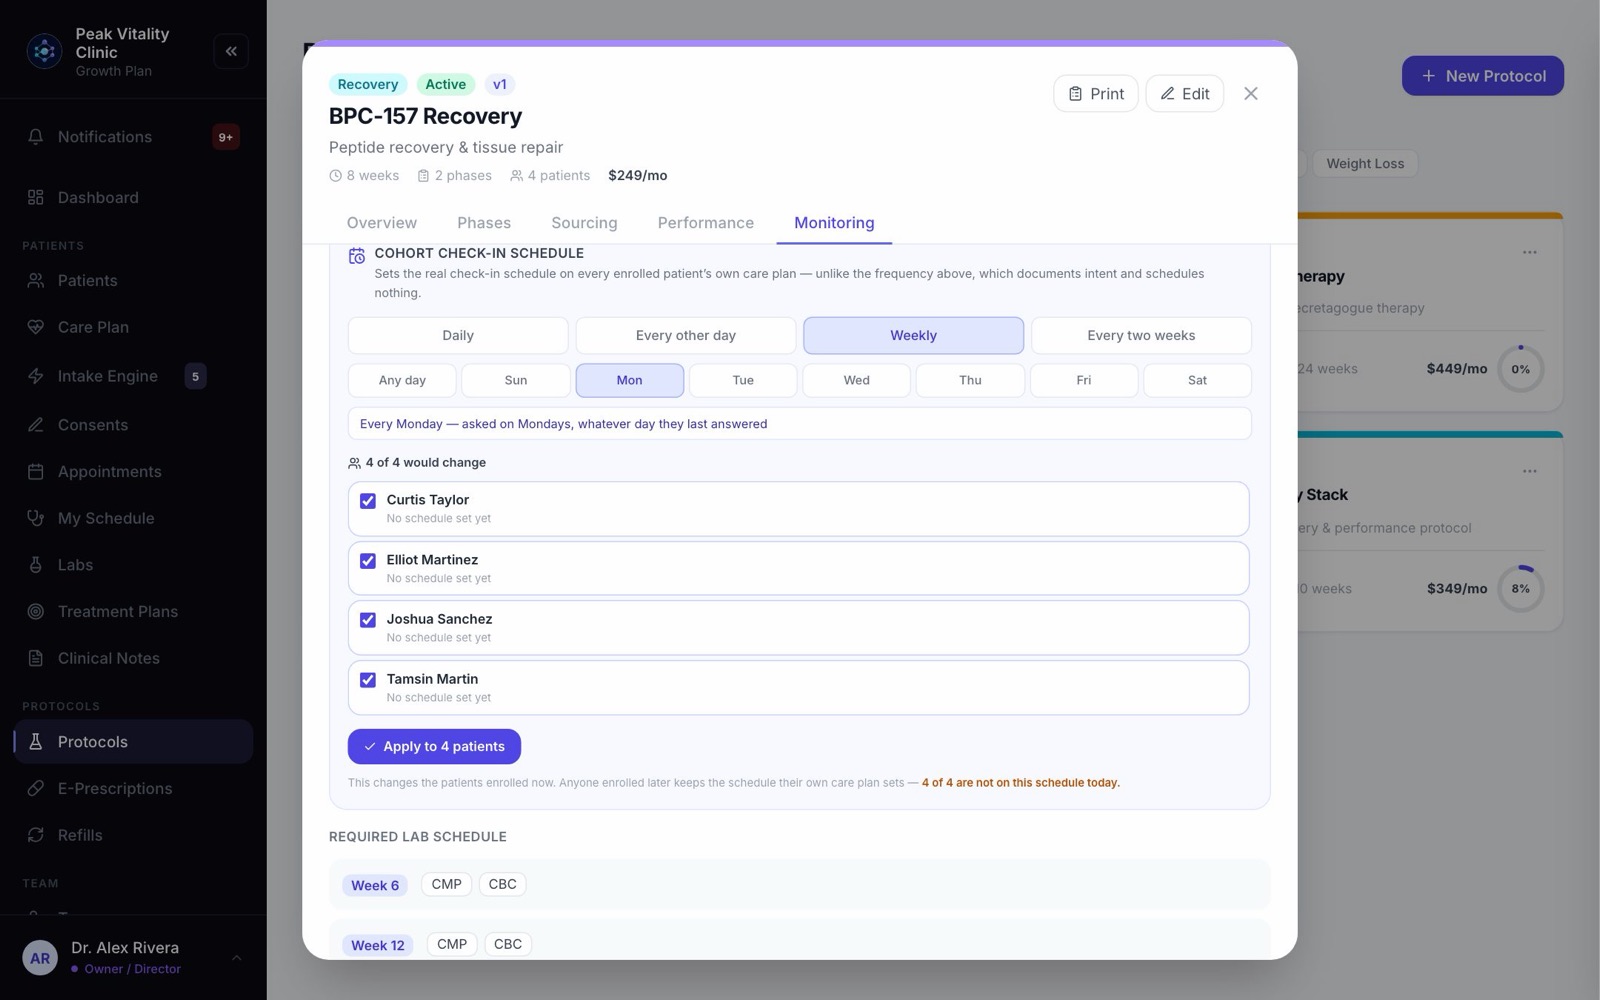
It changes the patients on the protocol now. Someone who joins later keeps their own plan’s schedule, so apply it again after you add someone.
14Edit, copy, publish, archive
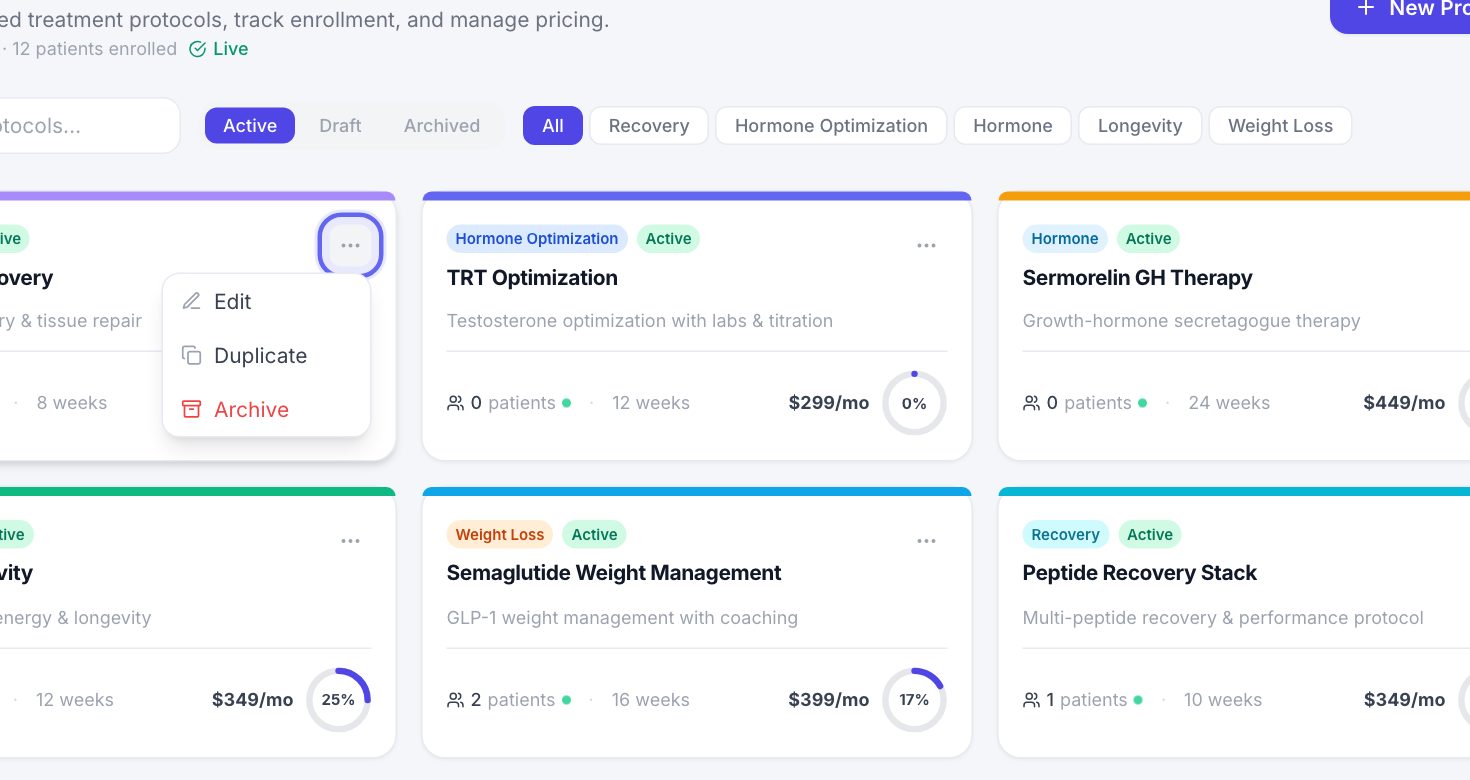
- 1Click … on a card.
- 2Edit opens it in the builder. Duplicate makes a copy, saved as a draft with “(Copy)” on the name.
- 3On a draft, Review & publish opens the builder on Review, so every check runs before it goes live.
- 4Archive stops new patients joining. Patients already on it keep their plan.
Keep going
Care Plan
A visit, one step at a time: pick the patient, choose a protocol, build and sign the plan, record vitals, write prescriptions, and finish.
Read the guideTreatment Plans
Every patient’s plan: the medicines, the doses and the weeks they run. Build a plan in phases, approve it, and see it the way the patient does.
Read the guideThe patient chart
Everything about one patient on one page. The header says who they are and what’s next; the tabs below hold each part of their record.
Read the guideE-Prescriptions
Write, sign and send prescriptions, and see where each one really is. Pharmacy messages, the state drug check and medication history live here too.
Read the guideRather be shown?
Inside Aminova, the tutorial walks you through every page, and the Getting started checklist shows you each task click by click. Or book a live training session with our team.