1The page at a glance
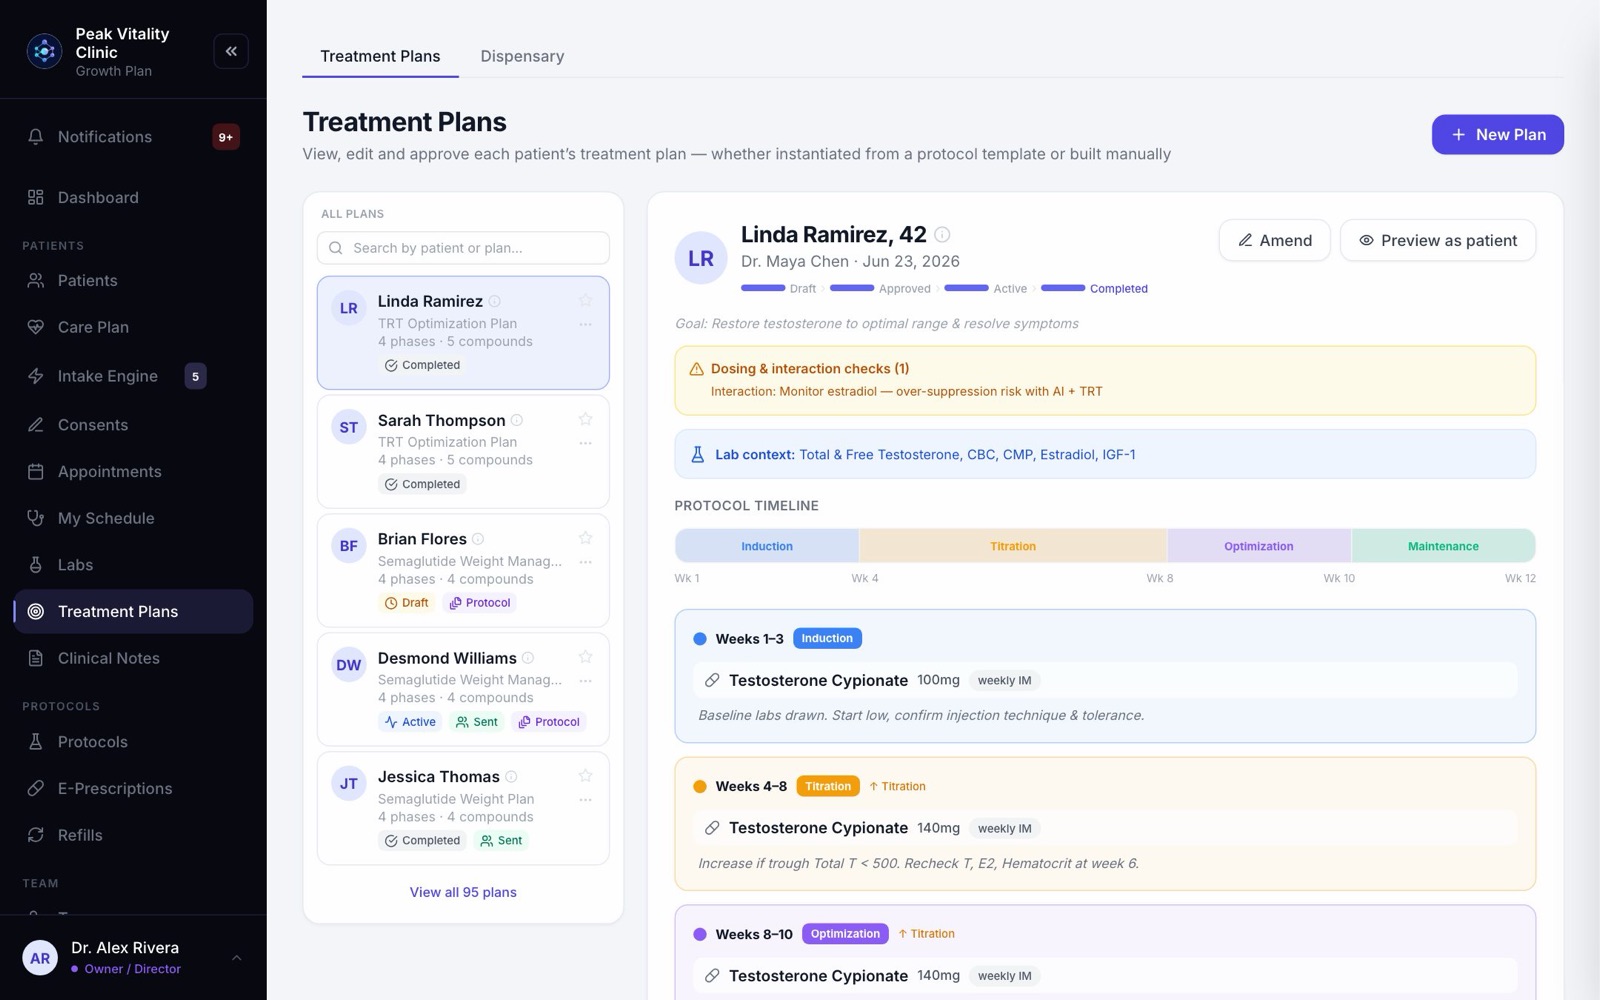
On the left is the list of plans, with your own templates above it once you have some. On the right is the plan you have open: where it stands, what to do next, and every phase of it.
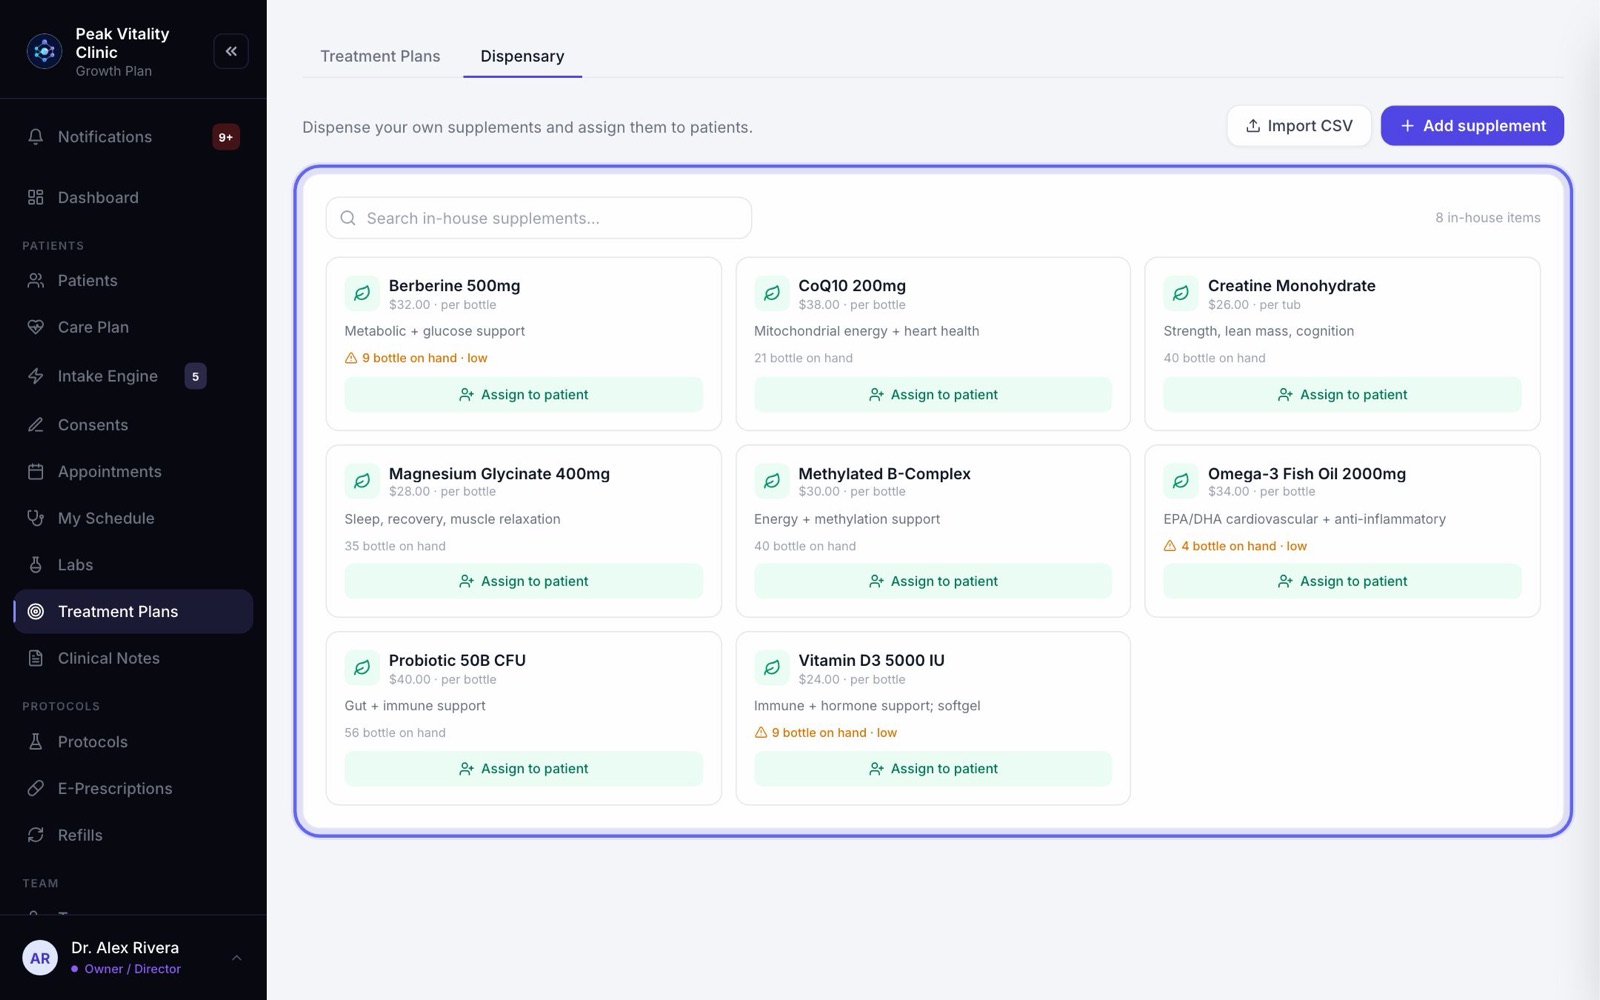
Two tabs sit at the top: Treatment Plans and Dispensary.
2Find a plan
- 1Type a patient’s name or the plan’s name in the search box.
- 2The list shows five plans at a time. The button under it opens all of them.
- 3Each card shows the patient, the plan, how many phases and medicines, and where it stands: Draft, Approved, Active or Completed. Sent means the patient can see it.
- 4Click a card to open the plan. The small info button next to a name shows the patient’s allergies, conditions and medicines.
3Start a plan
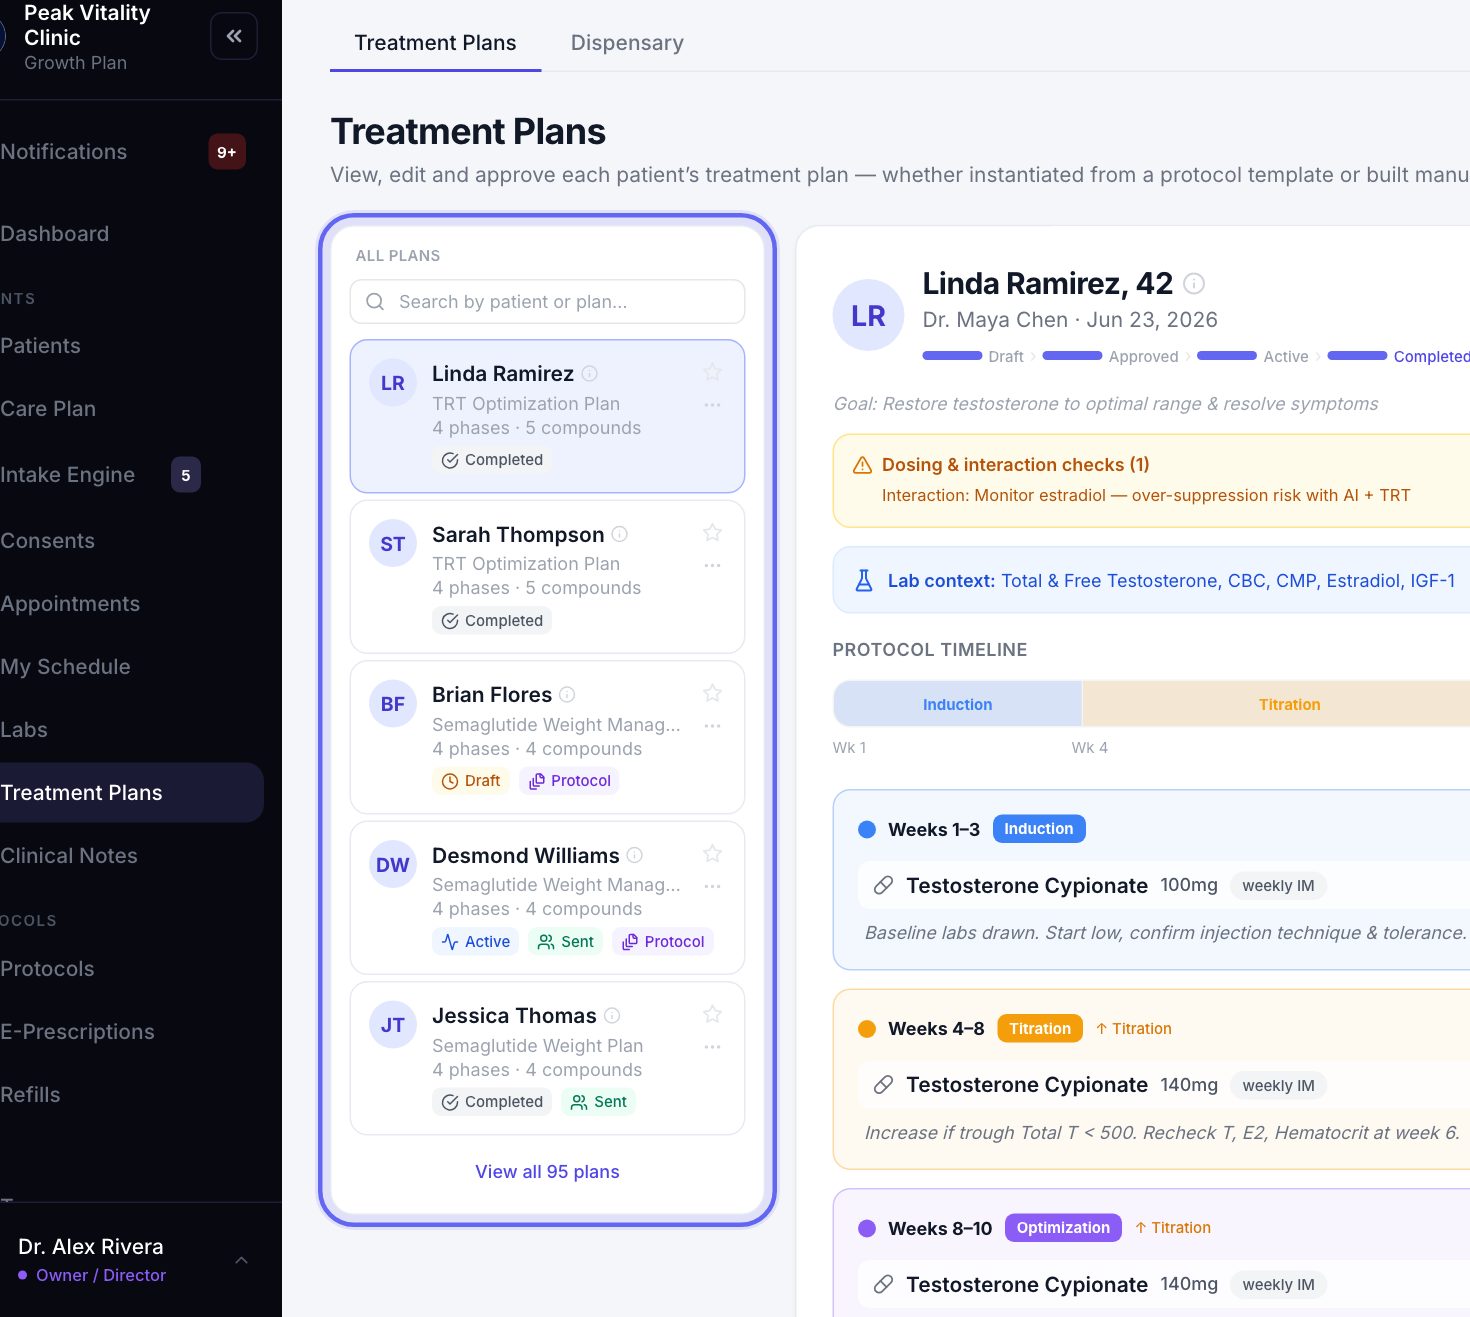
- 1Click New Plan.
- 2Search for the patient and click their name. Their out-of-range lab results fill in Key Lab Context on their own.
- 3To reuse a plan you saved, pick it under Start from a template.
- 4Give it a Plan Title and a Treatment Goal.
4Add phases and medicines
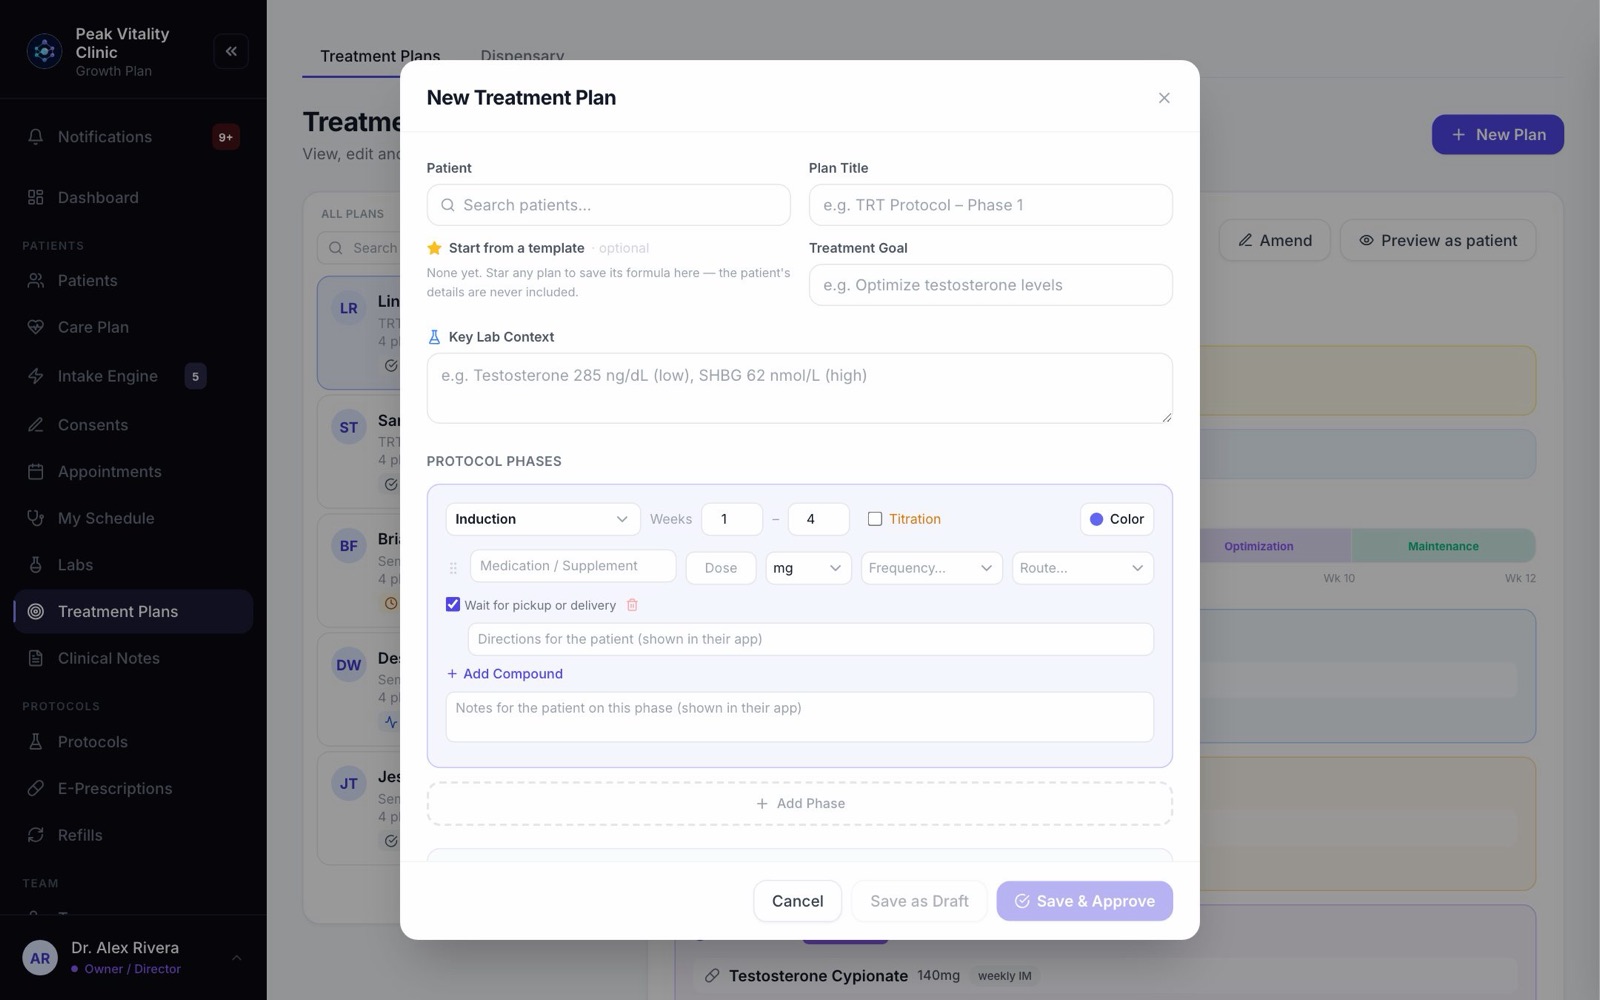
- 1A phase is a stretch of weeks, like weeks 1 to 4. Pick its name, like Induction or Maintenance, and set its weeks.
- 2Tick Titration if the dose is raised slowly during the phase. Color sets how it shows on the timeline.
- 3For each medicine, fill in the name, dose, unit, frequency and route. Set the times to take it, and write directions for the patient. They show in the patient’s app.
- 4Press Add Compound for another medicine, and Add Phase for the next stretch of weeks.
- 5Each phase has a notes box. Anything you write there shows in the patient’s app.
5Medicine that has to arrive first
Each medicine has Wait for pickup or delivery. Ticked, it starts once the patient confirms in their app that they have it. Unticked, it starts on the plan’s start date.
Once the patient confirms, the plan lists the day under Medication collected. A refill is counted from that day.
6The patient’s Progress page
Progress page decides what the patient sees on their Progress page for this plan: the numbers, the chart, and what they log by hand. Leave it on Use the clinic default, or pick the other button to lay it out for this plan only.
7Save it
- 1Save as Draft keeps it as a draft you can still change.
- 2Save & Approve saves it as approved. It works once every medicine has a name, dose, frequency and route.
Building, approving and changing plans takes the right to manage protocols. Owners, managers and physicians have it to start with.
8Where the plan stands
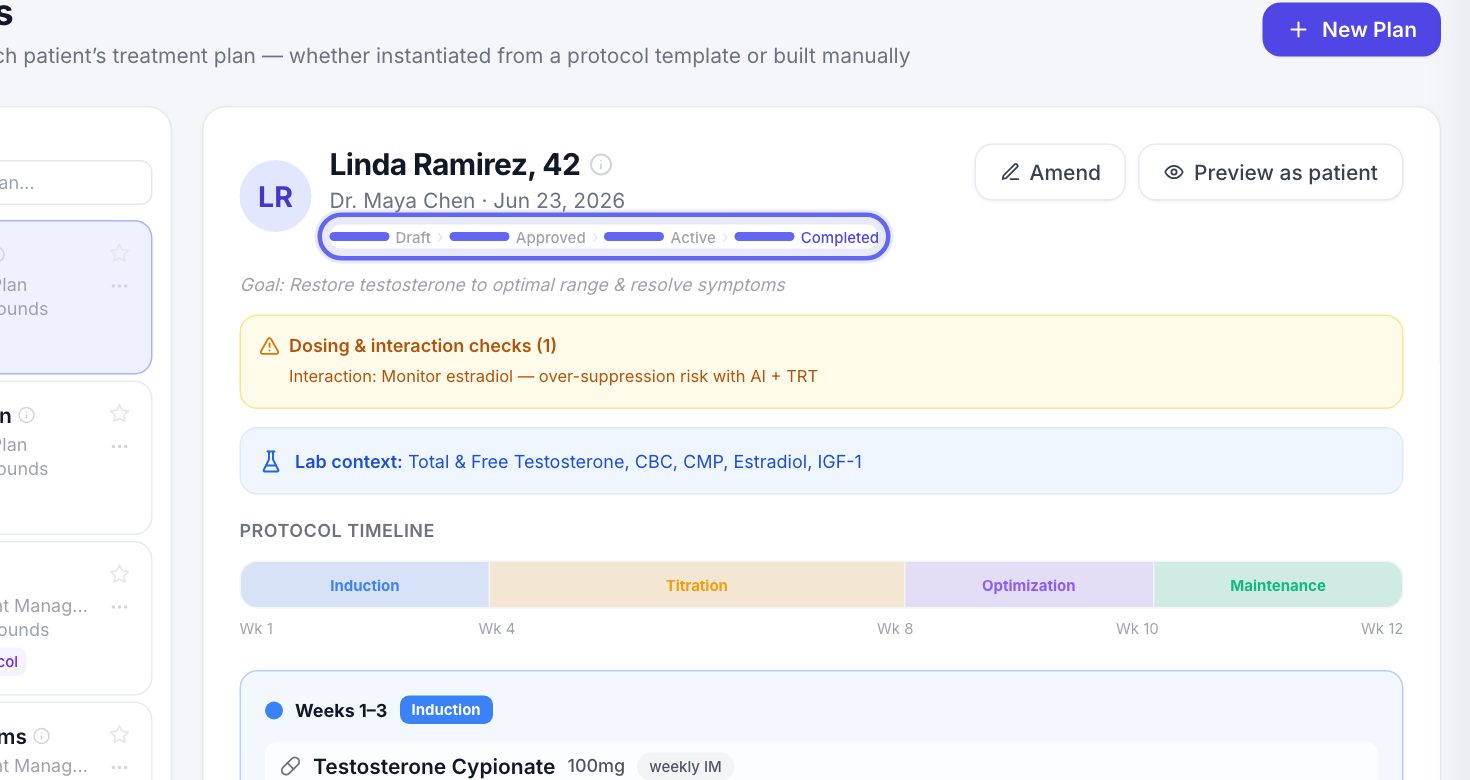
Under the patient’s name, a bar shows Draft, Approved, Active and Completed. The lit part is where this plan is. A paused plan sits on Active.
9What to do next
- 1On a draft, Edit Plan changes it. Approve & Sign signs it, shares it with the patient and locks it. A signed copy is also added to Clinical Notes.
- 2Share with patient lets them read a plan before it starts. Nothing is due until it is active.
- 3Set Active starts an approved plan. Pick the start date.
- 4An active plan has Pause and Mark complete. A paused one has Resume. Change start date shows while the start date is still ahead.
The patient is told when a plan is shared with them. A practice patient never gets an email or text.
10The plan itself
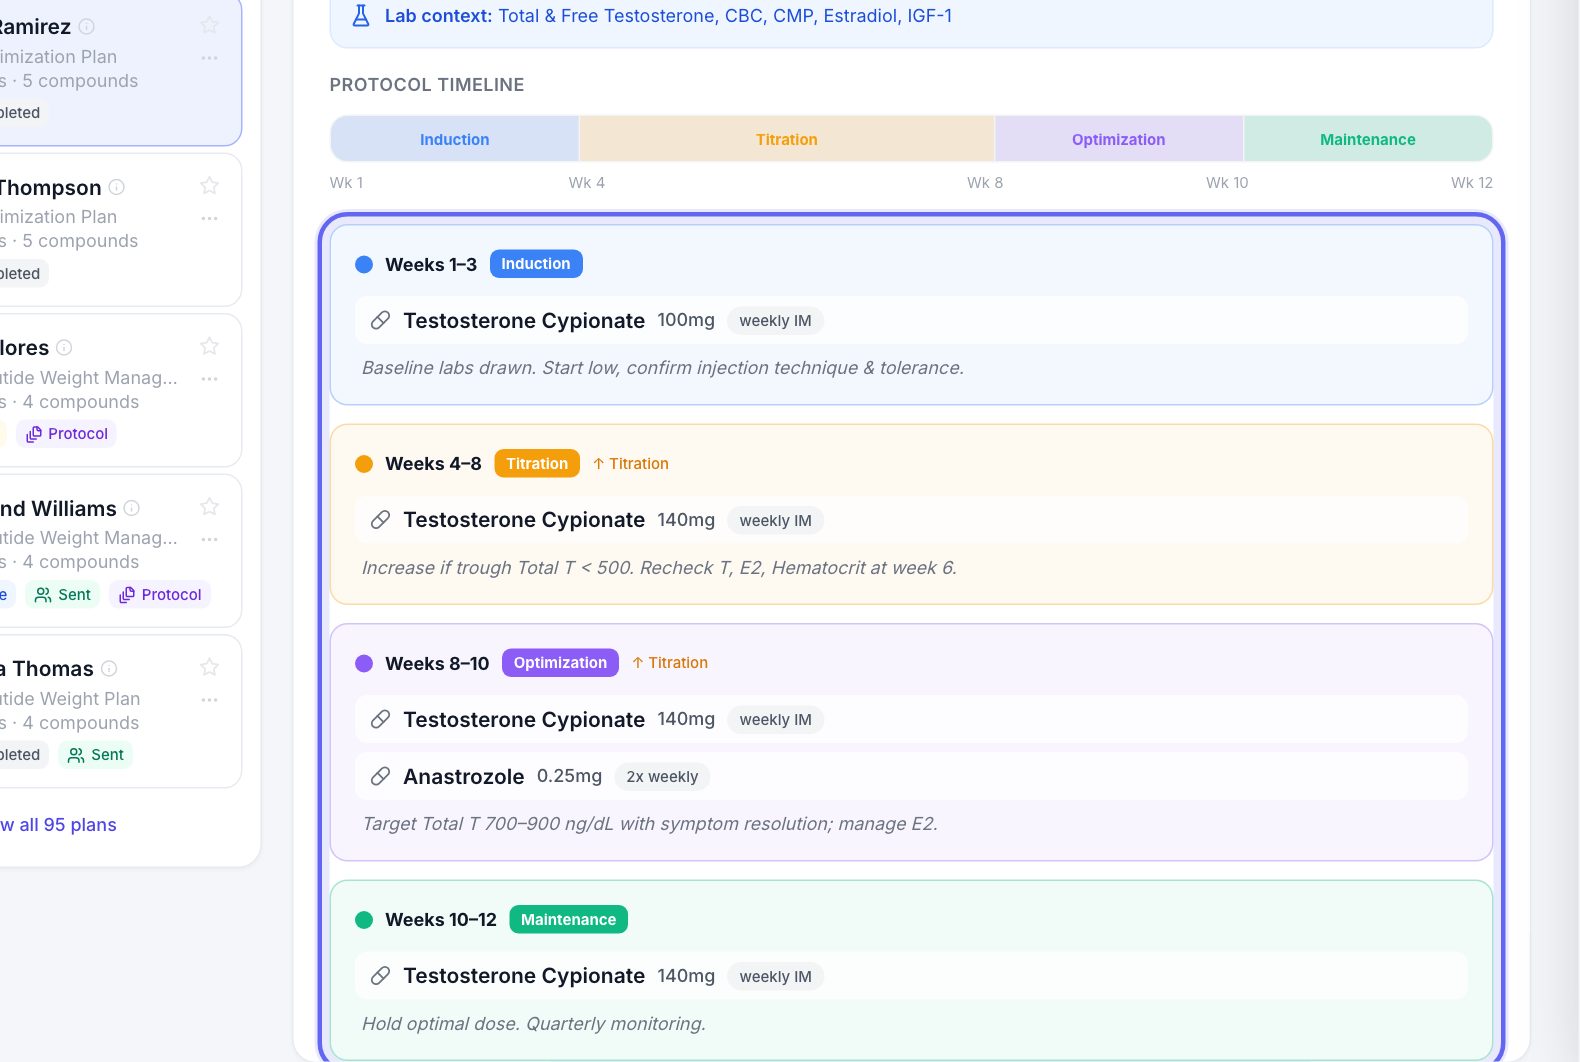
- 1A colored bar shows the phases, week by week.
- 2Below it, each phase lists every medicine, its dose, how often, the route, and the times.
- 3If a dose is higher than usual, or two medicines are known to clash, an amber box says so.
- 4The goal, supplements and handouts sit with the plan too. Supplements are added while you edit the plan. Attach handout adds a file the patient can open in their app once the plan is shared.
11Change an approved plan
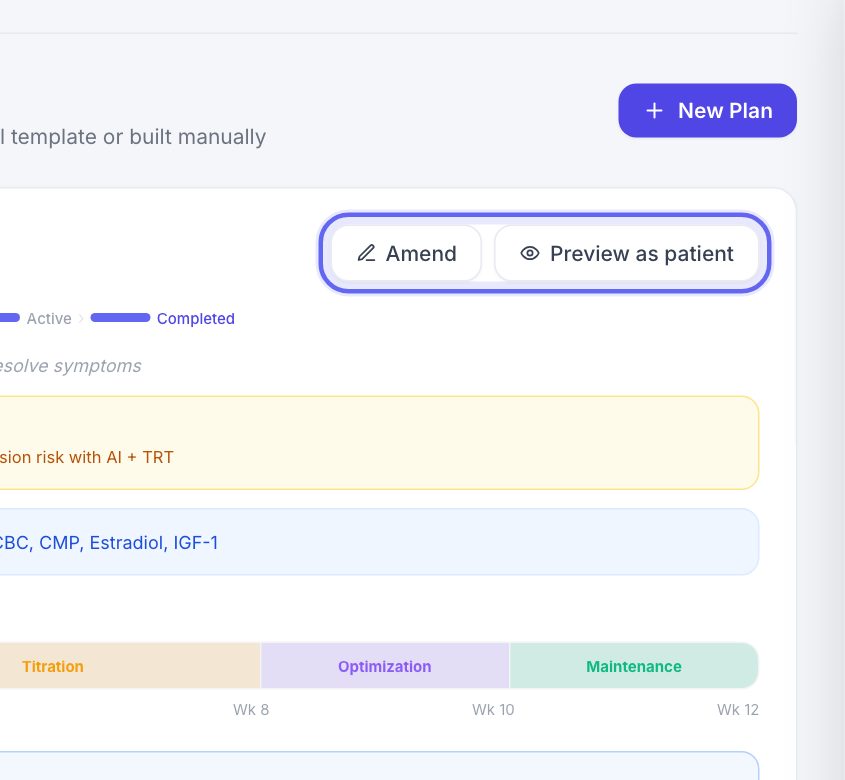
- 1Click Amend. The plan opens in the same editor as a draft.
- 2Make your changes and press Save Changes.
- 3Aminova lists exactly what changed. Write a Reason and press Sign & Record, then sign.
- 4The change is kept in the Amendment Trail on the plan, with who, when and why.
12See what the patient sees
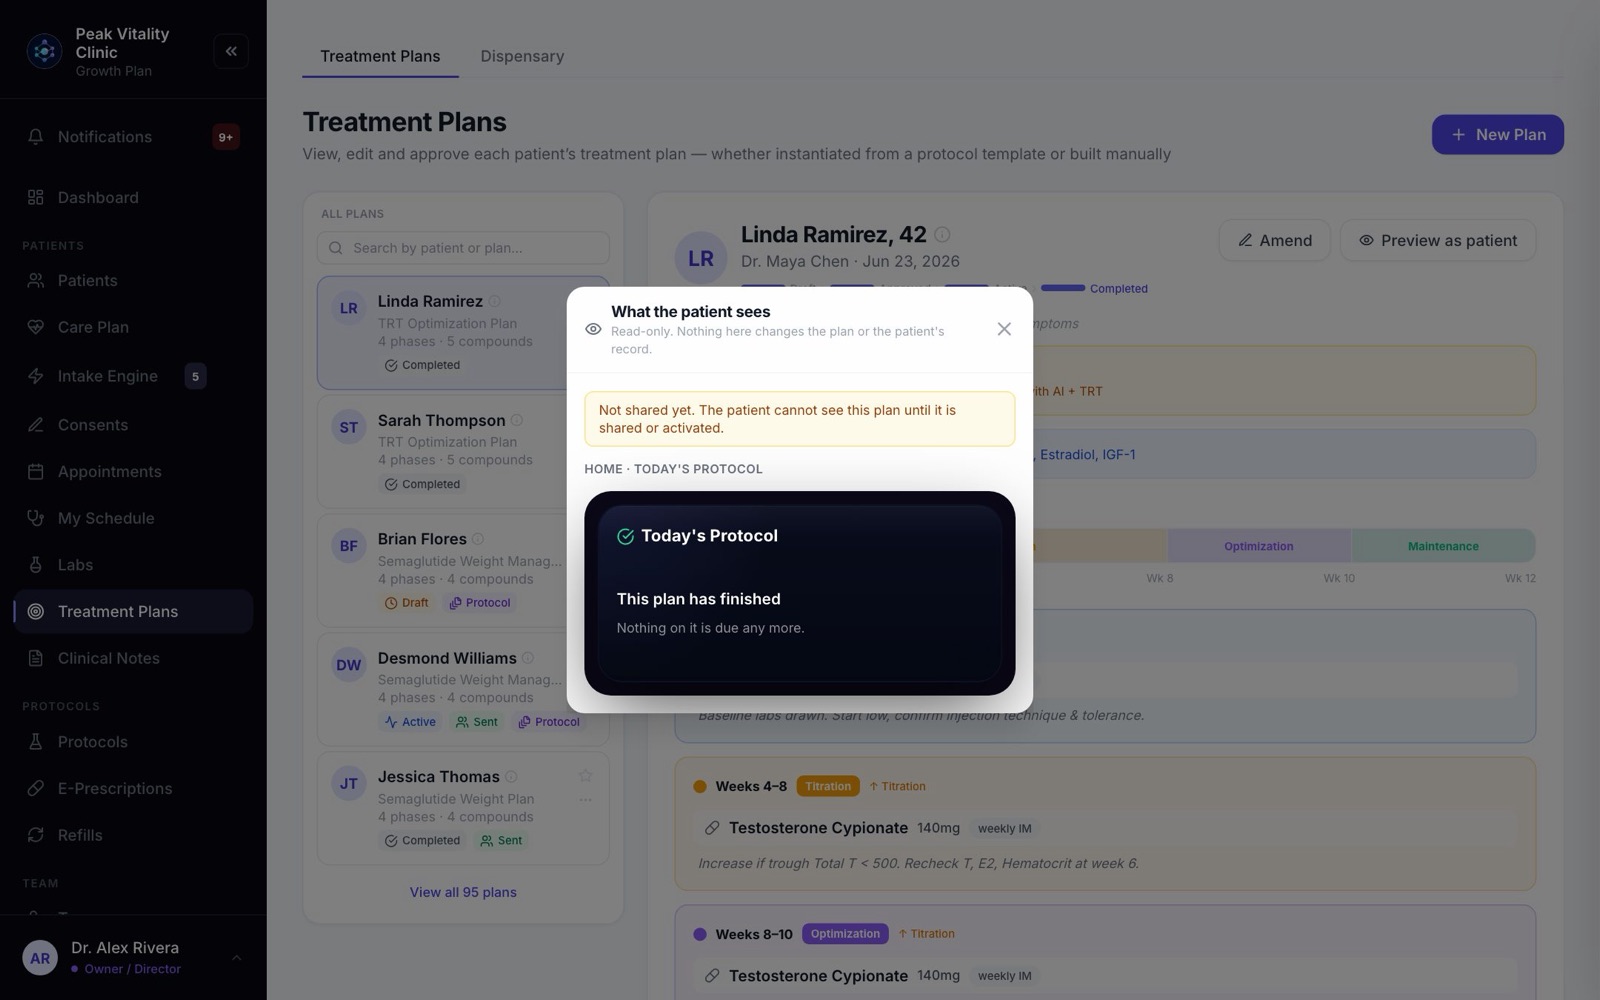
Click Preview as patient to see the plan the way it looks in the patient’s app. Nothing you do there changes the plan. If the plan isn’t shared yet, it says so.
13Save a plan as a template
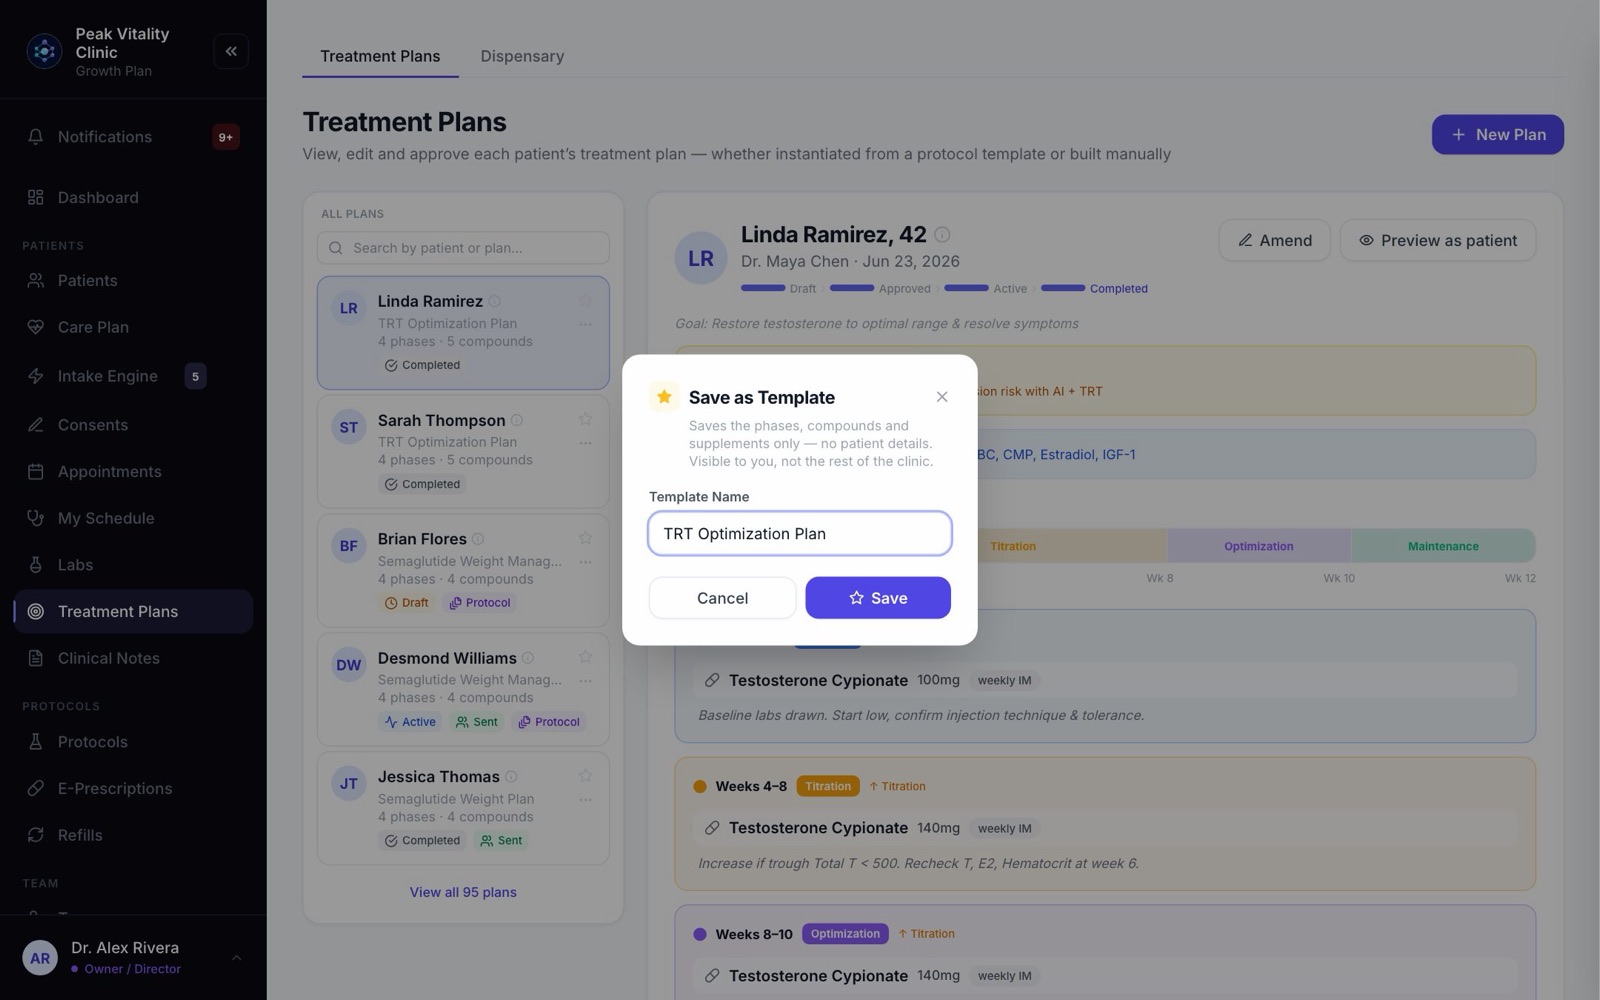
- 1Click the star on a plan’s card. Name the template and press Save.
- 2Only the phases, medicines and supplements are saved. No patient details. It is yours alone. The rest of the clinic doesn’t see it.
- 3Your templates show under My Templates. Click Use to start a plan from one.
- 4To copy a plan to another patient, click … on its card, then Duplicate.
14The Dispensary tab
The Dispensary tab is your clinic’s own supplements, with what is on hand. Click Assign to patient on one to hand it over. See the Dispensary manual.
Keep going
Care Plan
A visit, one step at a time: pick the patient, choose a protocol, build and sign the plan, record vitals, write prescriptions, and finish.
Read the guideProtocols
Your treatment programs. Build one step by step, price it, publish it, and see who is on each one and how they are doing.
Read the guideDispensary
Your clinic’s own supplements, and how many are on the shelf. Hand one to a patient, take the payment, and add supplements to the shelf.
Read the guideThe patient app
Your patients’ side of Aminova, screen by screen: how they get in, what each tab does, and where each thing they do shows up for your team.
Read the guideRefills
Approve or decline refills, get them signed and sent, and see what really reached the pharmacy. Approving is not sending.
Read the guideRather be shown?
Inside Aminova, the tutorial walks you through every page, and the Getting started checklist shows you each task click by click. Or book a live training session with our team.