1The page at a glance
Products is your price list. Two tabs sit at the very top: Catalog, which is everything you sell, and Orders, which is every patient order.
On the Catalog, the line under the title counts your active and archived products. Your list is on the left, and the product you pick opens on the right. Import CSV and Add Product sit in the top right.
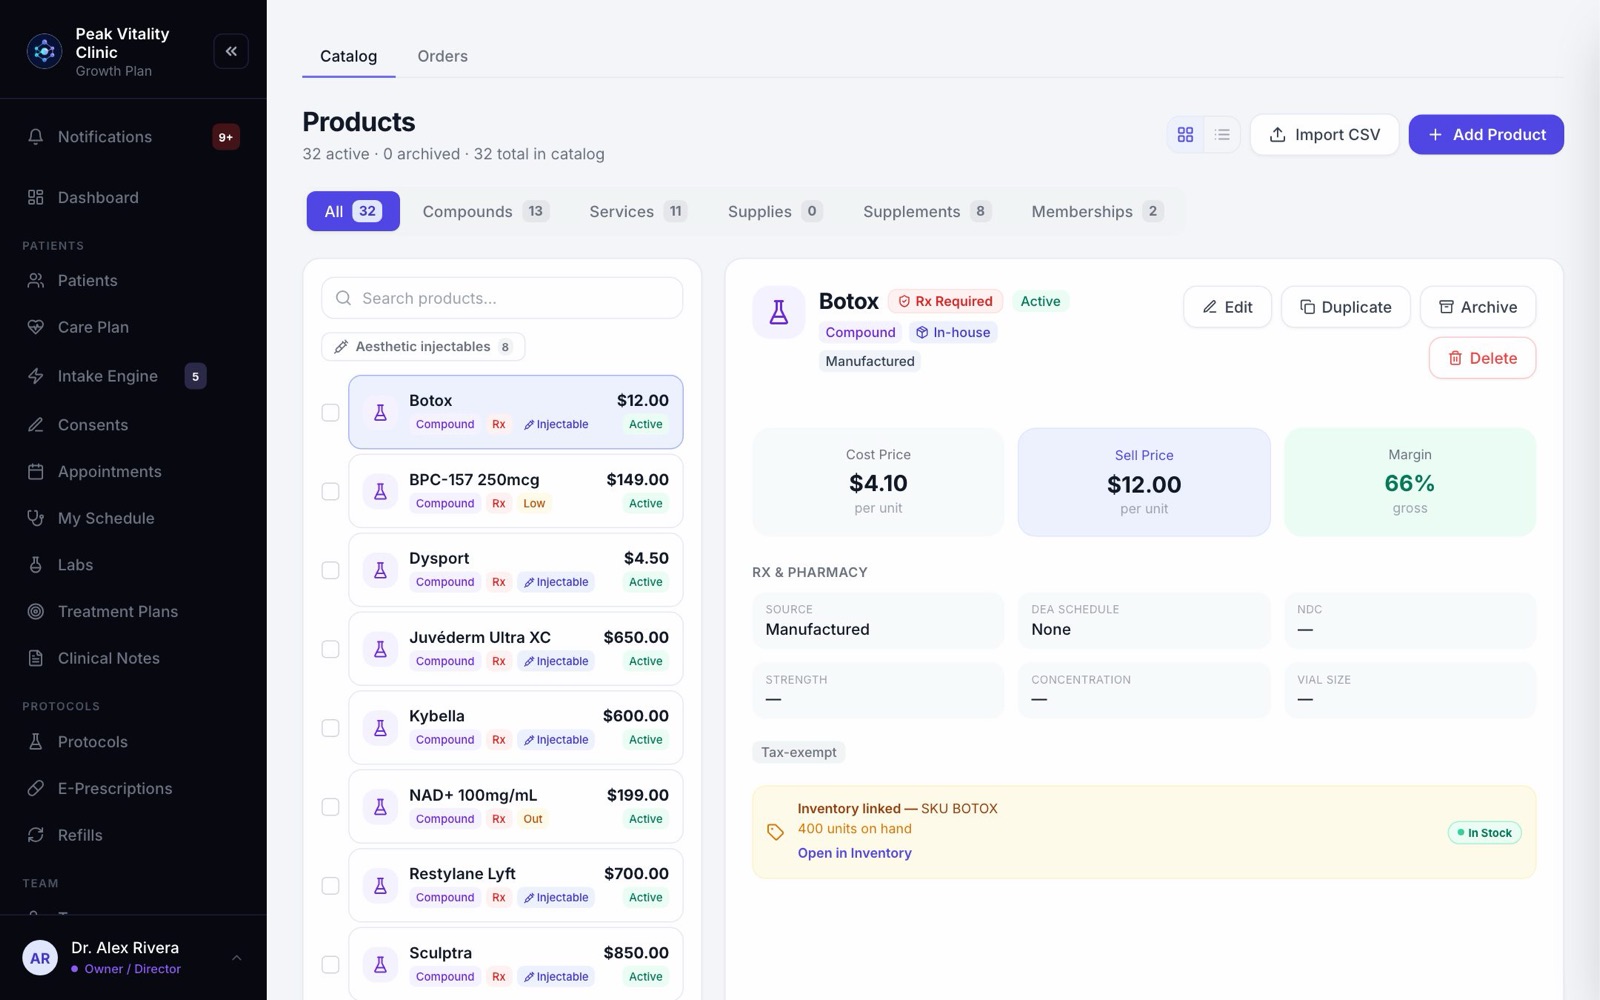
The two small buttons beside Import CSV switch between the split view and a full-width list.
2One kind at a time
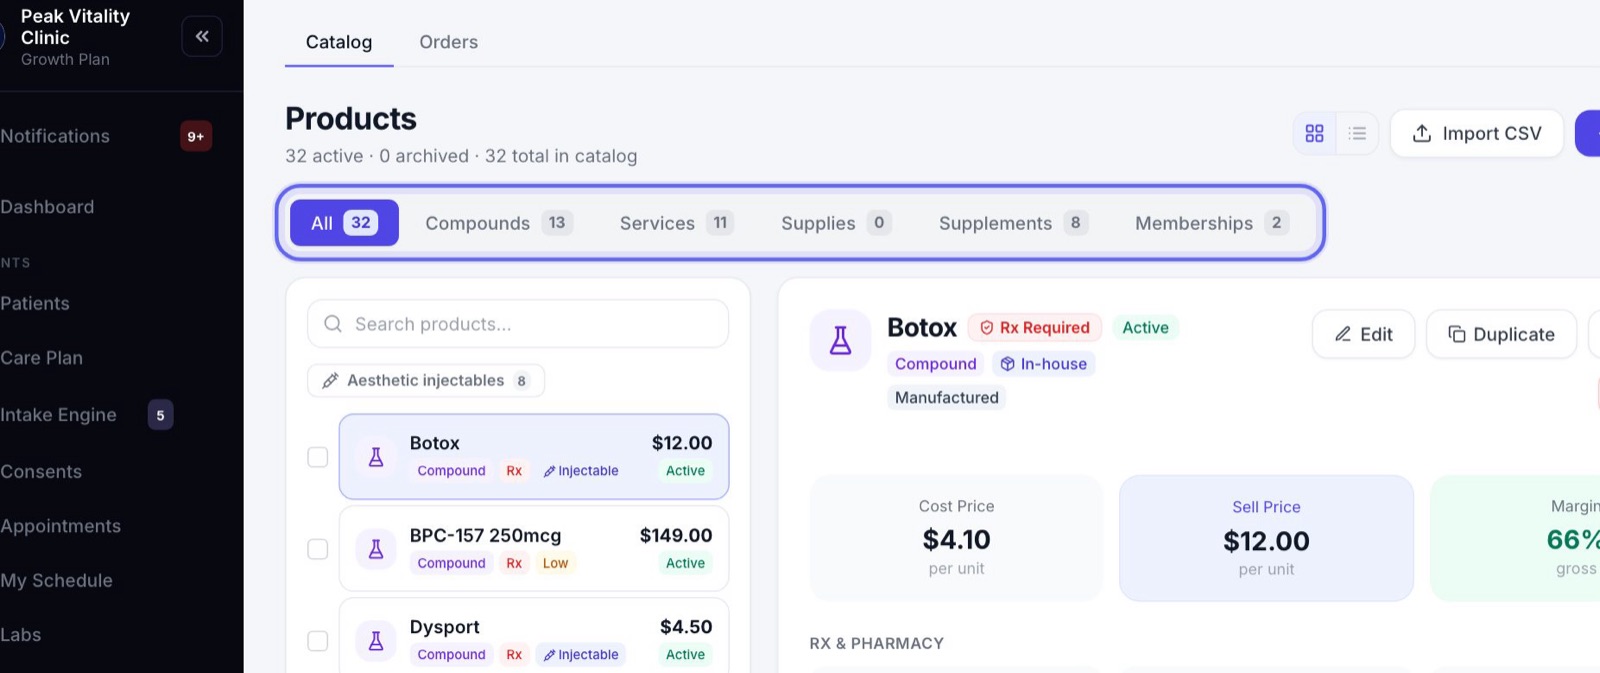
- 1Click Compounds, Services, Supplies or Supplements to see only that kind. All shows everything.
- 2Memberships holds your memberships and packages.
- 3The number on each tab is how many there are.
3Your catalog
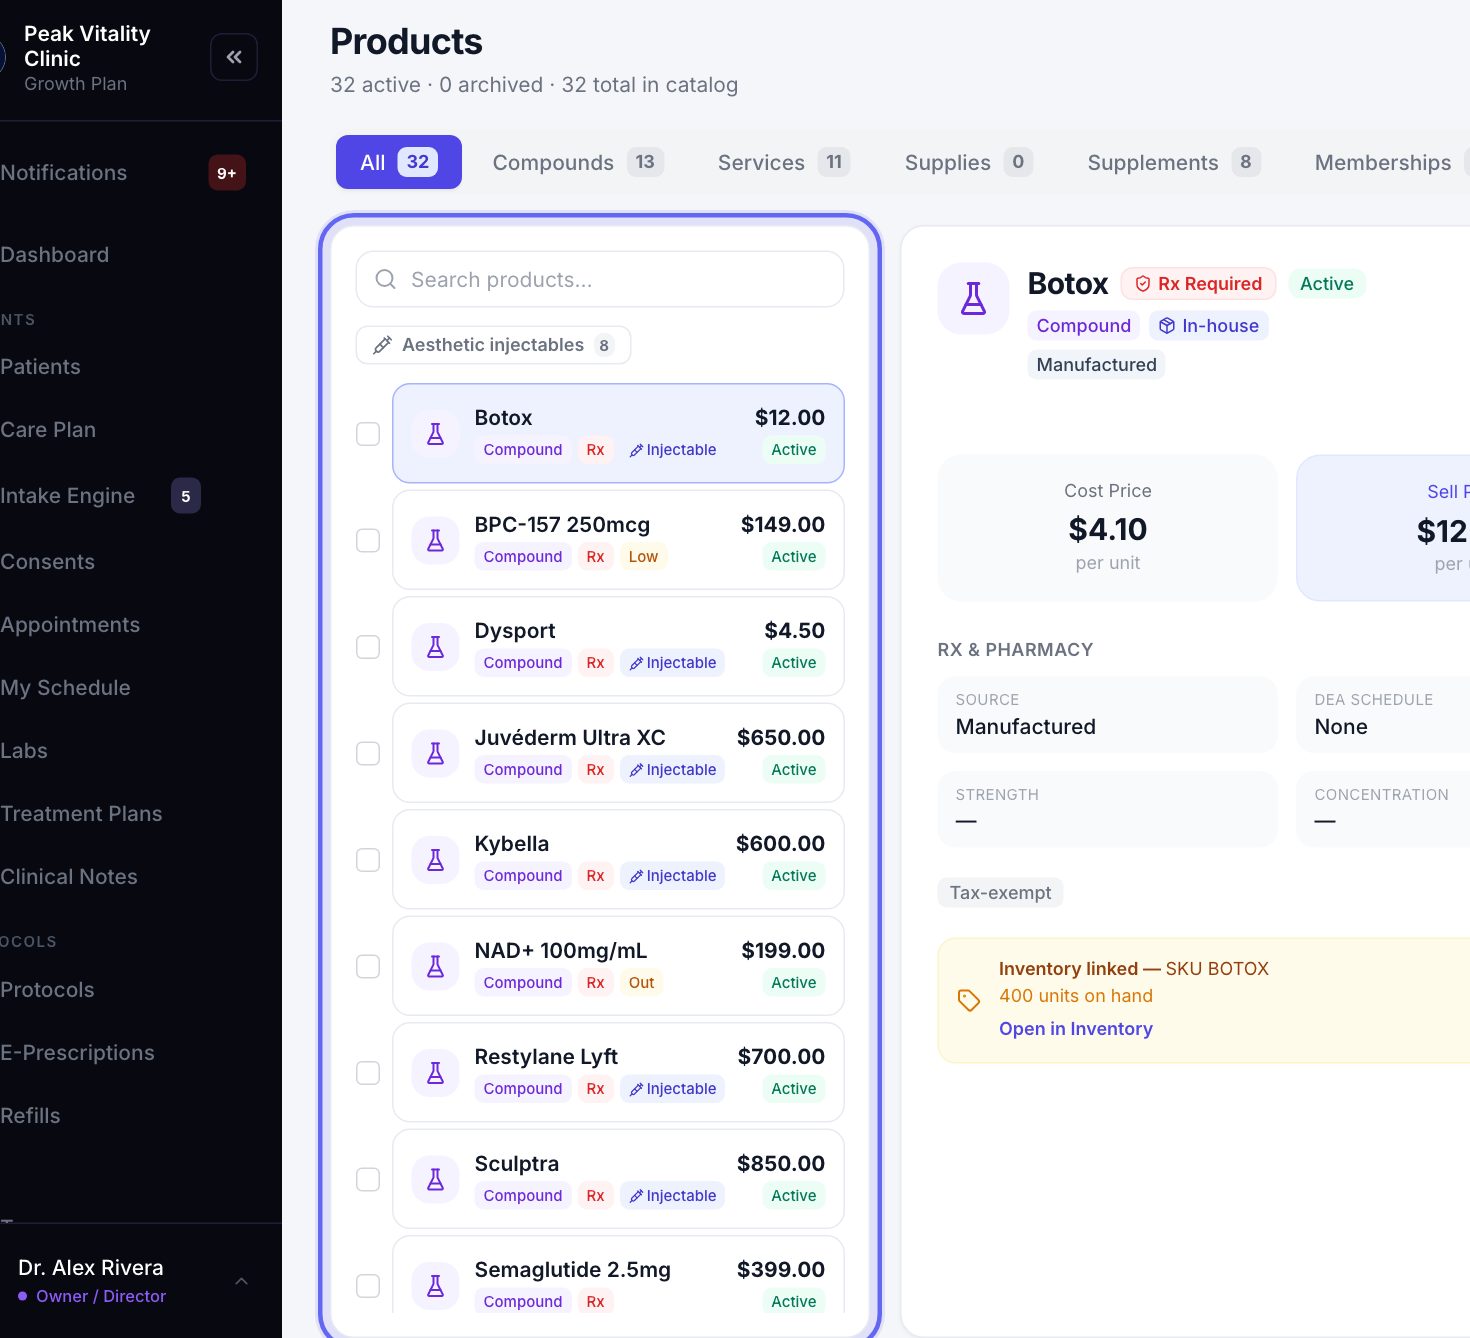
- 1Type in Search products… to find one by name or description.
- 2Each row shows the name, price, kind and status. Rx means it needs a prescription.
- 3An amber Low or Out tag means its stock is running short on the Inventory page.
- 4Click a row to open it. The small box icon that appears on hover archives it.
4One product, opened
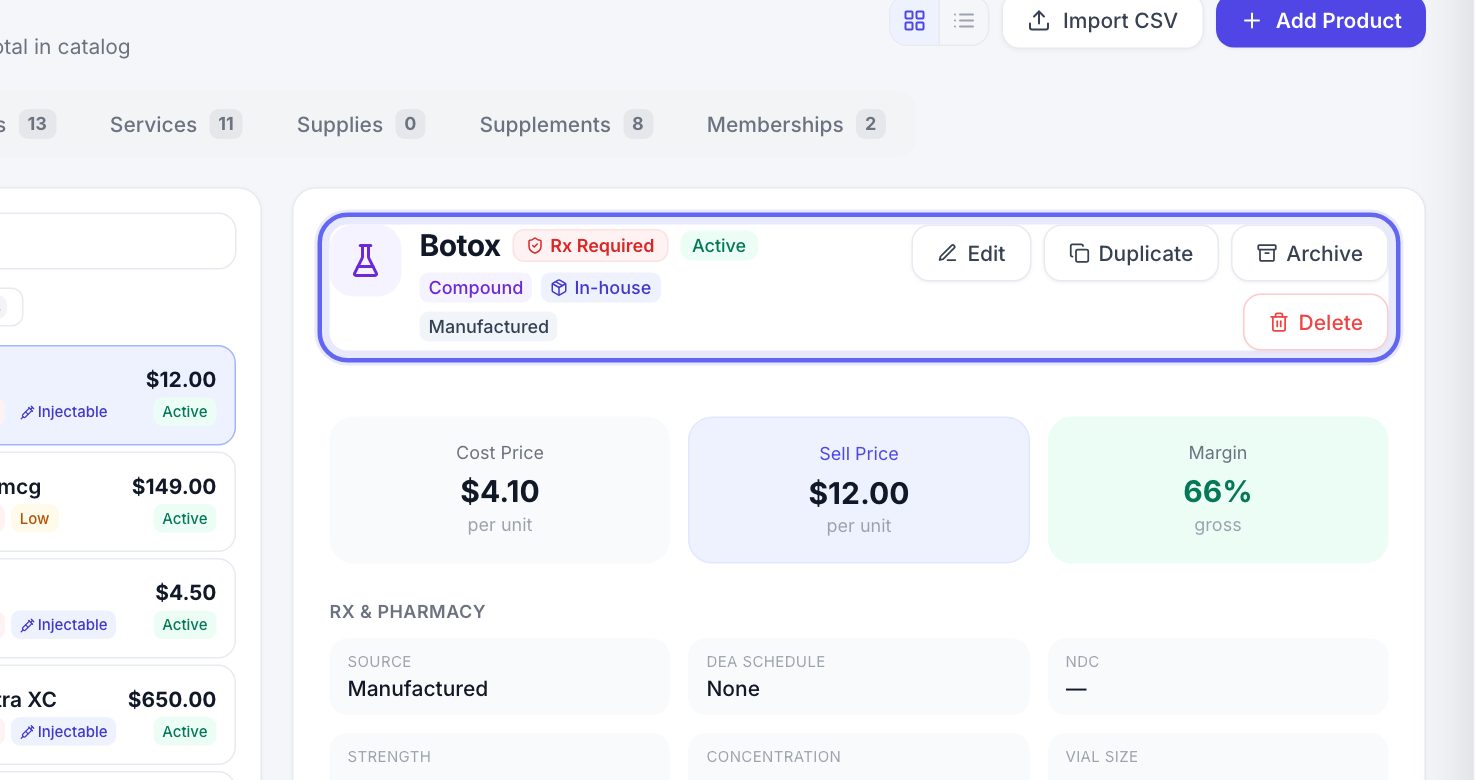
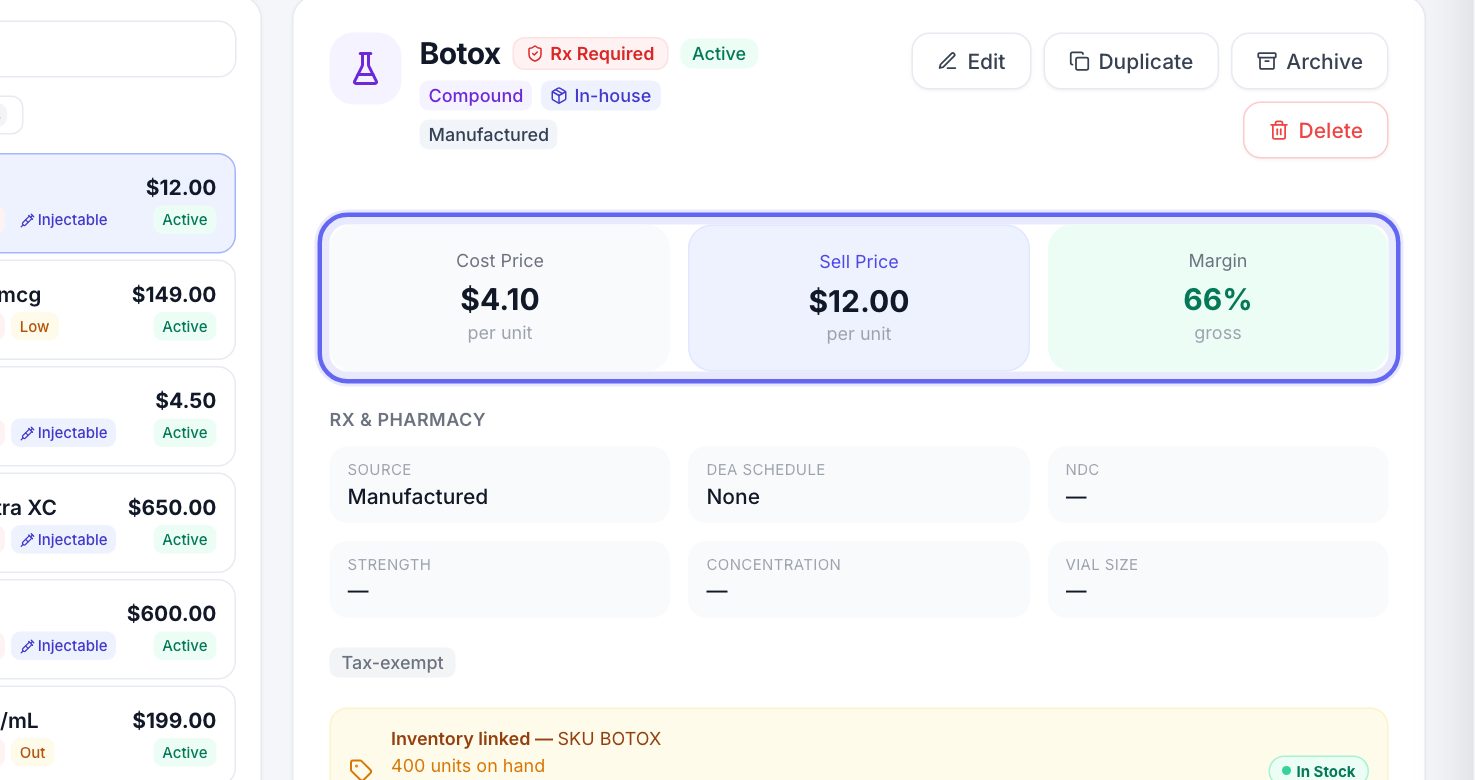
- 1The top shows its name and tags: its kind, In-house or Pharmacy-routed, and Rx Required if it needs a prescription.
- 2Edit changes it. Duplicate makes a copy, saved as a draft.
- 3Archive hides it from use but keeps the record. Delete removes it for good, after you confirm.
- 4Lower down: its prescription details, whether it is taxed, the protocols that use it, and its stock.
Archive anything you have sold before. Delete is for a product added by mistake.
5Cost, price and margin
Cost Price is what one unit costs you. Sell Price is what you charge. Margin is the share of the price you keep, and turns green at 40% or more.
When the product is linked to your stock, a box at the bottom shows its SKU and how many are on hand. Open in Inventory takes you to it.
6Add a product
- 1Click Add Product.
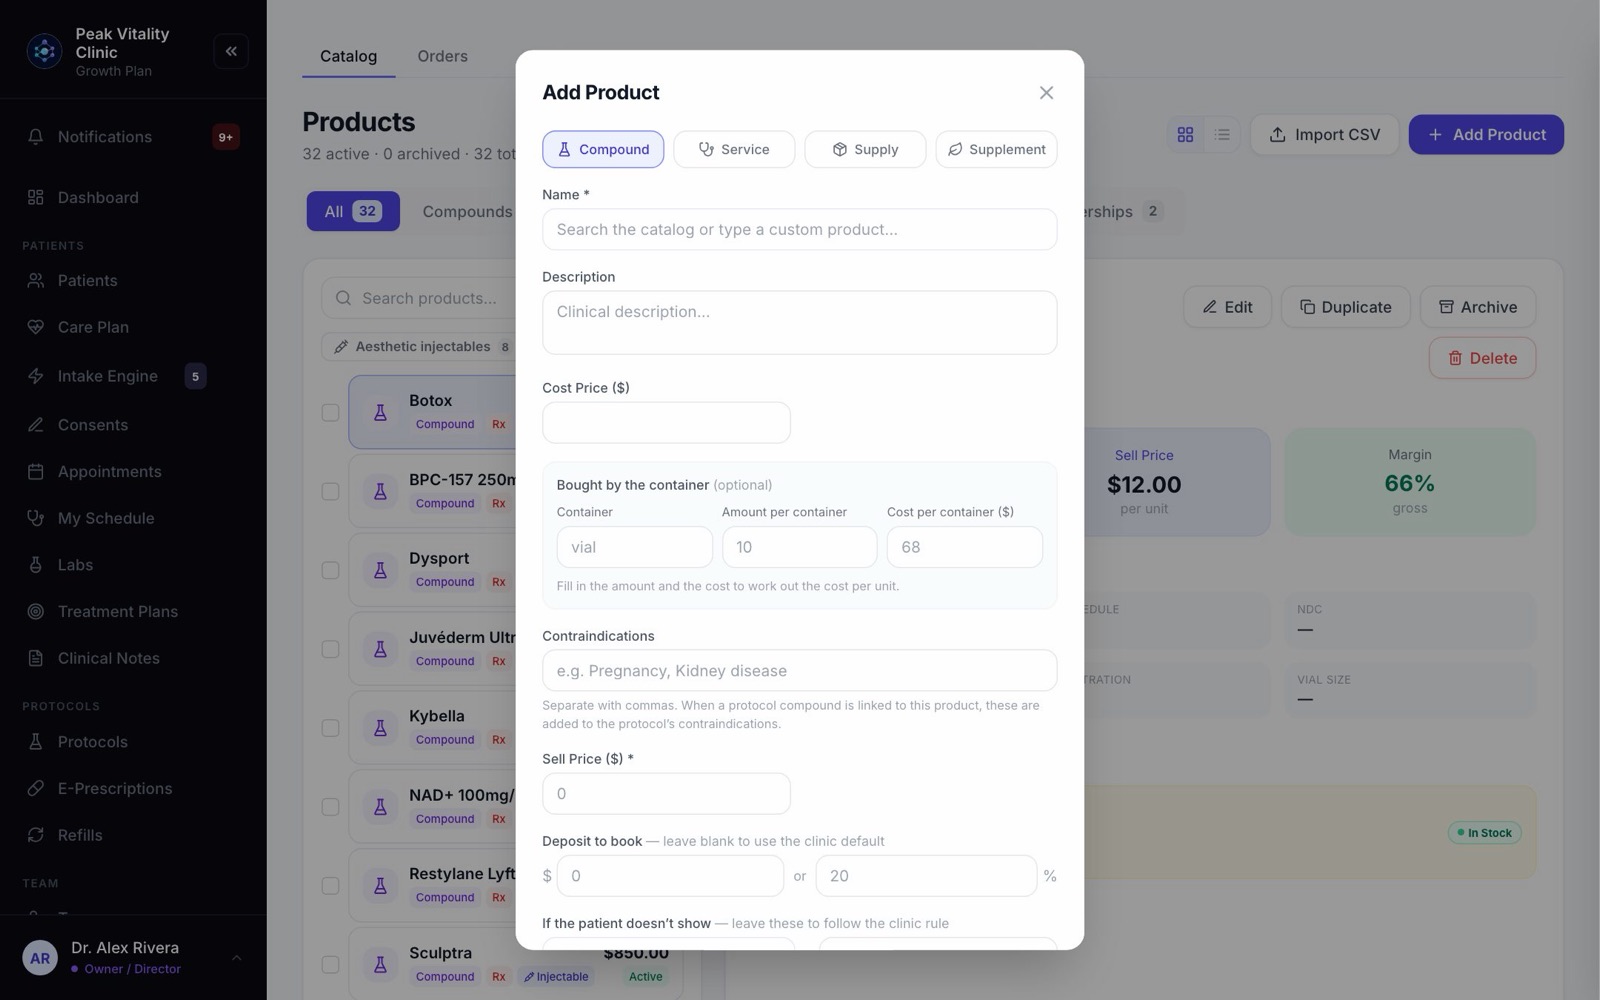
- 2Pick the kind at the top: Compound, Service, Supply or Supplement.
- 3Under Name, search the drug list or type your own. Picking a drug fills in its strengths, form, directions and schedule.
- 4Add a Description if you like, and set the Status: Active, Draft or Archived.
- 5Tap any Linked Protocols that use it.
Type a controlled drug’s name and it is marked Rx with its schedule. Type a supplement’s name and it is filed as a supplement.
7Price and deposit
- 1Type the Cost Price ($) and the Sell Price ($). A sell price of 0 is fine for a free service.
- 2Bought by the vial but sold by the mL? Fill in Bought by the container: the Container, the Amount per container and the Cost per container ($). The cost of one unit is worked out for you.
- 3Deposit to book is what a patient pays to hold a visit for this service. Type dollars or a percent. Leave it blank to use your clinic’s usual deposit.
- 4If the patient doesn’t show sets this service’s own no-show rule. Leave it to follow the clinic rule.
- 5Turn on Taxable if it is taxed, and add a Tax Code if you use one.
8Stock and where it comes from
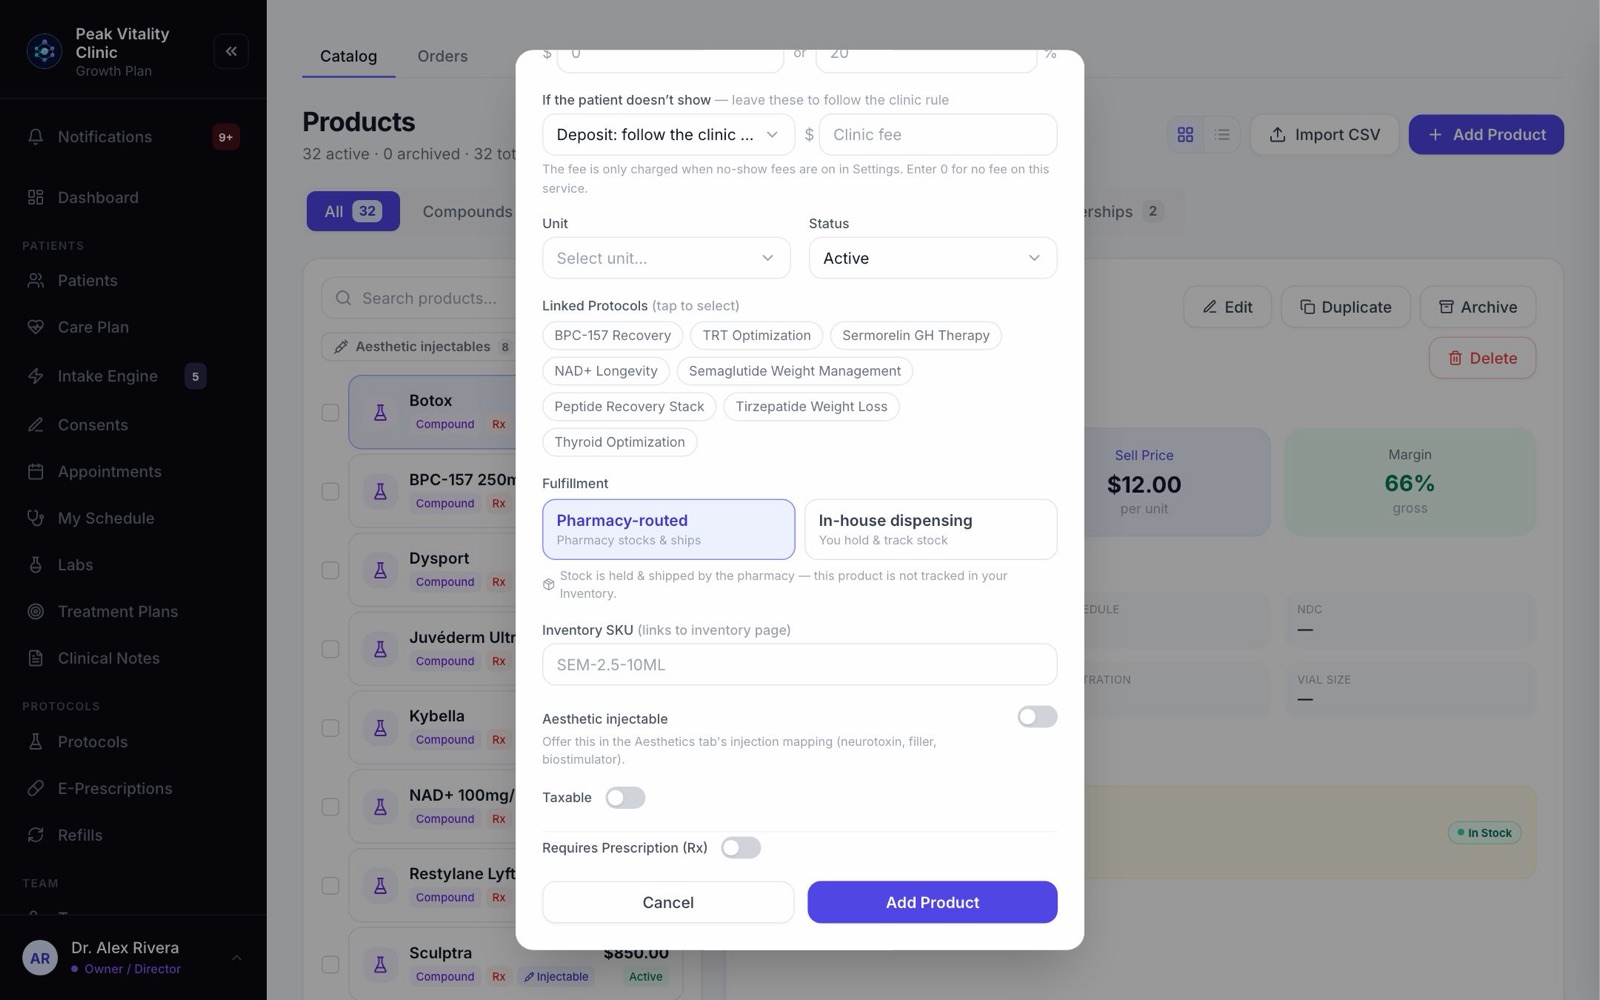
- 1Pick the Unit it is counted in, like vial, mL or bottle.
- 2Under Fulfillment, choose Pharmacy-routed if a pharmacy holds and ships it, or In-house dispensing if you keep it on your own shelf.
- 3An in-house product gets its own row on the Inventory page when you save it.
- 4Inventory SKU is the code that ties the product to its row on the Inventory page. A service has no SKU.
- 5Turn on Aesthetic injectable to offer it on a patient’s Aesthetics tab.
9Prescription details
- 1Turn on Requires Prescription (Rx). More fields open.
- 2Fill in the Source Type, DEA Schedule, NDC, Strengths (e-Rx dropdown), Form, Concentration and Vial Size.
- 3Add the Default Sig, the directions prescribers start from.
- 4For a compound, add each ingredient under Compound formula.
- 5Press Add Product. Editing one later, the button says Save Changes.
A prescription product needs an NDC or a strength before it saves.
10Aesthetic injectables
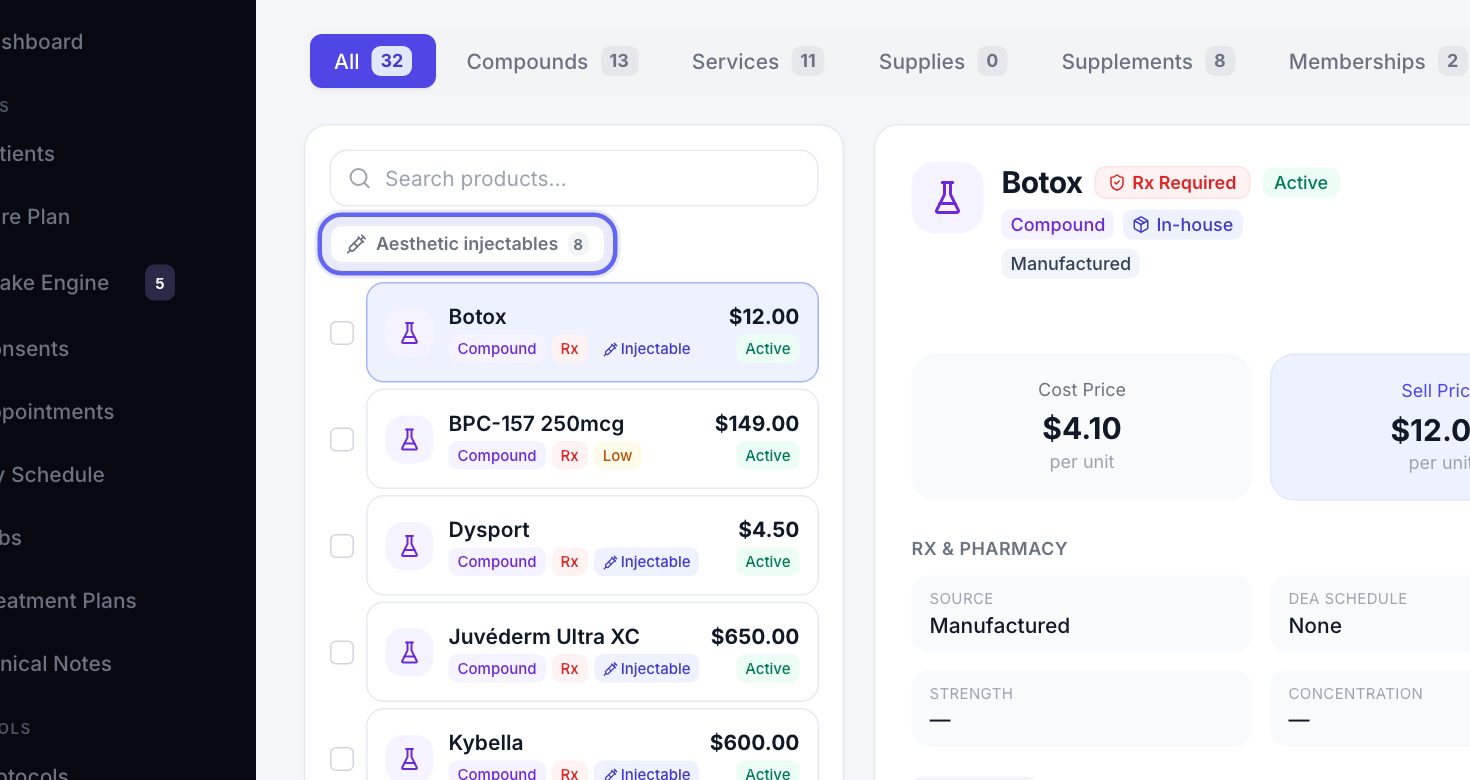
- 1Click Aesthetic injectables above the list. It shows only the products offered on a patient’s Aesthetics tab. The number is how many.
- 2To mark several at once, tick the boxes beside them. Then press Mark as injectable or Remove mark.
- 3Nothing marked yet? Add the common injectables adds them as drafts. Set a price on each.
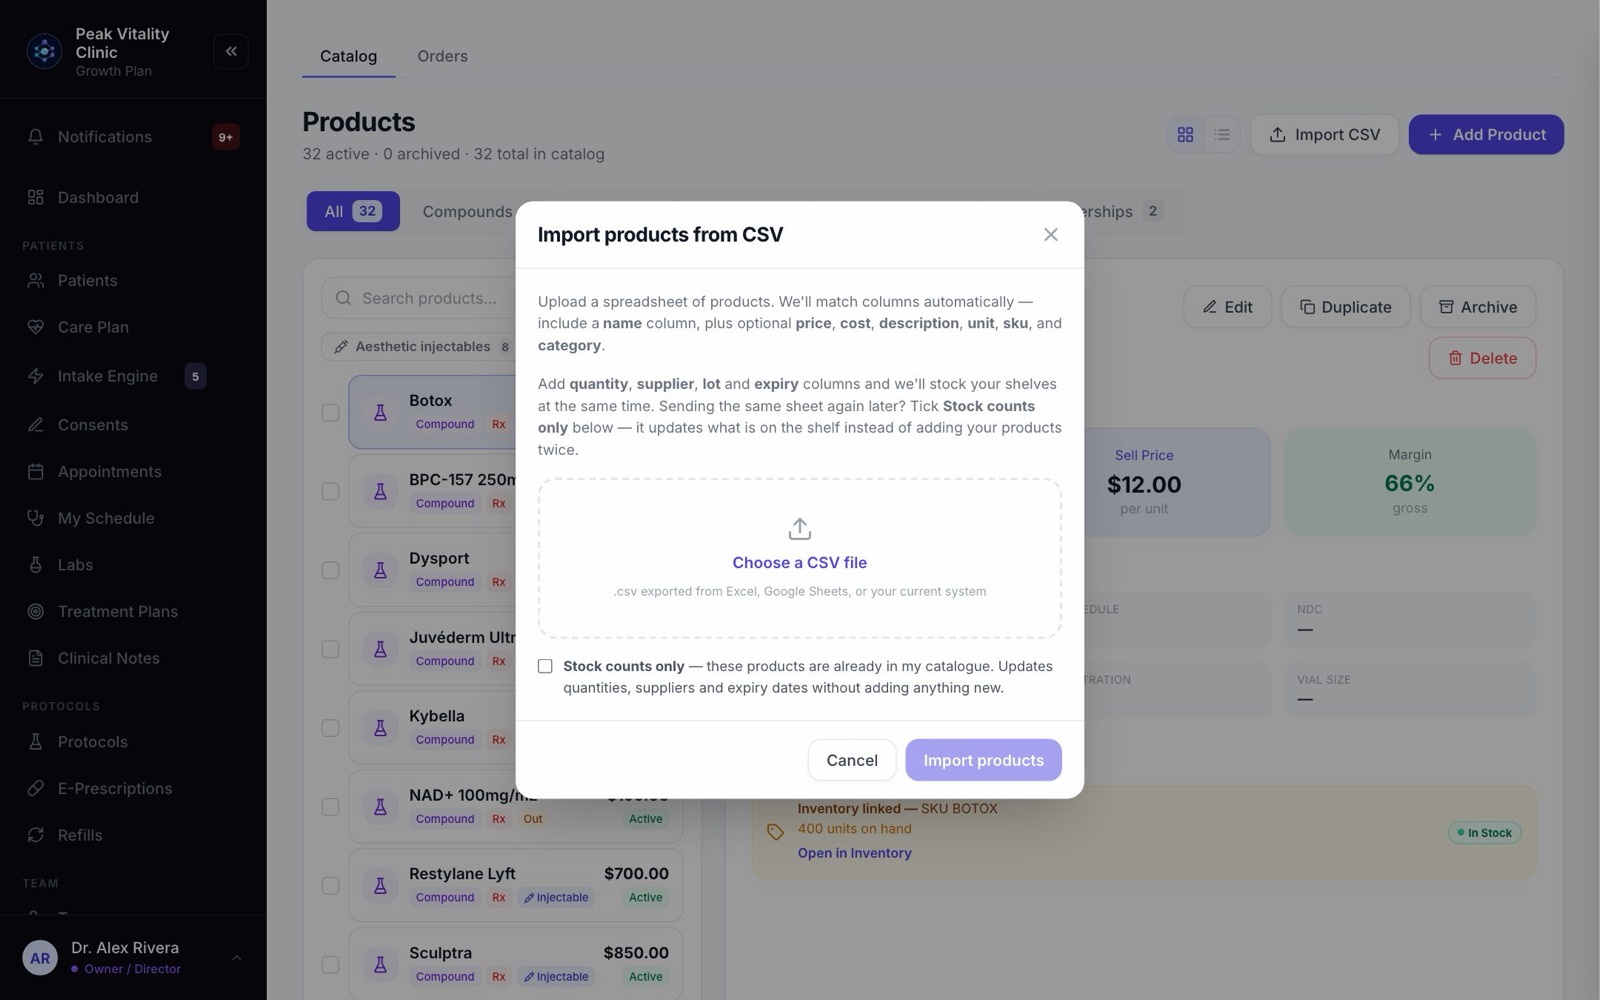
11Import a list
- 1Click Import CSV.
- 2Use a spreadsheet with a name column. Price, cost, description, unit, SKU and category columns are optional.
- 3Add quantity, supplier, lot and expiry columns to stock your shelves at the same time.
- 4Press Choose a CSV file, check the preview, and import.
- 5Sending the same sheet again later to update counts? Tick Stock counts only, so nothing is added twice.
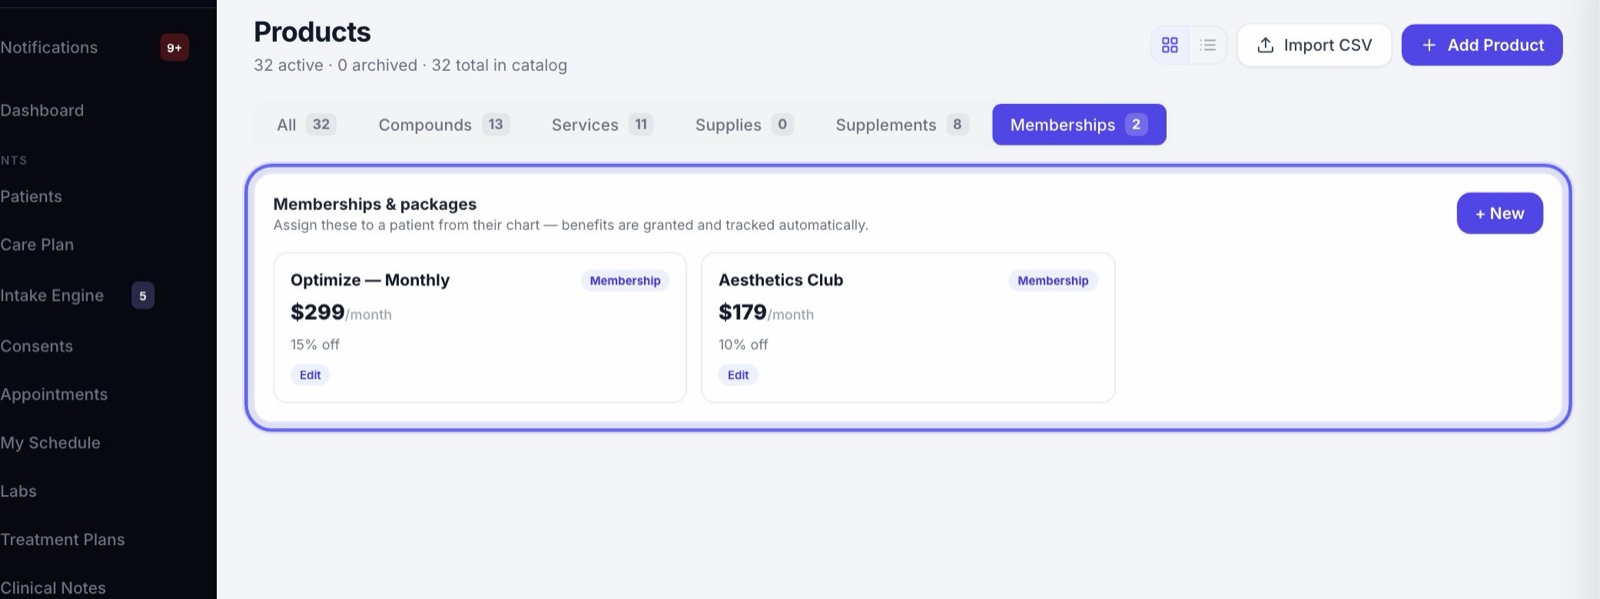
12Memberships and packages
The Memberships tab lists your plans. A membership bills on repeat. A package is paid once and counts down as it is used.
Press + New to make one, or Edit on a plan to change it. You give a plan to a patient from their chart.
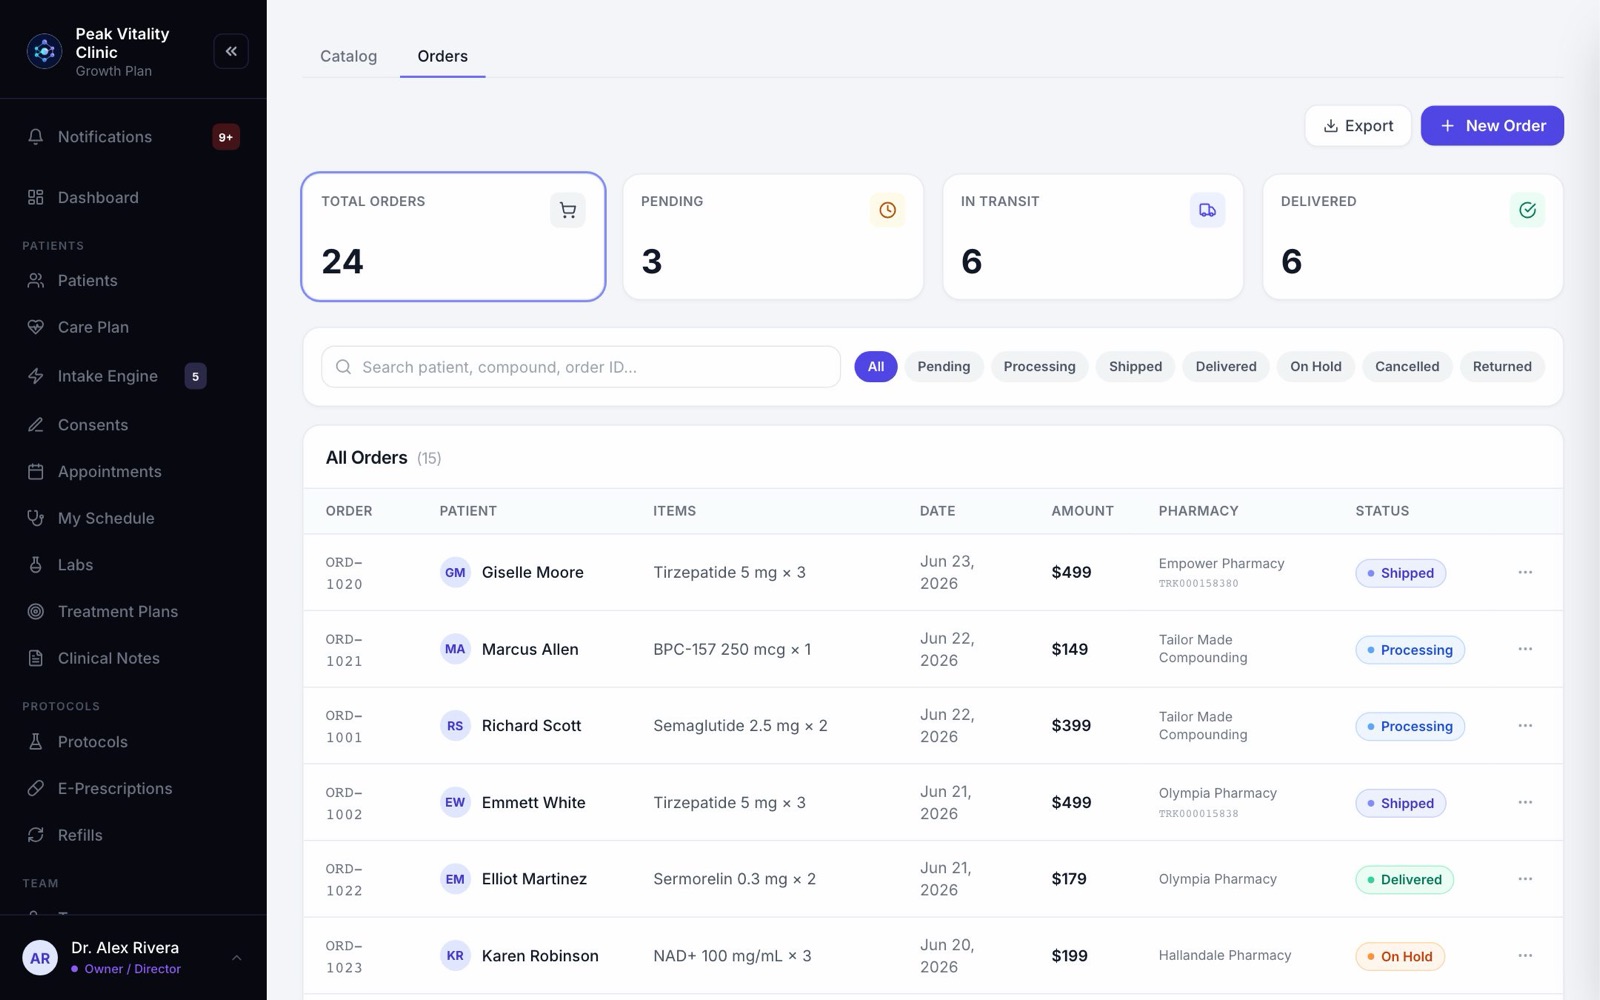
13Orders
- 1Click Orders at the top of the page.
- 2The numbers show all orders, pending, in transit and delivered. Click one to show only those.
- 3Search by patient, item or order ID, or use the status buttons.
- 4Each order’s … menu moves it along: Mark Processing, Mark Shipped or Mark collected, then Mark Delivered. It also holds Put On Hold, Edit Order and Cancel Order.
- 5New Order starts one by hand. Export downloads the list.
Keep going
Inventory
What is on your shelves, what is running low, and what is on order. Count stock, record lots, reorder from your suppliers and receive deliveries.
Read the guideSet up your inventory
Put your shelves into Aminova once: your categories, your suppliers, every item and how many you have. From then on, the counts keep themselves.
Read the guideSet up memberships and packages
Build each plan you sell once: its price, what it includes, and its terms. Then it is ready to give to any patient from their chart.
Read the guideDispensary
Your clinic’s own supplements, and how many are on the shelf. Hand one to a patient, take the payment, and add supplements to the shelf.
Read the guideE-Prescriptions
Write, sign and send prescriptions, and see where each one really is. Pharmacy messages, the state drug check and medication history live here too.
Read the guideRather be shown?
Inside Aminova, the tutorial walks you through every page, and the Getting started checklist shows you each task click by click. Or book a live training session with our team.