1Memberships and packages
A membership bills again and again, every month, quarter or year. It can include visits, services, labs, a discount and money to spend on treatments.
A package is paid once and counts down as it is used, like 10 IV drips or 3 PRP sessions.
If members sign an agreement, make it first as a consent form. You pick it while building the plan.
2Open the plan builder
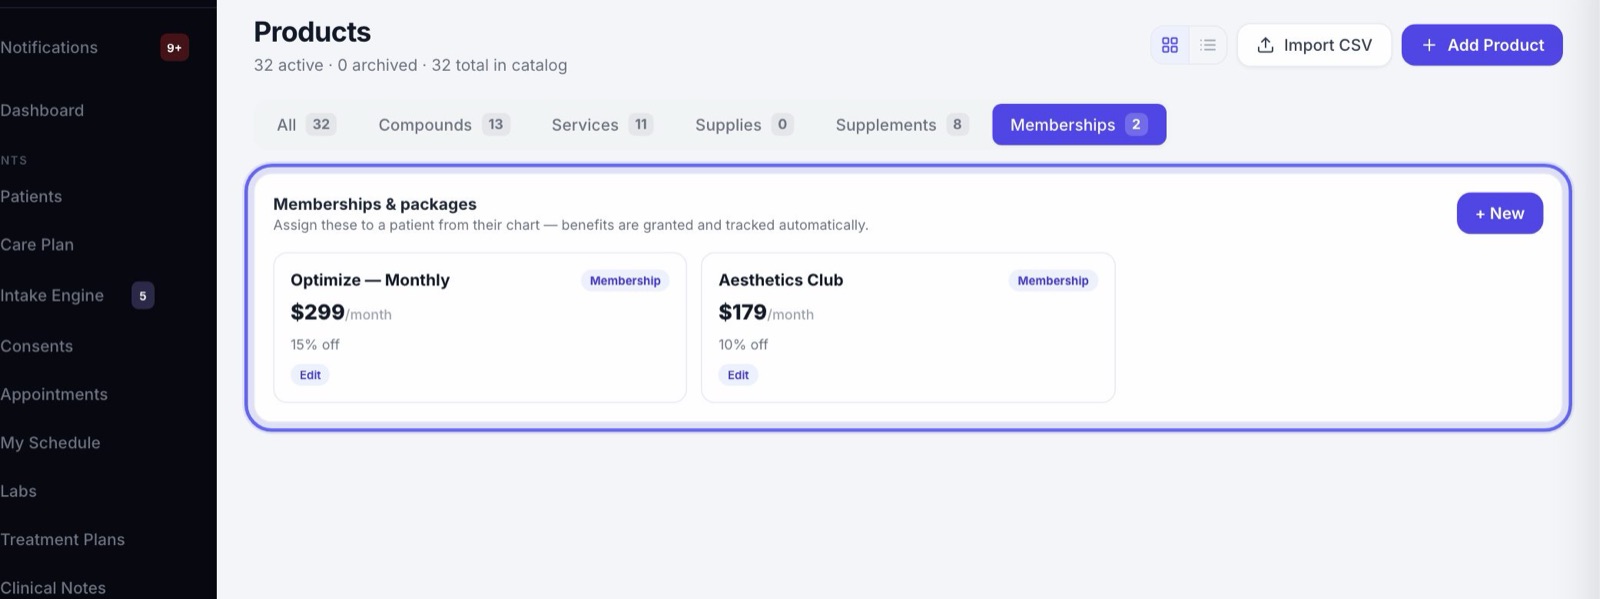
- 1Go to Products and click the Memberships tab.
- 2Press + New.
- 3You can also start one from Billing → Subscriptions with New membership or package. Both make the same plan.
3Pick the plan type
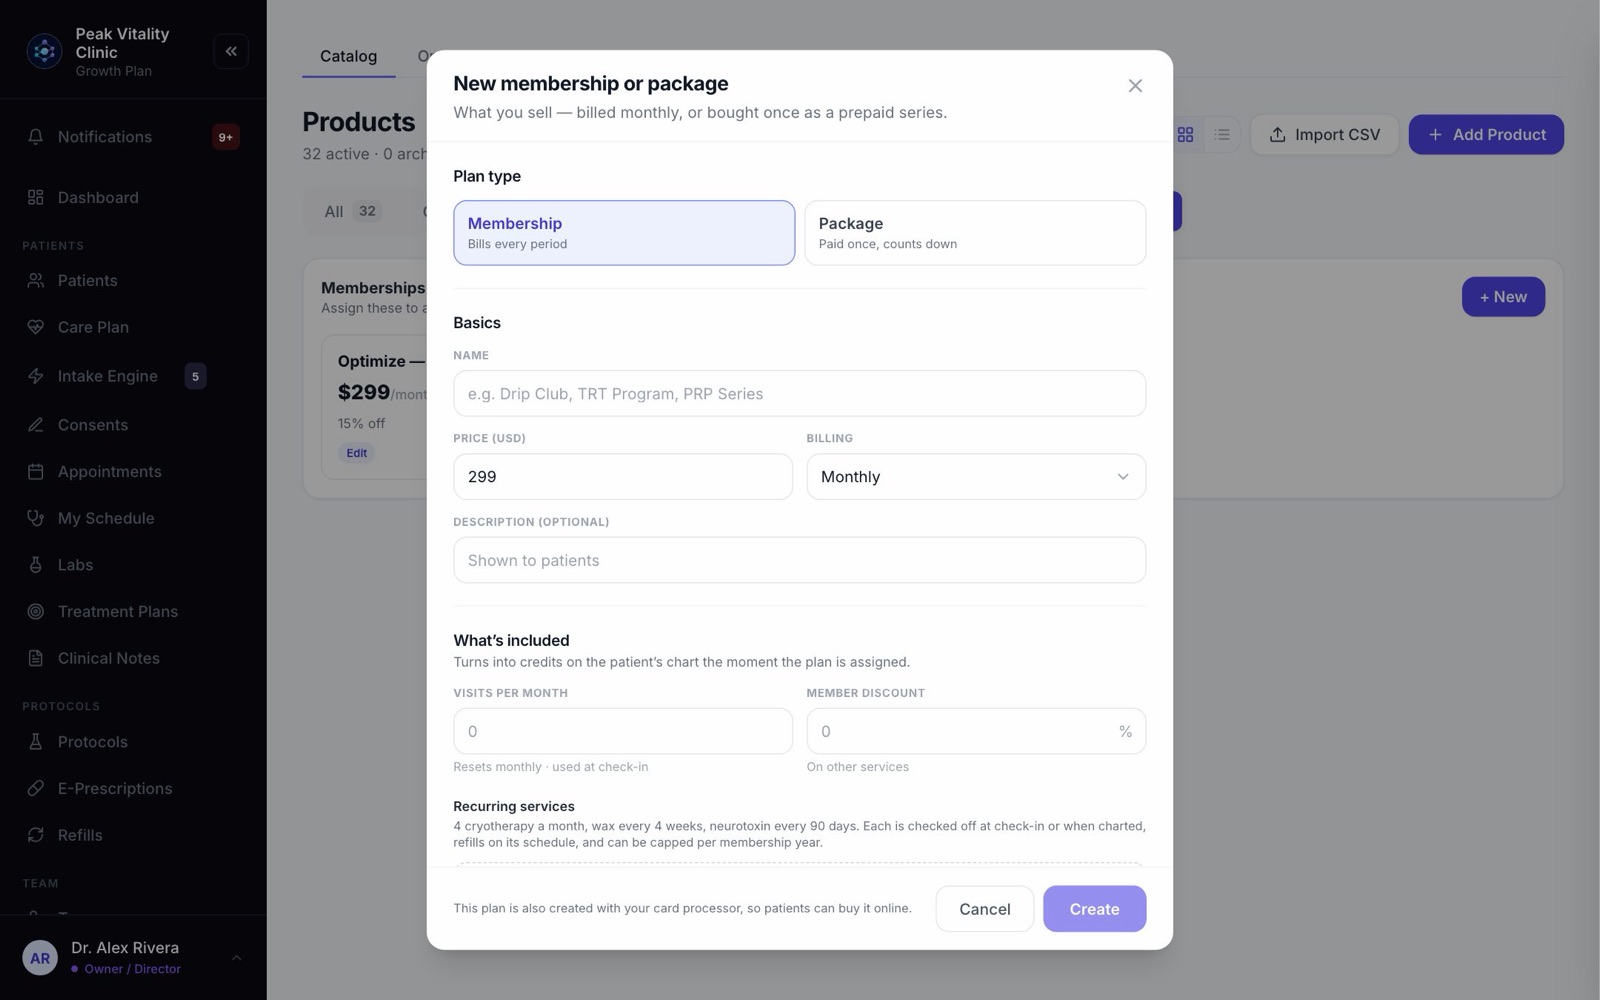
- 1Under Plan type, pick Membership (bills every period) or Package (paid once, counts down).
- 2The rest of the form changes to fit. A package skips the parts that only make sense for billing on repeat.
4The basics
- 1Give it a Name, like “Drip Club” or “PRP Series”.
- 2Set the Price (USD). For a membership, pick the Billing: Monthly, Quarterly or Annual.
- 3Add a Description (optional). Patients see it.
- 4If the name sounds like a hormone plan, like TRT or HRT, you are asked whether the price includes the medication. Answer it to save.
5Visits and member discount
- 1Visits per month is how many visits a member gets. They refill each month and are used when the patient checks in.
- 2Under Visits count for, add the visit types they cover. Left empty, they cover any regular visit.
- 3Member discount is a percent off your other services. Members get it at checkout on their own.
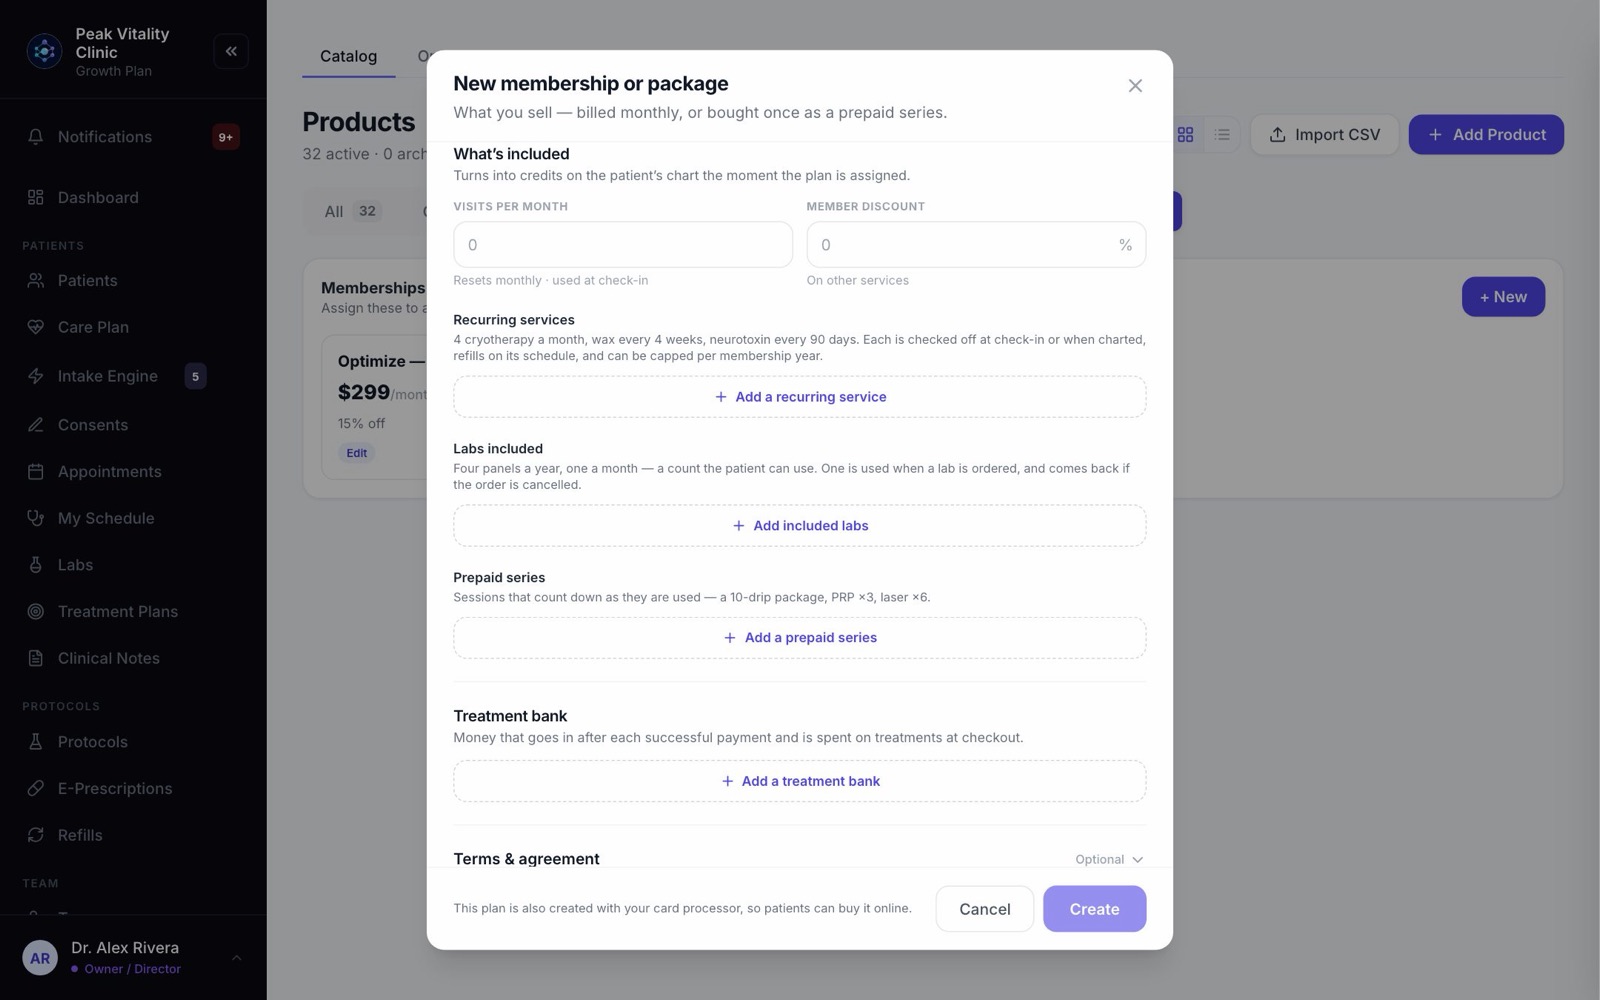
Everything under What’s included turns into credits on the patient’s chart the moment the plan is given to them.
6Recurring services
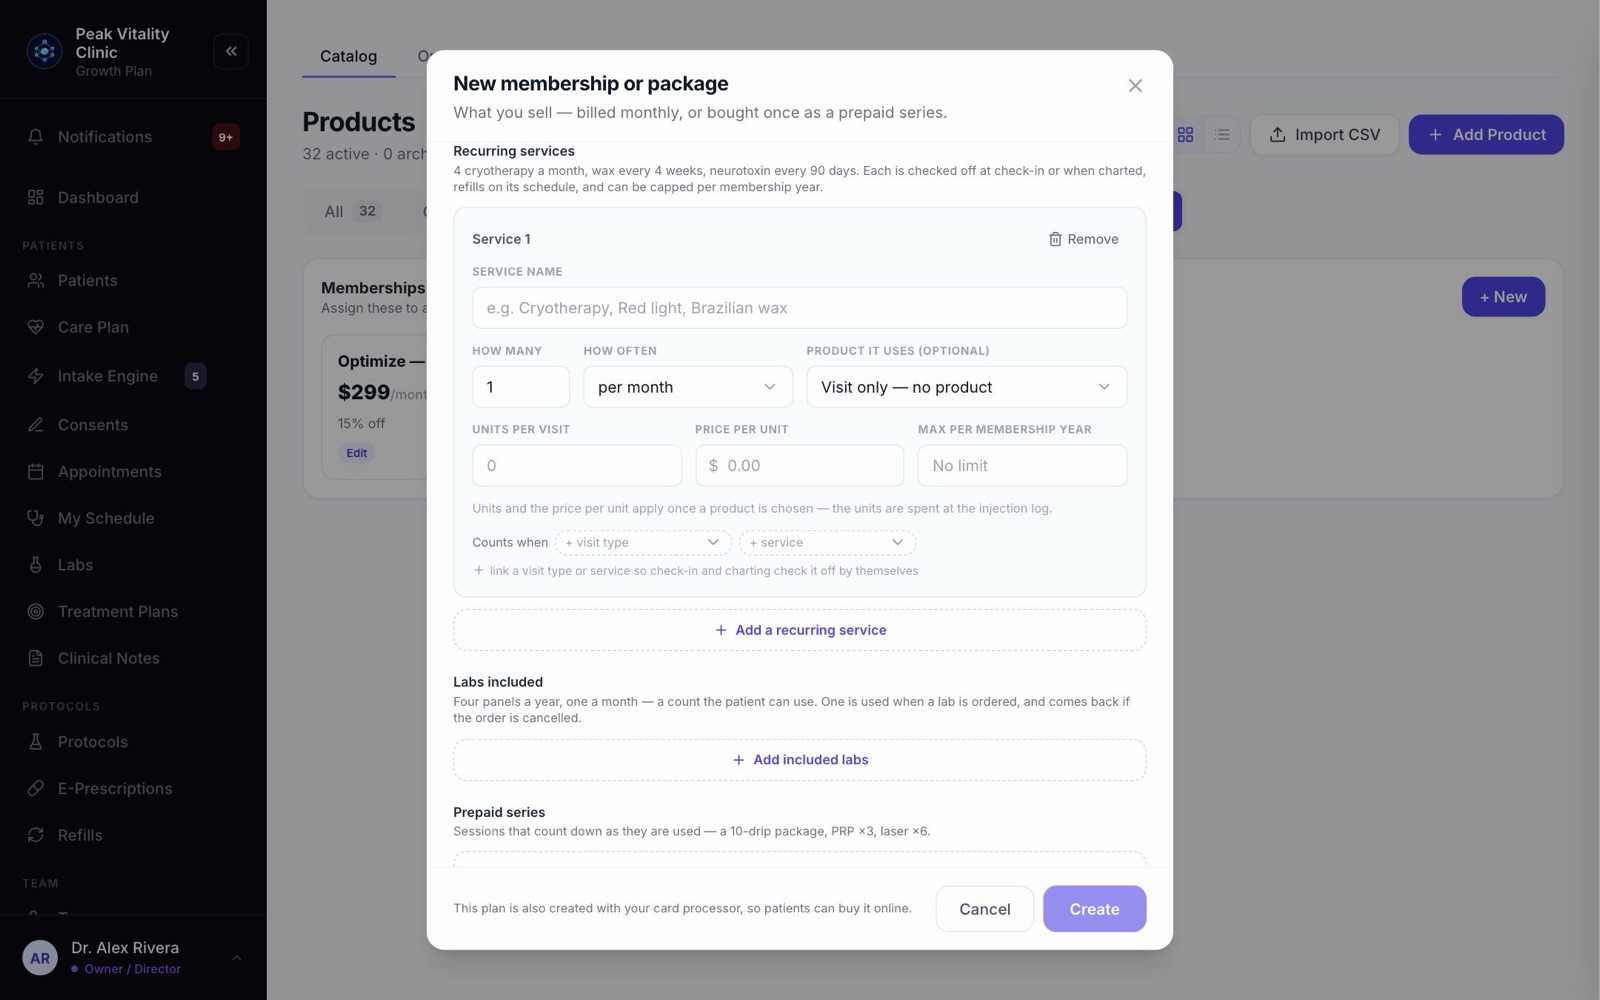
- 1Press Add a recurring service for each one, like 4 cryotherapy a month or a wax every 4 weeks.
- 2Fill in the Service name, How many and How often.
- 3For something counted in units, like neurotoxin, pick the Product it uses, the Units per visit and the Price per unit. The units are used from the injection log.
- 4Set a Max per membership year if there is a yearly limit.
- 5Under Counts when, add the + visit type or + service that uses it. Then check-in and charting check it off by themselves.
7Labs included
- 1Press Add included labs.
- 2Fill in What the patient sees, How many and How often, like 4 per year.
- 3Leave Only these panels (optional) empty to cover any lab. Or name panels to limit it.
- 4One is used when a lab is ordered, and comes back if the order is canceled.
8Prepaid series
- 1Press Add a prepaid series. This is the heart of a package.
- 2Type the Series name and how many Sessions, like IV drip and 10.
- 3Under Counts when, link the visit type or service it covers. Left unlinked, it covers any regular visit.
9Treatment bank (optional)
- 1Press Add a treatment bank to put money into the member’s bank after each payment.
- 2Set Added each payment (USD) and, if you want one, a Balance cap (optional).
- 3Choose whether Unused money Rolls over or Ends each period.
- 4Under Can be spent on, pick Any service or product or Only these categories.
- 5Choose what happens If the membership is cancelled: Patient keeps it or Forfeited.
Money goes in only after a payment goes through, never at sign-up. Prescriptions and compounds are never paid from the bank.
10Terms and agreement
- 1Click Terms & agreement to open it.
- 2Commitment is how long they sign up for, from Month to month to 24 months.
- 3Set anything Due at enrollment (USD), What that is called, and any Deposit held (USD). Tick the box if the first period is also due at enrollment.
- 4Grace after a decline is how many days a member keeps their benefits after a card is declined.
- 5Pick the Membership agreement. It is sent to the patient as soon as they join. No repeat charge runs until they sign it.
- 6Plans that are levels of one program, like 30, 60 and 90 units, share a Tier group. A patient then switches between them instead of holding two.
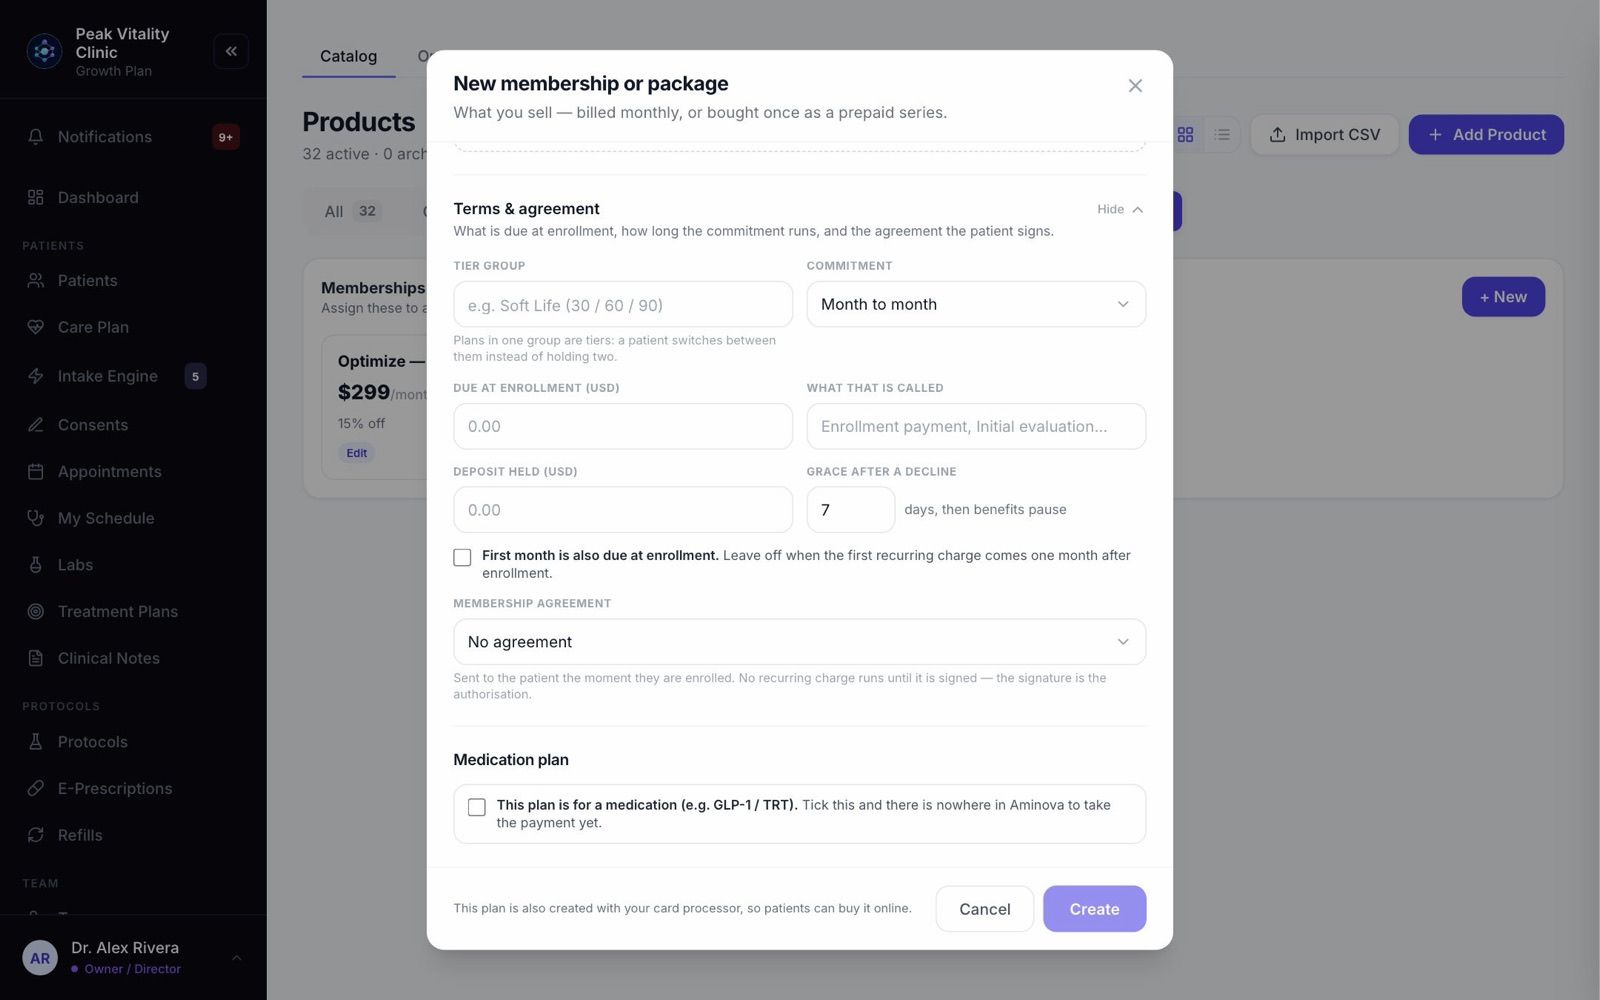
11Medication plans
If the price includes a medication, like a GLP-1 or TRT, tick This plan is for a medication (e.g. GLP-1 / TRT). A medication plan is never charged to a card on file. Each period is collected in person.
The note under the box tells you how your clinic can take that payment.
12Create it
- 1Read the note beside the button. It says where the plan can be sold once it is saved.
- 2Press Create. The plan shows on the Memberships tab.
- 3To change it later, press Edit on it, then Save changes. If you change the price, you choose whether to Apply the new price to current members. Left off, they keep the price they joined at.
13Give it to a patient
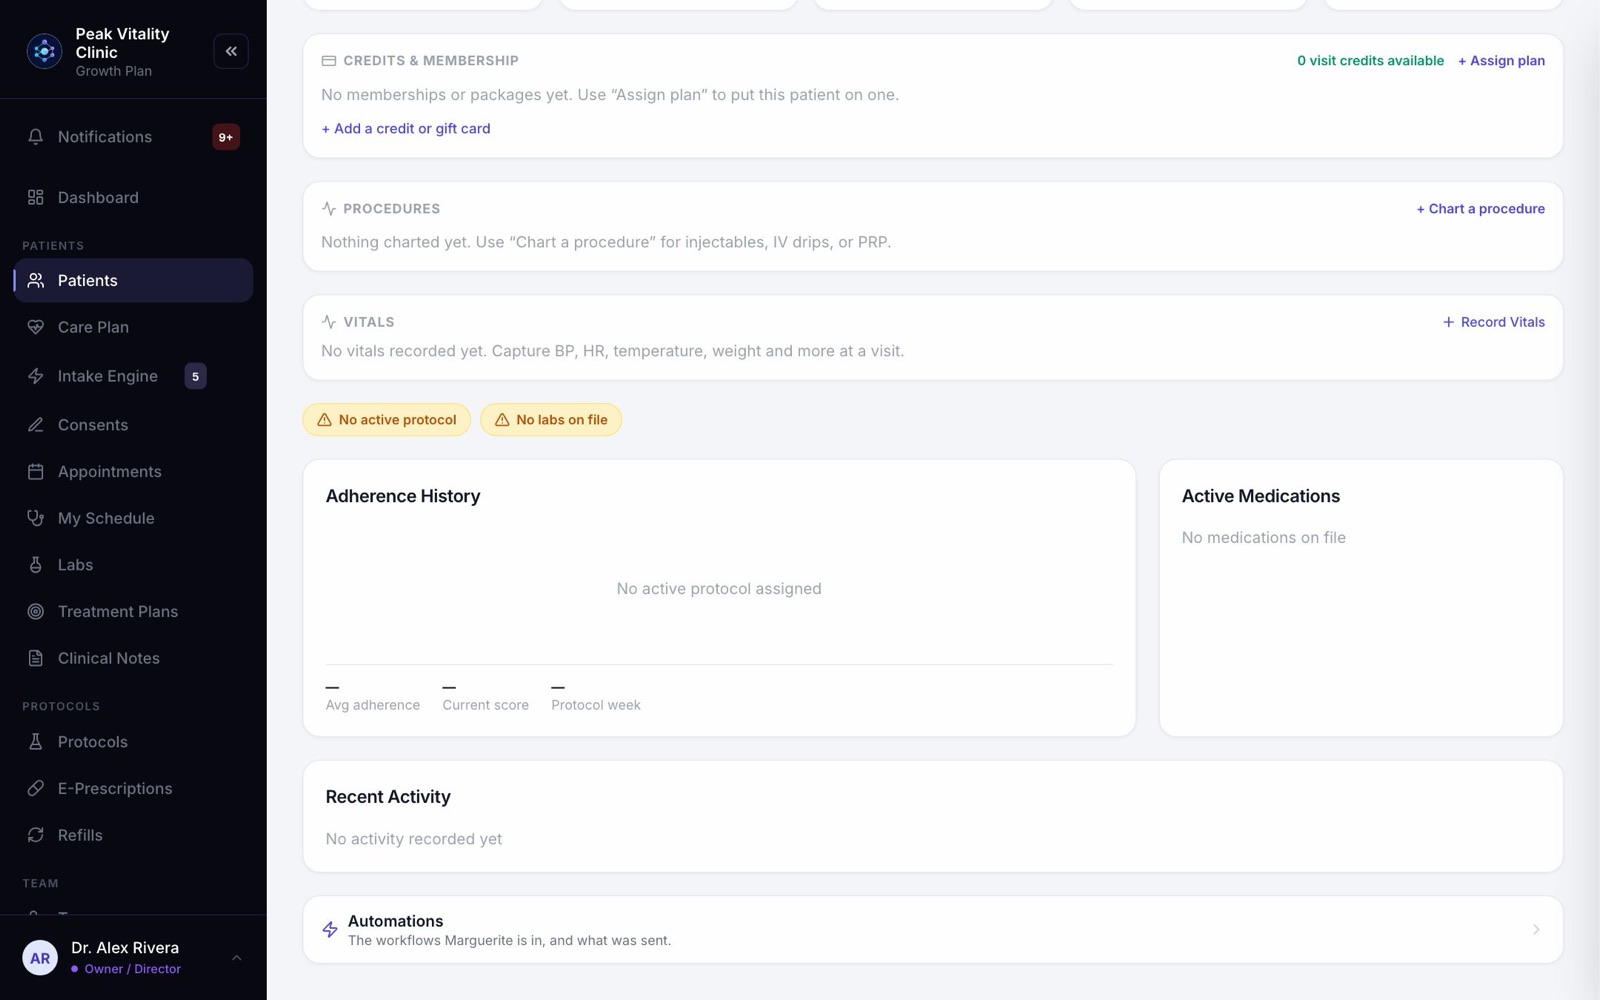
Open the patient’s chart. On the Overview tab, find Credits & Membership and press + Assign plan.
The Memberships and packages manual walks through that, and everything that happens after.
Keep going
Memberships and packages
Plans patients pay for: a membership that bills on repeat, or a package paid once that counts down. Build it once, give it to a patient, and their benefits track themselves.
Read the guideSet up your consent forms
Bring in the consent PDFs you use today, place the signature boxes, and decide who signs each one and how often. Then attach them to your visit types.
Read the guideProducts
Everything you sell, and what you charge for it. Add compounds, services, supplies and supplements, set their cost and price, and see every patient order.
Read the guideBilling
Bill patients, take payments and keep track of what’s owed. Make invoices, record and refund payments, print receipts, and set up your discounts.
Read the guideTake card payments
Connect your card processor, add your card terminals, then set your payment rules: deposits, no-show fees, cash prices and your own payment types.
Read the guideRather be shown?
Inside Aminova, the tutorial walks you through every page, and the Getting started checklist shows you each task click by click. Or book a live training session with our team.