1Why this comes first
Your clinic profile is the information Aminova shows about your practice: your name on forms, your phone and email, your address. Your time zone and opening hours decide when visits can be booked.
It takes a few minutes, and you do it once. Do it before you book your first visit.
2Open your clinic profile
- 1Go to Settings in the sidebar.
- 2Click Clinic Profile, the first topic on the left.
- 3Or click your clinic’s name at the top of the sidebar, then Clinic Profile.
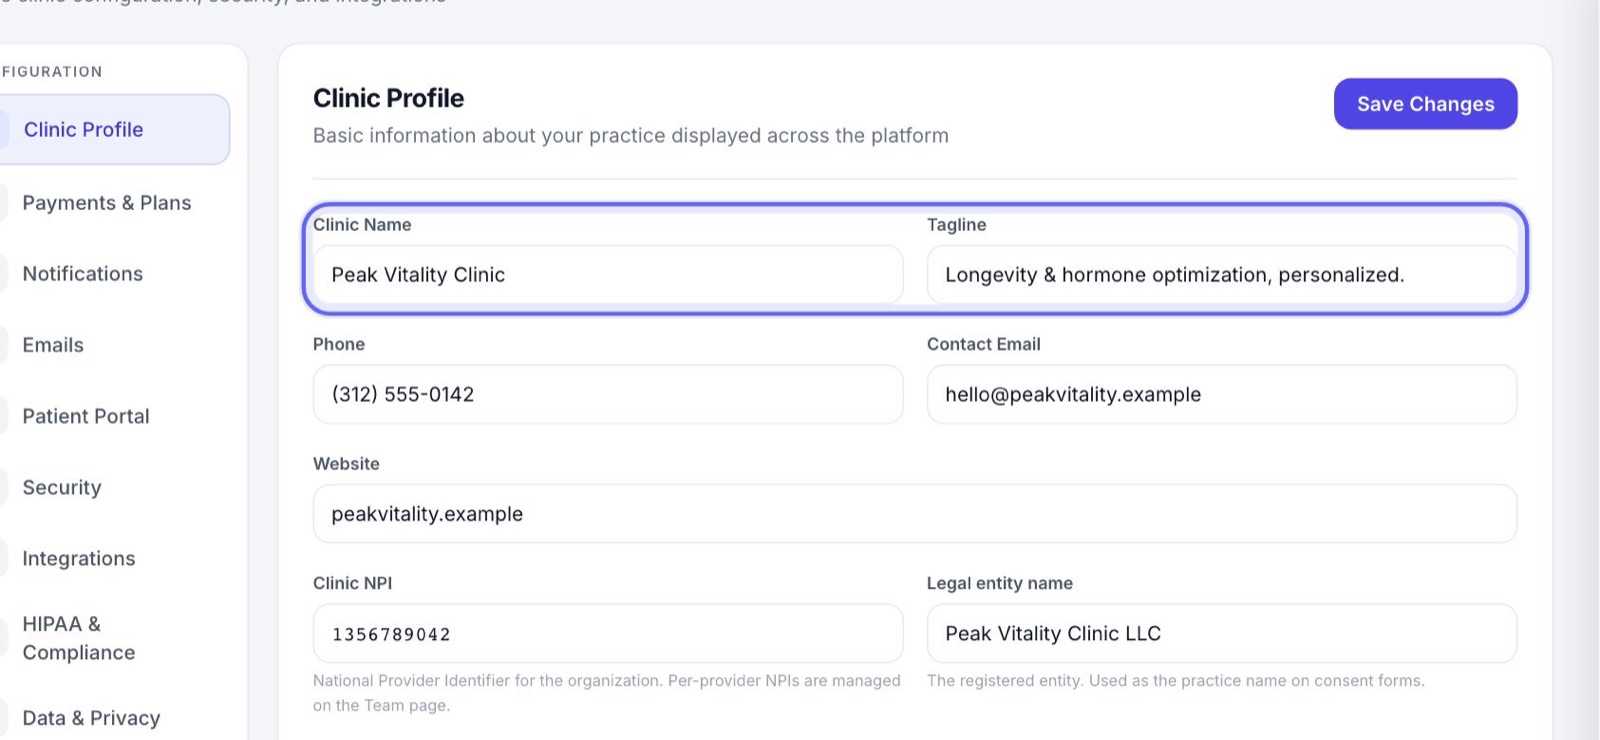
3Name and contact details
- 1Type your Clinic Name as patients know it. Add a short Tagline if you like.
- 2Add the Phone and Contact Email patients should use.
- 3Add your Website.
4Legal name and IDs
- 1Enter your Clinic NPI: the 10-digit national provider number for the practice itself.
- 2Enter your Legal entity name: your registered business name. Consent forms use it as the practice name.
- 3Enter your Tax ID / EIN: the federal tax number for your business.
Each provider’s own NPI goes on the Team page, not here.
5Your address
- 1Type your Street Address, with the suite number.
- 2Fill in the City, State and ZIP Code.
6Set your time zone
- 1Under Timezone, pick the zone your clinic is in.
- 2Visit times in the patient app are shown in this zone.
- 3Do you see patients in other states? Tick We serve patients nationwide. Every visit time in the patient app then shows its zone, like “2:30 PM ET”.
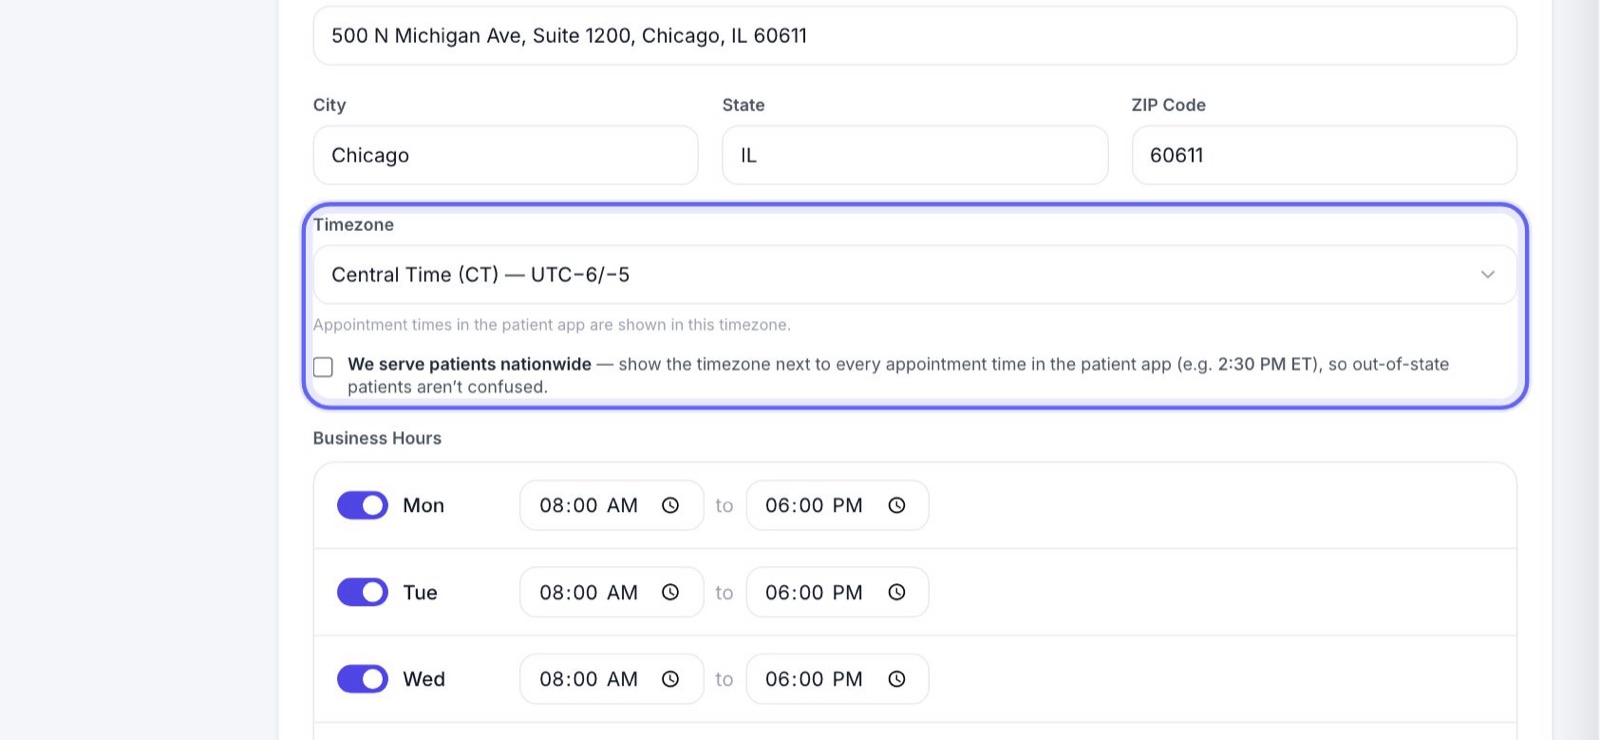
Set this before you book anything, so every visit starts at the right time.
7Set your opening hours
- 1Under Business Hours, find each day of the week.
- 2Switch a day on, then set the time you open and the time you close.
- 3Switch a day off to mark it Closed.
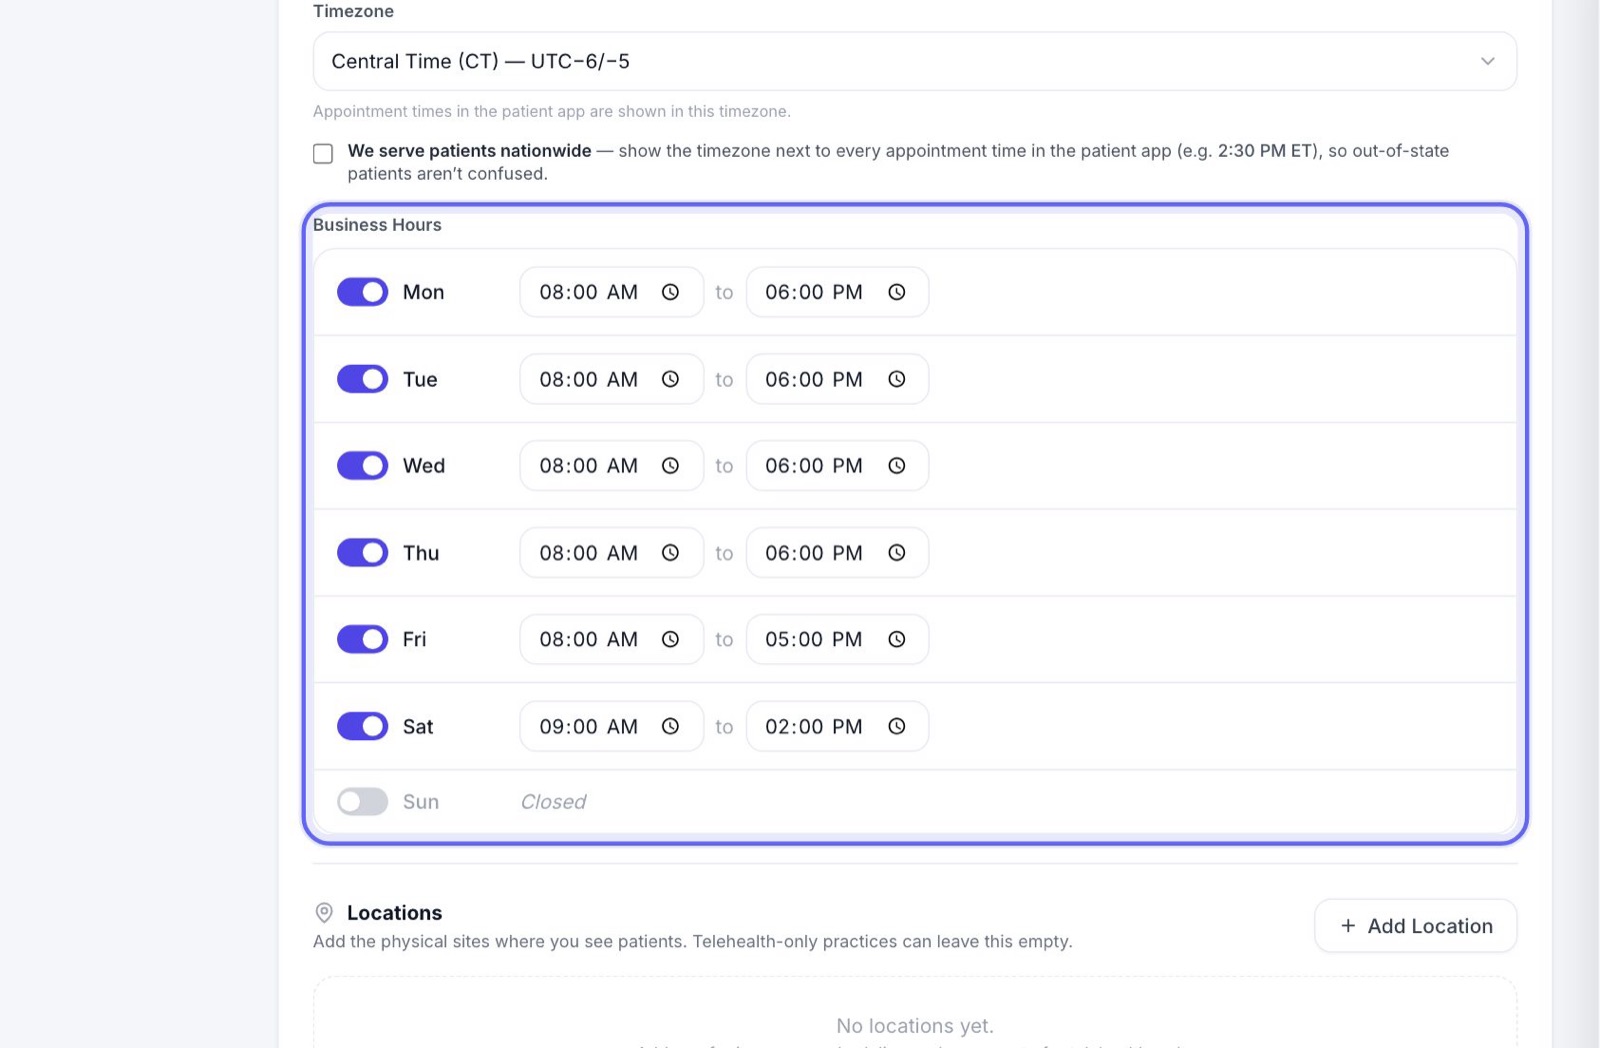
8How your hours shape booking
If you don’t use Staff Scheduling, your opening hours are the outer limit for booking. Nothing is offered on a closed day or outside your hours. Each provider’s own hours, under Team → Set Availability, can only make their day shorter, never longer.
If you do use Staff Scheduling, the shifts there decide when each person can be booked.
9Add your locations
- 1Under Locations, press Add Location.
- 2Fill in the Location Name, like “Downtown Clinic”, its Phone and its address.
- 3Leave Timezone on Use clinic timezone, unless this site is in a different zone.
- 4Press Save Location. Add each place where you see patients.
- 5Later, use Edit to change one, or Deactivate to stop using it for now.
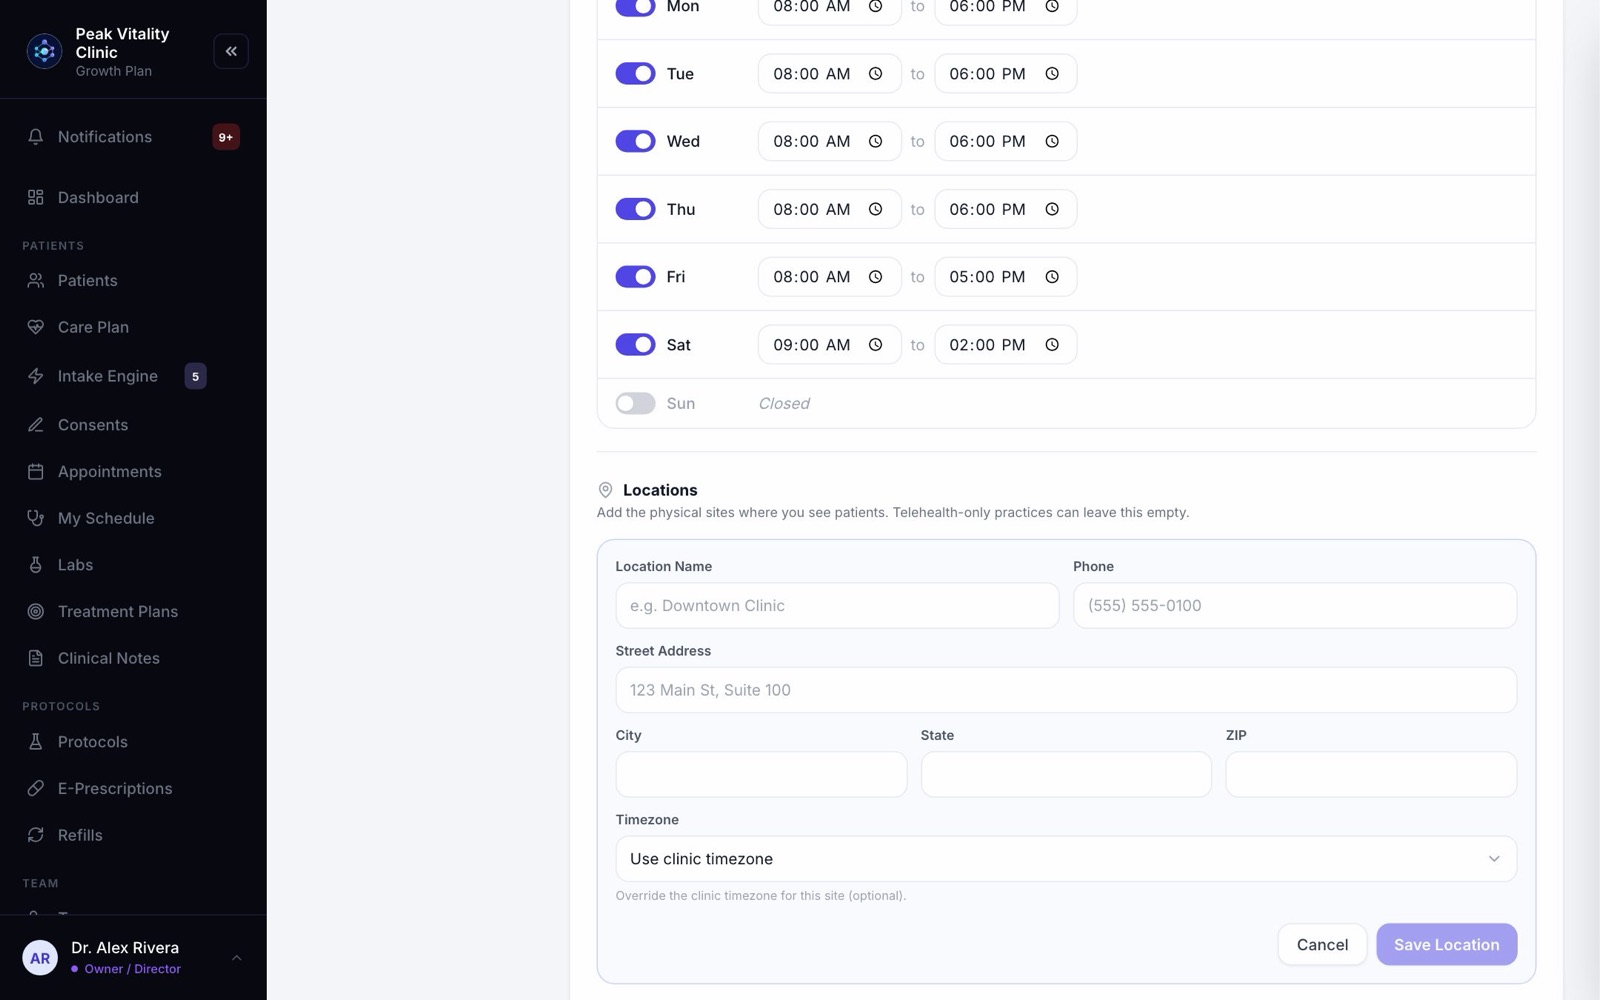
Only do video visits? Leave Locations empty.
10Add your logo
- 1Click your clinic’s name at the top of the sidebar.
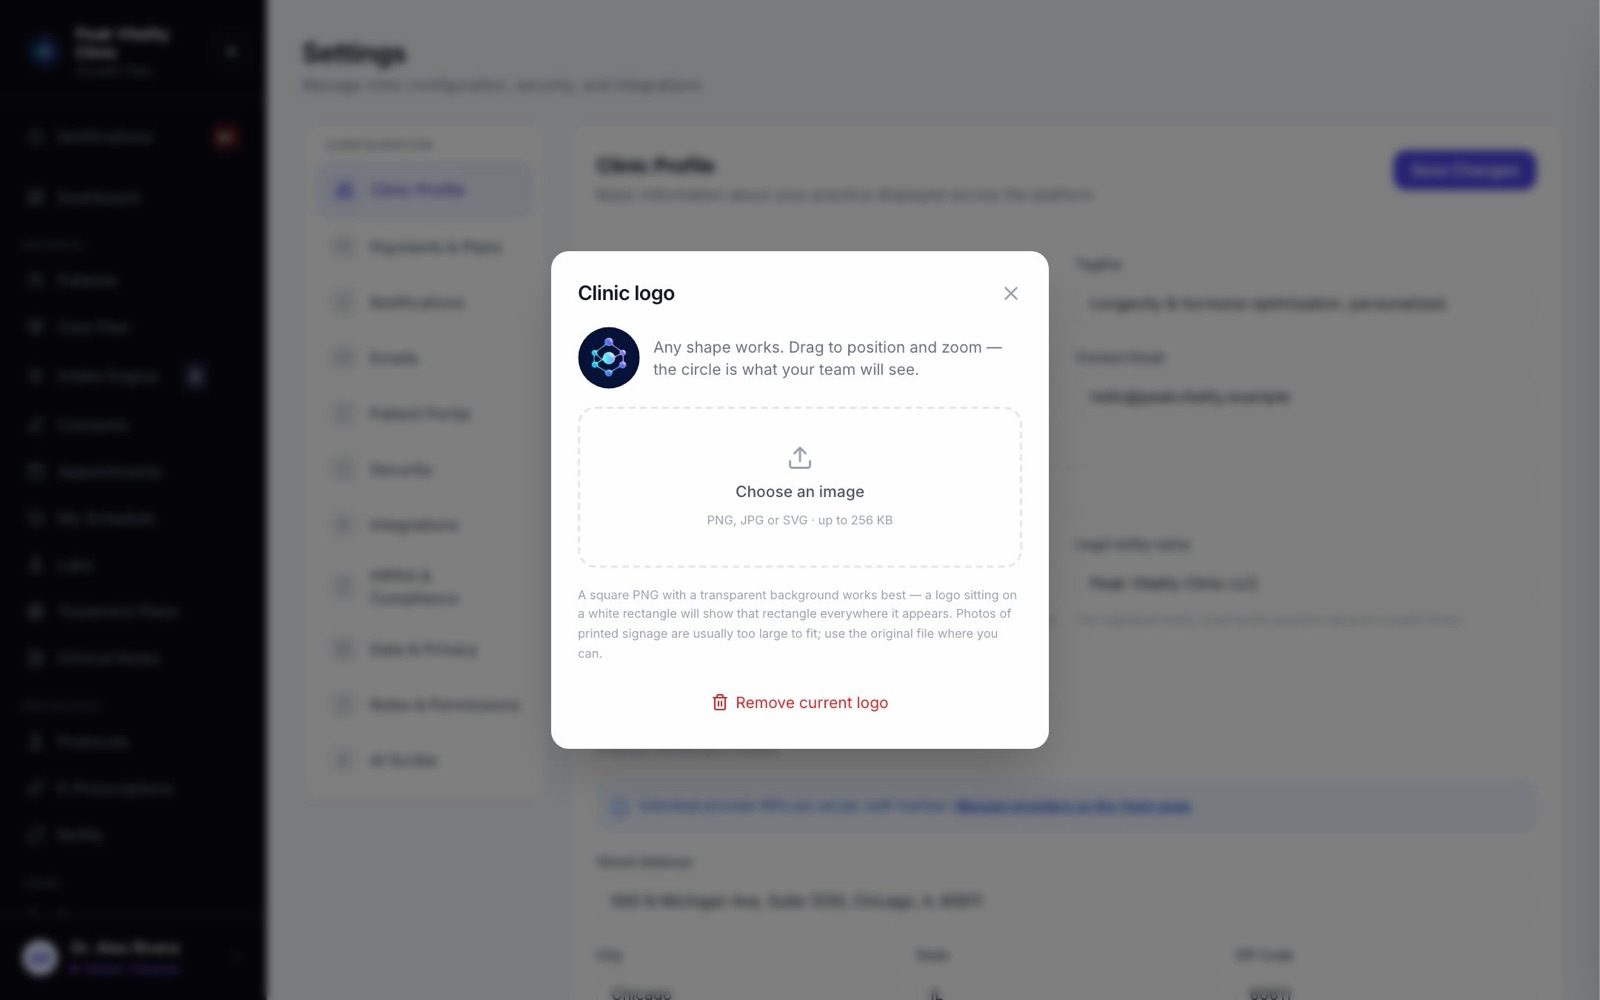
- 2Click Edit logo, then Choose an image. A PNG, JPG or SVG file works.
- 3Drag the picture to place it, and use the slider to zoom. The circle is what your team sees.
- 4Press Save logo. It shows at the top of the sidebar, beside your clinic’s name.
11Save and check
- 1Your changes save on their own a moment after you make them.
- 2When you’re done, press Save Changes at the top of Clinic Profile to be sure. It turns green and says Saved!
- 3That’s it. Your clinic profile and hours are set up.
Keep going
Settings
How your clinic runs: your details and hours, payments, what patients are told, the patient app, security, connected tools and who can do what.
Read the guideSet up your visit types and booking link
Build each kind of visit once: its length, providers, rooms, price and forms. Then turn on the link patients book from.
Read the guideSet up staff shifts
Put everyone’s working hours on the roster. For providers, those shifts are the hours patients can book.
Read the guideInvite your team
Give everyone at your clinic their own login, with the right role. Then add providers’ credentials so patients can be booked with them.
Read the guideSet up labs
Add your lab accounts and order codes, choose how results get in, and decide which panels patients can ask for.
Read the guideRather be shown?
Inside Aminova, the tutorial walks you through every page, and the Getting started checklist shows you each task click by click. Or book a live training session with our team.