1Before you start
Everyone who works at your clinic gets their own login. Never share one. Each person’s role decides what they can see and do.
Have each person’s full name, work email and job ready. For providers, have their NPI, DEA and license numbers too.
2Open Team
- 1Go to Team in the sidebar.
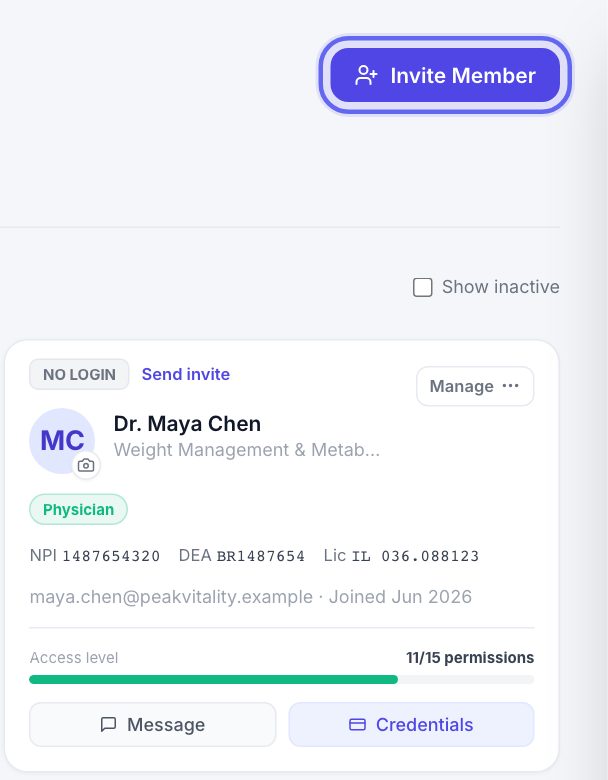
- 2Click Invite Member at the top right.
3Add each person
- 1Type their Full name and their email.
- 2Pick their role. The roles are Owner / Director, Practice Manager, Physician, Nurse / NP / PA, Medical Assistant, Front Desk and Billing Specialist.
- 3Click Add another member for the next person. Remove takes a row out.
- 4Press Send invite. With several people, it says Send invites.
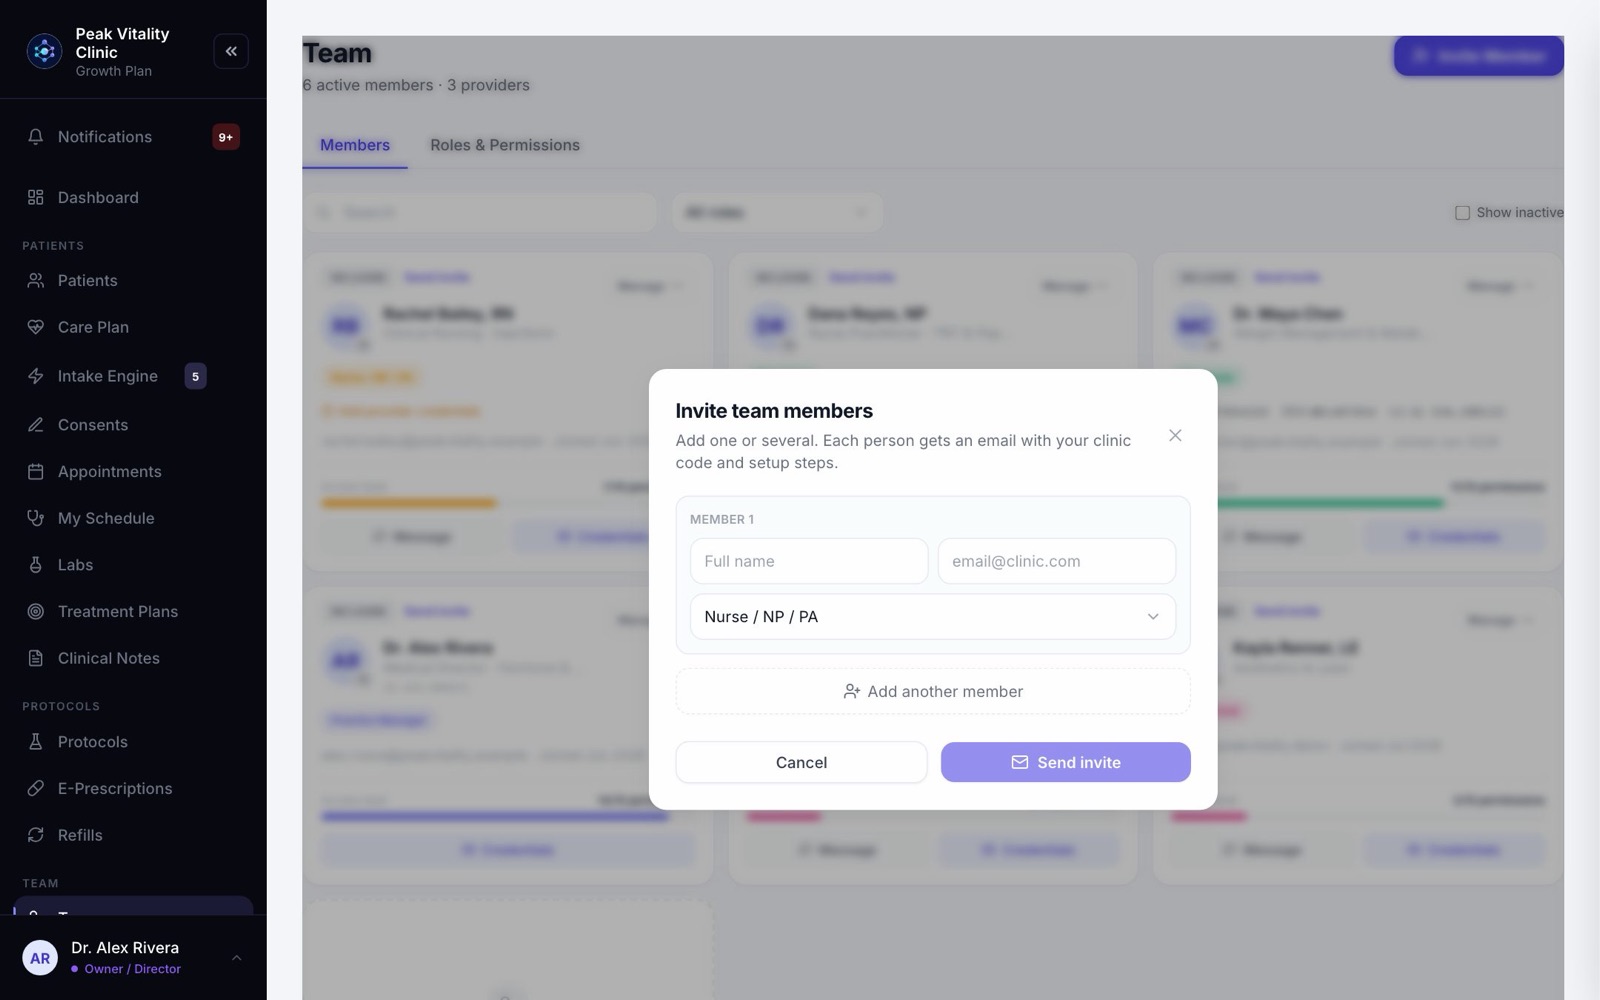
Only an owner can invite another owner. If a manager picks Owner / Director, the person joins as a Practice Manager.
4Check what each role can do
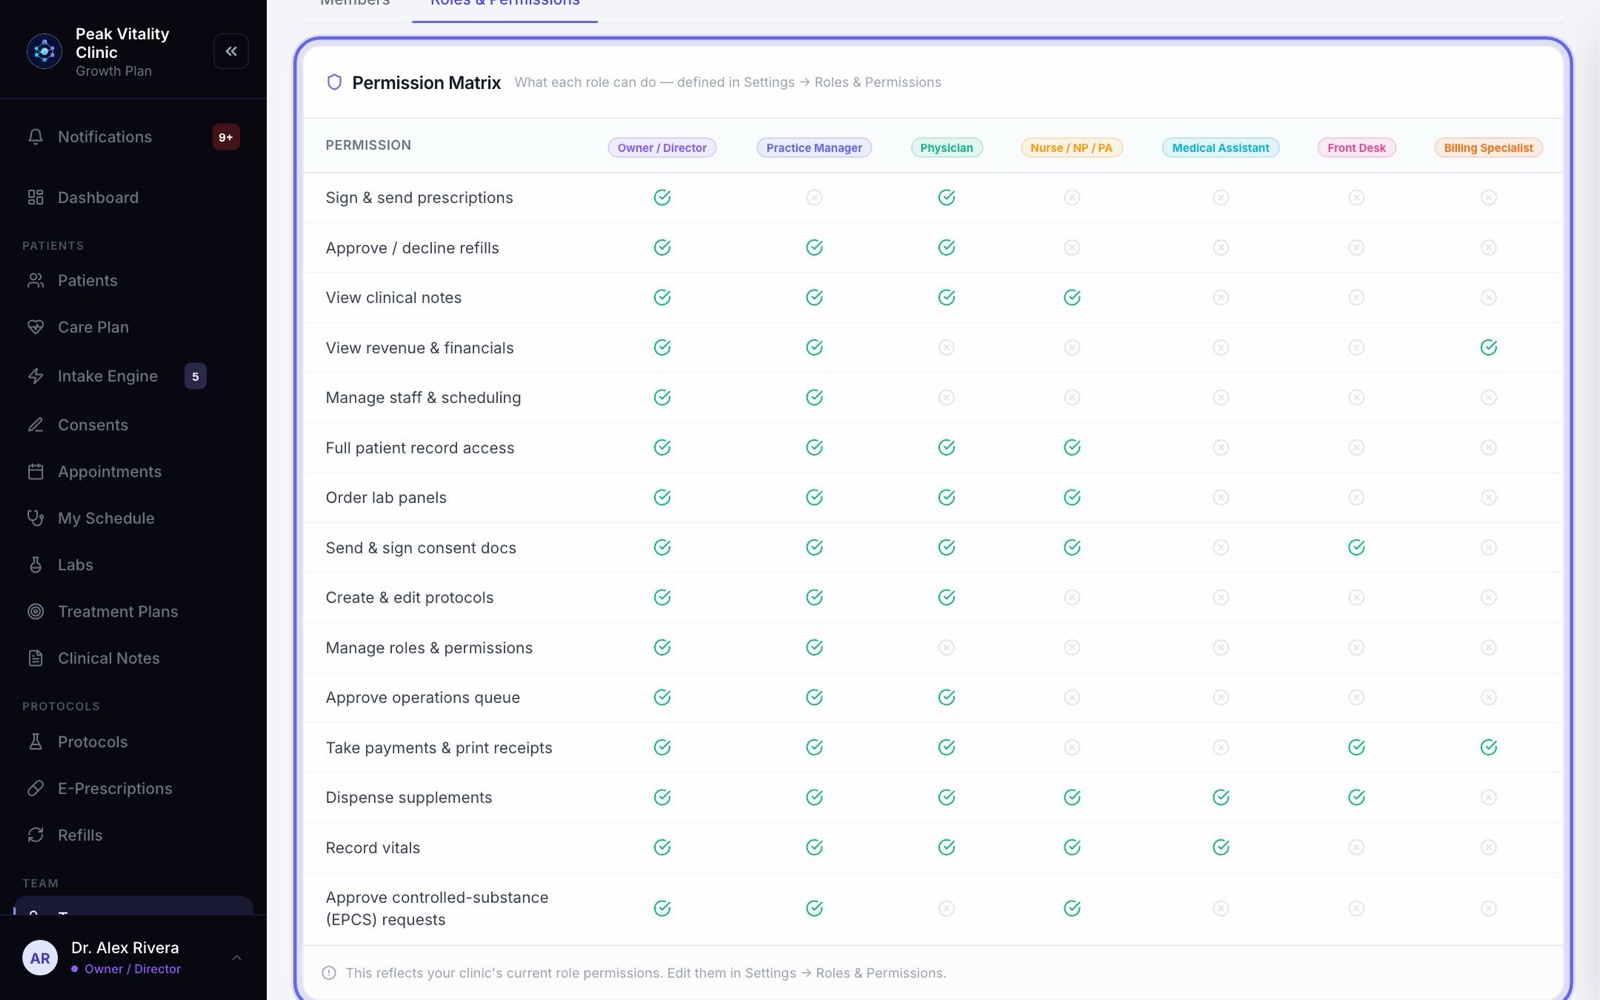
- 1Open the Roles & Permissions tab on the Team page.
- 2Each row is something a person can do. A check means that role can do it.
- 3To change what a role can do, go to Settings and open Roles & Permissions.
5What they get
- 1Each person gets an email with your clinic code and an Open Aminova button.
- 2They choose First time here? Set up your account and enter the clinic code if asked.
- 3They enter the email you invited, and type the 6-digit code sent to it.
- 4They create a password and get their own Employee ID. They sign in with their email or that ID.
Tell your team to use the exact email you typed. A different address won’t match the invite.
6Watch who has joined
- 1Invites not accepted yet are listed under Pending Invitations.
- 2An invite lasts 7 days. Refresh sends the email again and gives them 7 more days.
- 3Cancel takes an invite back, like one sent to the wrong person.
- 4Once someone finishes setting up, they leave this list.
7Staff already on the list
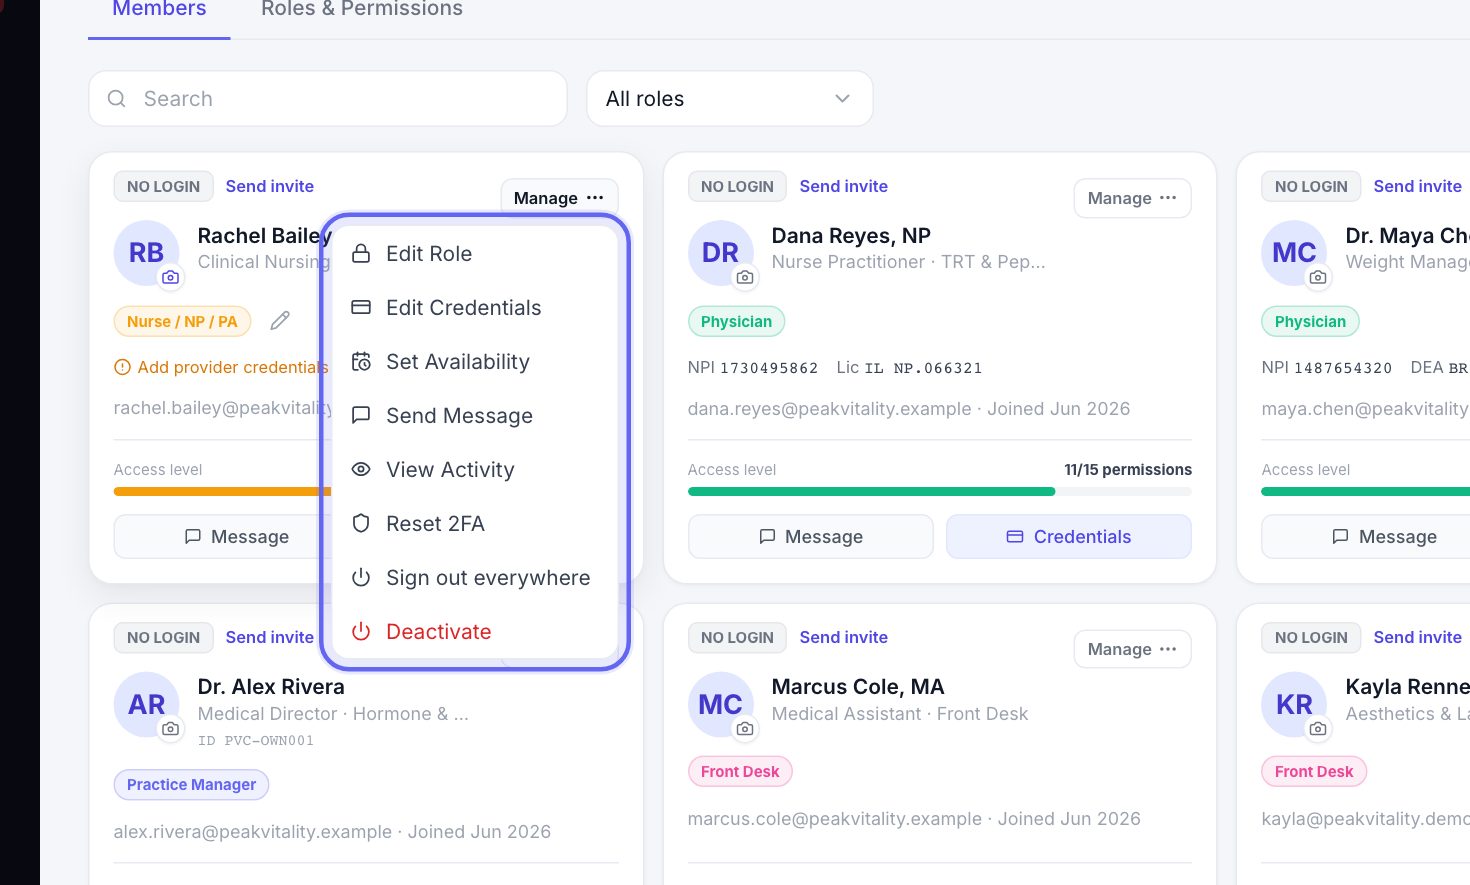
- 1If your staff came over from another system, their cards may show NO LOGIN.
- 2Click Send invite on the card. Check the name and email, then press Send invite.
- 3The card shows INVITE SENT until they finish setting up.
8Fix a wrong email
- 1Click Credentials on their card and change Email. Press Save.
- 2If they had a pending invite, it goes again to the new address.
9Add providers’ credentials
- 1On a provider’s card, click Credentials.
- 2Tick Sees patients. Only people with this ticked can be booked.
- 3Add their NPI and press Verify. Add their DEA Number, State License # and License Expiry. Add a Supervising Physician if they need one.
- 4Under Licensed States, type each two-letter state code and press Enter.
- 5Press Save.
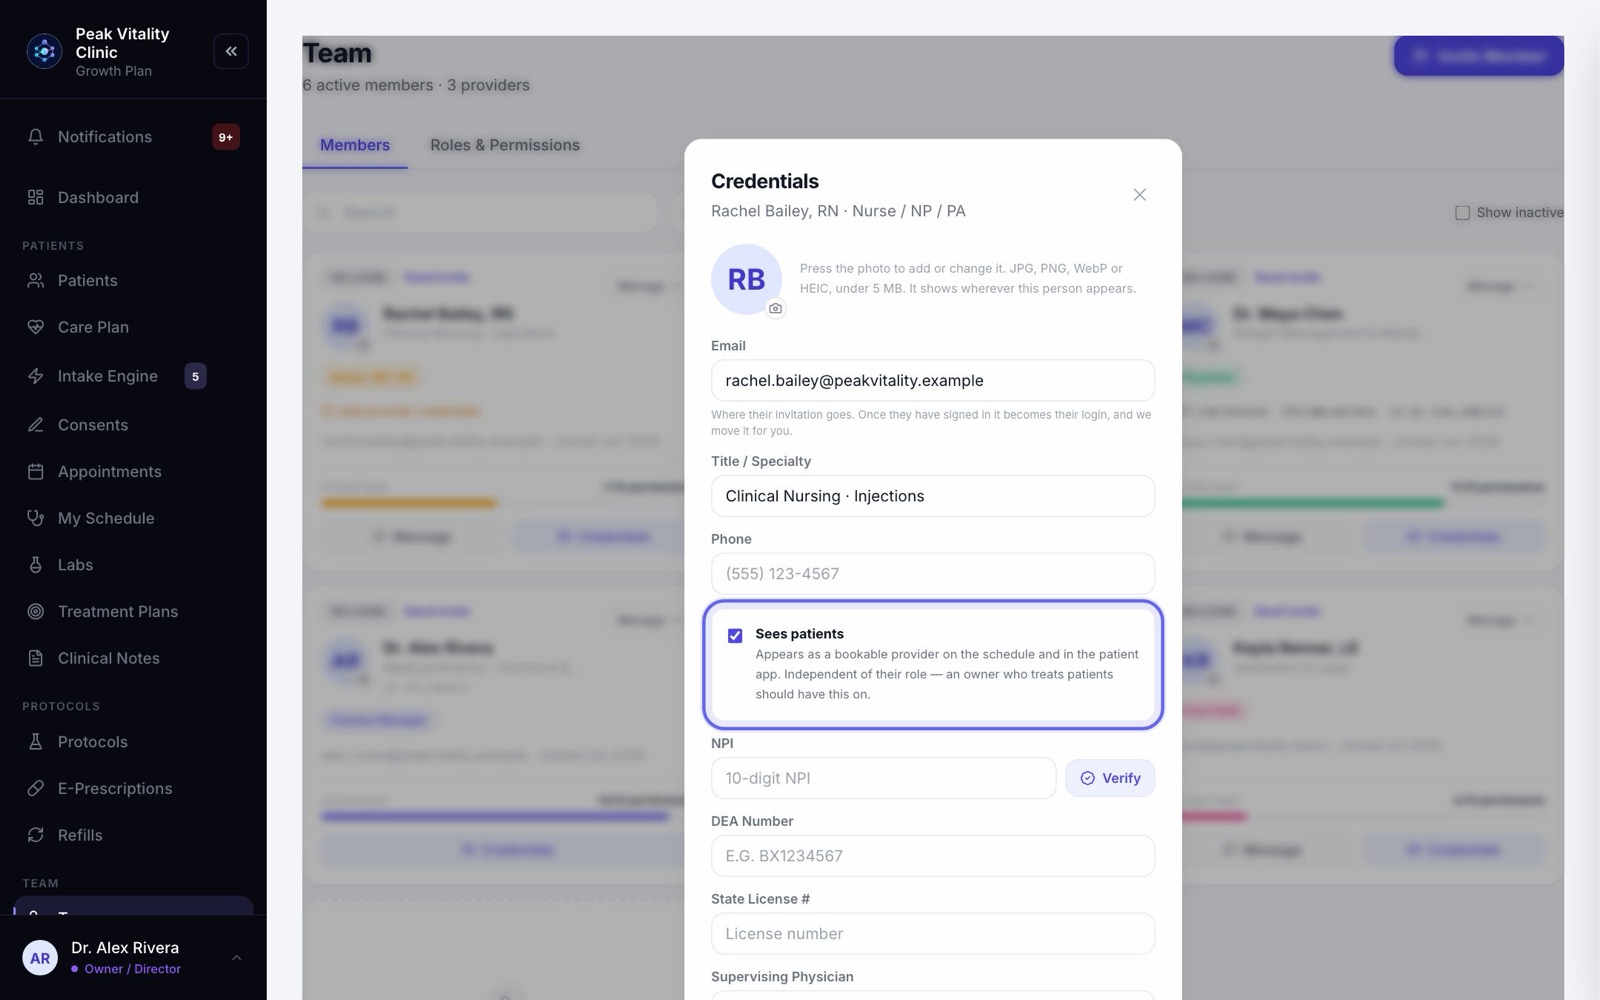
Do you treat patients yourself? Open your own card and tick Sees patients too. You stay an owner.
10Set when they work
Patients can only book a provider when they are working. Put their shifts on the roster in Staff Scheduling. The Set up staff shifts guide shows how.
For someone without shifts, open Manage on their card and choose Set Availability to set their usual week.
11Check nothing is left over
- 1Look for a Not on the staff list box on the Team page. It lists people who can sign in but can’t have visits.
- 2Click Add to staff list for each one.
- 3You’re done when every card has no NO LOGIN tag and Pending Invitations is empty.
Keep going
Team
Everyone who works at your clinic. Invite people, give each a role, keep their credentials up to date, and remove someone who has left.
Read the guideSet up staff shifts
Put everyone’s working hours on the roster. For providers, those shifts are the hours patients can book.
Read the guideTurn on two-step sign-in
Make everyone confirm their sign-in with a code from an app on their phone. Set up your own first, then your team is walked through it the next time they sign in.
Read the guideSet up e-prescribing
Get each prescriber able to send prescriptions electronically: what Setup checks, the details each prescriber needs, and the extra steps for controlled substances.
Read the guideFor owners and practice managers
Everything you need to set up the clinic, bring your team in, decide who can do what, and keep an eye on the money and the day.
Read the guideRather be shown?
Inside Aminova, the tutorial walks you through every page, and the Getting started checklist shows you each task click by click. Or book a live training session with our team.