1The page at a glance
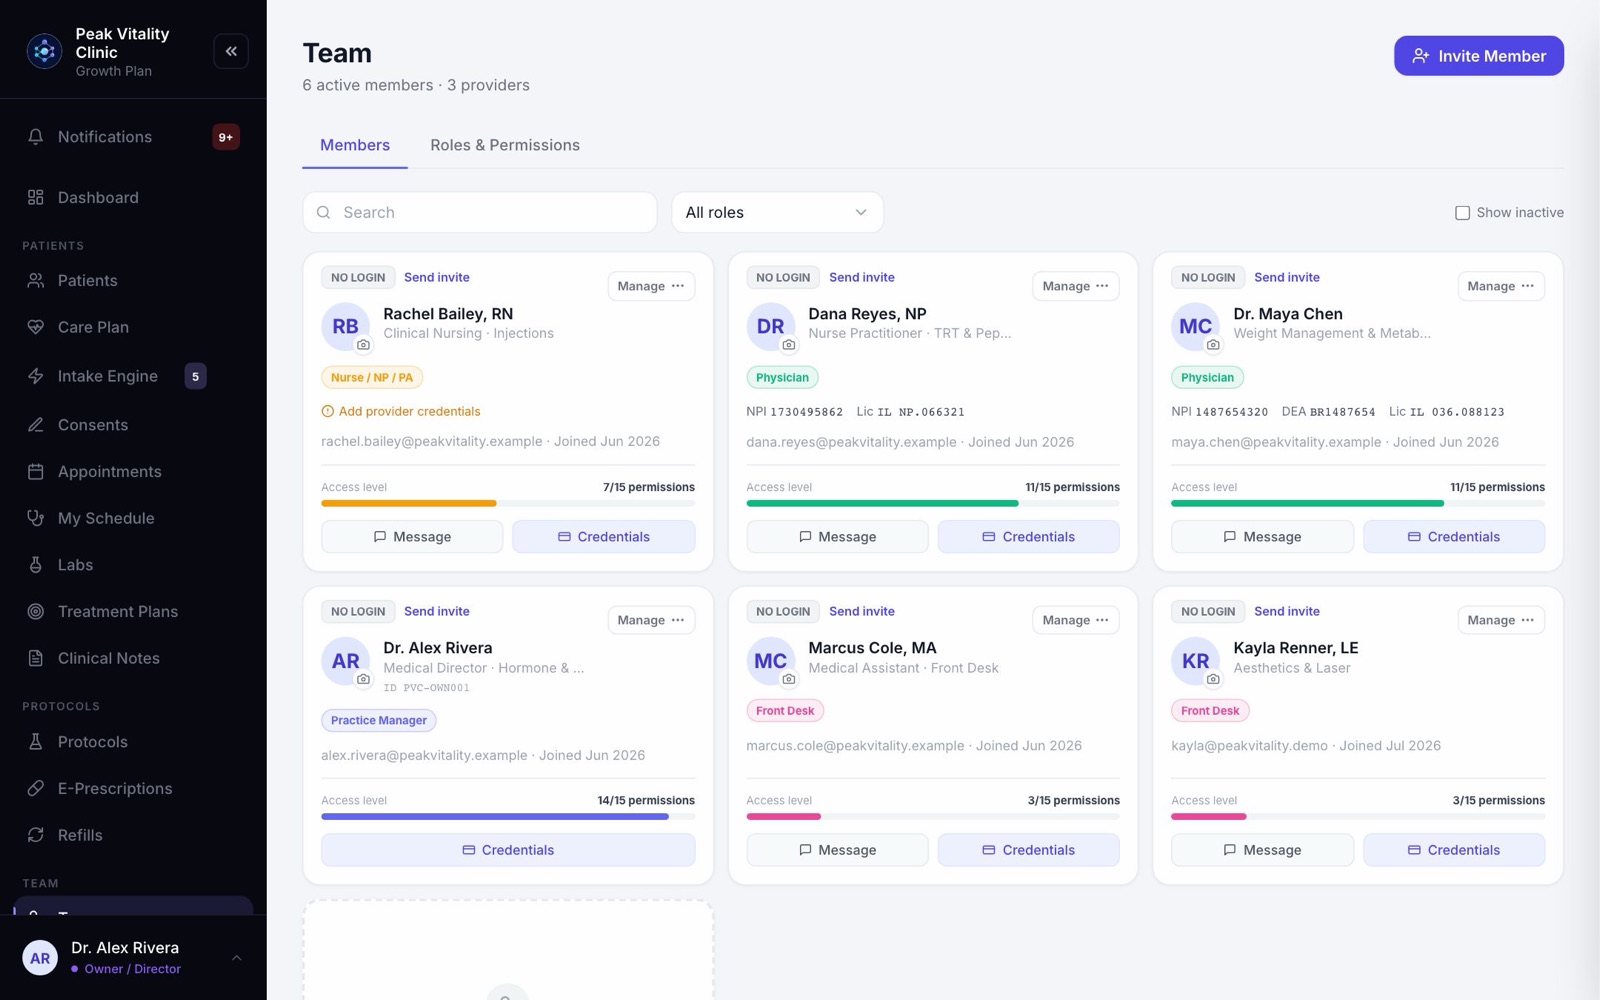
Team lists everyone at your clinic, one card per person. Under the title you see how many active members and providers you have.
There are two tabs. Members is your staff list. Roles & Permissions shows what each role is allowed to do.
By default, only owners and managers see this page. What you can change here depends on your role.
2Find someone
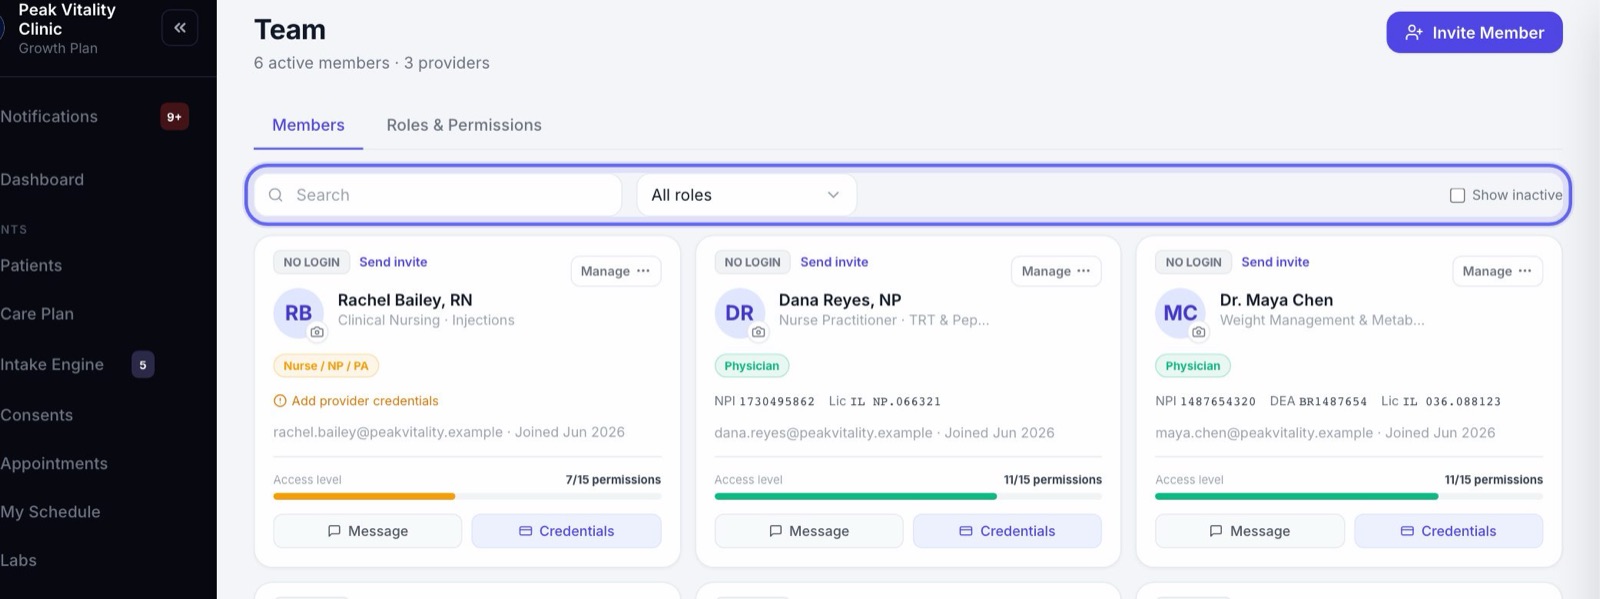
- 1Type in Search to find a person by name or email.
- 2Click All roles to show one role only, like Front Desk.
- 3Tick Show inactive to also see people you deactivated.
3What a card shows
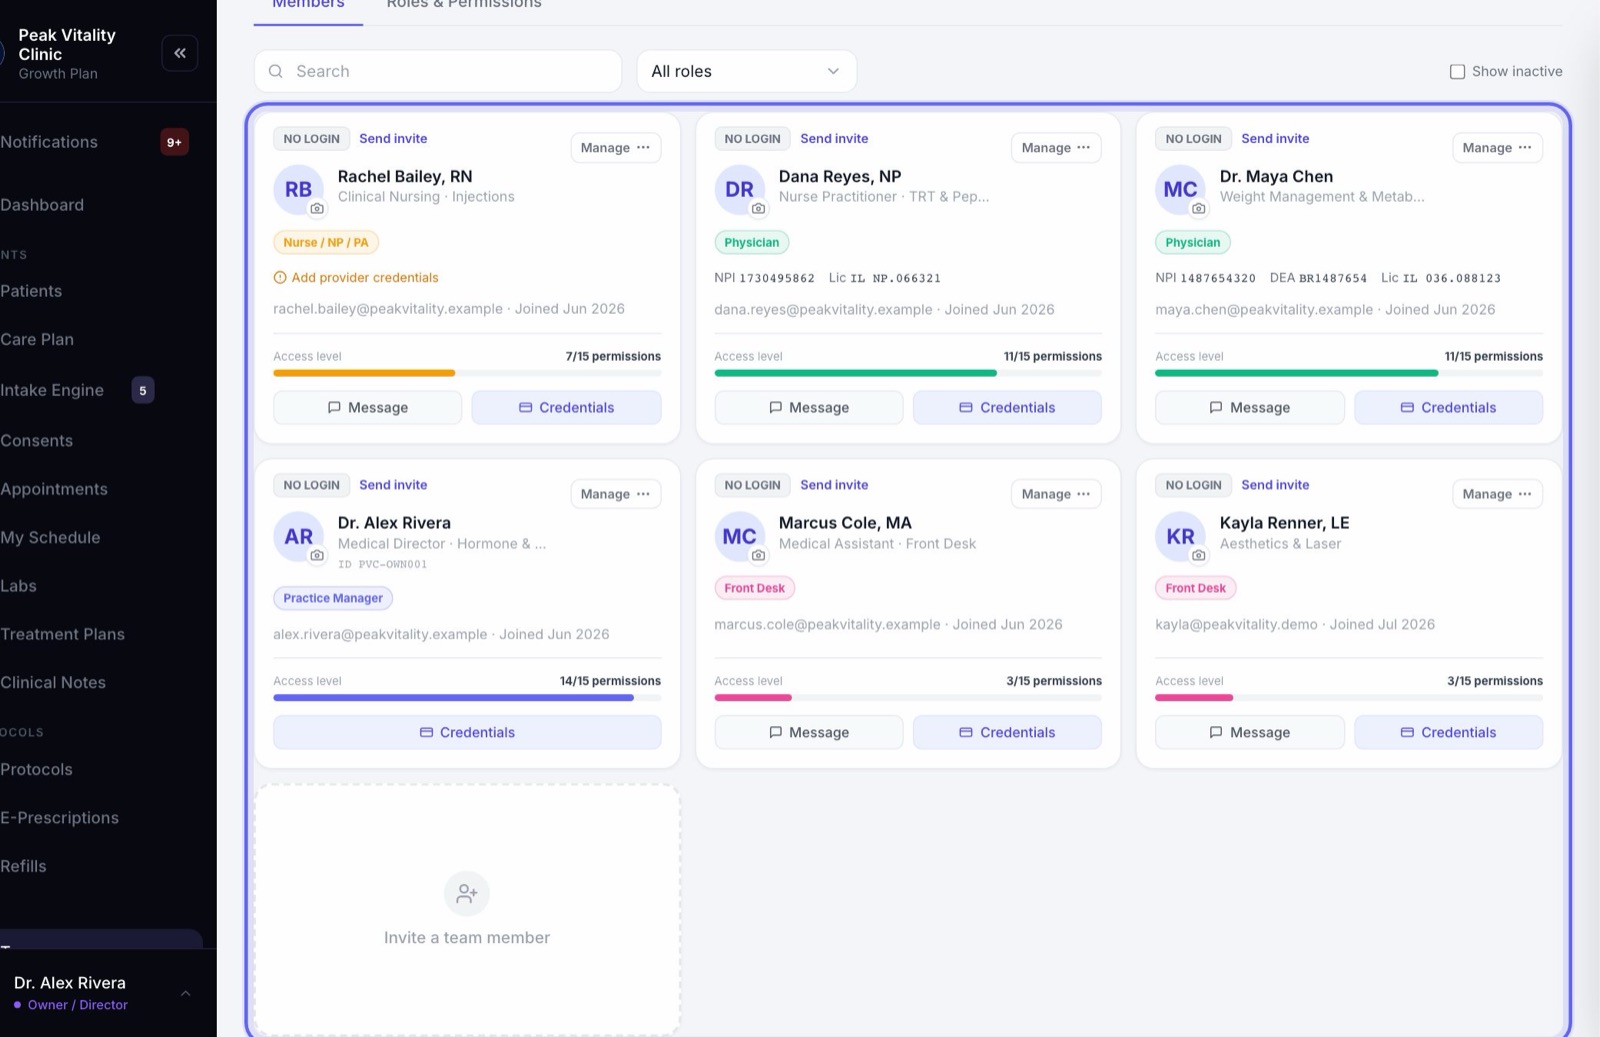
- 1The photo, name, title and their team member ID. Press the photo to add or change it.
- 2Their role, in a colored tag. A License expired or License expires in tag warns you when a license is running out.
- 3For physicians and nurses, their NPI, DEA and license number. If none are on file, you see Add provider credentials.
- 4Their email and the month they joined.
- 5Message opens a chat with them. Credentials opens their details.
- 6Owners also see an Access level bar: how many permissions this role has.
4Invite people
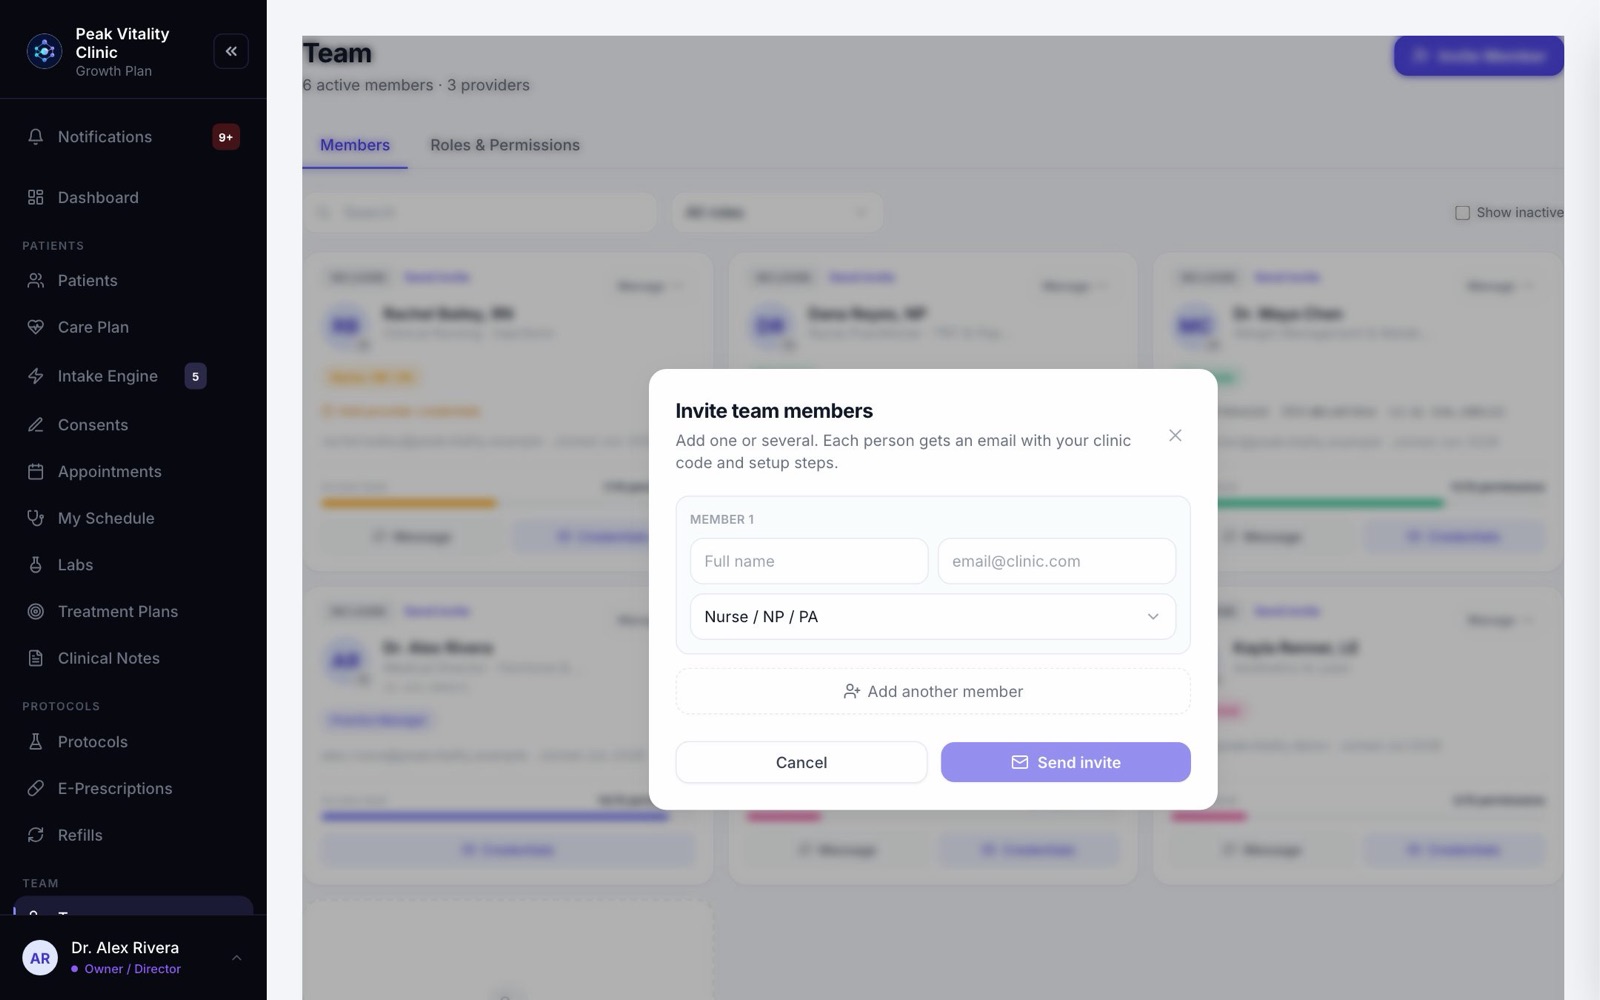
- 1Click Invite Member, or the Invite a team member card at the end of the list.
- 2Type their Full name and email, and pick their role.
- 3To invite more than one person, click Add another member.
- 4Press Send invite. Each person gets an email with your clinic code and how to set up their login.
Only an owner can invite another owner. The Invite your team setup guide walks through it step by step.
5People who can’t sign in yet
- 1A NO LOGIN tag means the person is on your team but has no login yet. This is common after you bring staff over from another system.
- 2Click Send invite beside the tag. Check the name and email, then press Send invite again. Nothing is sent until you do.
- 3The tag changes to INVITE SENT until they finish setting up.
6Pending Invitations
- 1Invites nobody has accepted yet are listed under Pending Invitations, with when each was sent.
- 2An invite lasts 7 days. Refresh sends the email again and gives them 7 more days.
- 3Cancel takes the invite back.
7The Manage menu
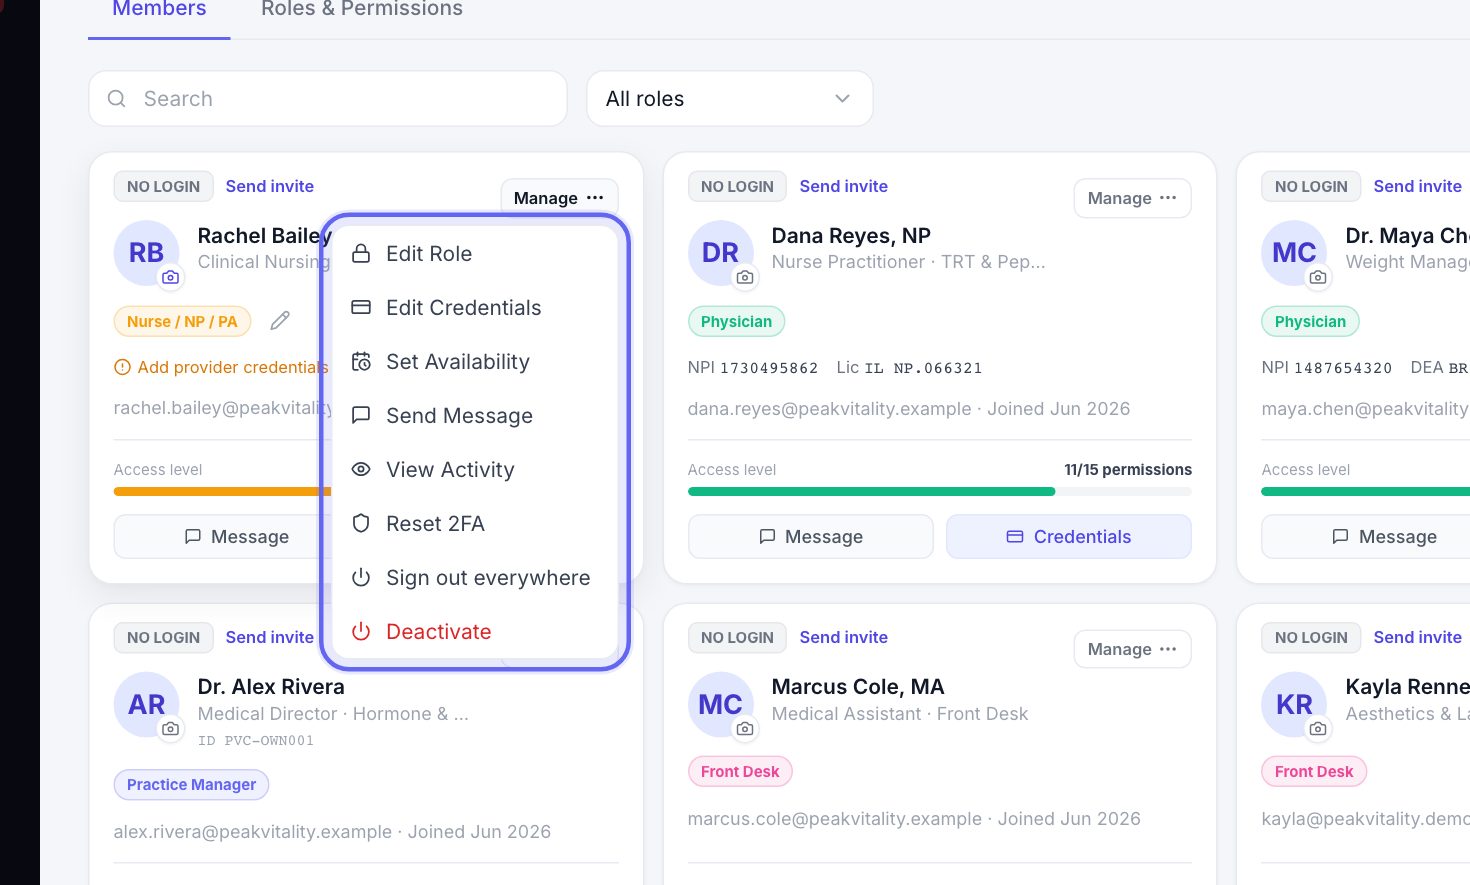
- 1Click Manage in the corner of a card.
- 2You see Edit Role, Edit Credentials, Set Availability, Send Message, View Activity, Reset 2FA, Sign out everywhere and Deactivate.
- 3You only see the items your role is allowed to use.
8Change someone’s role
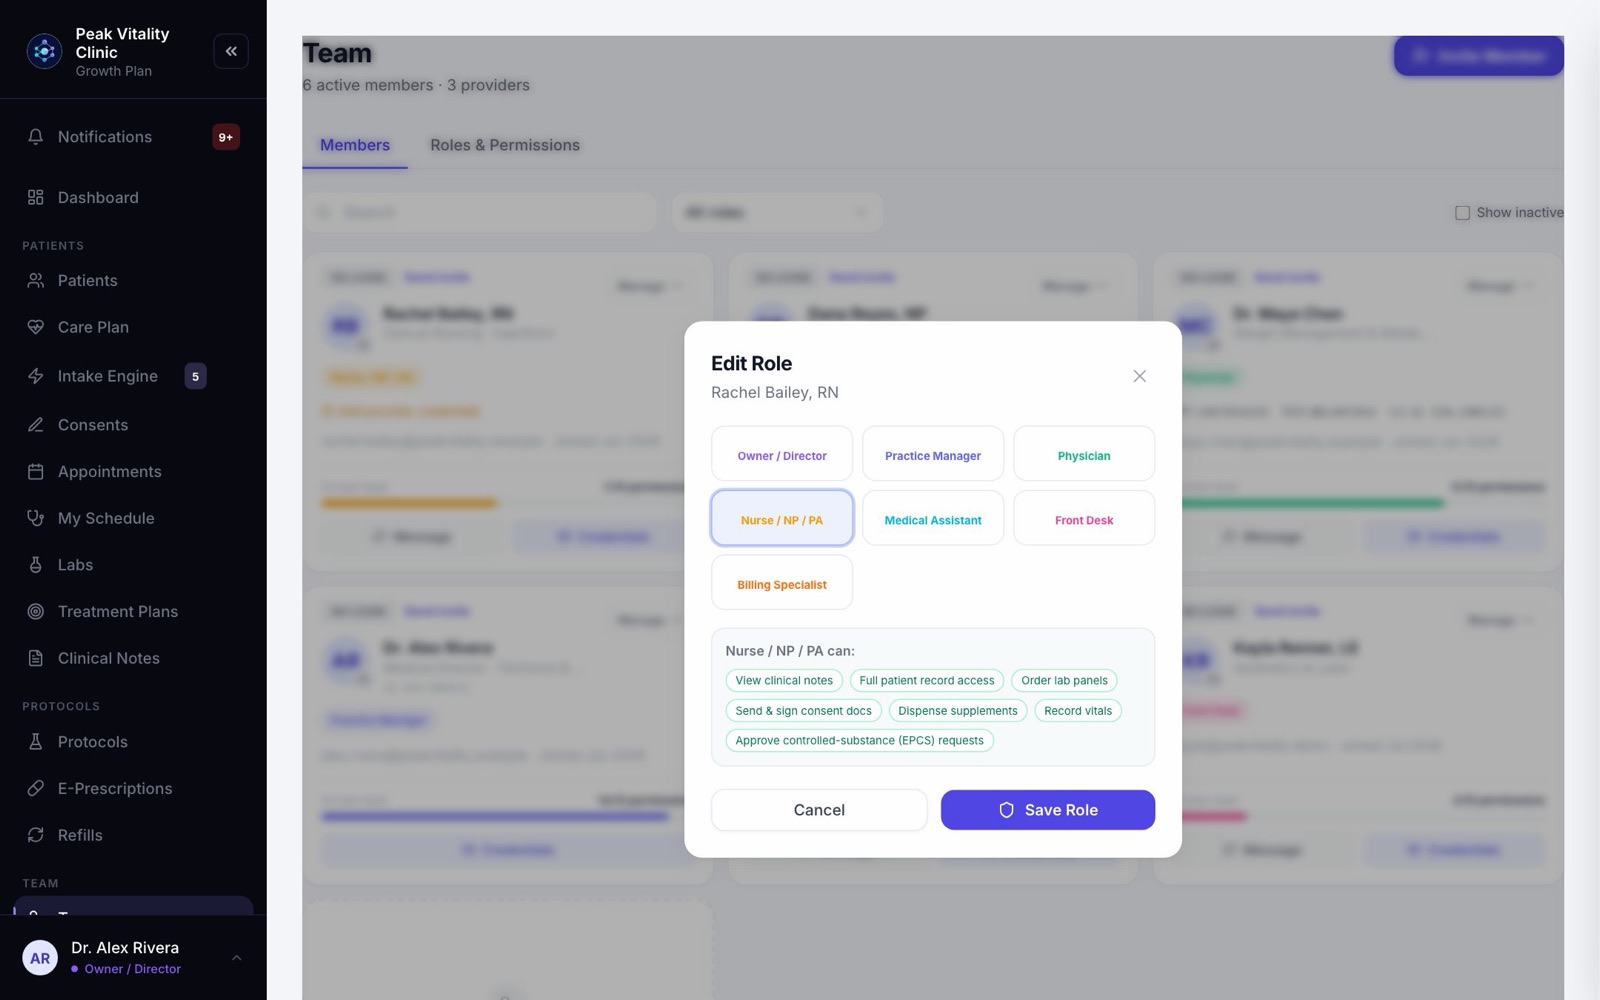
- 1Choose Edit Role in the Manage menu. You can also hover over the role tag and click the pencil.
- 2Pick the new role. The box below lists what that role can do in your clinic.
- 3Press Save Role.
9Credentials
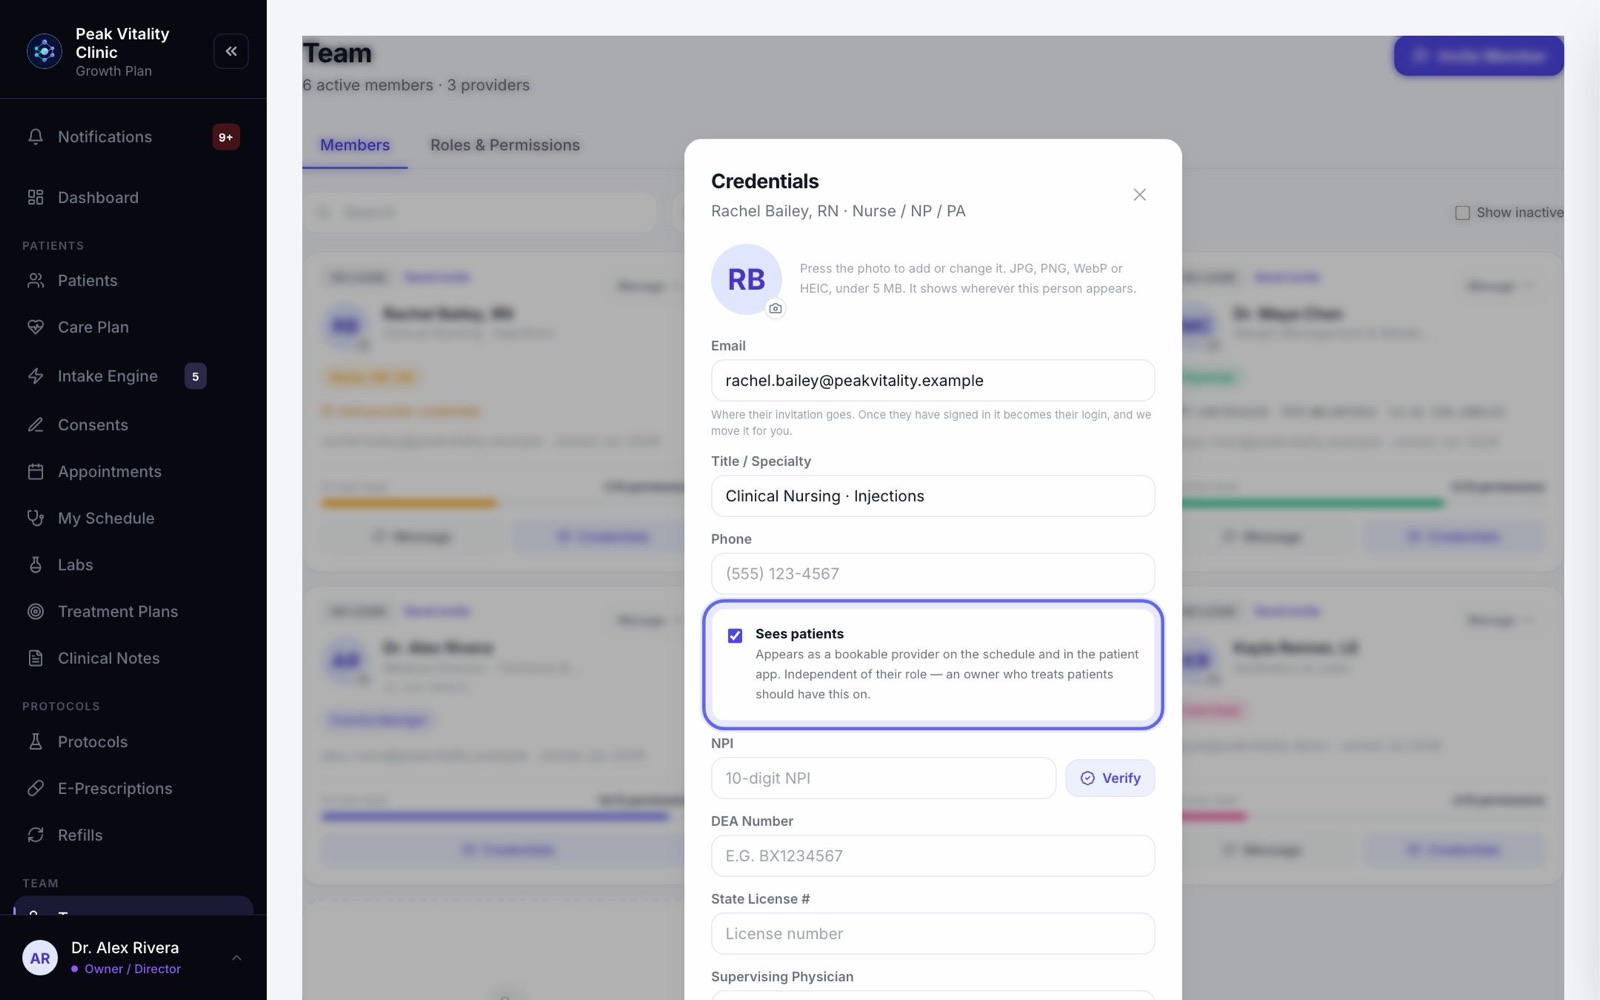
- 1Click Credentials on the card, or Edit Credentials in the Manage menu. You can always edit your own.
- 2Fill in Title / Specialty and Phone.
- 3Tick Sees patients for anyone patients can book with. An owner who treats patients should tick it too. Only an owner or manager can change it.
- 4For someone who sees patients, add their NPI and press Verify to check it against the national registry. Add their DEA Number, State License #, Supervising Physician and License Expiry.
- 5Under Licensed States, type a two-letter code like TX and press Enter. Prescribing is blocked for patients in states not on the list.
- 6Press Save.
10Fix an email address
- 1Open Credentials and change Email, then press Save.
- 2If they have a pending invite, it is sent again to the new address.
- 3Once someone has signed in, their email is their login and can’t be changed here. Contact Aminova and we will move it.
11Set Availability
- 1Owners and managers see Set Availability for anyone who sees patients.
- 2Pick their Usual working days, when the day starts and ends, and Max Appointments / Day (capacity).
- 3Click Add a break to block out lunch or admin time every working day.
- 4Press Save Availability.
On any day someone has a shift in Staff Scheduling, the shift decides when they can be booked. Breaks and the daily cap from here still apply.
12Message and activity
- 1Message or Send Message opens a private chat with that person.
- 2View Activity shows what they have done in Aminova in the last 90 days, from your clinic’s audit log.
13When someone leaves
- 1Choose Deactivate in the Manage menu, then Deactivate again to confirm. They keep their record but can’t sign in.
- 2To bring them back, tick Show inactive, open Manage and choose Reactivate. They get a new team member ID. Share it with them so they can sign in.
- 3Sign out everywhere ends their sign-in on every device, like after a lost phone.
- 4Reset 2FA makes them set up two-step sign-in again the next time they sign in.
14Not on the staff list
This box only shows when someone can sign in but isn’t on your staff list. Visits can’t be put on them, and their My Schedule stays empty.
Click Add to staff list to fix it.
15Roles & Permissions
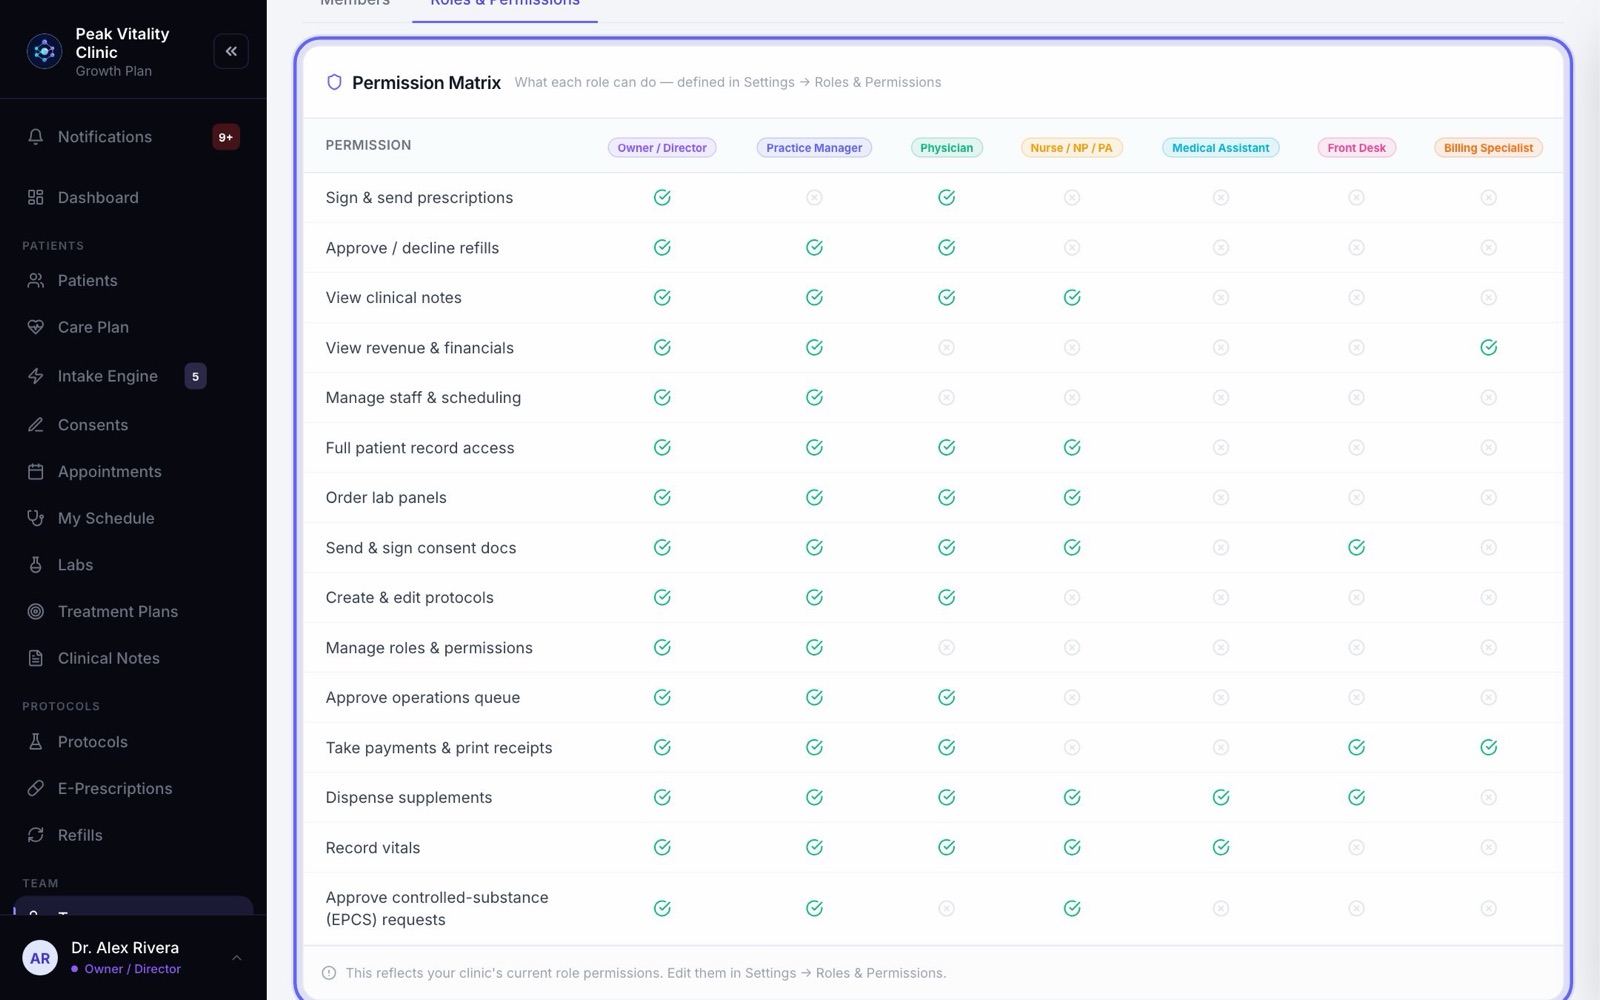
The Roles & Permissions tab is a table. Each row is something a person can do, each column is a role, and a check means that role can do it.
This tab only shows the rules. To change them, go to Settings and open Roles & Permissions.
Keep going
Invite your team
Give everyone at your clinic their own login, with the right role. Then add providers’ credentials so patients can be booked with them.
Read the guideStaff Scheduling
Who works when, and who is away. Set shifts, see who is on right now, ask for time off, and approve it.
Read the guideSet up staff shifts
Put everyone’s working hours on the roster. For providers, those shifts are the hours patients can book.
Read the guideSettings
How your clinic runs: your details and hours, payments, what patients are told, the patient app, security, connected tools and who can do what.
Read the guideTurn on two-step sign-in
Make everyone confirm their sign-in with a code from an app on their phone. Set up your own first, then your team is walked through it the next time they sign in.
Read the guideFor owners and practice managers
Everything you need to set up the clinic, bring your team in, decide who can do what, and keep an eye on the money and the day.
Read the guideRather be shown?
Inside Aminova, the tutorial walks you through every page, and the Getting started checklist shows you each task click by click. Or book a live training session with our team.