1What they are
The tutorial walks you through every page you use, one at a time, in the order you’ll need them. It only shows the pages and buttons your role can use.
The checklist is the Getting started box in the bottom right corner. It lists the everyday things to try once, and, for owners and managers, what to set up before you open.
2Start the tutorial
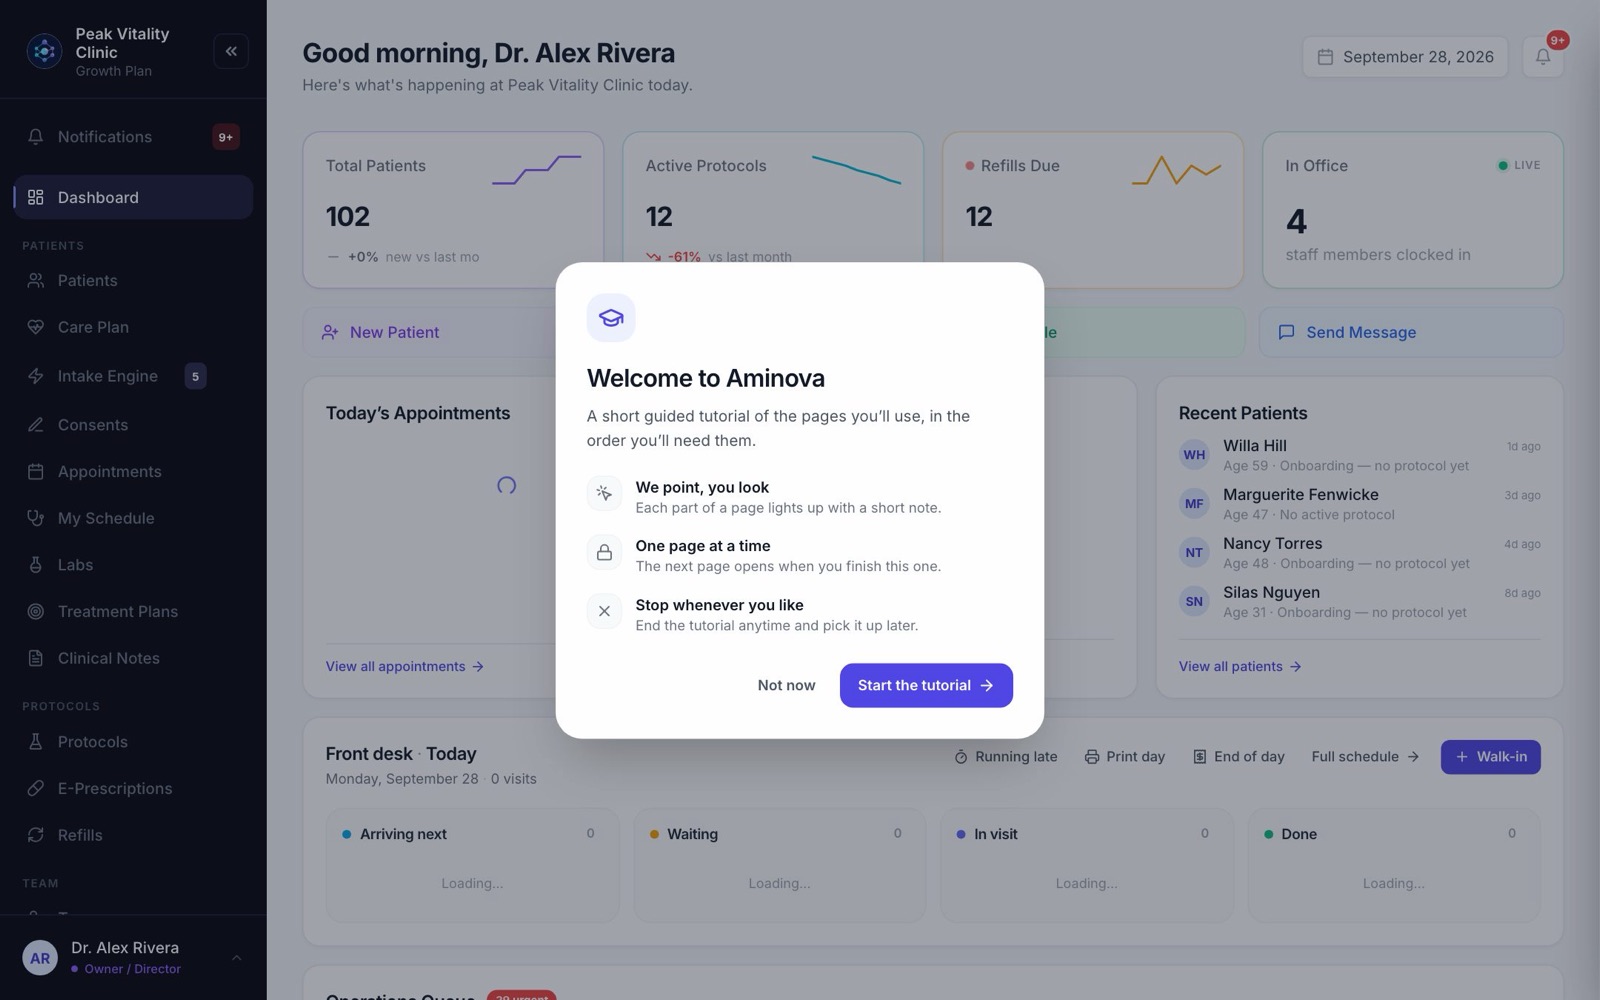
- 1The first time you sign in on a computer, a welcome appears on its own. Press Start the tutorial, or Not now.
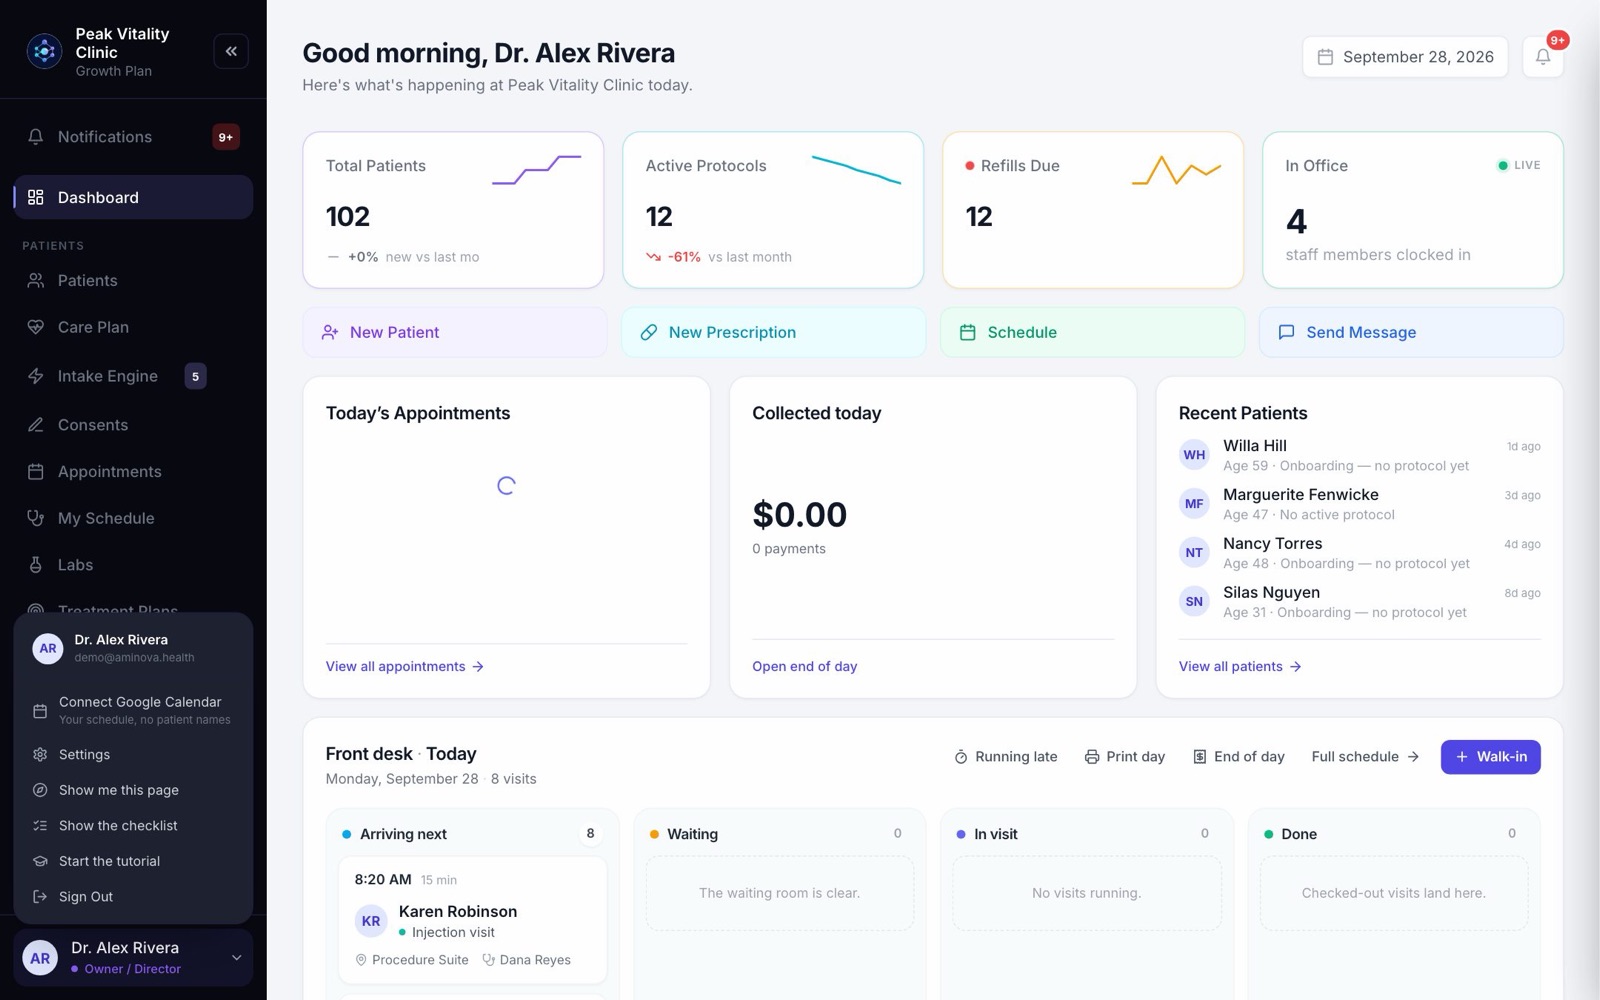
- 2To start it any time, click your name at the bottom of the sidebar, then Start the tutorial.
- 3The welcome only appears on its own on a computer-sized screen, where the sidebar is in view.
3How it works
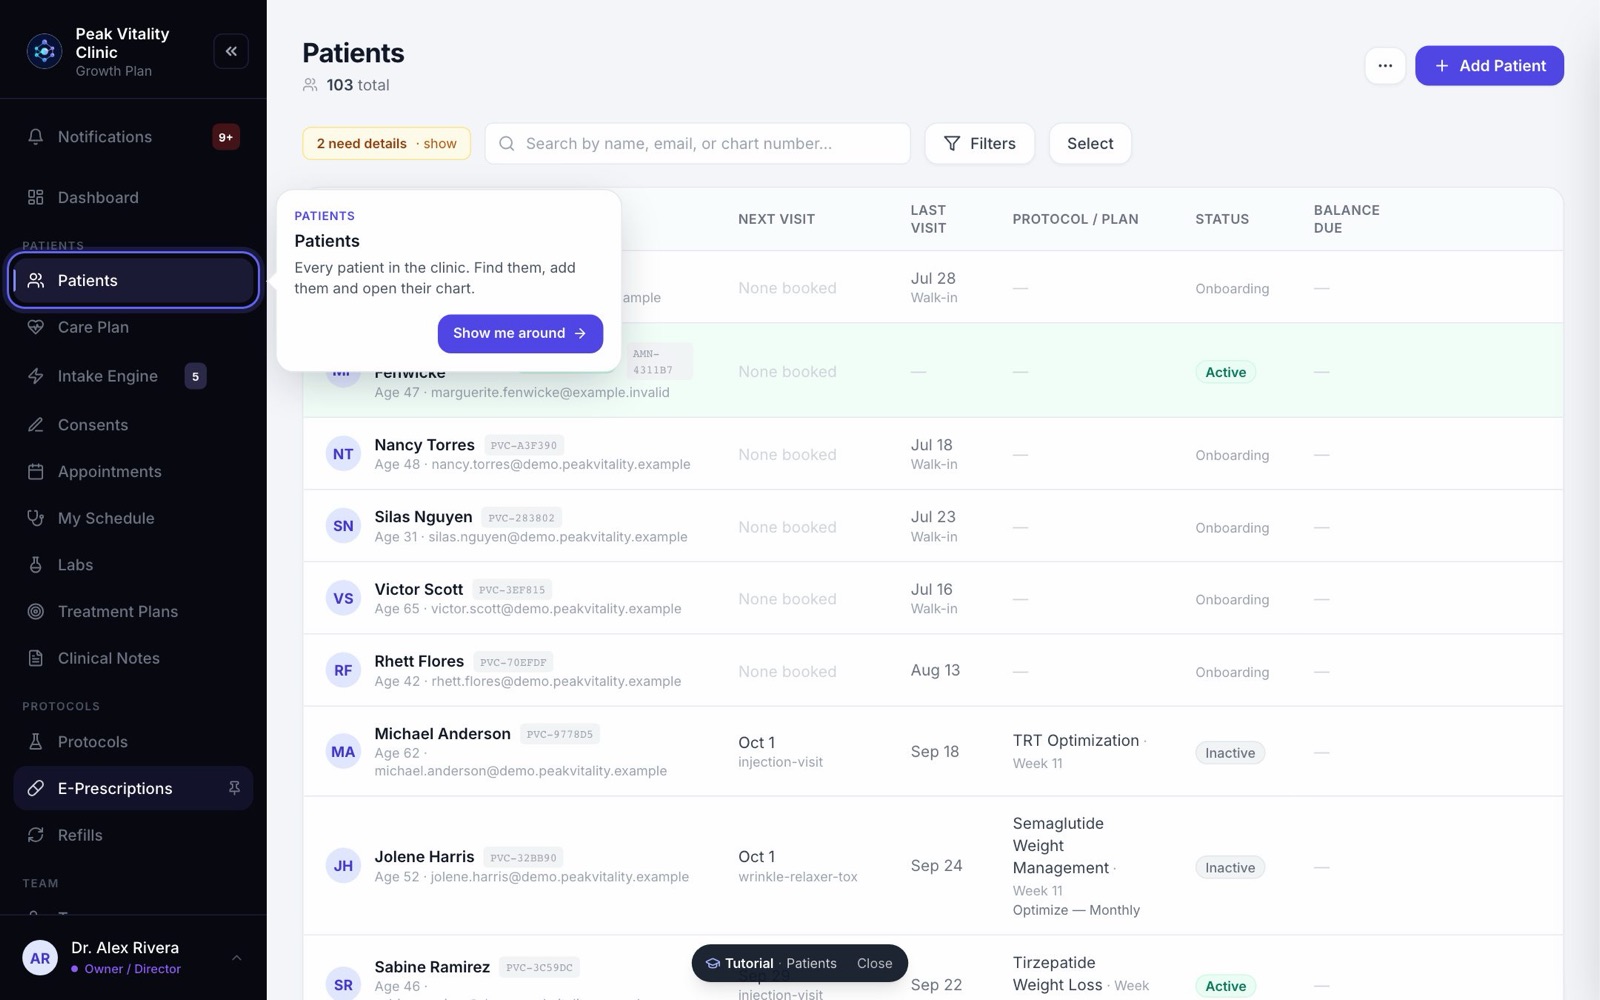
- 1One part of the page lights up with a colored outline, and a short note beside it says what it is.
- 2Press Next to move on, or Back to go back. The arrow keys work too.
- 3Sometimes the tutorial opens a tab or panel for you, so you can see what’s inside.
- 4A bar at the bottom of the screen says which page you’re on, like “page 3 of 20”.
4One page at a time
- 1Pages you haven’t reached yet are grayed out in the sidebar, with a small lock. They open as you go.
- 2On the last note of a page, the button names the next page, like Next: Appointments. Press it and you’re taken there.
- 3If you click away to another page, press Back to the tutorial on the bar at the bottom.
- 4At the end you’ll see That’s the tutorial. Every page is open again.
5Stop, and pick it up later
- 1Press End tutorial on the bar at any time. The whole sidebar opens again.
- 2Your place is saved to your account, so you can pick it up on any computer.
- 3To carry on, click your name at the bottom of the sidebar, then Resume the tutorial, then Pick up where I left off.
6Your name menu
Click your name at the bottom of the sidebar. Along with the tutorial, you’ll find Show me this page, and Show the checklist if you’ve hidden it.
7Show me this page
On any page, click your name, then Show me this page. You get the tutorial for just that page, and your place in the full tutorial is kept.
Press Done on the last note, or Close on the bar.
8The checklist box
- 1Closed, it’s a small Getting started button in the bottom right, with how many are done. Click it to open it.
- 2Open, it has two lists: Learn Aminova and, for owners and managers, Set up your clinic.
- 3It steps out of the way while the tutorial is running.
- 4It shows on computer-sized screens.
9Learn Aminova
Everyday things to do once, for real, on a practice patient, so the first time isn’t in front of a real one: Take the tutorial, Add a practice patient, Book a visit, Check a patient in, Write a visit note, Message a patient and Take a payment. Owners and managers also get Send an intake form.
You only see the ones your role can do. Each person has their own list, and only your own work ticks yours.
10Set up your clinic
For owners and managers: Your clinic’s details, Your visit types, Forms on your visits, Your consent forms, Invite your team, Who works when, Take card payments, Set up e-prescribing (if your plan has it), Turn on your booking link and Bring in your patients.
This list is shared by the whole clinic.
11It ticks itself
You can’t tick an item by hand. It ticks when the thing really exists: a note saved, a visit type made, a card processor connected.
Done items turn gray. Their button changes to Again, if you want another go.
12Show me
- 1Press Show me on any item. You’re taken to the right page, and the first thing to click lights up.
- 2It waits for you. The note says Click it to go on, or Ticks off when it’s saved.
- 3Press Skip to move on without doing it, or End on the bar at the bottom to stop.
13Practice patients
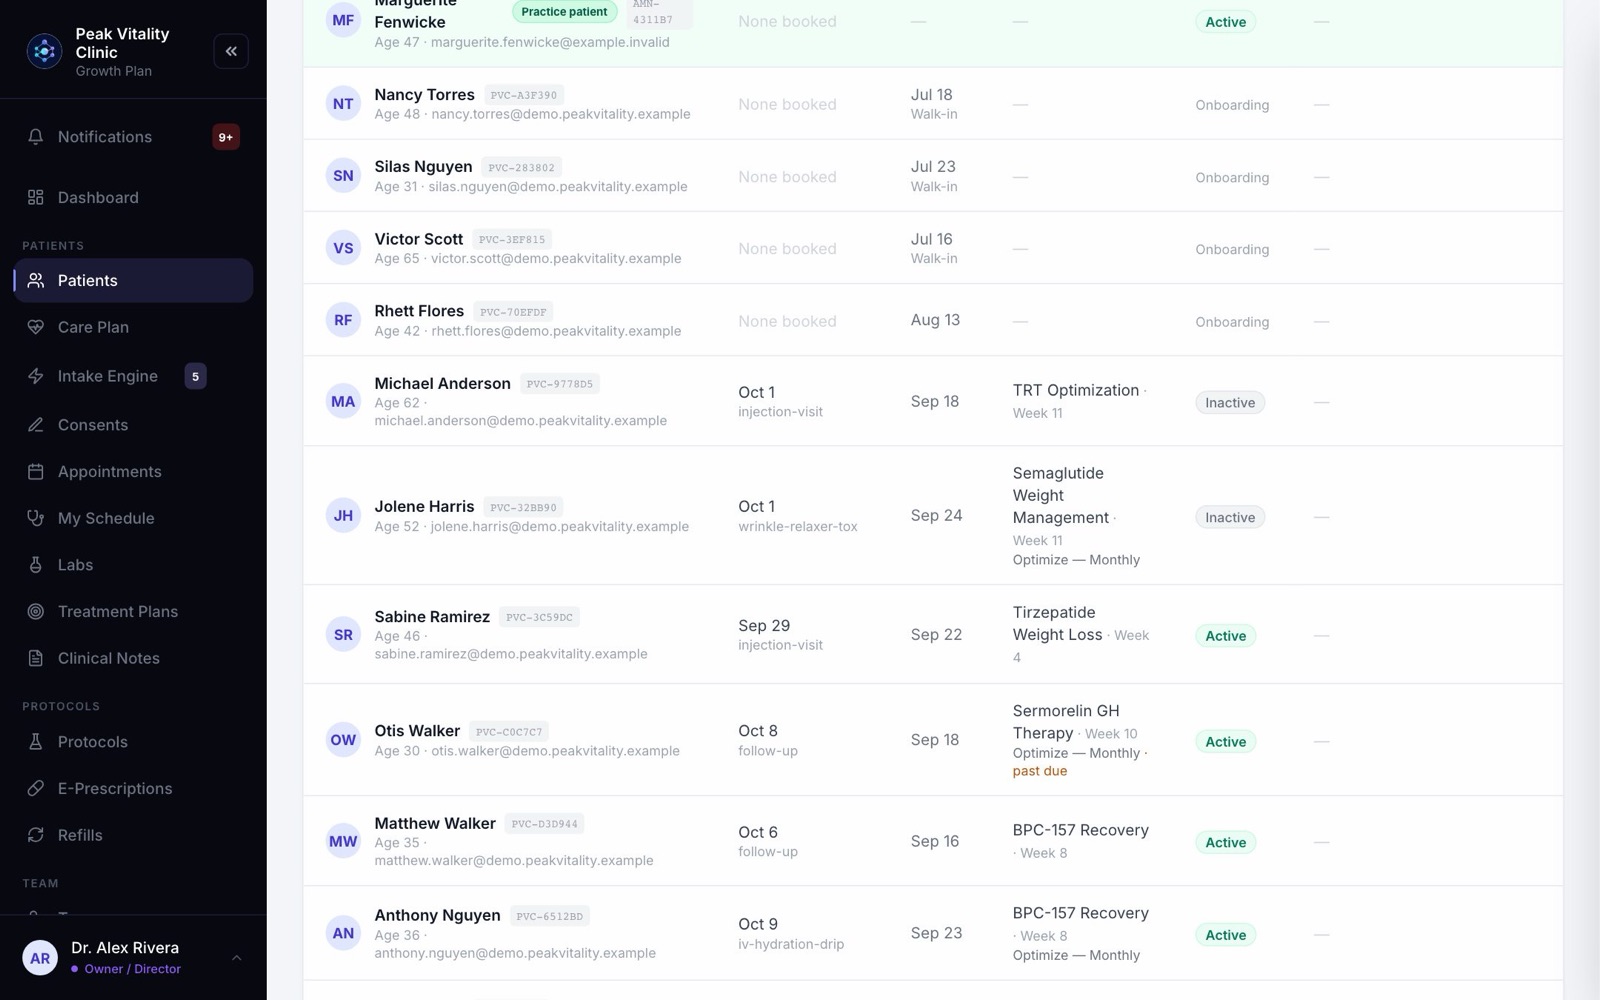
- 1Start with Add a practice patient. While it runs, Add Patient makes a practice patient. It says Practice patient — nothing is sent, no card is charged.
- 2Make one up. No email is needed. Fill in the other starred fields with anything.
- 3They show in your patient list with a green Practice patient badge. Use them for the rest of your list.
- 4A practice patient never gets emails, texts or bills. To practice a payment, record it as cash.
14Hide the checklist
- 1Open the box and press Hide checklist at the bottom.
- 2To bring it back, click your name at the bottom of the sidebar, then Show the checklist.
- 3When everything is done, the box says You’re all set.
Keep going
Patients
Every patient in your clinic. Find anyone, sort and filter the list, add a new patient, put patients in groups, and open a chart.
Read the guideDashboard
Your clinic at a glance. Today’s numbers, who is coming in, the money taken, work that needs a person, and the bell where anything new for you lands.
Read the guideAI Assistant
Ask how to do anything in Aminova, by typing or out loud. It knows the software, not your patients.
Read the guideFor owners and practice managers
Everything you need to set up the clinic, bring your team in, decide who can do what, and keep an eye on the money and the day.
Read the guideRather be shown?
Inside Aminova, the tutorial walks you through every page, and the Getting started checklist shows you each task click by click. Or book a live training session with our team.