1The page at a glance
My Schedule shows only your visits: the ones you are the provider on, covering for a colleague, or helping with. Your day is on the left. The visit you open fills the right side.
If the page says You’re not set up as a clinician, you have no visits of your own yet. Add yourself under Team, or use Appointments to see the whole clinic.
2Pick a day
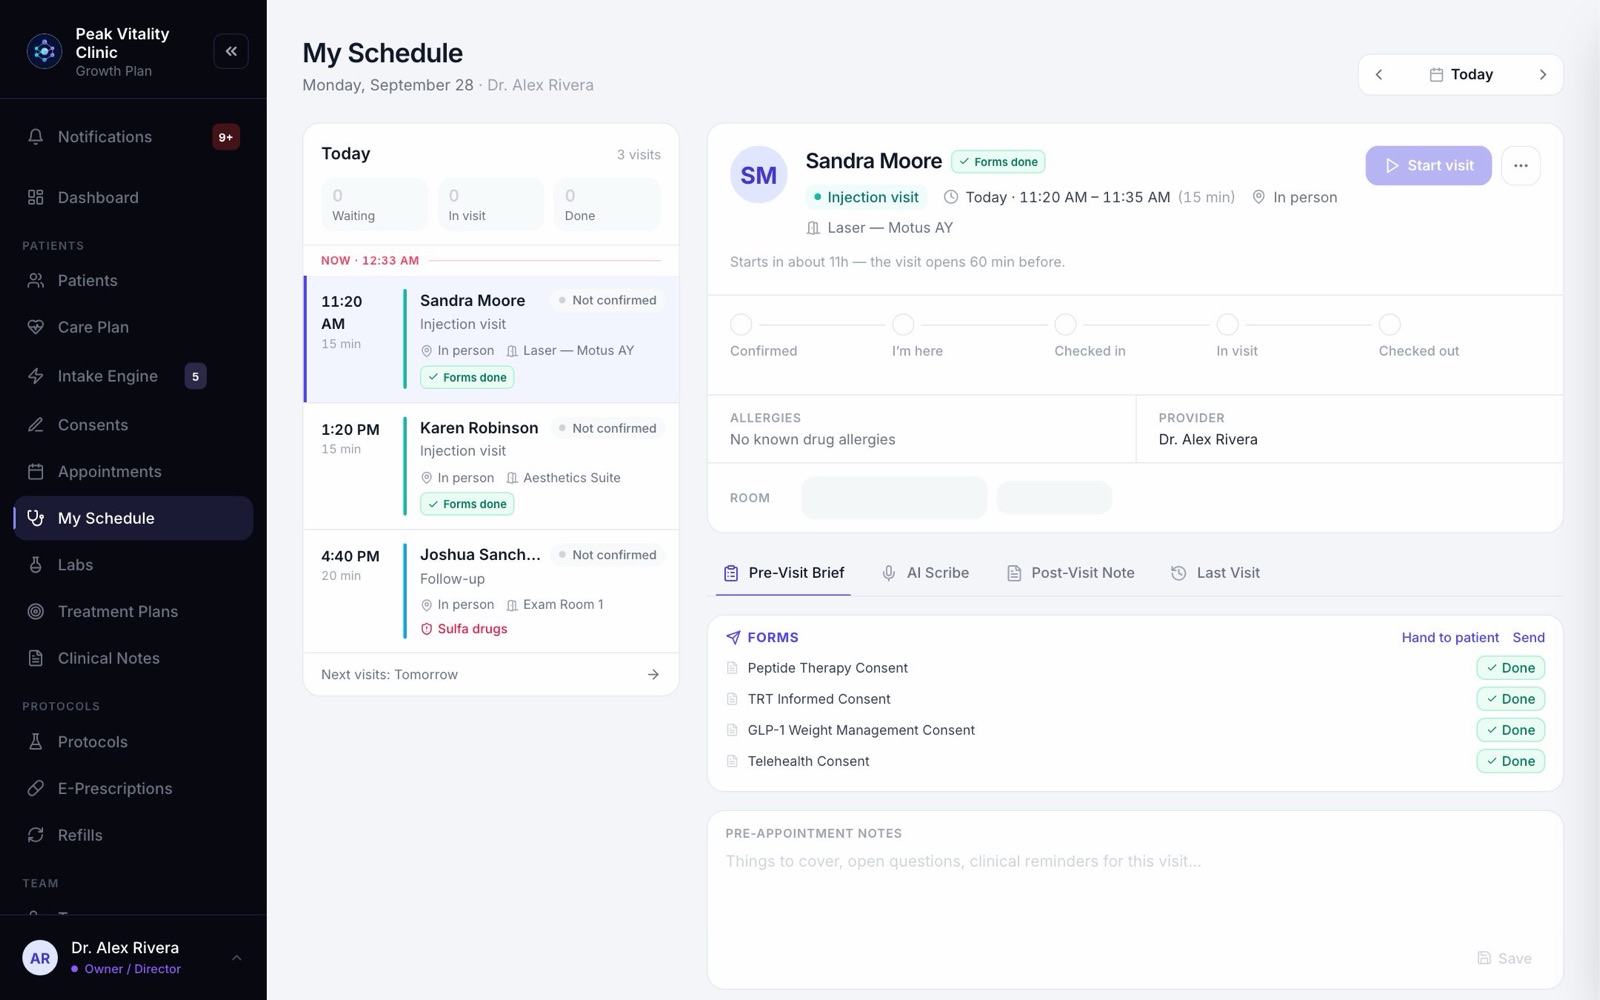
- 1Use the arrows to go back or ahead one day.
- 2Click the date to pick any day from a calendar.
- 3On any other day, Jump to today brings you back.
3Your day
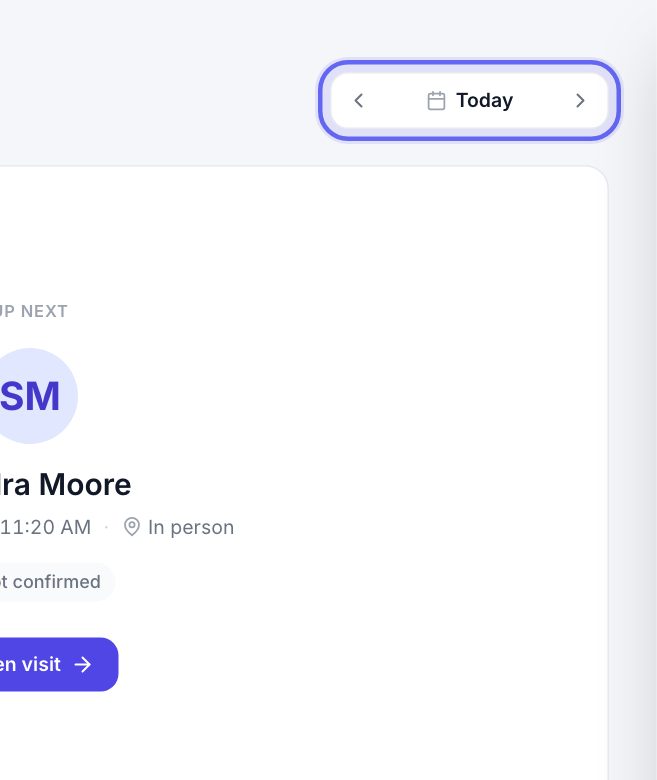
- 1Your visits are listed in time order. A red Now line shows where you are in the day.
- 2Each row shows the time, the patient, the kind of visit, and whether it is in person or video. Allergies show in red.
- 3The tag on the right says where the visit stands, like Not confirmed, Confirmed, Waiting or In visit. Waiting and In visit also show how long so far.
- 4At the top, today shows how many are Waiting, In visit and Done.
- 5When the front desk checks your patient in, a bar at the top tells you they are waiting. Press Open visit to go straight to it.
4Open a visit
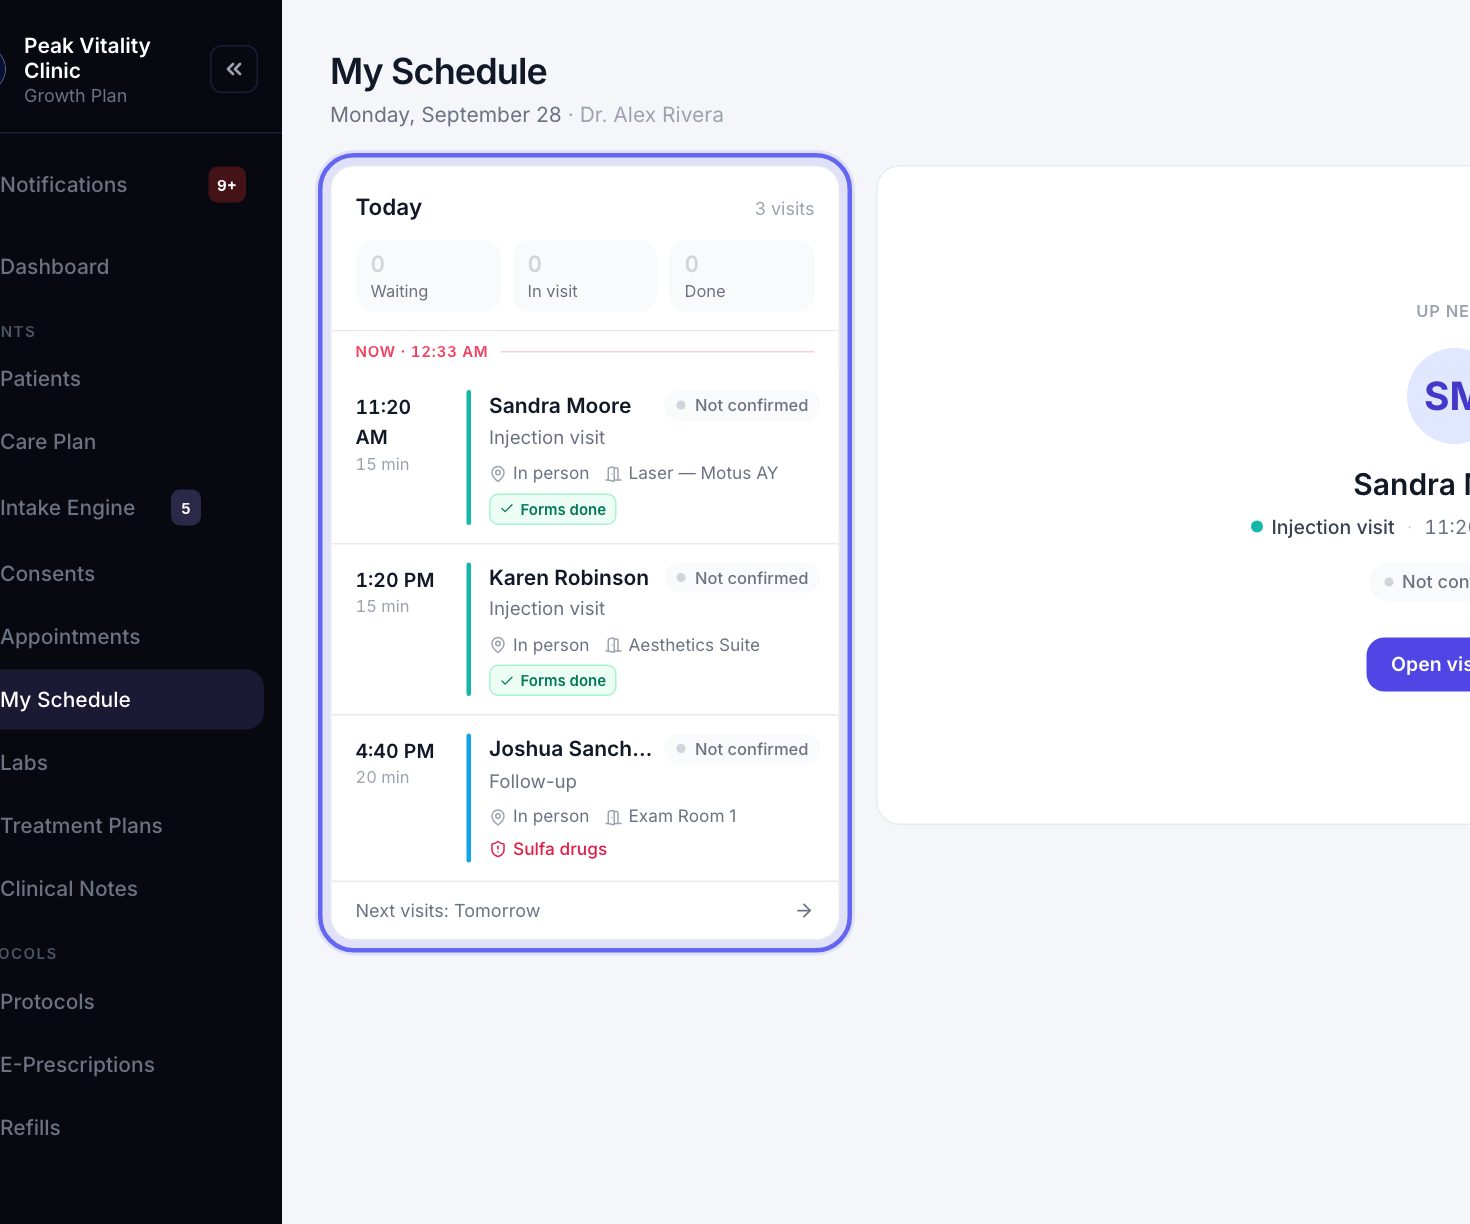
Click a visit to open it. If nothing is open, the right side offers the visit that needs you next, with Open visit.
The top of the visit shows the patient, the kind of visit, the time, and the room. A First visit tag means this is their first visit to the clinic.
5Start the visit
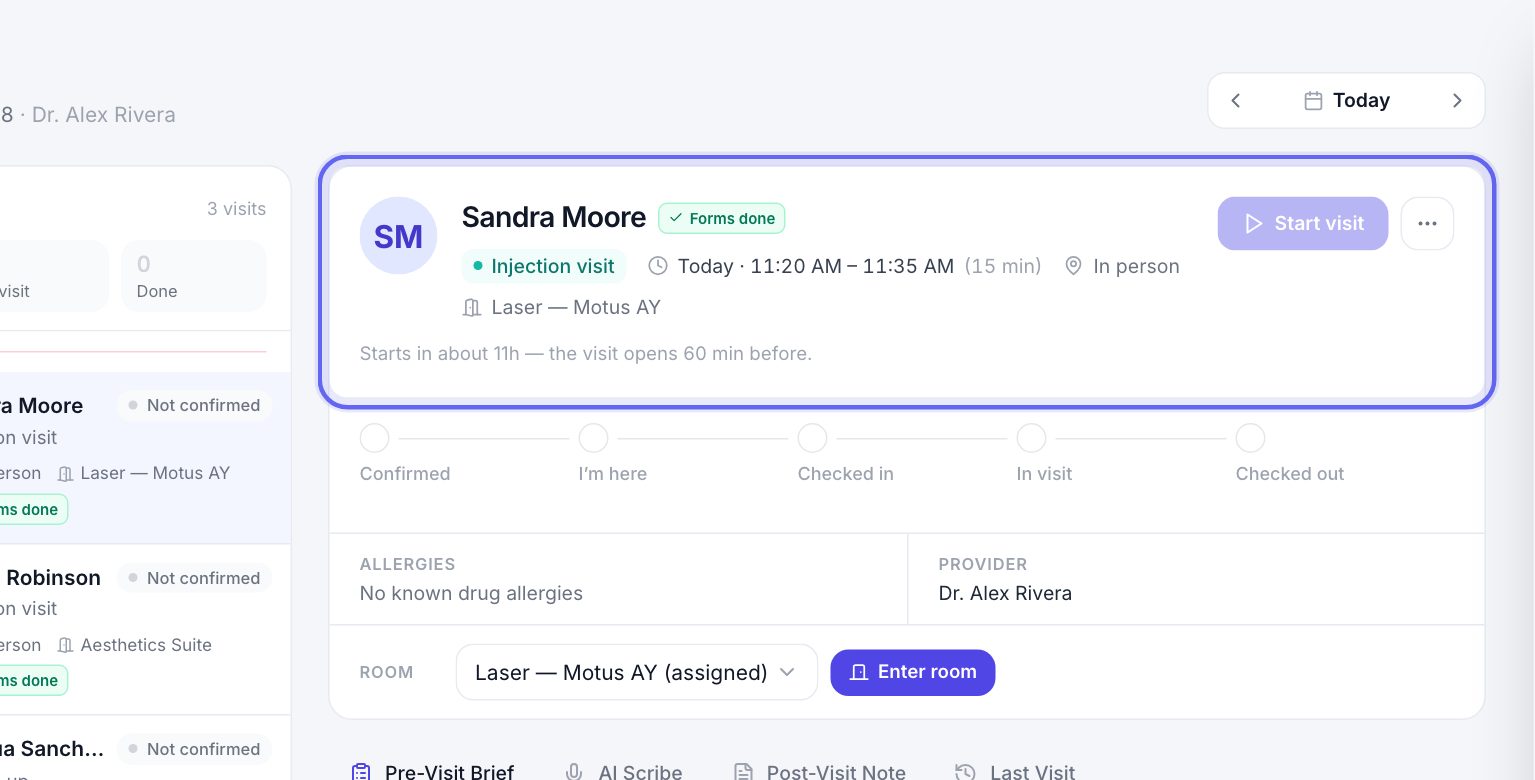
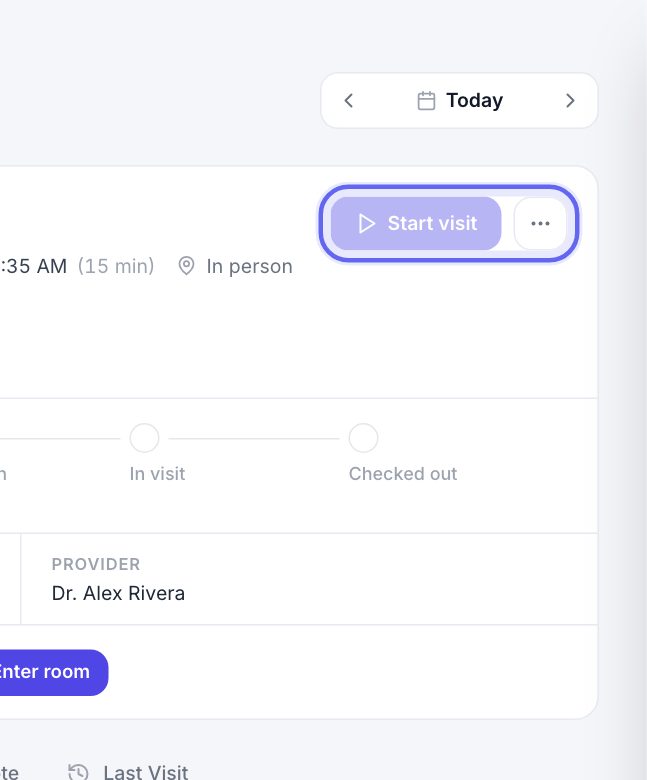
- 1For an in-person visit, press Start visit. It also opens Quick Visit, for vitals and a short note.
- 2For a video visit, press Join Telehealth Call. If you leave the call, Rejoin call takes you back.
- 3Both open 60 minutes before the visit, so you can’t start one weeks early by mistake.
- 4When you’re done, press Check out. It’s the same check-out the front desk does.
- 5The … menu holds Quick Visit, No-show and Cancel. No-show and cancel ask you first.
- 6Once a visit is over, Book follow-up books the next one right here.
Before a video visit, if the patient hasn’t signed a required consent, you’re shown which ones. You can stop, or press Proceed anyway.
6Where they are, and what to know
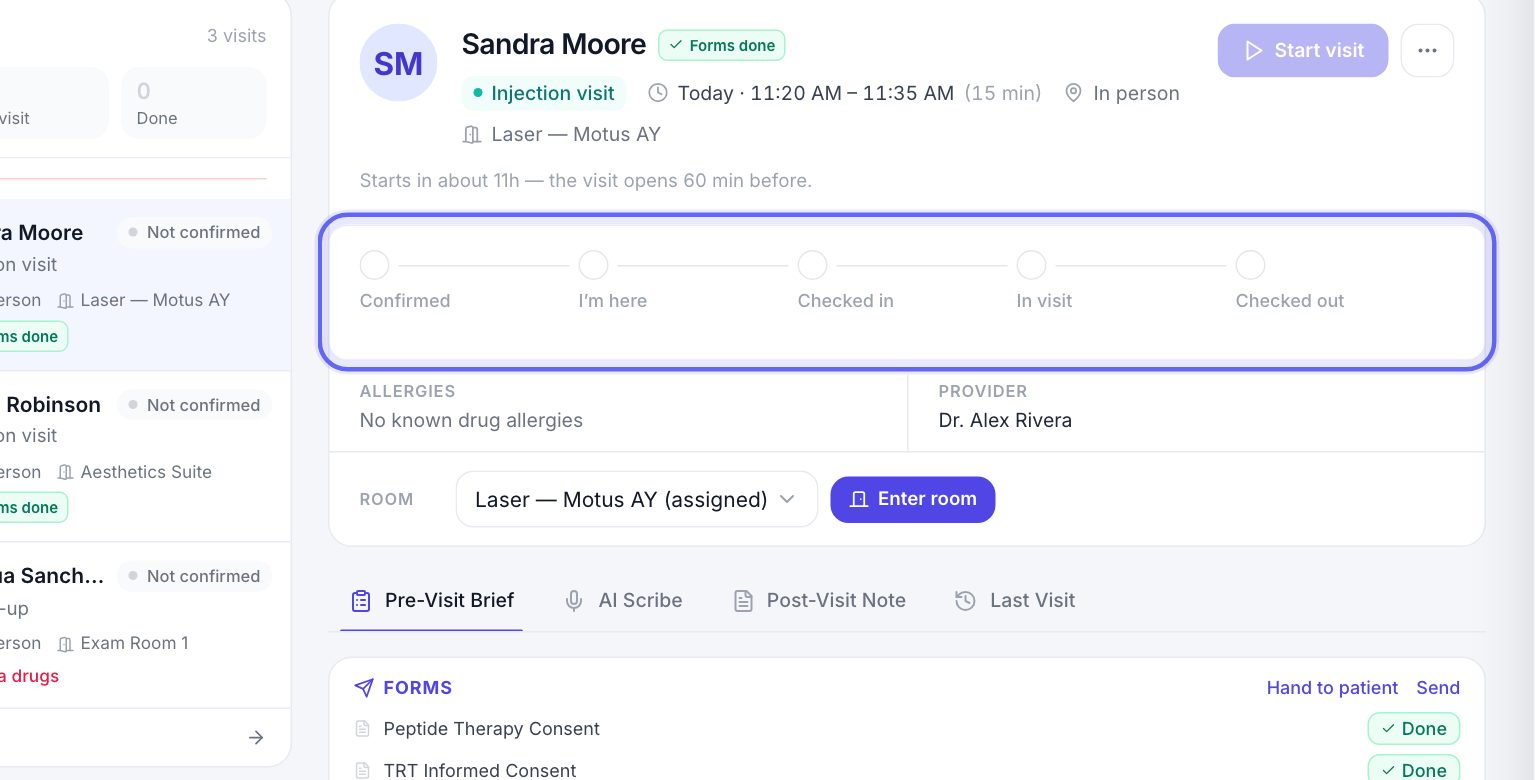
- 1The steps show where the patient is: Confirmed, I’m here, Checked in, In visit, Checked out, with the time of each.
- 2Below them: Allergies, the Price, whether the Deposit is paid, and the Provider.
7Rooms
- 1For an in-person visit, pick a room and press Enter room.
- 2When you leave, press Done — free the room, so the front desk knows it’s open.
- 3A visit that moves through several rooms shows its room steps here instead. See the Room steps manual.
8Before, during, after
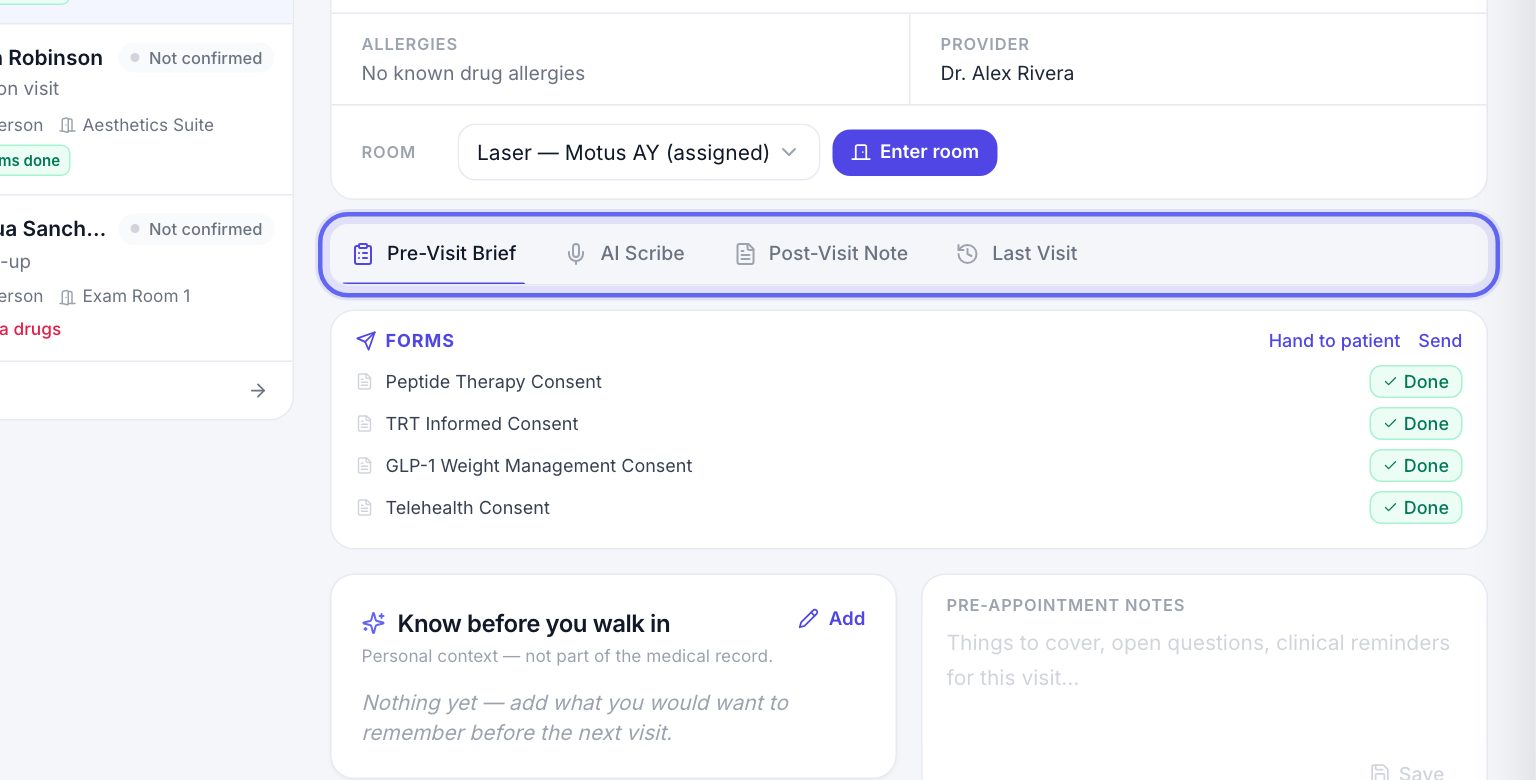
- 1Pre-Visit Brief is what to read before you go in.
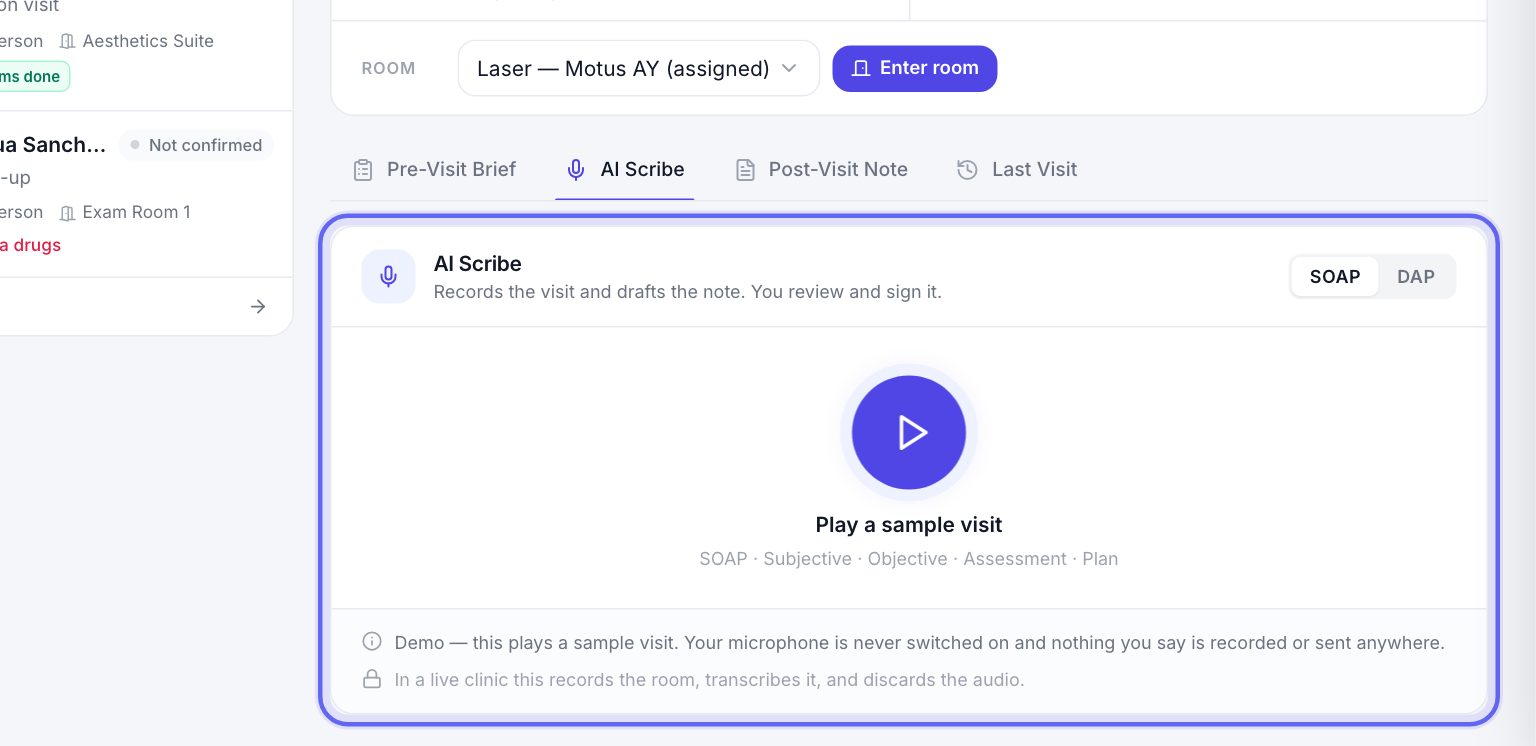
- 2AI Scribe records the visit and drafts your note. Video visits don’t show it; they have their own scribe inside the call.
- 3Post-Visit Note is where you write up the visit.
- 4Last Visit shows the patient’s last note, with Print.
- 5A visit that hasn’t started opens on the brief. One that has started opens on the note.
9Forms and prep
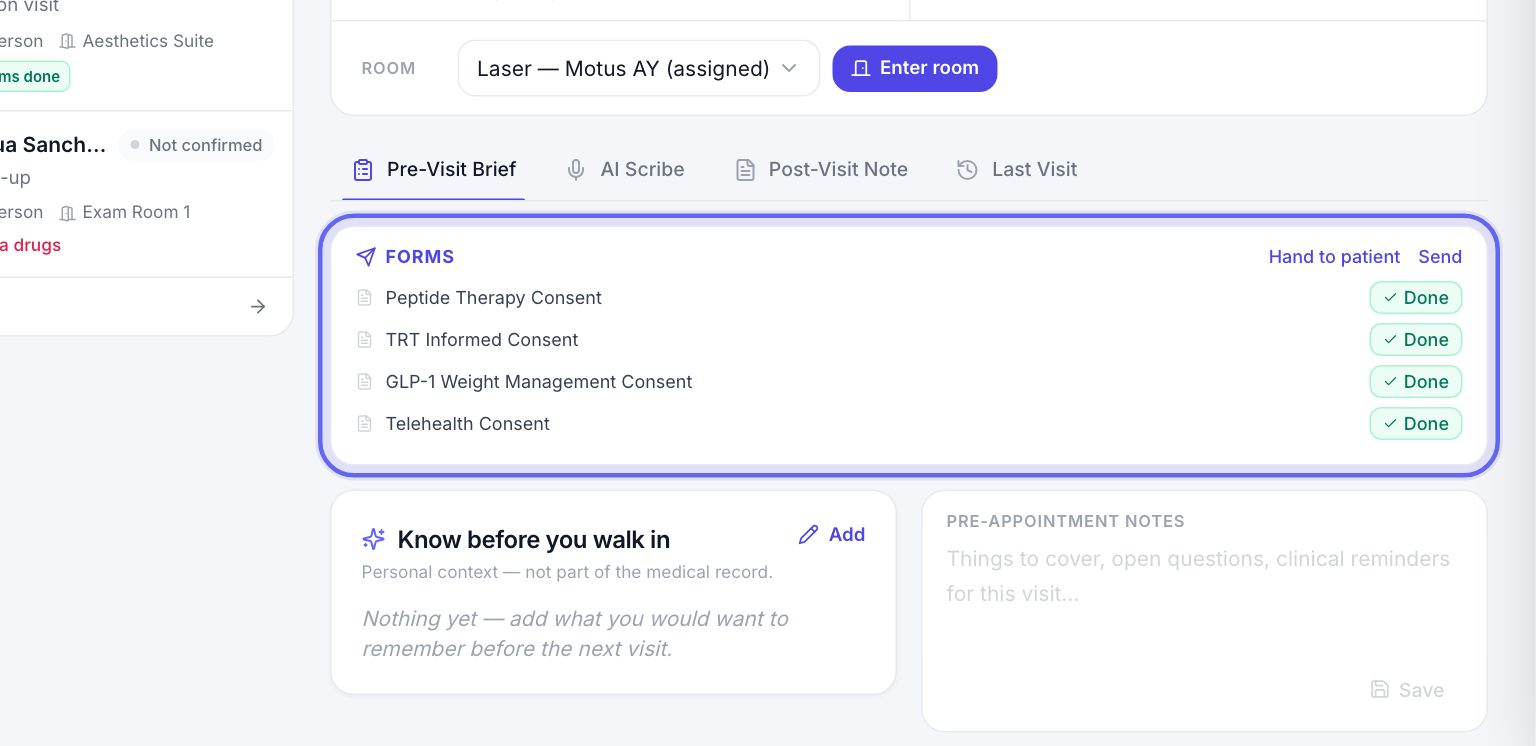
- 1The Forms card shows each form as Done, Opened, Waiting or Not sent.
- 2Press Send now on a form that was never sent. Send lets you pick more forms.
- 3Hand to patient lets the patient sign what they still owe on a tablet.
- 4If the visit type has a Prep checklist, tick items off as you get ready. The ticks stay on this device only.
10Your notes before the visit
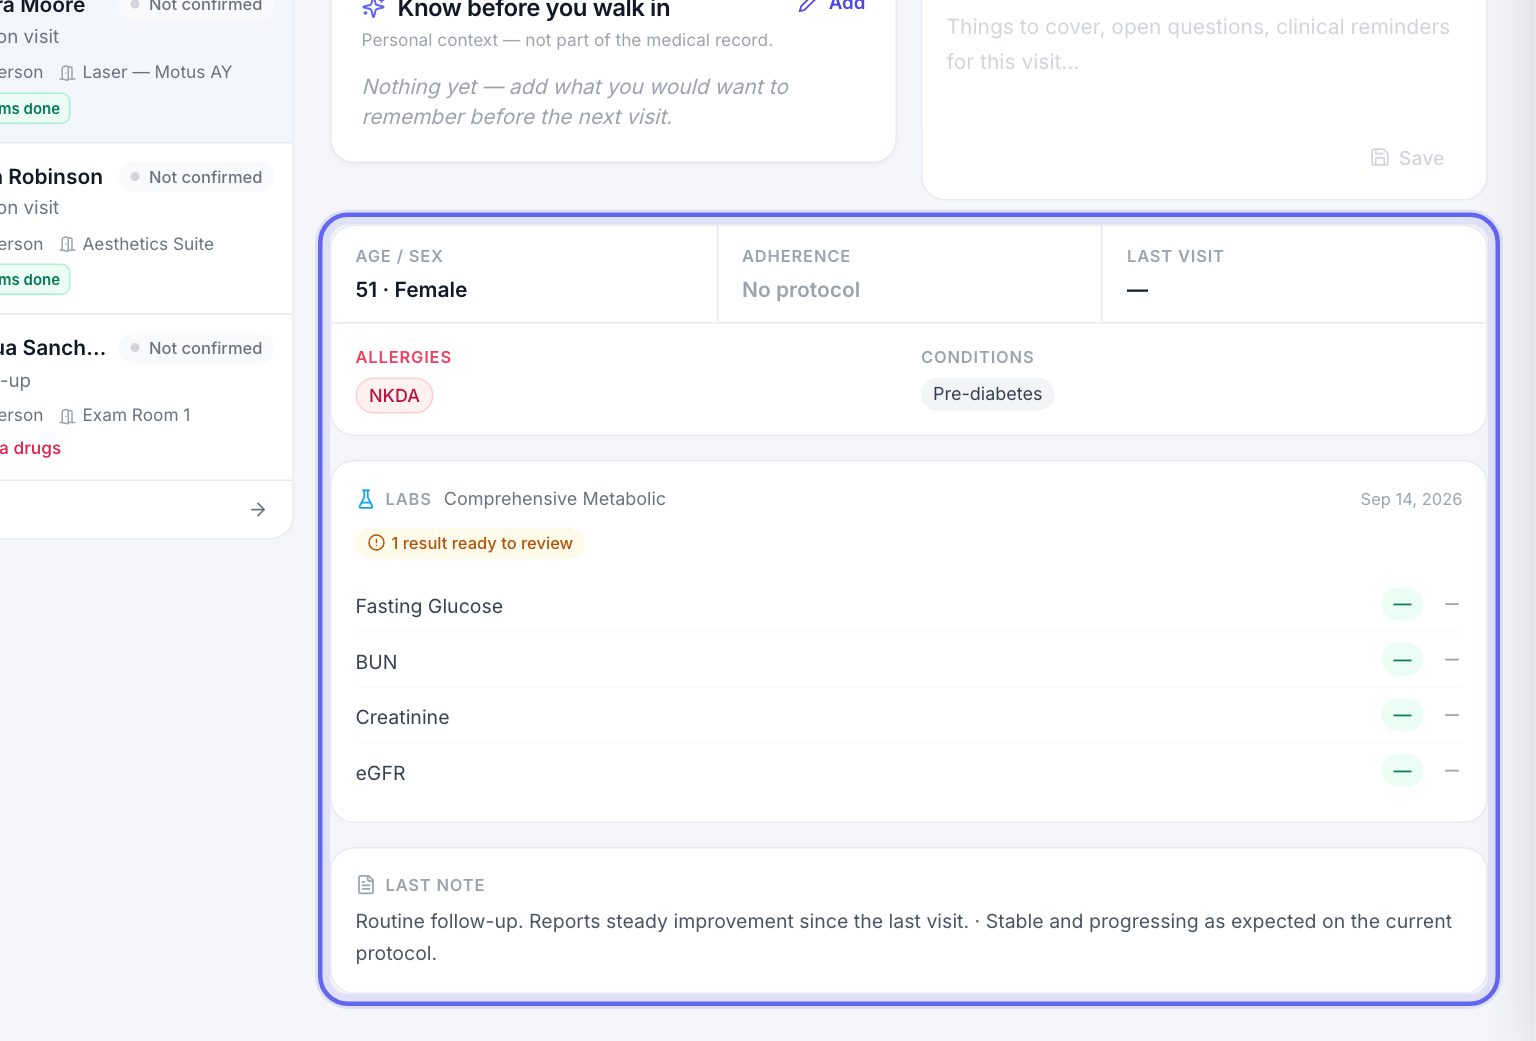
- 1Know before you walk in holds personal things worth remembering, like their kids’ names. It is not part of the medical record.
- 2Pre-Appointment Notes are notes to yourself for this visit. Press Save.
- 3Once the visit starts, the pre-visit notes lock. Write what happens in the visit note instead.
11The patient brief
- 1Read it before you go in: Clinical Alerts, age, Allergies, Conditions and Last Visit.
- 2Active Protocol shows their protocol and medications.
- 3Labs shows the latest results, with results waiting for review and labs still out.
- 4Refills Due lists refills running low. Each one opens in a new tab, so your note stays put.
12AI scribe
On an in-person visit, the AI Scribe tab records the visit and drafts the note for you to check. It records only patients who signed your recording consent form. Tell the patient first and get their agreement.
See the AI scribe manual for the whole flow.
13Your visit note
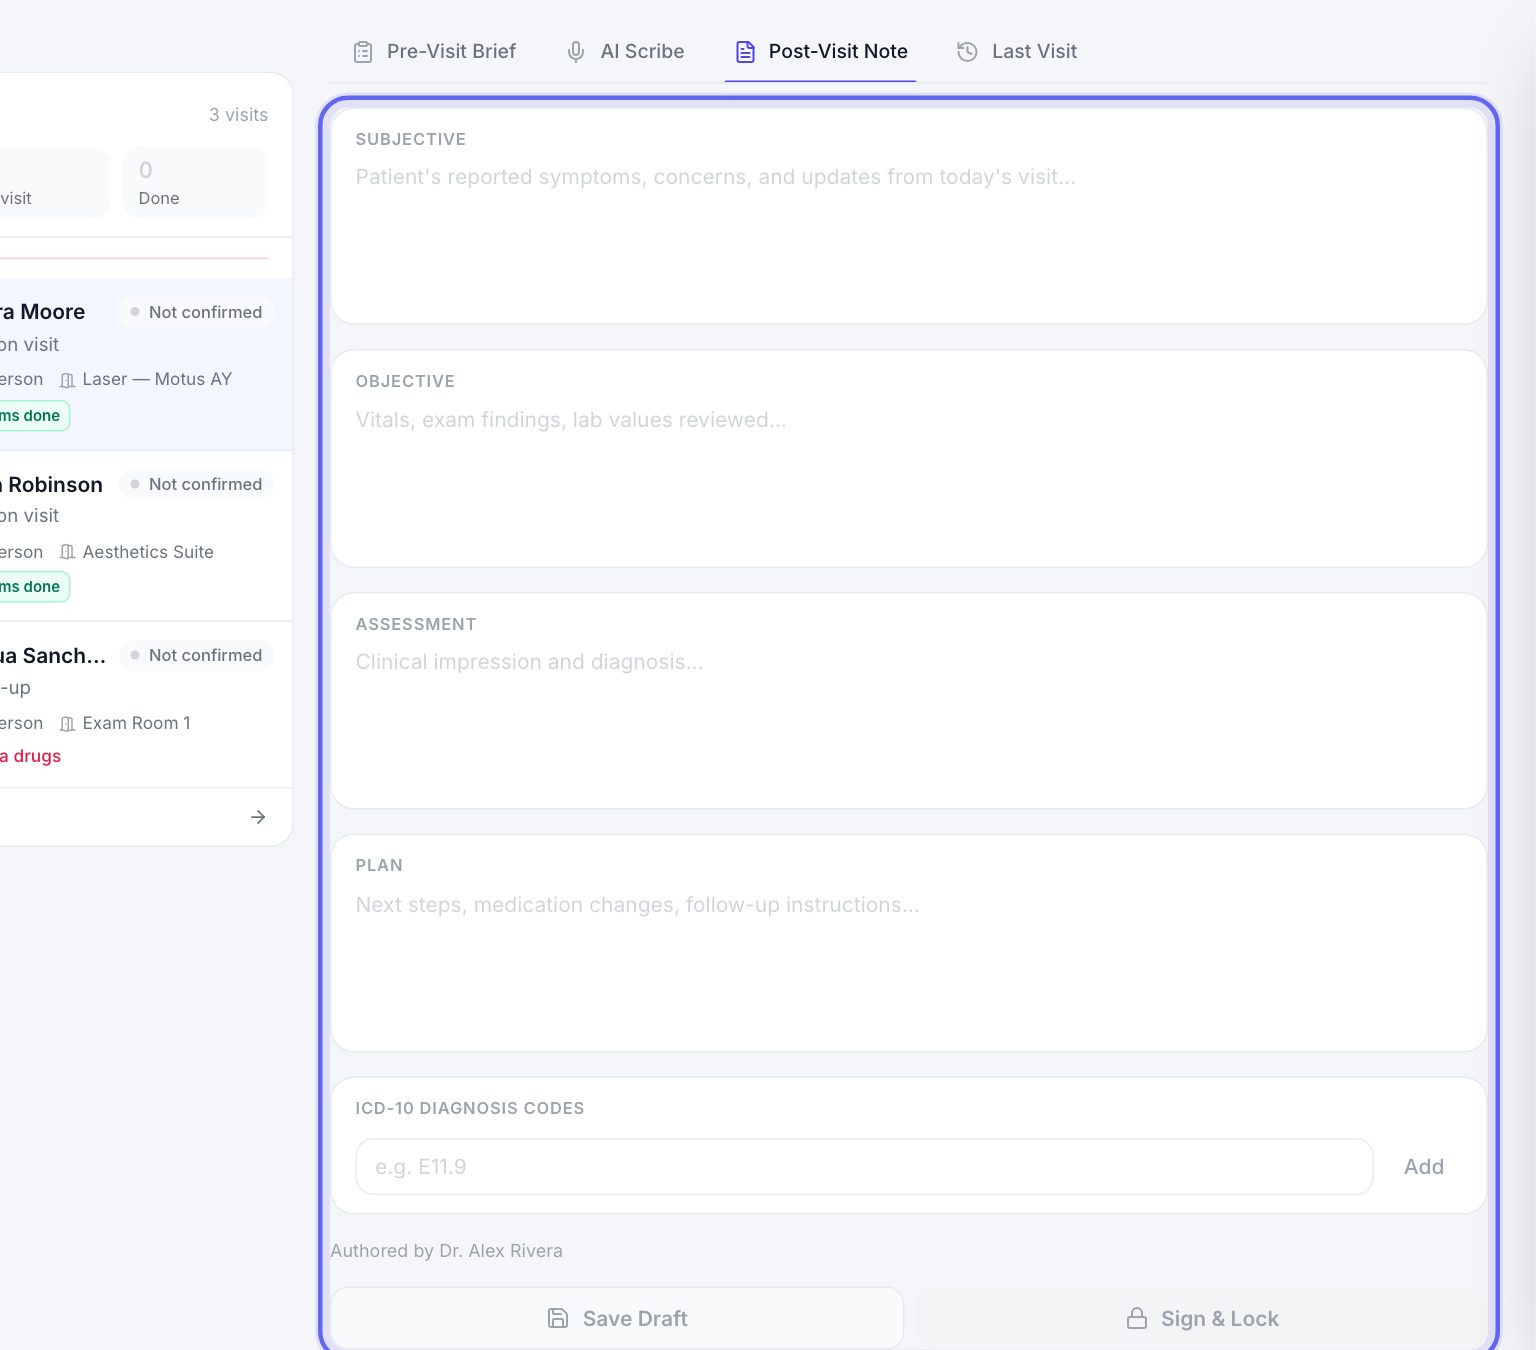
- 1The note has four boxes: Subjective, Objective, Assessment and Plan. If you have note templates, pick one under Note layout instead.
- 2Write in each box. Add diagnosis codes under ICD-10 Diagnosis Codes and press Add.
- 3Save Draft puts the note in the chart and keeps it open for changes.
- 4Sign & Lock makes the note final and marks the visit completed.
A visit whose time has passed but was never closed offers Complete. Close it once the note is written.
Keep going
Appointments
Every visit, for everyone. Book visits, run the front desk, and open any appointment to check a patient in, move it or charge it.
Read the guideRoom steps
For visits that move through more than one room: vitals, then treatment, then recovery. Set the steps once, then move the patient on with one tap.
Read the guideAI scribe
The AI scribe listens to a visit and drafts the note. It records only patients who agreed to it, and a person checks and signs every note.
Read the guideClinical Notes
Every note for every patient, in one place. Write a note, sign it, find it again later, and change a signed note the right way.
Read the guideVideo visits
A video visit from booking to note: the patient joins from their app, you join from My Schedule with their chart beside the video, and the note and summary follow.
Read the guideRather be shown?
Inside Aminova, the tutorial walks you through every page, and the Getting started checklist shows you each task click by click. Or book a live training session with our team.