1The page at a glance
Communications has three tabs. Campaigns are one message sent to many patients at once. Programs are courses each patient works through in their portal, one part at a time. Branding is how your campaign emails look.
Only owners and managers can use this page. Anyone else who opens it sees one line saying so.
2Your campaigns
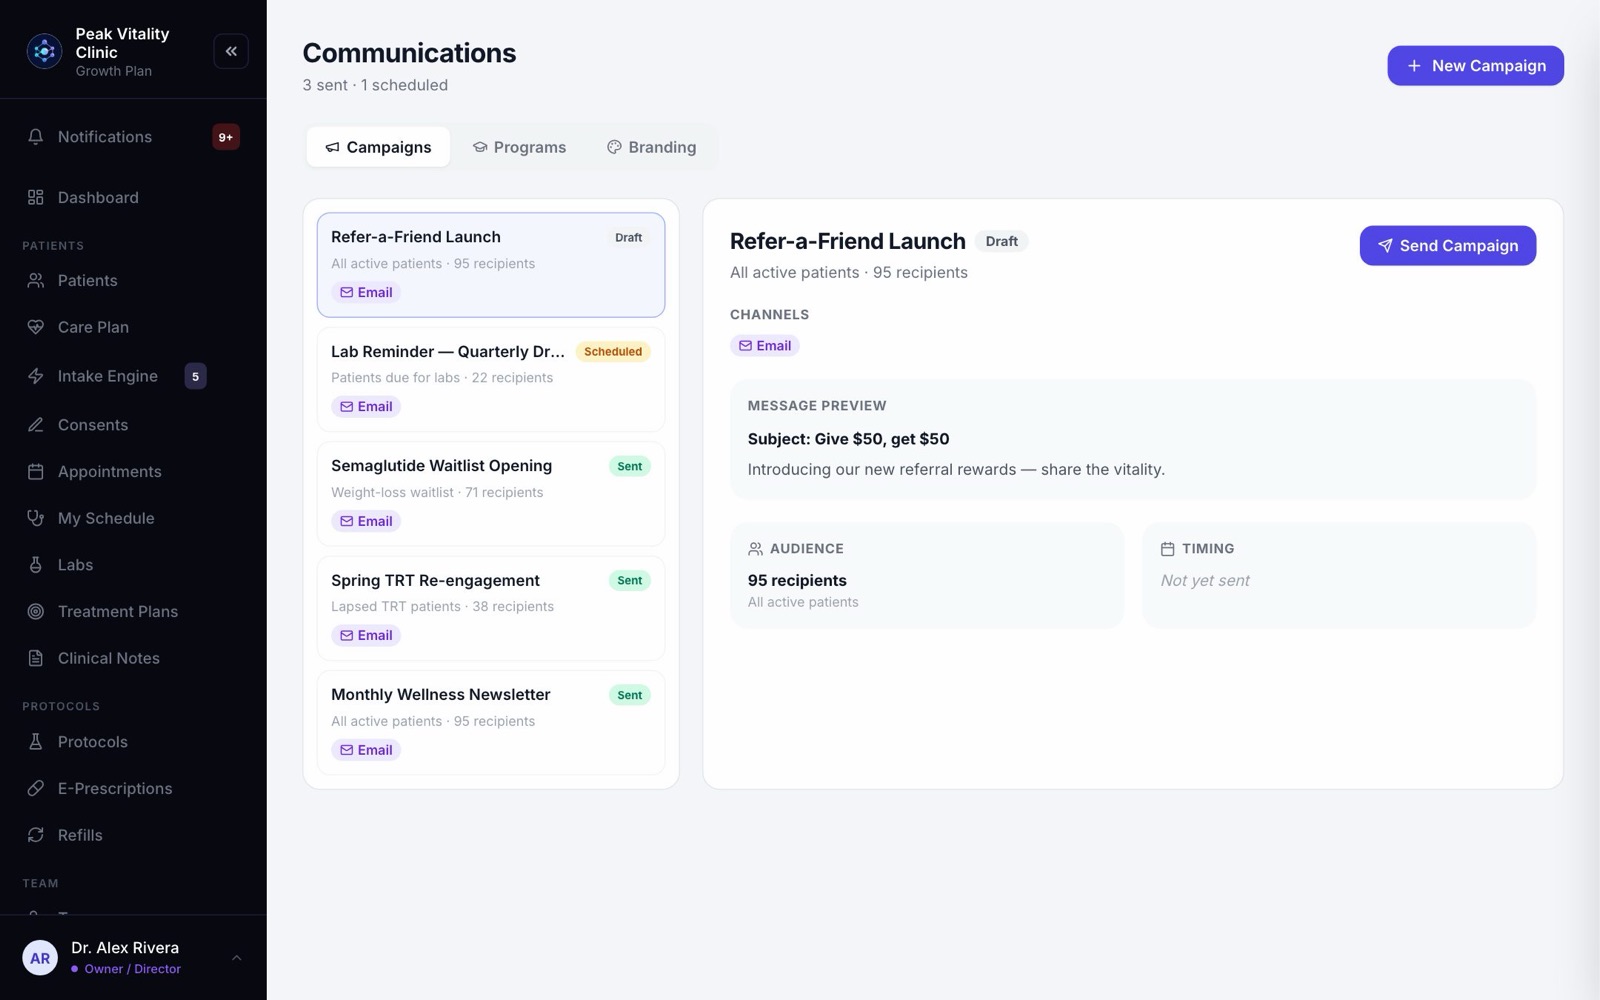
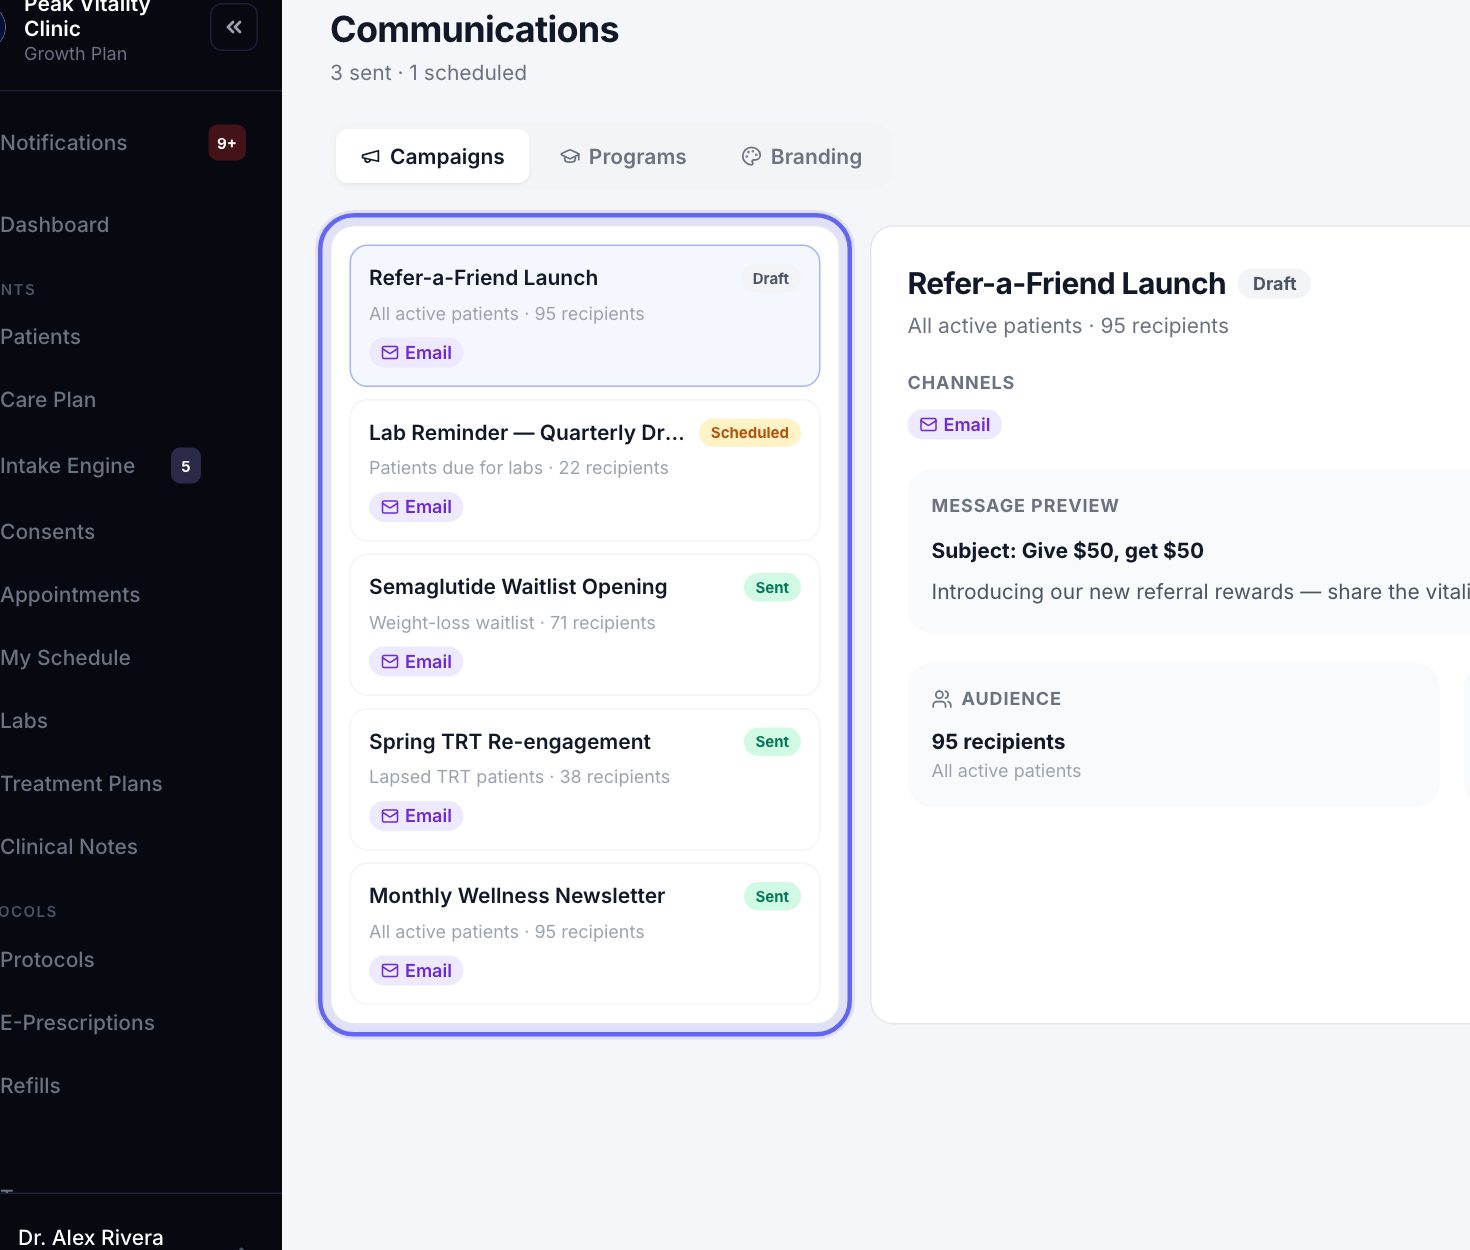
- 1The list on the left shows each campaign, who it is for, how many patients that is, and how it goes out: Push, Email or both.
- 2The colored tag says where it stands: Draft, Sent, Part-sent or Failed.
- 3Click a campaign to open it on the right, with its Message Preview, Audience and Timing.
3Start a new campaign
- 1Click New Campaign.
- 2Type a Campaign Name.
- 3Add a Subject Line. It is the title patients see, in their app or at the top of the email. With no subject line, the campaign name is used.
- 4Choose the channels, the audience and the message, as the next sections show.
- 5Press Save Draft. Nothing is sent yet.
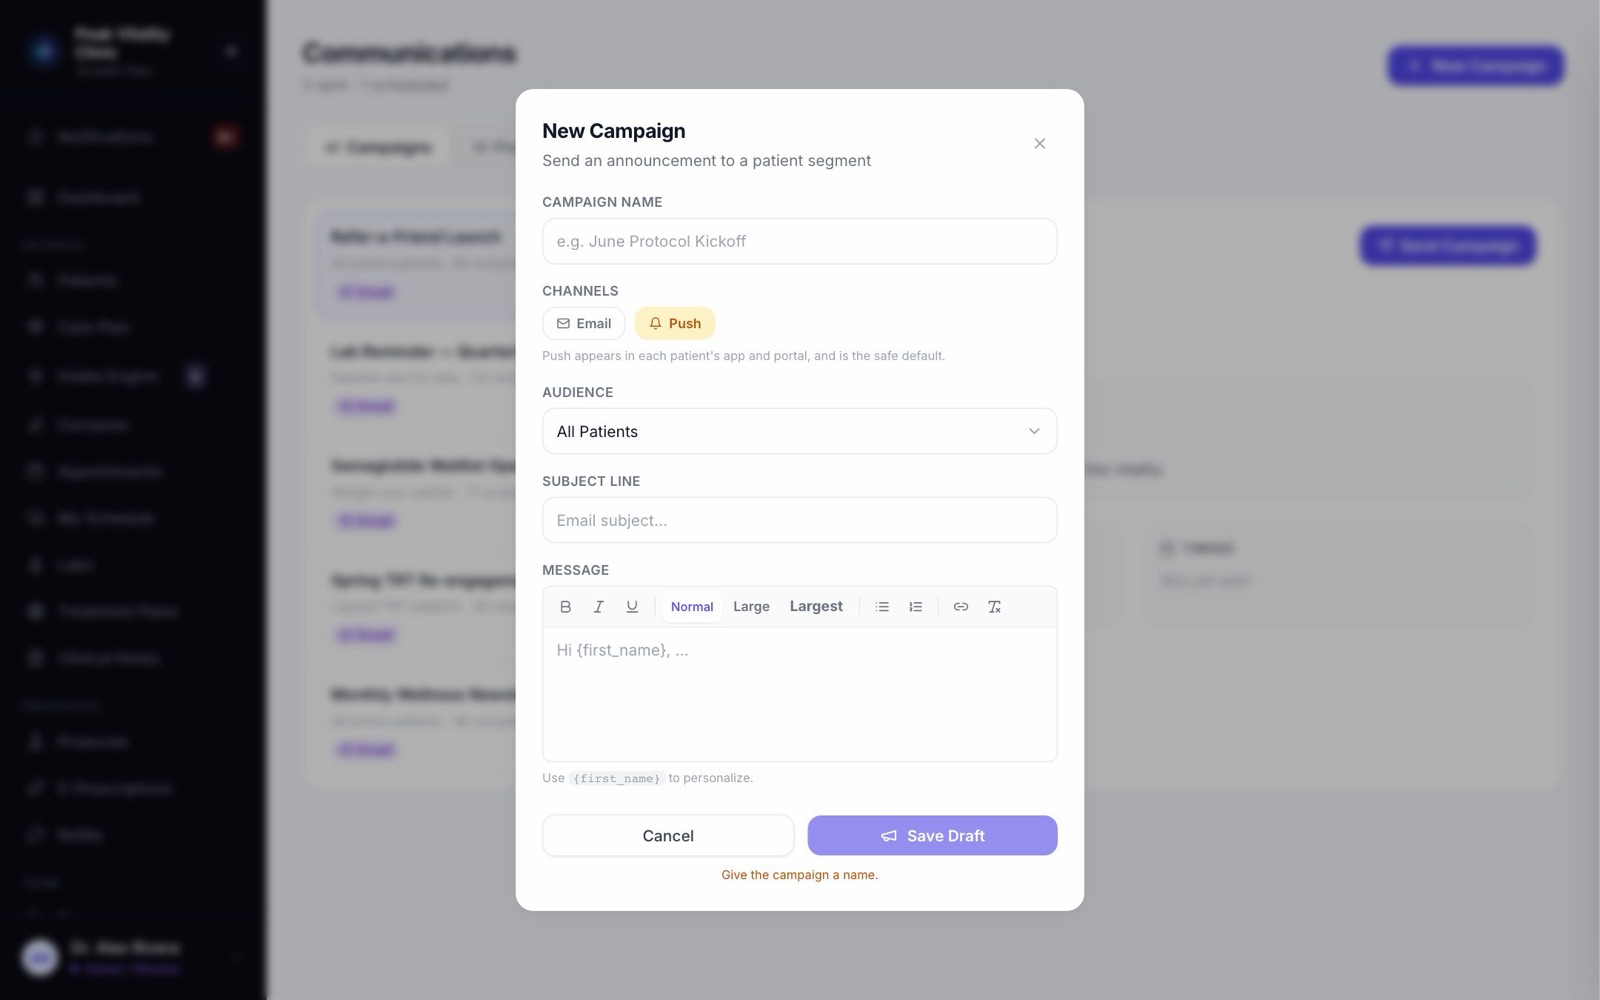
If Save Draft is grayed out, the line under it says what is missing, like a subject line or a message.
4Push or email
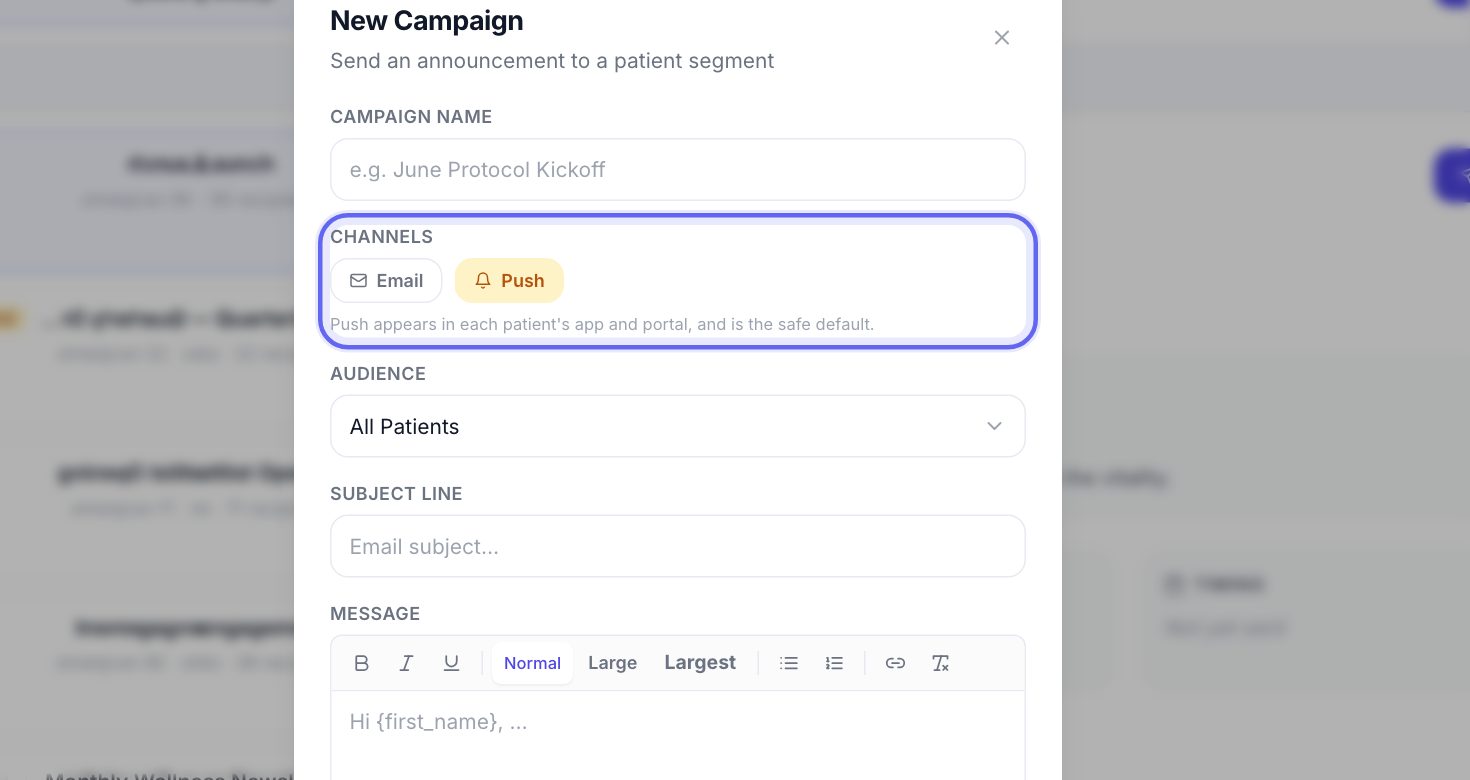
- 1Push shows up in each patient’s app and portal. It is picked for you, and it is the safe choice.
- 2Email goes to the patient’s inbox. Turn it on only when you need it. Email needs a Subject Line.
- 3You can pick both.
Sending a lot of email at once can land your clinic in spam folders, reminders included. Email only goes to patients who haven’t unsubscribed, and a big send goes out in hourly batches.
5Who gets it
- 1Open Audience and pick a group: All Patients, Active Patients, new patients, patients with a visit in the next 7 days, patients who owe money, or Active members.
- 2Pick Patients with an appointment on… and choose a date to reach everyone booked that day, like when you have to close.
- 3Pick Patients on a protocol… and choose the protocol. Only patients on it right now are included.
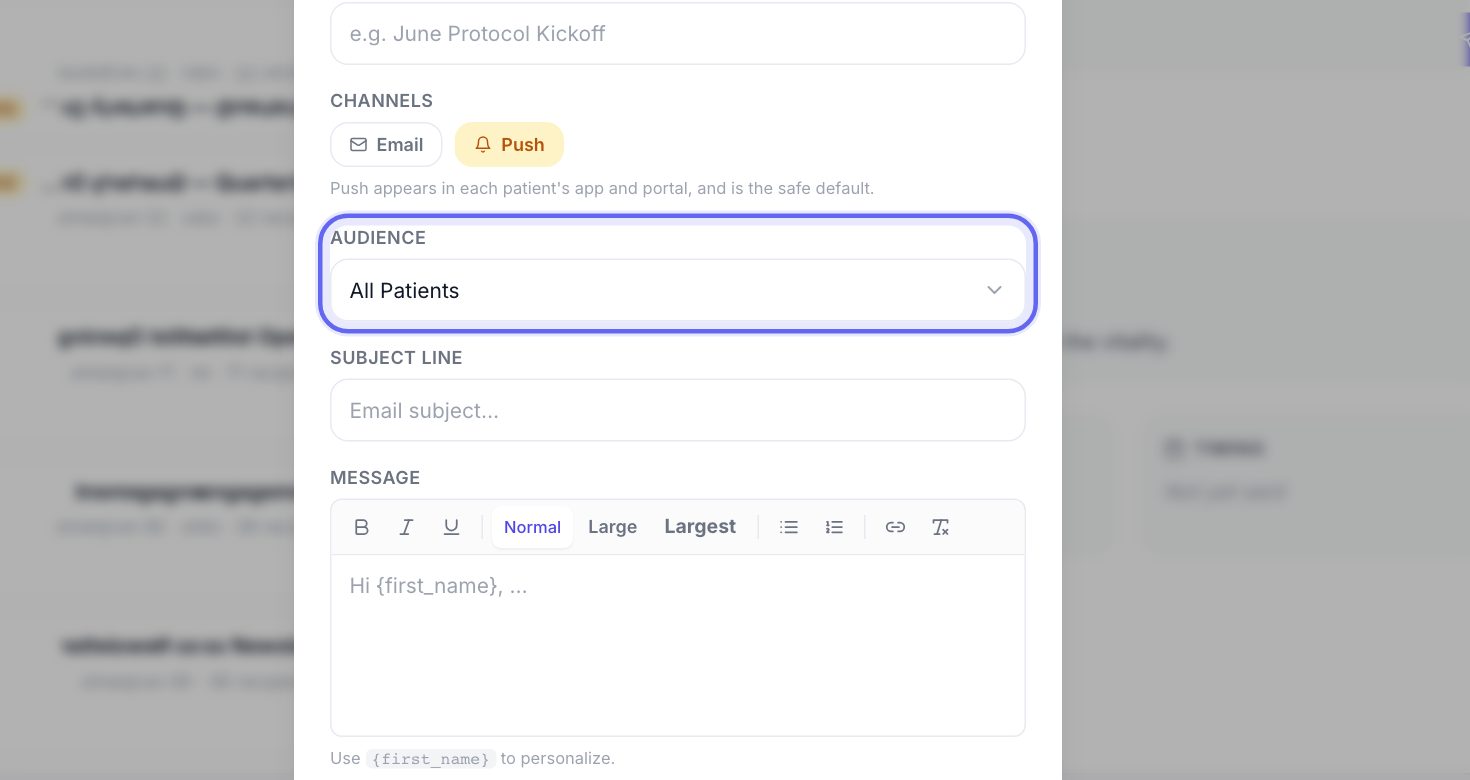
Patients who asked not to be contacted are left out on their own. So is your practice patient.
6Write the message
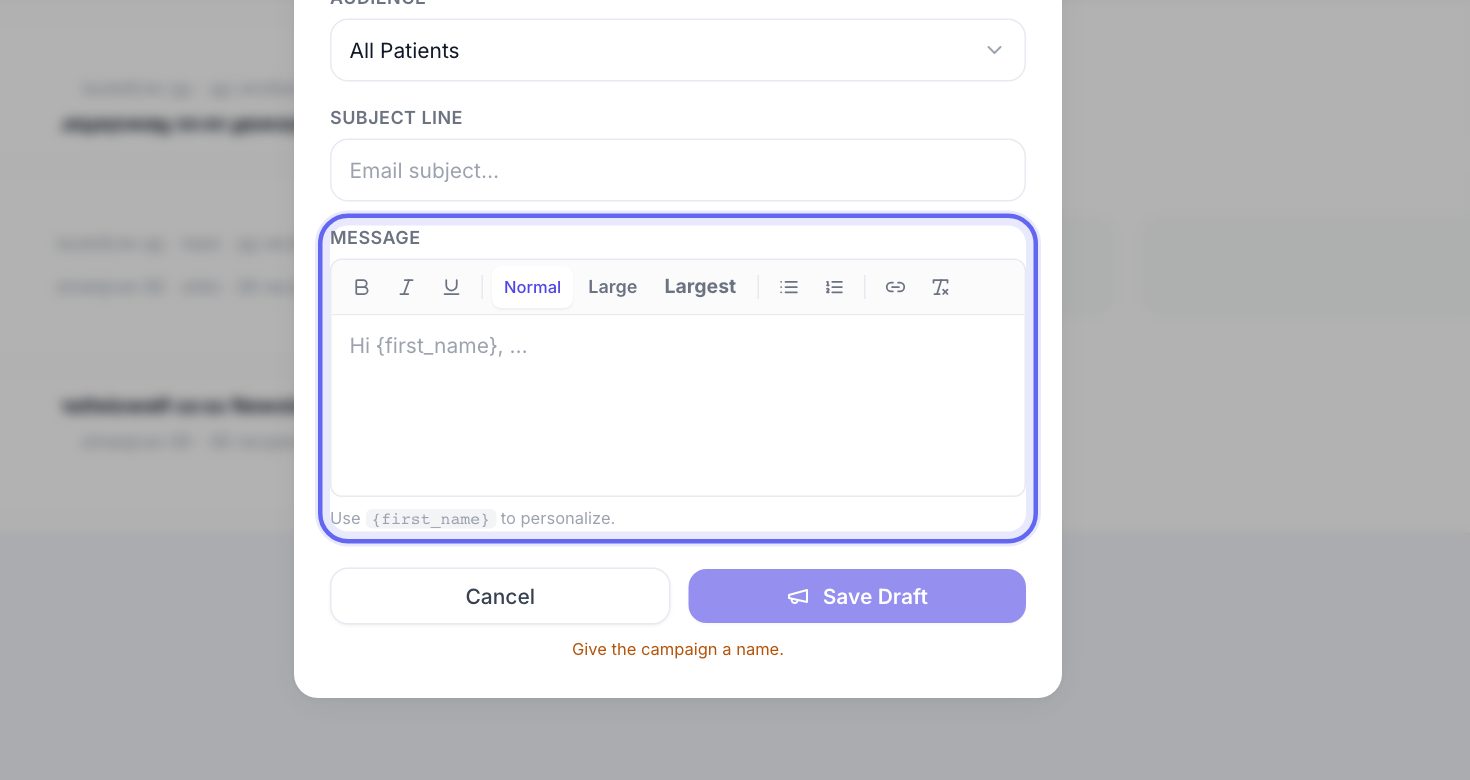
- 1Type your Message. You can make words bold, add lists and add links.
- 2Type {first_name} where you want each patient’s first name.
- 3Email keeps your formatting. Push shows the same words as plain text.
7Check it, then send
- 1Click the draft in your list and read it through on the right.
- 2Press Send Campaign.
- 3A box counts your audience again, right now, and says how it goes out. For email it also says who is left out and why.
- 4Press the red Send to button to send. A sent message can’t be taken back or changed.
A very big send can stop partway. It then shows Part-sent. Press Resume Send to finish it. Nobody gets it twice.
8After it goes out
- 1Delivered is the share of the audience it reached.
- 2Reached / audience is how many patients got it, out of how many it was for.
- 3Emails accepted means the email was handed off to be delivered. It does not mean the patient opened it.
- 4In-app messages is how many went to patients’ apps and portals. Not reached counts anyone it missed.
- 5If nothing went out, the campaign says Failed. Press Try Again.
9Programs: courses for patients
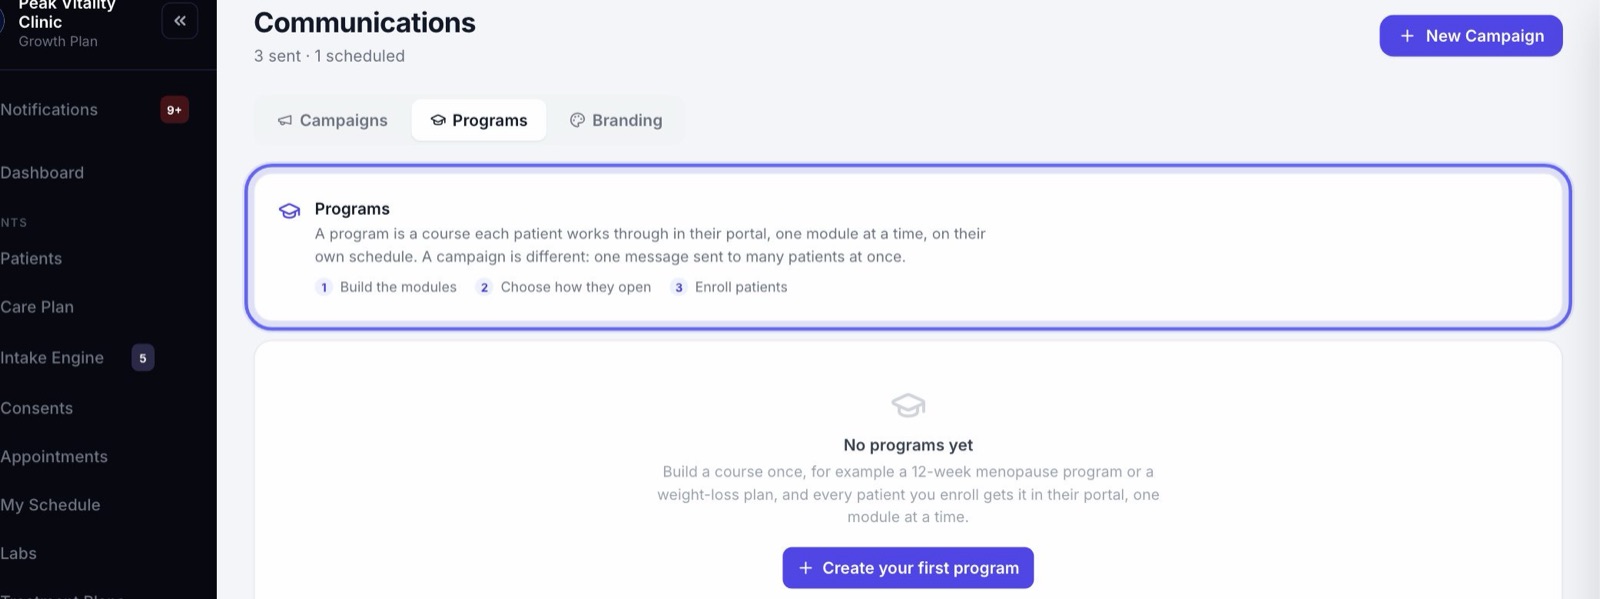
A program is a course each patient works through in their portal, one module at a time, on their own clock. For example, a 12-week menopause course or a weight-loss plan.
Each program shows as a card with how its modules open, how many it has, and how many patients are active, paused or done.
10Build a program
- 1Click New program (or Create your first program). Give it a Name and a short description, then press Create and add the first module.
- 2On Curriculum, give each module a Title and its Content. Use Add module for more, and Add a section to group them.
- 3On Settings, under How modules open, pick Self-paced (the next one opens when they finish the last), Drip (a set number of days after they join) or Fixed dates (the same date for everyone).
- 4Press Save program.
11Enroll patients
- 1Open the program and go to Enrollments.
- 2Search for the patient, pick a start date if you want one, and press Enroll. Leave the date empty to start today.
- 3The table shows each patient’s progress and last activity. Use Pause, Resume or Unlock all modules on their row.
A module can also email the patient when it opens. Turn on Email this module when it opens on that module.
12Before and after care instructions
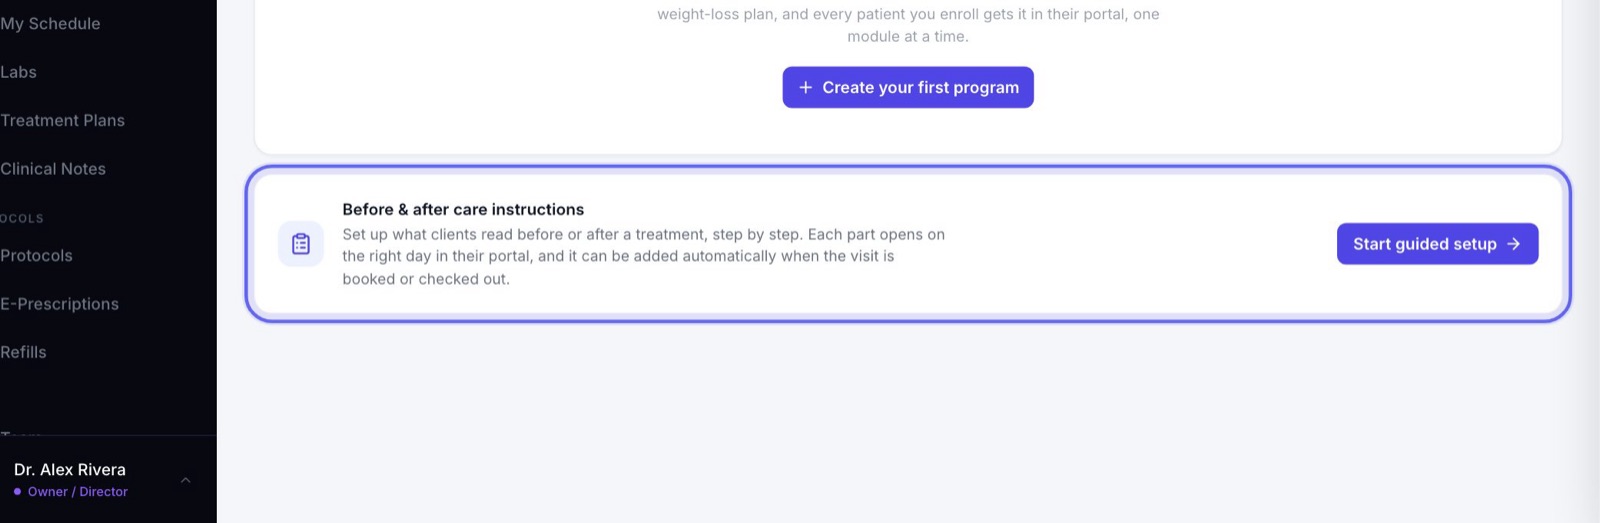
- 1Under Before & after care instructions, press Start guided setup.
- 2Name the Treatment, and choose After the treatment or Before the treatment.
- 3Split the instructions into parts. Each part opens on its own day. Day 0 opens when the visit is checked out, or when it is booked for “before” instructions.
- 4Tick the visit types it belongs to. When one of those visits is booked or checked out, the patient gets it in their portal on their own.
- 5Check the summary and press Create care instructions.
13Your email look
- 1Open the Branding tab and turn on Use branding.
- 2On Color & type, pick a Brand color and a Typeface.
- 3On Banner, choose the banner at the top of your emails.
- 4On Footer details, check your Postal address, Phone and Website. They start from your Clinic Profile. The address is required by law in marketing email.
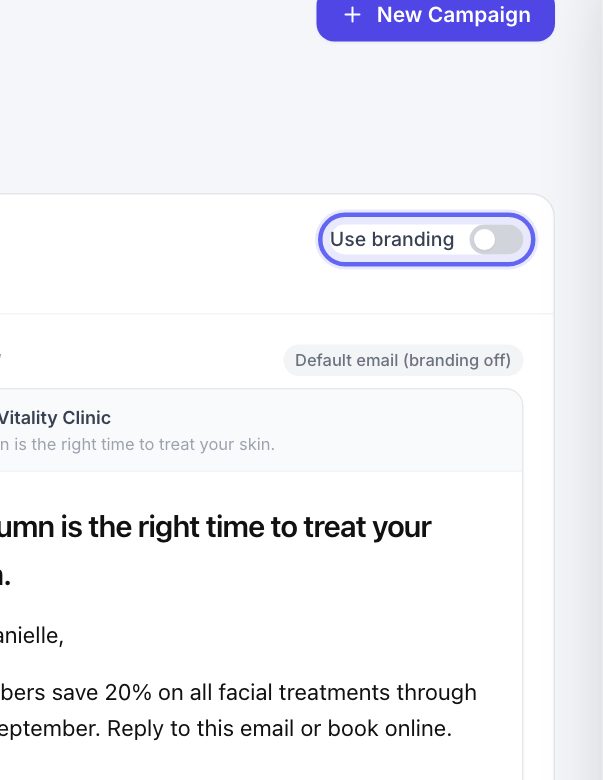
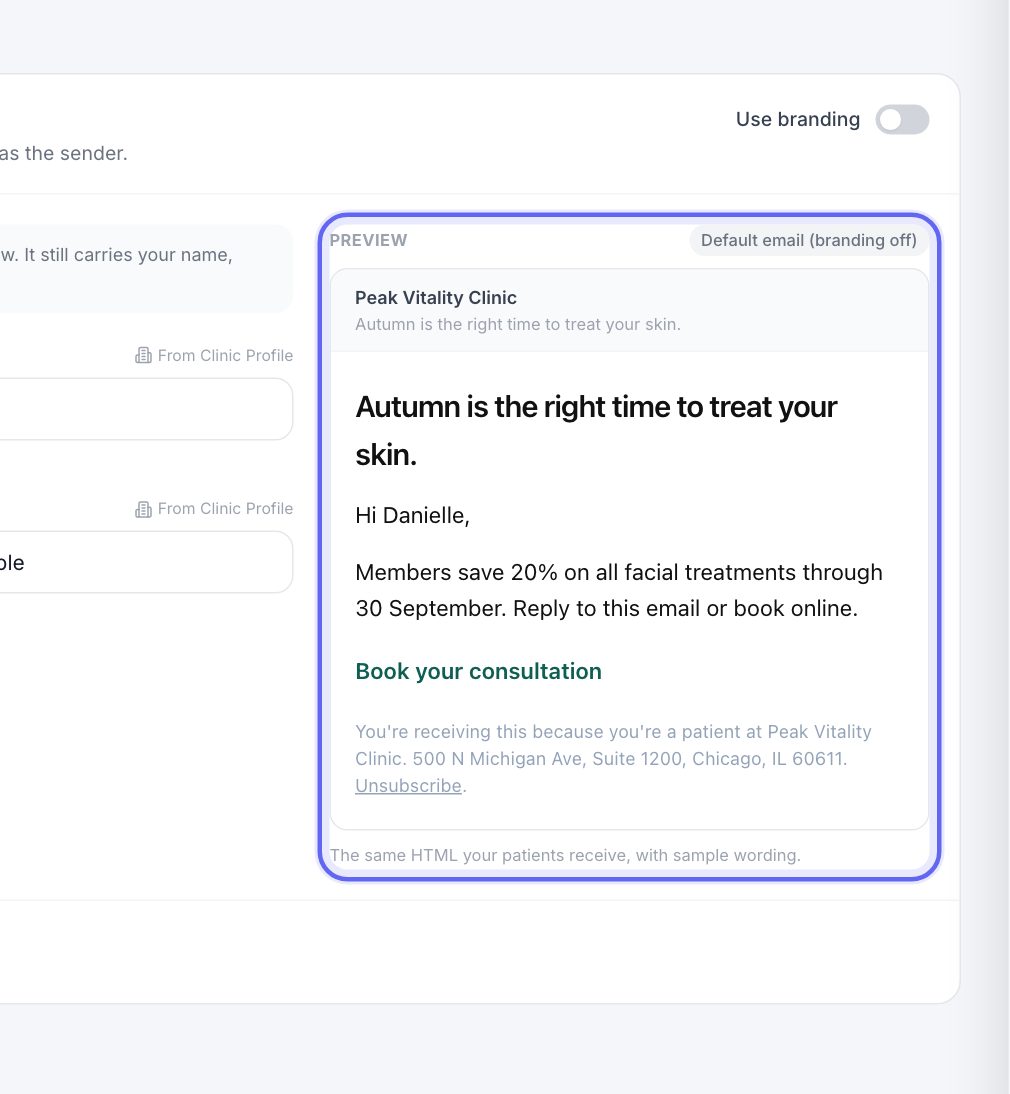
With branding off, campaigns still go out as a clean, plain email with your name, footer and unsubscribe link.
14See the real email
On the right is the email your patients get, with sample words. It changes as you make changes. Press Save branding when it looks right. It is used from your next campaign.
Keep going
Messaging and reminders
How your clinic reaches patients: messages, booking confirmations, appointment reminders and other notices. What goes out on its own, how you control it, and what patients can turn off.
Read the guideWorkflows
Messages and tasks that happen on their own. Pick what starts one, who it is for and what it does, check who it reaches, then switch it on.
Read the guideMessages
One inbox for every conversation with your patients and your team. Reply, hand a message to the right person, and leave notes only your team can see.
Read the guideThe patient app
Your patients’ side of Aminova, screen by screen: how they get in, what each tab does, and where each thing they do shows up for your team.
Read the guideSet up your clinic profile and hours
Add your clinic’s name, contact details, address and IDs, set your time zone and opening hours, add your locations, and upload your logo.
Read the guideRather be shown?
Inside Aminova, the tutorial walks you through every page, and the Getting started checklist shows you each task click by click. Or book a live training session with our team.