1What you’re setting up
Your patients use the app to book visits, fill in forms, message your team, see their plan and track their progress. You decide which of those they get.
Everything here is in Settings → Patient Portal. Only owners and managers can open Settings.
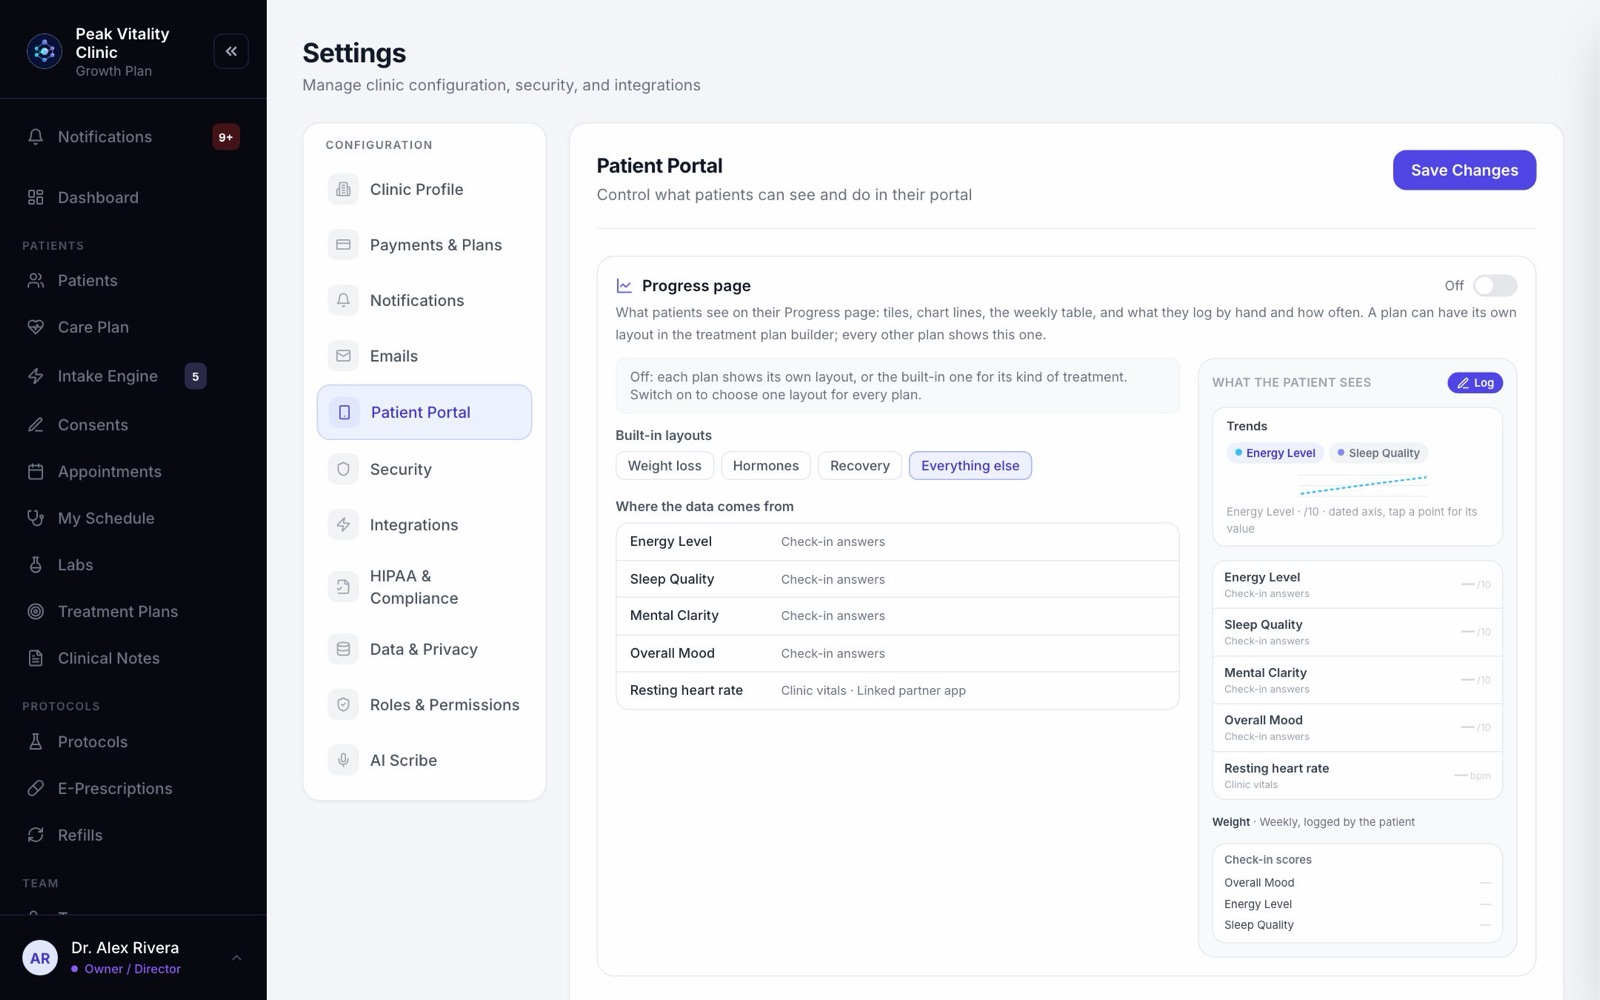
2Open the Patient Portal settings
- 1Go to Settings in the sidebar.
- 2Click Patient Portal in the list on the left.
- 3Changes save on their own a moment after you make them. You can also press Save Changes at the top.
3Choose your access code
- 1Under Patient Access Code is your clinic’s code. Patients type it to connect to your clinic in the app. Press the copy button to copy it.
- 2To change it, type a new one under Set a new access code: 4 to 8 letters or numbers. Wait for Available, then press Save.
- 3Check it and press Yes, set this code.
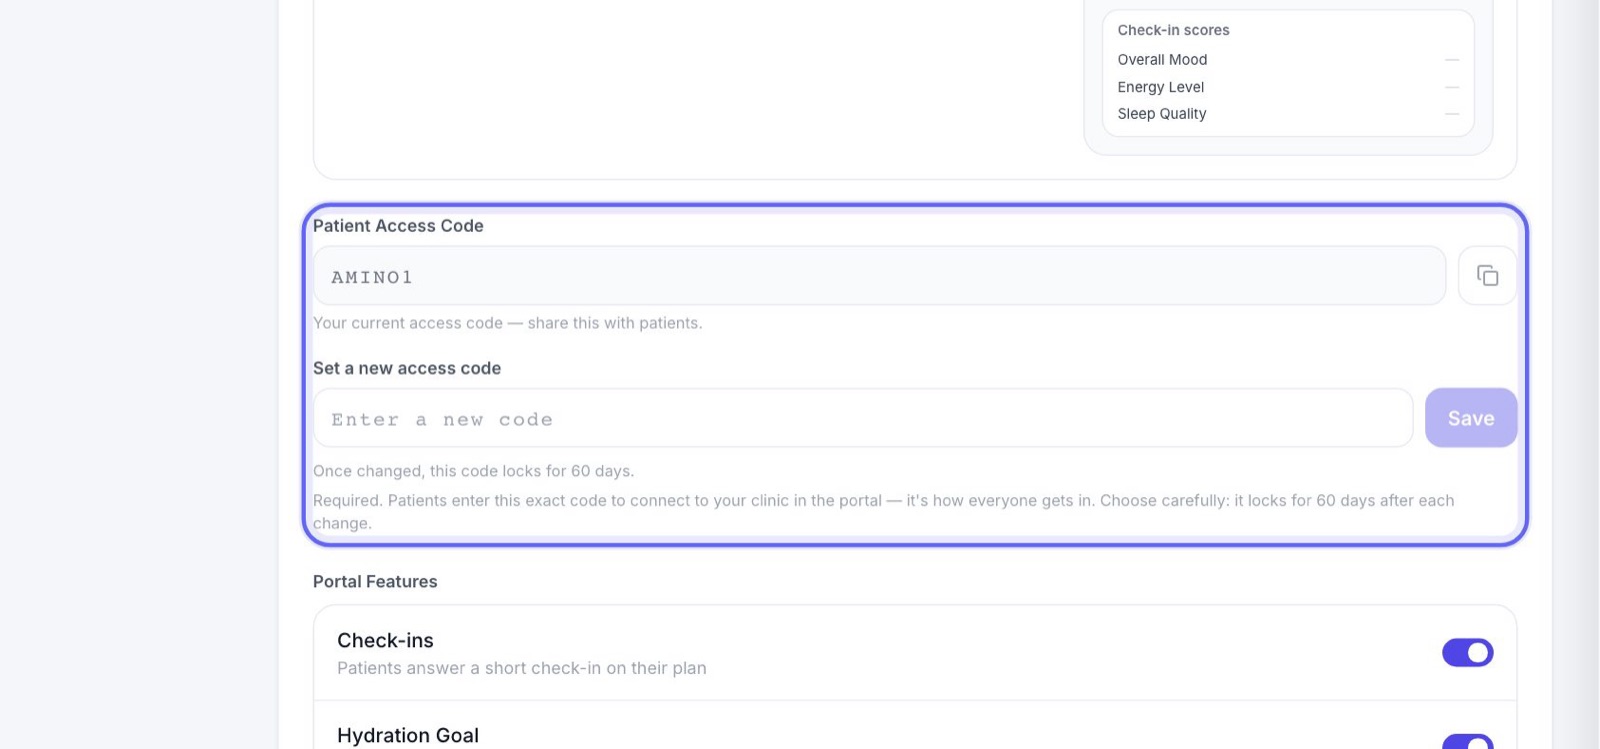
Choose carefully. Once changed, the code locks for 60 days, and anyone you gave the old code to will need the new one.
4Choose what patients can do
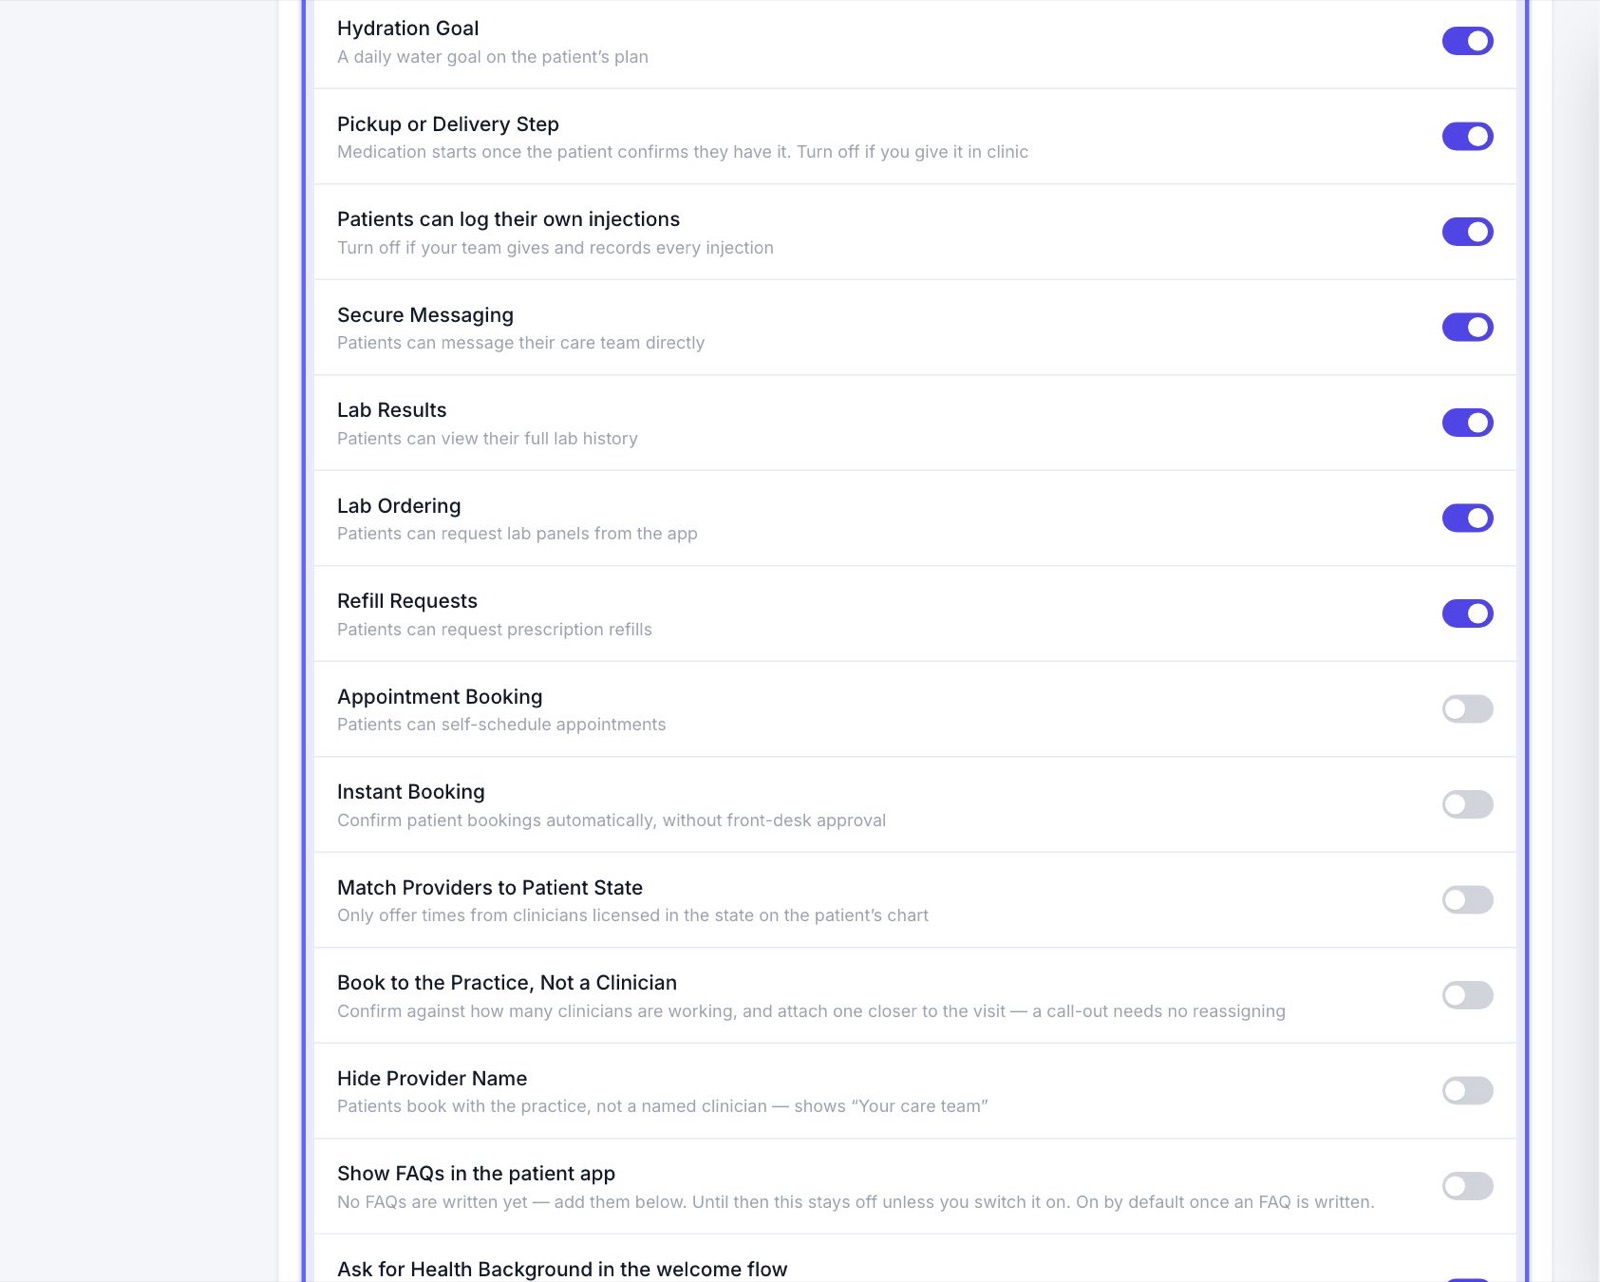
- 1Under Portal Features, switch each feature on or off.
- 2Secure Messaging lets patients message your team. Lab Results shows their lab history. Lab Ordering lets them request lab panels. Refill Requests lets them ask for refills.
- 3Appointment Booking lets them book their own visits.
5Set how patients book
- 1Instant Booking confirms patient bookings on their own. Leave it off and the front desk approves each one.
- 2Match Providers to Patient State only offers times from clinicians licensed in the state on the patient’s chart.
- 3Book to the Practice, Not a Clinician confirms a booking when enough clinicians are working, and puts one of them on it closer to the visit.
- 4Hide Provider Name shows “Your care team” instead of a clinician’s name.
6Set up the patient’s plan
- 1Check-ins: patients answer a short check-in on their plan.
- 2Hydration Goal: a daily water goal on their plan.
- 3Pickup or Delivery Step: their medicine starts once they confirm they have it. Turn it off if you give it in the clinic.
- 4Patients can log their own injections: turn it off if your team gives and records every injection.
7The Health Background step
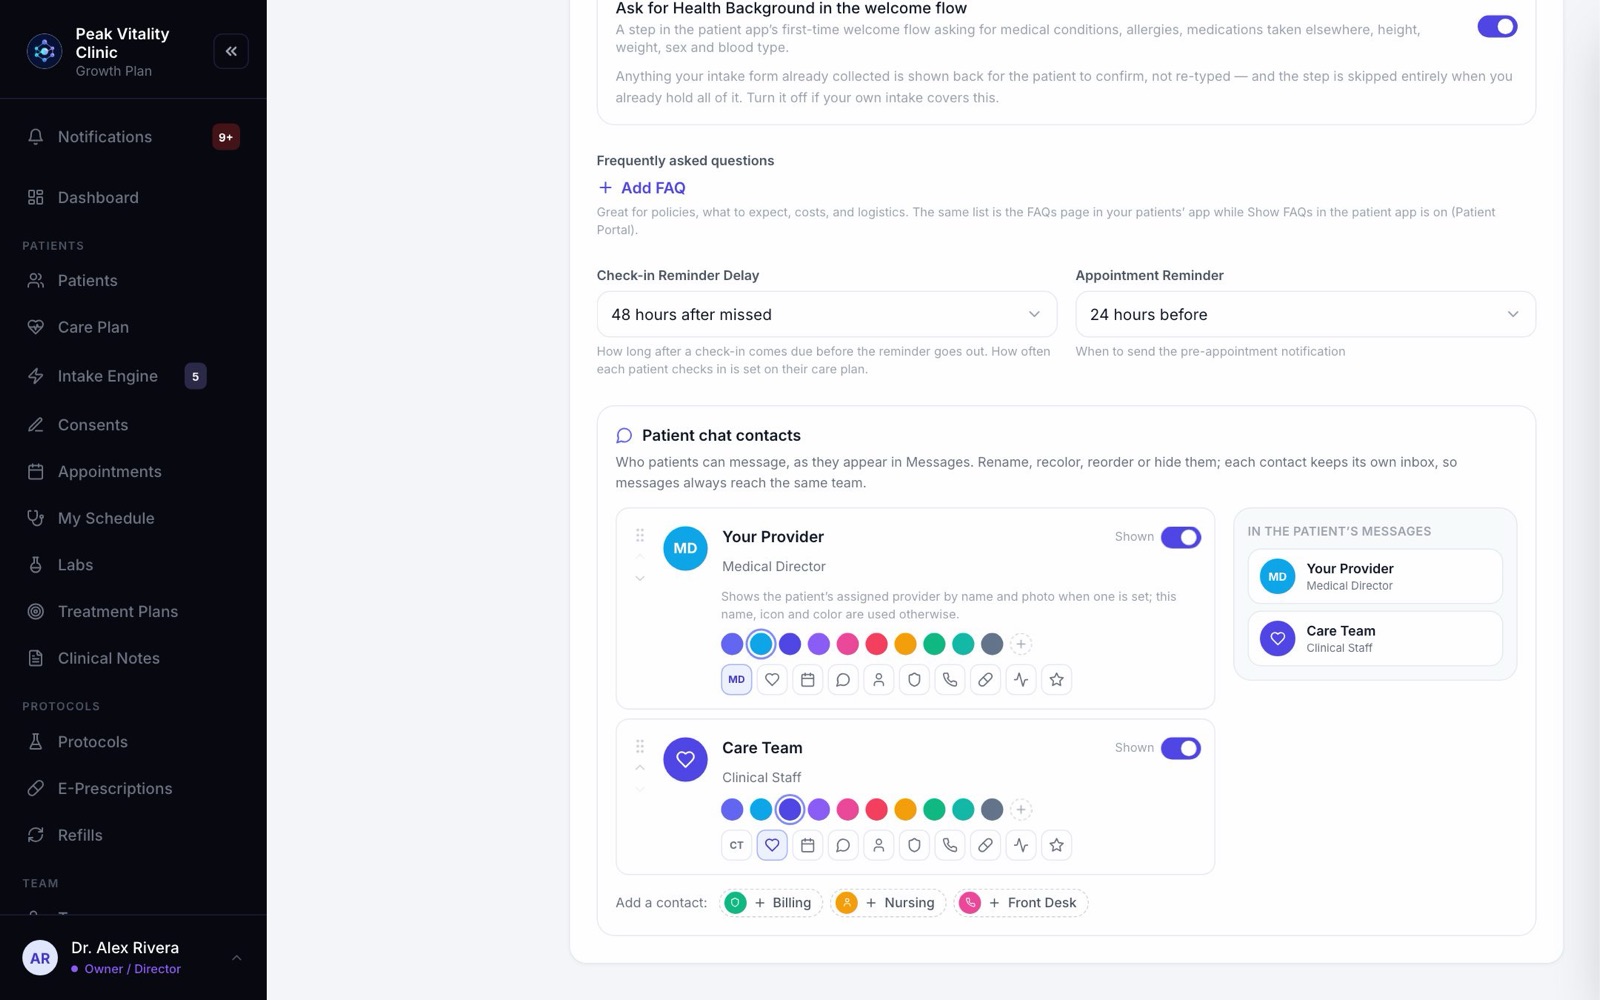
The first time a patient opens the app, a welcome flow can ask for their conditions, allergies, medicines, height, weight, sex and blood type. That’s Ask for Health Background in the welcome flow.
Anything your intake form already collected is shown back for them to confirm. Turn it off if your own intake form covers this, and make sure that form asks for allergies and medicines.
8Add your FAQs
- 1Under Frequently asked questions, press Add FAQ.
- 2Type the question next to Q and the answer next to A. Good ones cover costs, policies and what to expect.
- 3Switch on Show FAQs in the patient app to give patients a searchable FAQ page. Once you’ve written one, it’s on unless you switch it off.
9Set your reminders
- 1Check-in Reminder Delay: how long after a missed check-in the reminder goes out, or Disabled.
- 2Appointment Reminder: how long before a visit patients are reminded, from 2 to 72 hours.
10Choose who patients can message
- 1Under Patient chat contacts, rename, recolor, reorder or hide each contact.
- 2Use Add a contact to bring one back.
- 3The box on the right shows the list as patients see it in Messages. Each contact keeps its own inbox, so messages always reach the same team.
11The Progress page
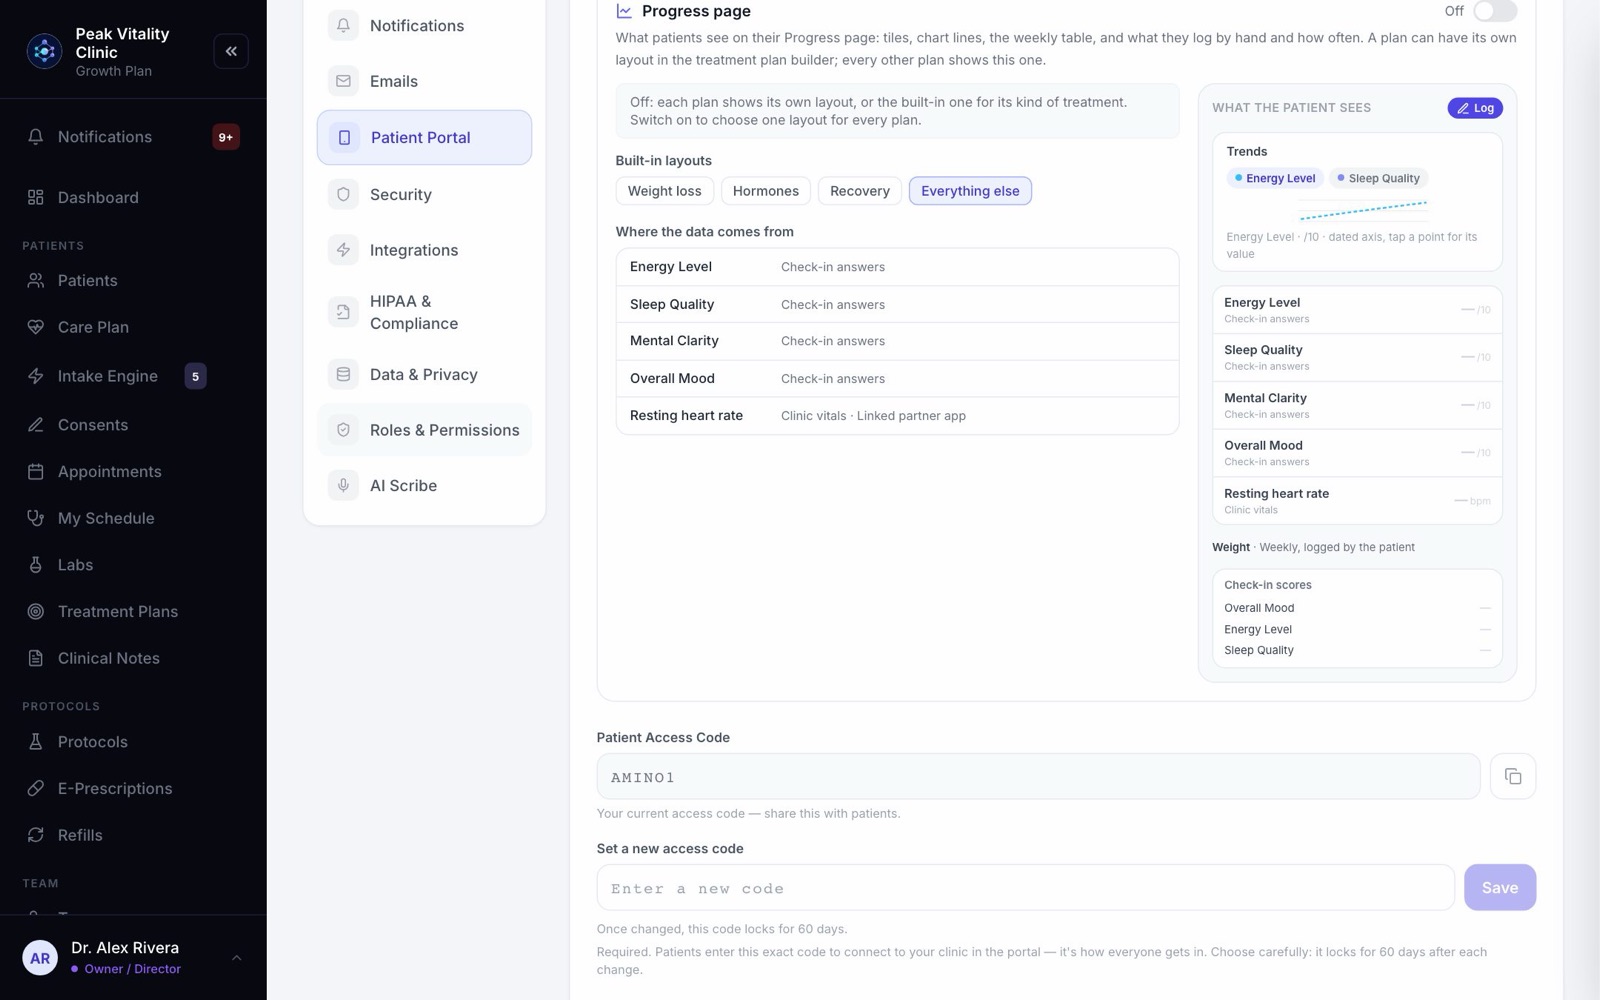
- 1At the top of Patient Portal is Progress page: what patients see when they track their progress.
- 2Leave it off and each plan uses its own layout. Switch it on to use one layout for every plan.
- 3When it’s on, set it up and press Save layout. This one doesn’t save on its own.
12Choose what patients are told
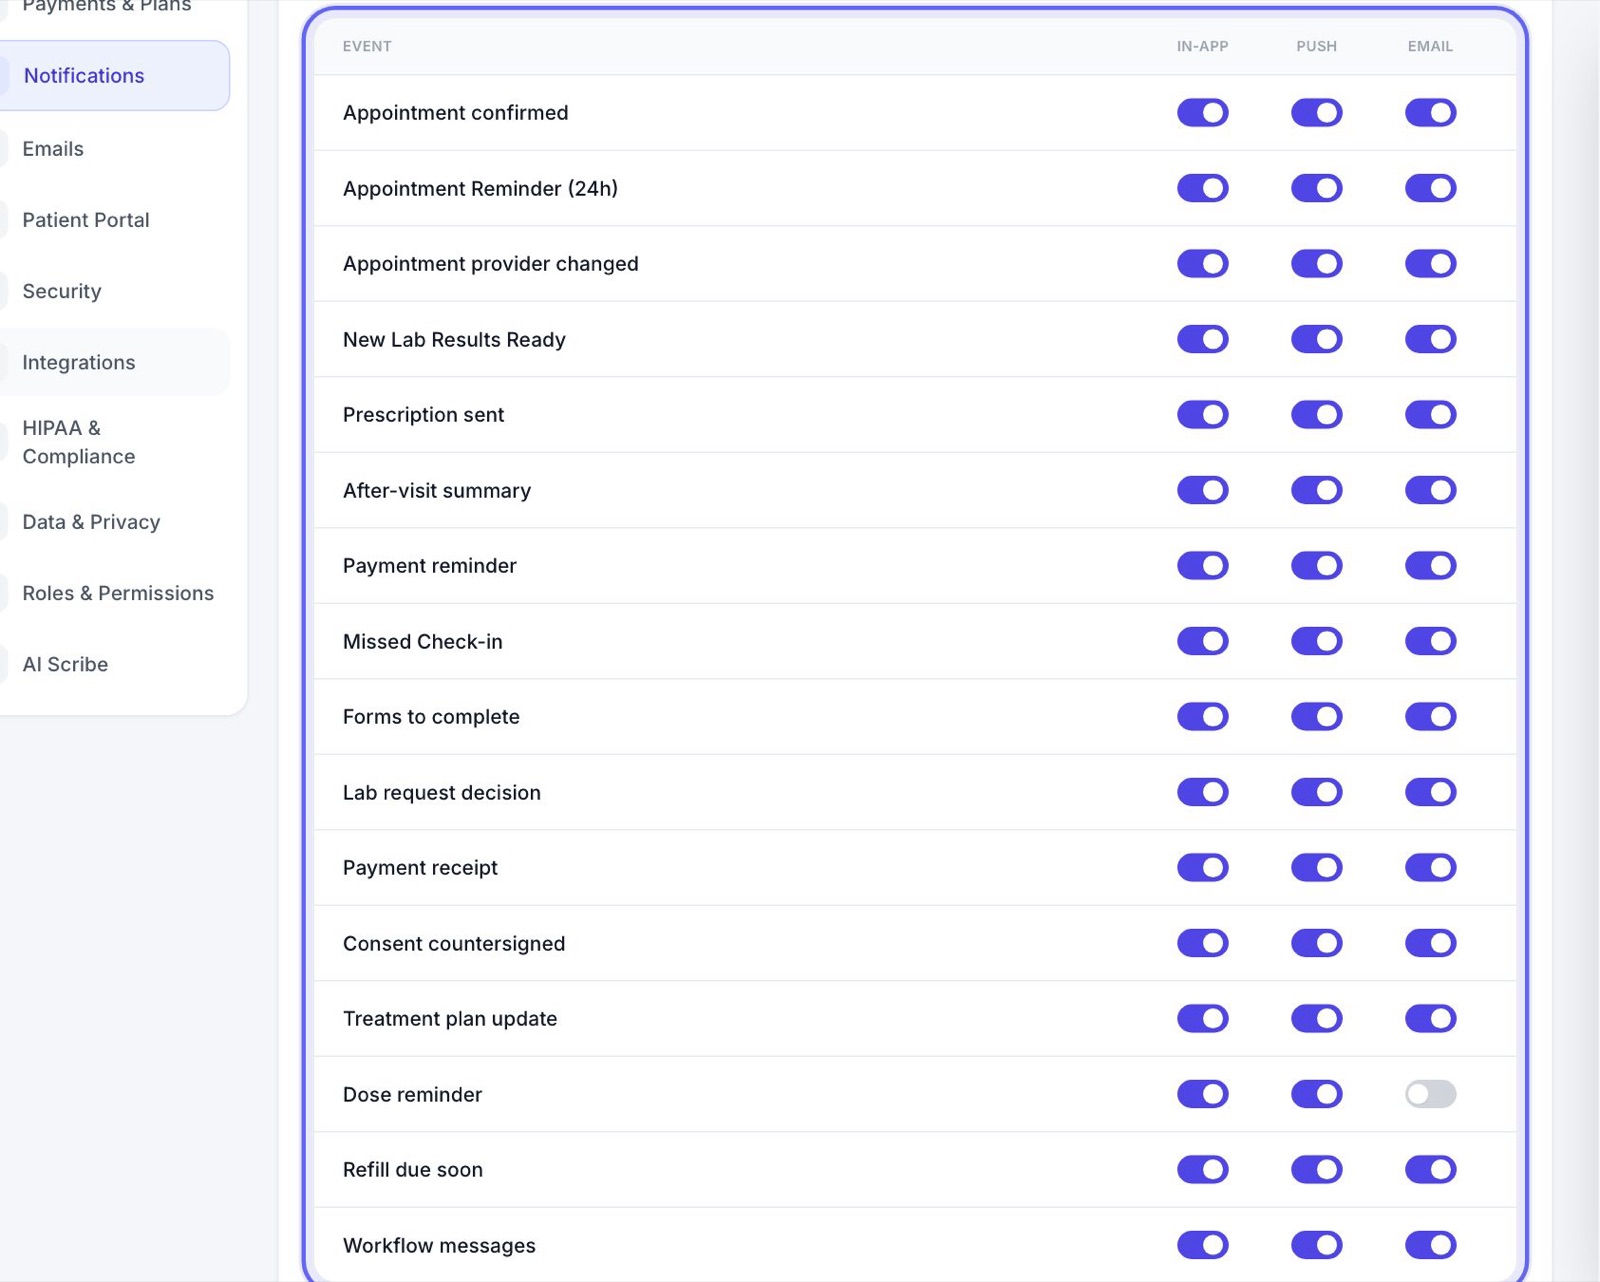
- 1Click Notifications on the left.
- 2For each event, choose In-App, Push to their phone, Email, or any mix. Texts aren’t offered.
13Give patients their sign-in details
- 1When you add a patient, you see their Activation details: your Clinic code and their User ID. Copy them, or email them.
- 2For many patients at once, go to Patients, press Select, tick them, and press Email sign-in details.
Practice patients never get emails, texts or bills, so they’re left out of sign-in emails.
Keep going
The patient app
Your patients’ side of Aminova, screen by screen: how they get in, what each tab does, and where each thing they do shows up for your team.
Read the guidePatients
Every patient in your clinic. Find anyone, sort and filter the list, add a new patient, put patients in groups, and open a chart.
Read the guideMessaging and reminders
How your clinic reaches patients: messages, booking confirmations, appointment reminders and other notices. What goes out on its own, how you control it, and what patients can turn off.
Read the guideSettings
How your clinic runs: your details and hours, payments, what patients are told, the patient app, security, connected tools and who can do what.
Read the guideRather be shown?
Inside Aminova, the tutorial walks you through every page, and the Getting started checklist shows you each task click by click. Or book a live training session with our team.