1Why set up rooms
Once your rooms are in, the front desk sees who is in which room, which rooms are being cleaned and which are free. A visit that needs certain rooms is only offered when one of them is free.
Equipment, like a laser, is set up the same way, so one device is never promised to two rooms at once.
2Open your room setup
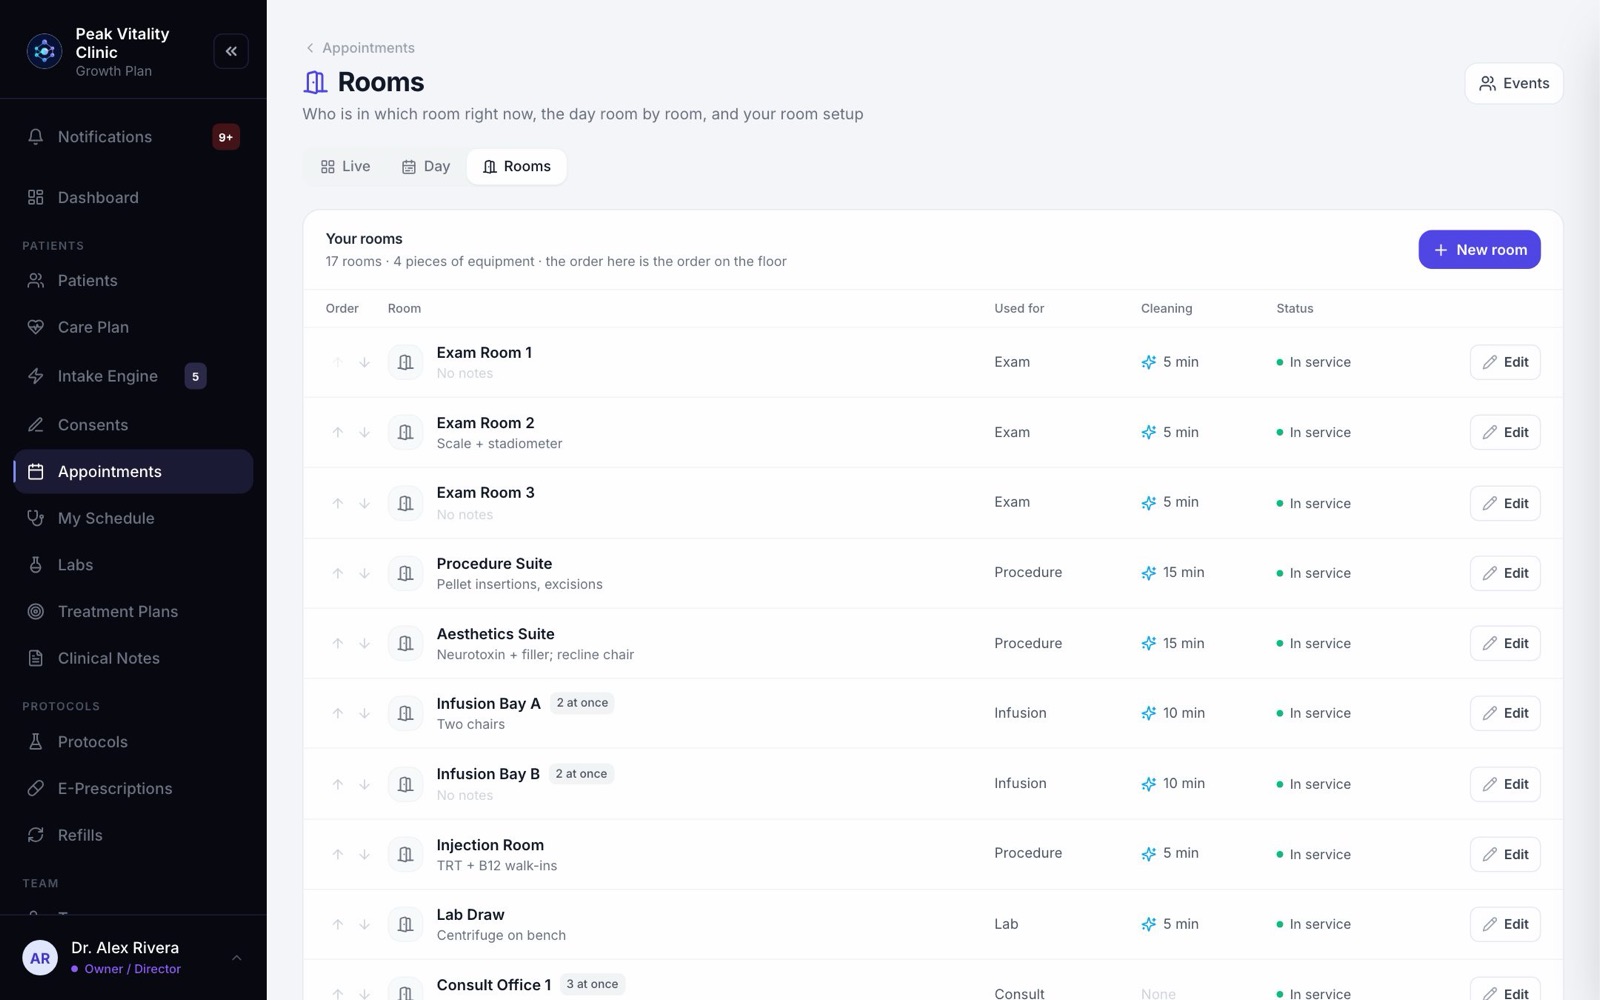
- 1Go to Appointments and click Rooms at the top right.
- 2Click the Rooms tab.
- 3Only owners and managers can add or change rooms. Everyone else sees the list.
3Add a room
- 1Click New room. With no rooms yet, the button says Add your first room.
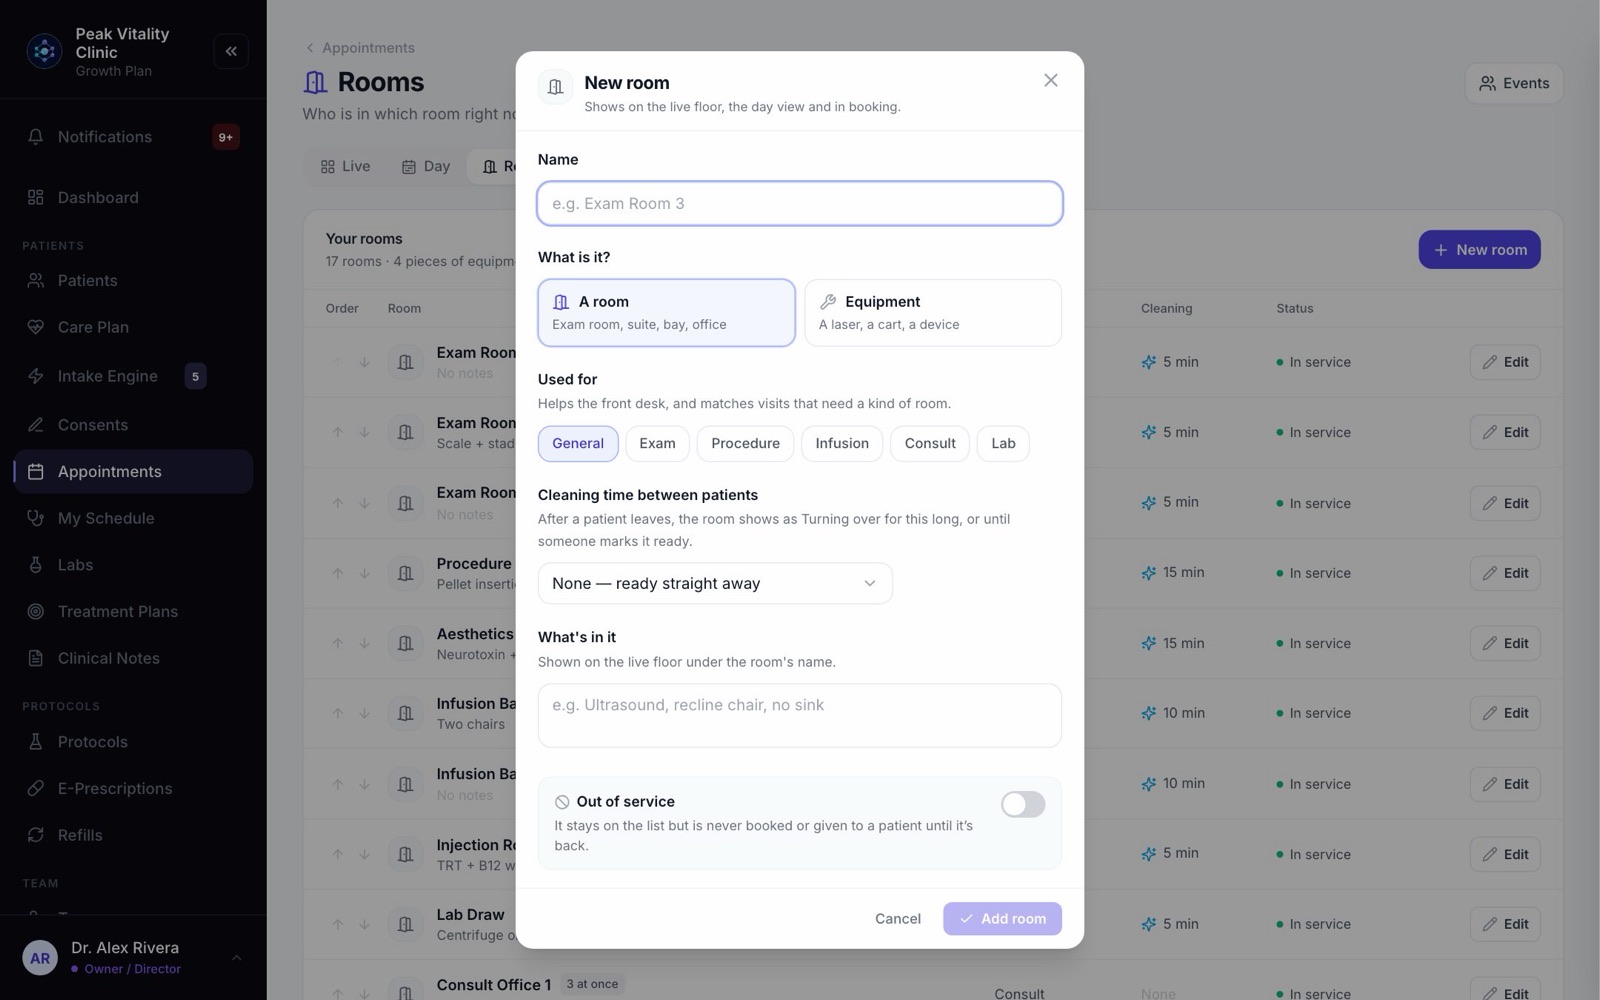
- 2Type a Name people will know it by, like “Exam Room 3”.
- 3Under What is it?, choose A room or Equipment.
4What it’s used for
- 1Under Used for, pick General, Exam, Procedure, Infusion, Consult or Lab.
- 2It helps the front desk, and matches visits that need a kind of room.
- 3Picking one also fills in a usual cleaning time for you. You can change it.
5Cleaning time
- 1Set Cleaning time between patients, from None — ready straight away up to 60 minutes.
- 2When a patient leaves, the room shows as Turning over for this long, or until someone marks it ready.
6What’s in it
- 1Under What’s in it, note anything useful, like “Ultrasound, recline chair, no sink”. For equipment this box is called Notes.
- 2It shows under the room’s name on the live floor.
7Save it
- 1Press Add room, or Add equipment.
- 2To change a room later, press Edit on its row, make your changes, and press Save changes.
- 3Nothing saves until you press the button. Closing with changes asks you first.
8Put them in floor order
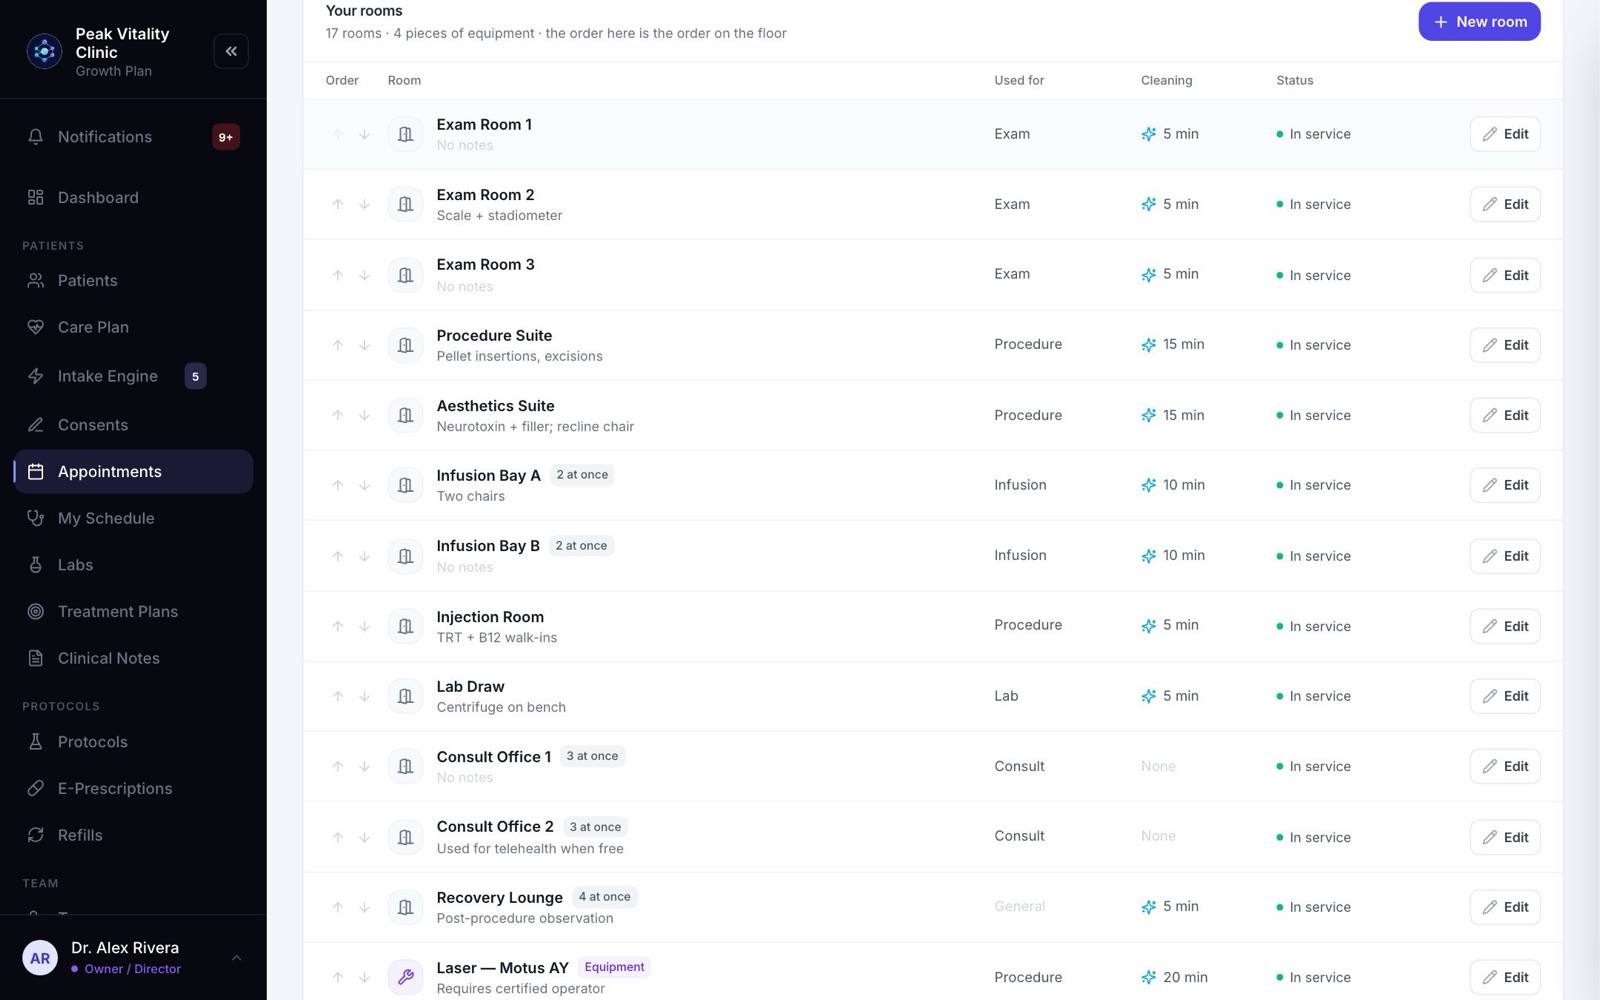
- 1Use the up and down arrows on each row.
- 2Put them in the order you walk the hallway. The live floor shows them in this order, so it’s quick to scan.
9Out of service, or removed
- 1A broken room: open it, switch on Out of service and say what’s wrong. It stays on the list but is never booked or given to a patient until it’s back.
- 2A room you no longer have: open it and press Remove room. It stops showing on the floor and in booking. Past visits keep the room’s name.
10Tell each visit which rooms it uses
- 1Go to Appointments → Visit types and click Edit on a visit.
- 2Open Rooms & timing.
- 3Under Rooms this visit needs, press Add a room for each room it can use. Leave it empty if any room will do.
- 4Under Equipment it needs, add any device that must be free too.
- 5Save the visit type.
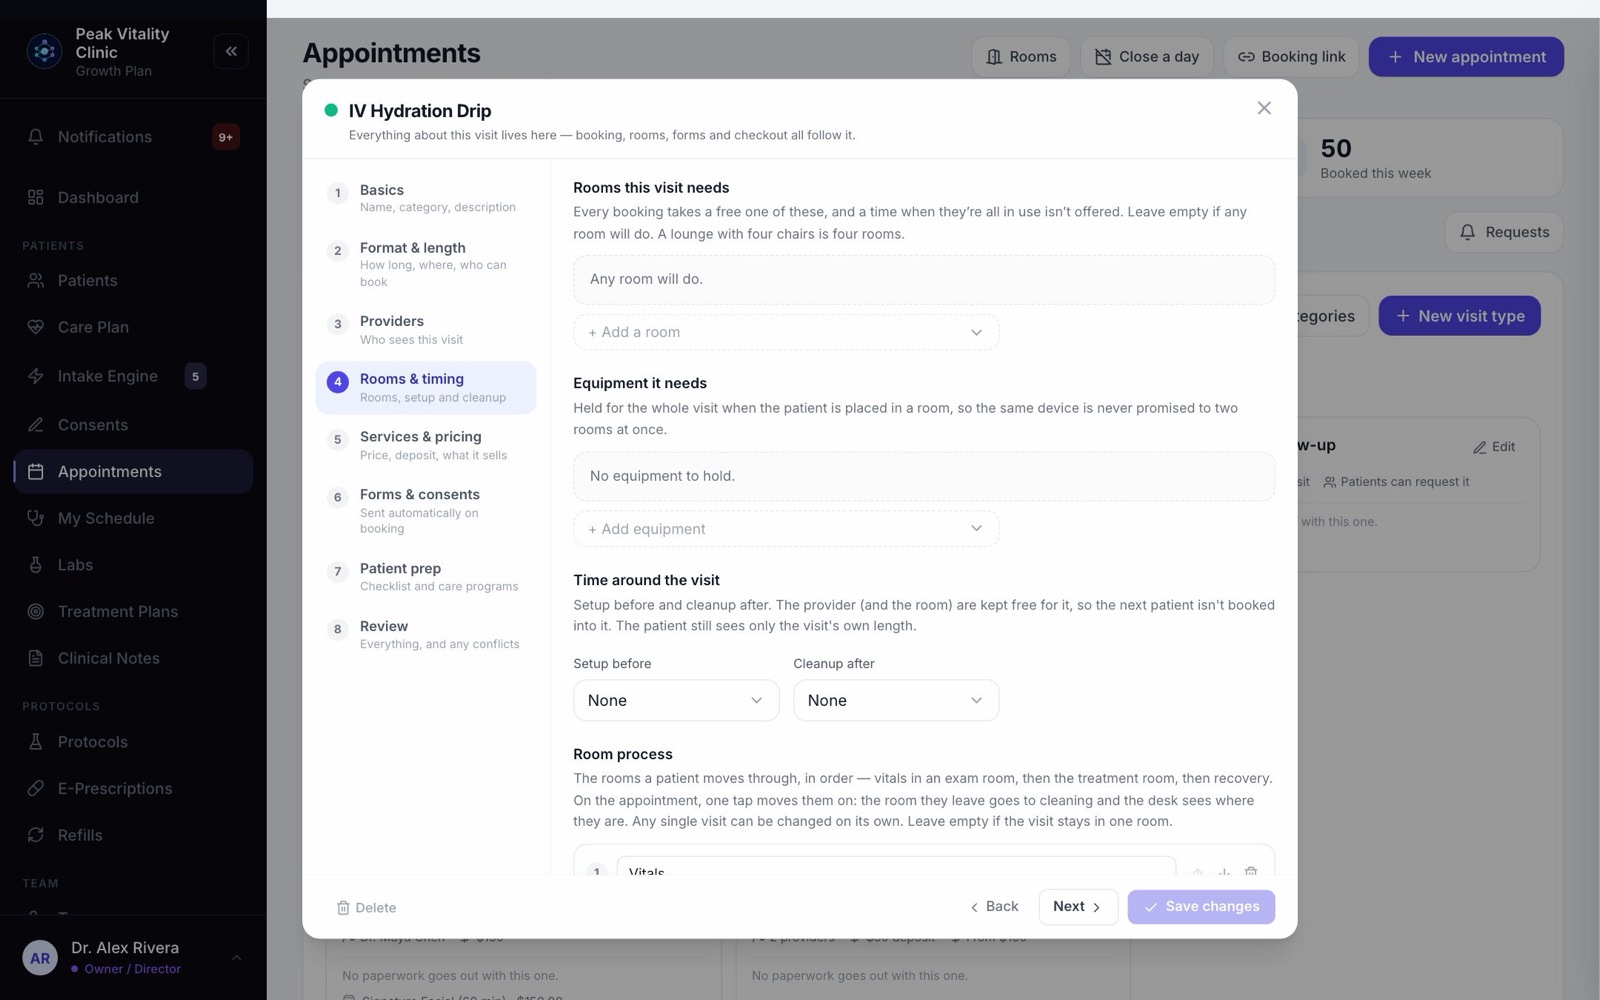
A visit is only offered at times when one of its rooms is free. A lounge with four chairs is set up as four rooms.
11Visits that move between rooms
If a patient moves from room to room during one visit, like vitals, then a drip, then recovery, add room steps to that visit type. The Room steps manual shows how.
12Check your floor
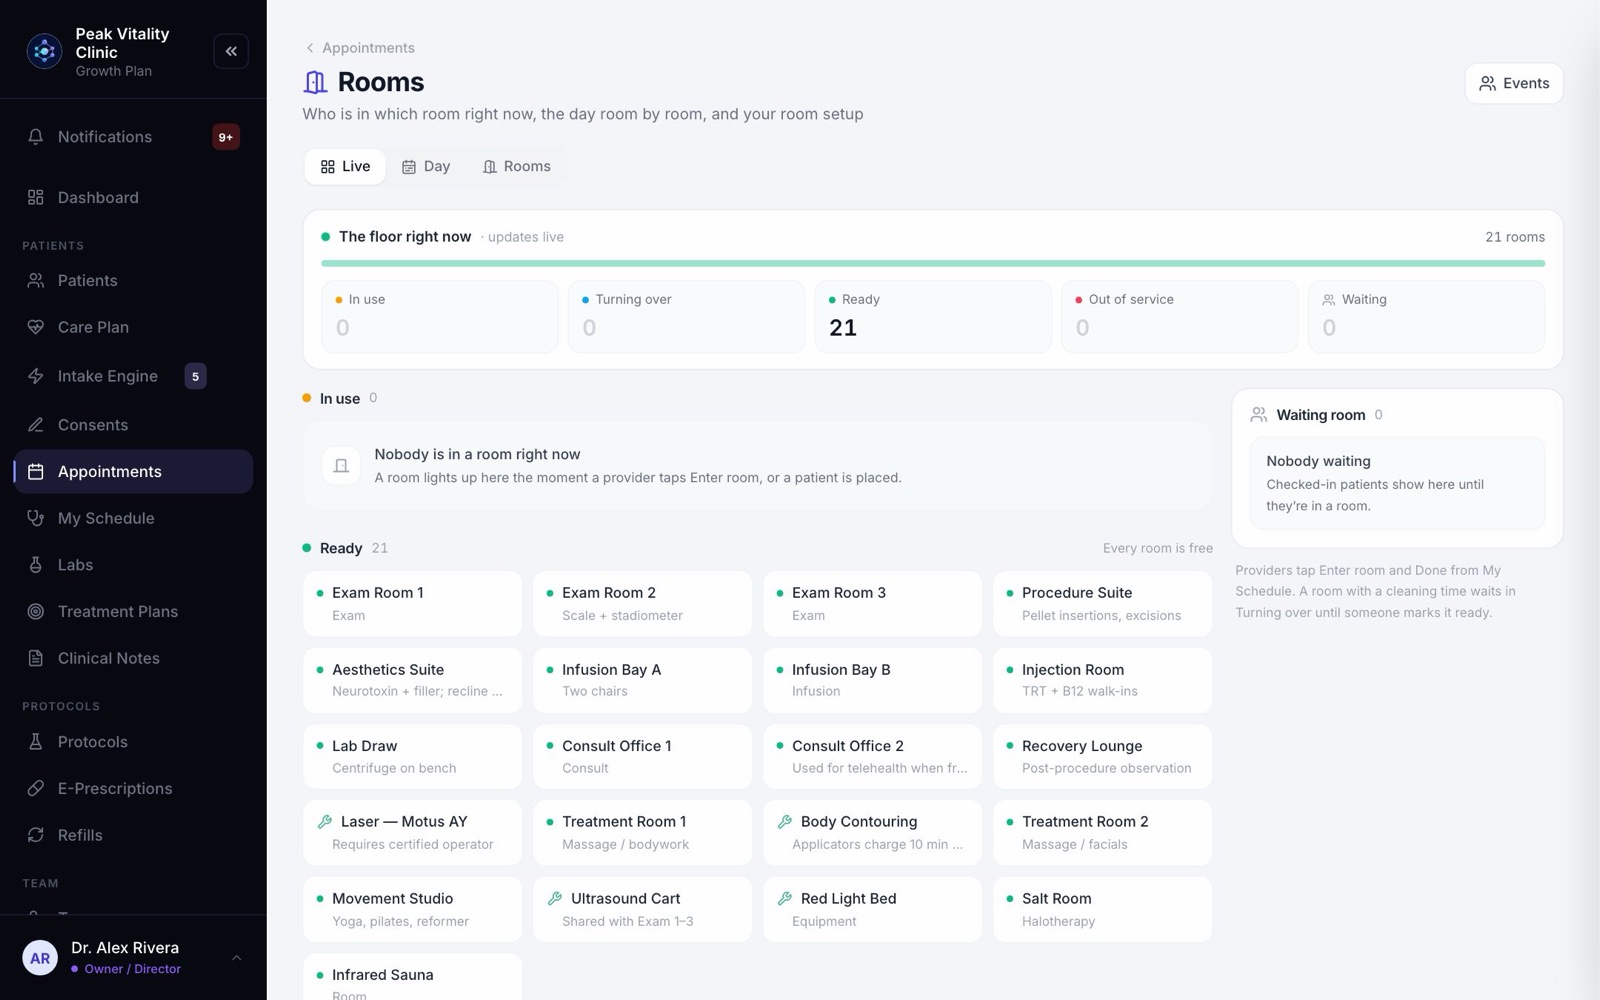
Open the Live tab. Your rooms are there, all Ready. You’re set.
Keep going
Rooms
Who is in which room right now, the day room by room, and where you set your rooms up.
Read the guideRoom steps
For visits that move through more than one room: vitals, then treatment, then recovery. Set the steps once, then move the patient on with one tap.
Read the guideSet up your visit types and booking link
Build each kind of visit once: its length, providers, rooms, price and forms. Then turn on the link patients book from.
Read the guideRather be shown?
Inside Aminova, the tutorial walks you through every page, and the Getting started checklist shows you each task click by click. Or book a live training session with our team.